This guide provides a step-by-step process for adding a new sales or letting appraisal record efficiently in the iamproperty CRM system. By following the outlined instructions, users can ensure accuracy and completeness in their appraisals, which is crucial for effective property management. It simplifies the process, making it accessible even for those unfamiliar with the system, ultimately enhancing productivity and organisation in sales operations.
1. Navigate to https://crm.iamproperty.com/MyDay

2. Click either the "More actions" icon then click here.
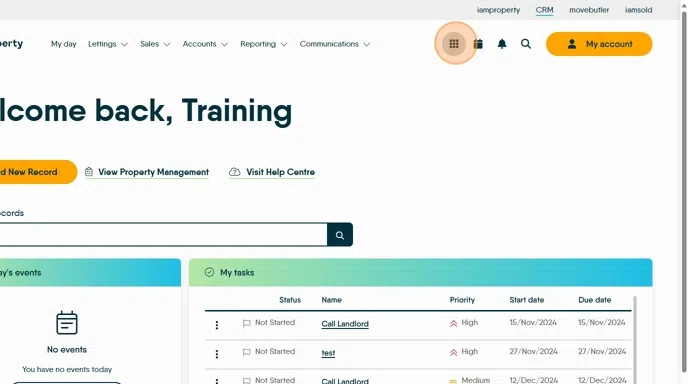
3. or click "Add New Record"

4. Click either "Sales Appraisal" or "Lettings Appraisal" as required.
For this example we are using Sales Appraisal.
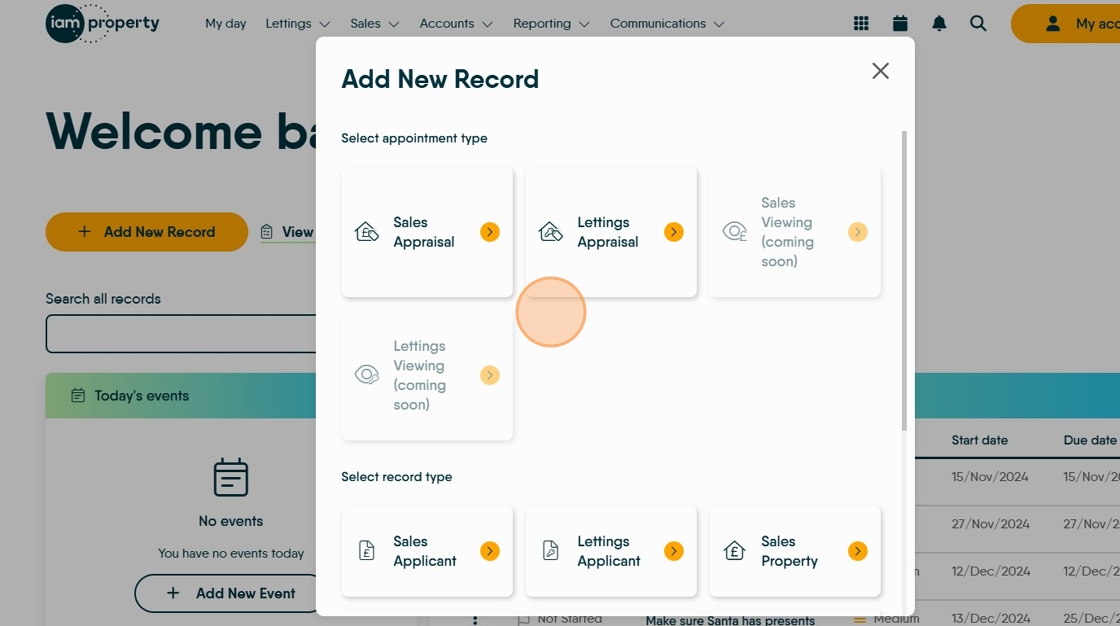
5. Click "Sales Appraisal"

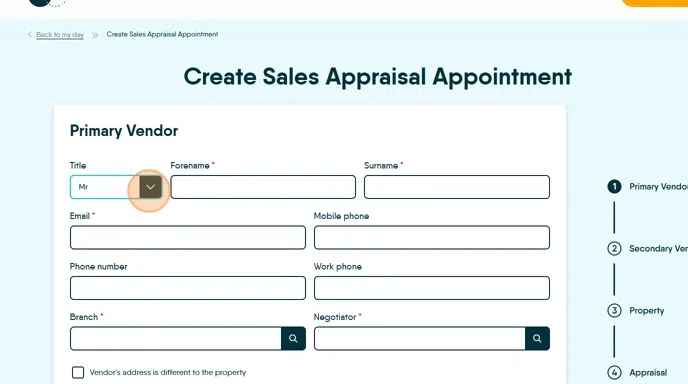
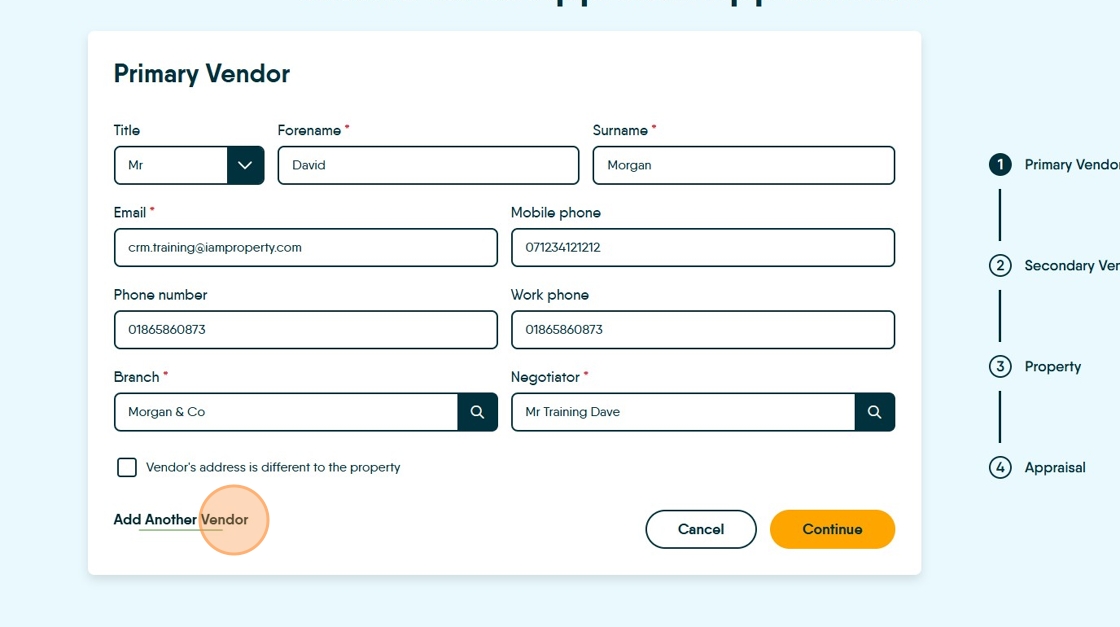
Vendor/Landlord
6. Complete all the details for the Primary Vendor. Then set the Branch and Negotiator details.
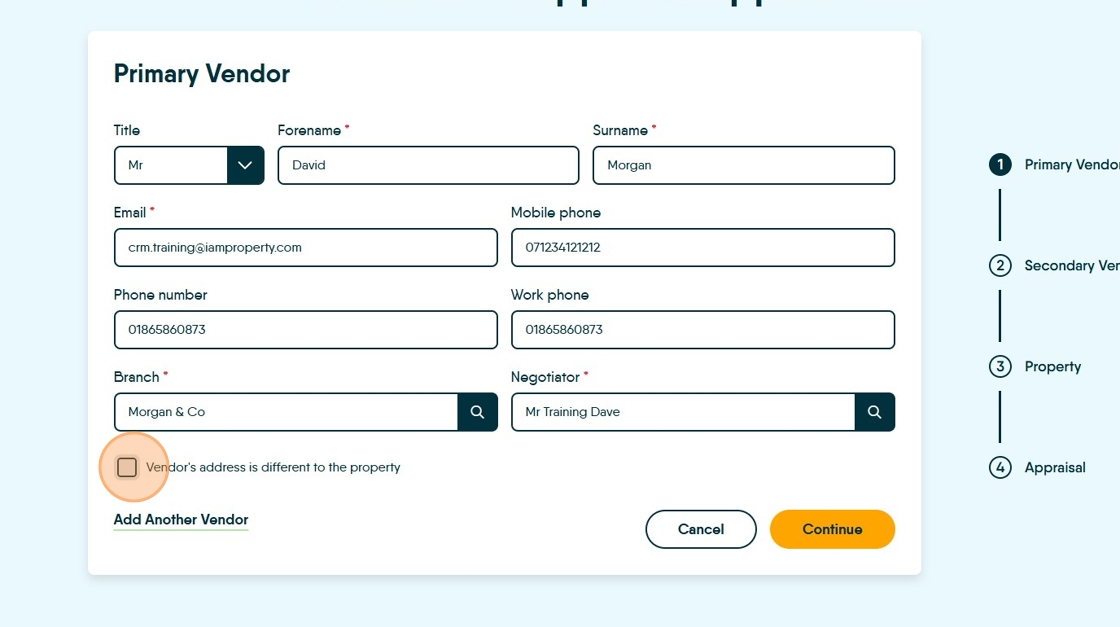
7. If the Vendor is not selling their primary residence. Click "Vendor's address is different to the property"
8. Either click the "Search postcode *" field, or, the "Enter Address Manually" option and add the Vendors address. This is only required if the Vendor is not selling their primary residence.

9. If there are multiple vendors click "Add another vendor" to add a second vendor.
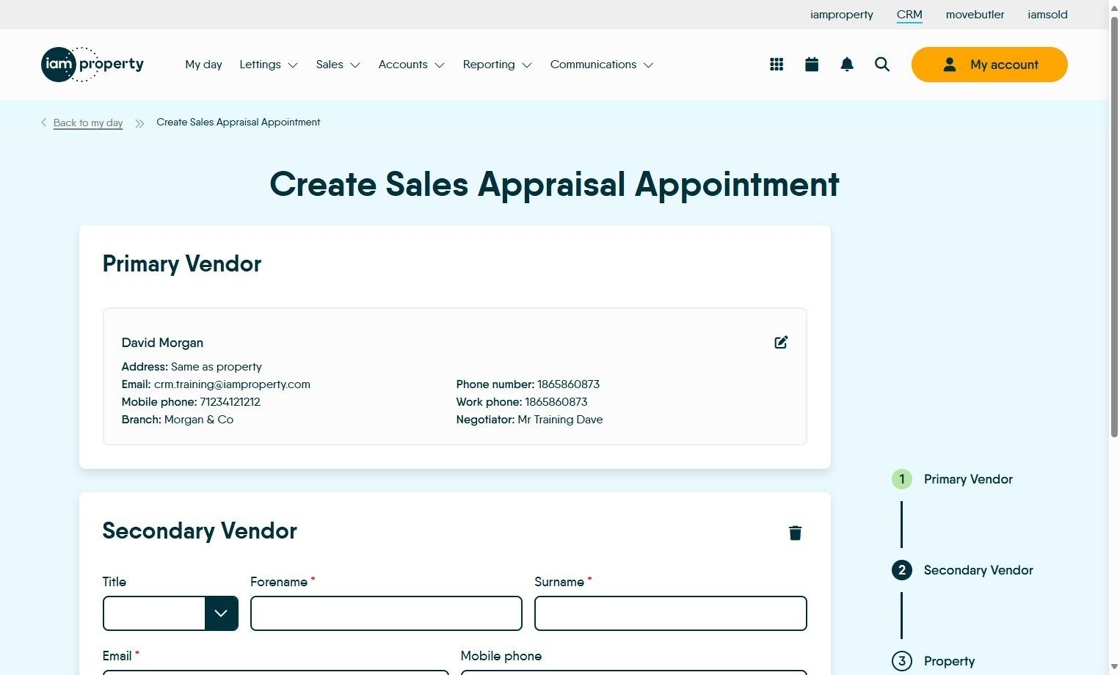
N.B. You can only add 2 Vendors or Landlords at this point, additional entries can be added via the property record (as currently)
10. Adding the Secondary Vendor is the same as creating a primary.
11. If this Vendor/Landlord address is different. Click here.
Click here.
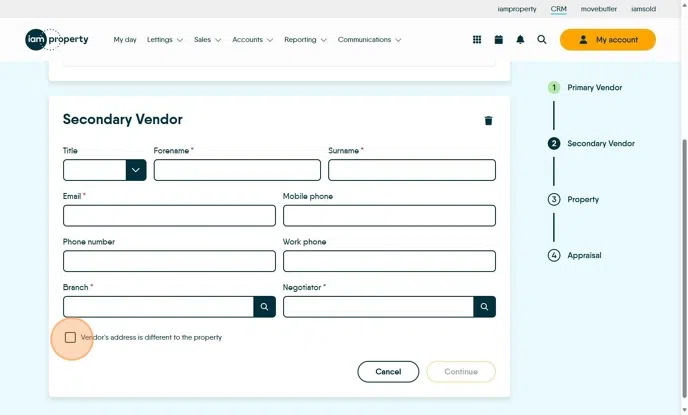
12. If a second Vendor/Landlord has been added by mistake or an error has be made it can be deleted by clicking here

Property
13. Click the "Address *" field and add the postcode

14. Click here to edit the address if required.

15. Click "Or enter address manually"
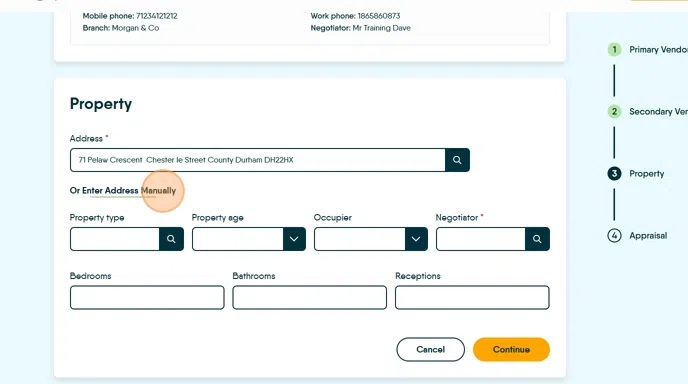
16. Click the "Property type" field and set the property type from the drop down menu.

17. Select the "Property Age"

18. Select the "Occupier".

19. Click the "Negotiator *" field and set the property negotiator.

20. Set the number of Bedrooms, Bathrooms and Reception rooms.
Click this number field.
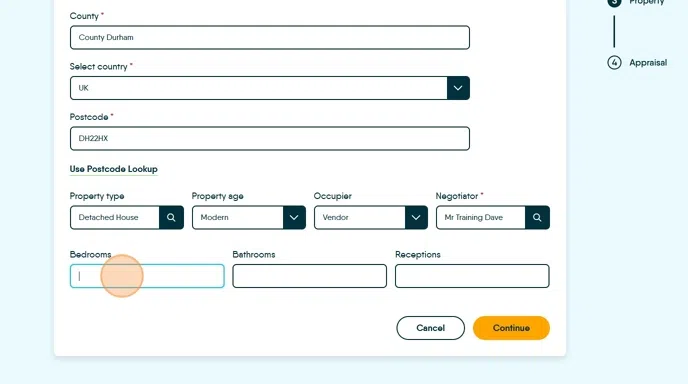
21. Click "Continue"

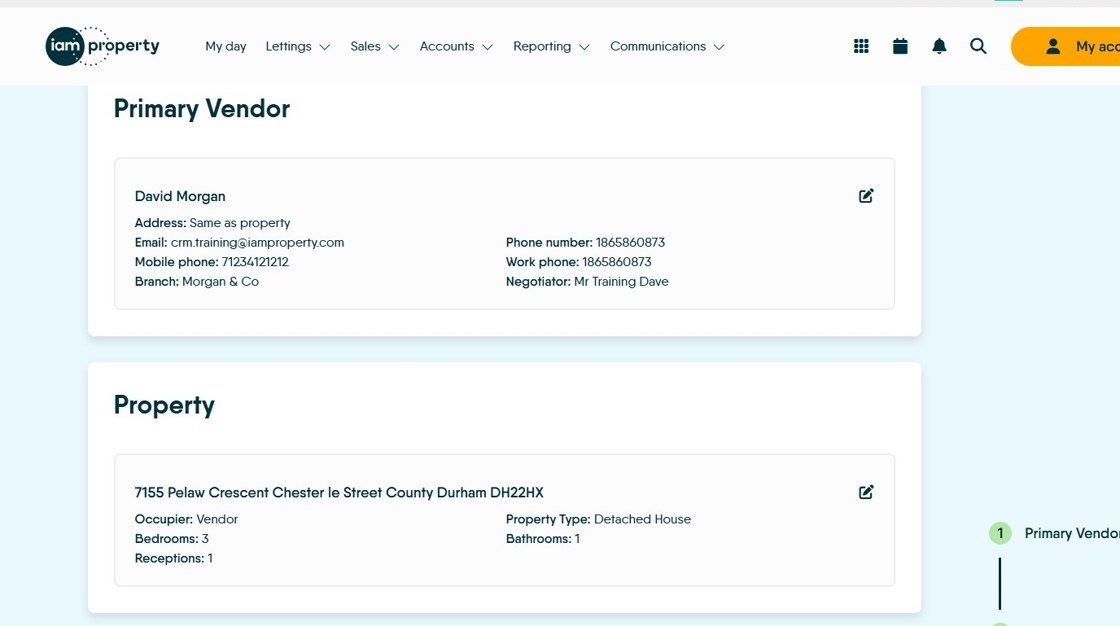
22. You will see a summary of the Vendor and Property information.
Appointment
23. Click "Assignee(s)" and set the negotiator conducting the Appraisal."

24. Click the "Start date *" field and set the appointment date.

25. Click the "Start time *" field to set the appointment start time.
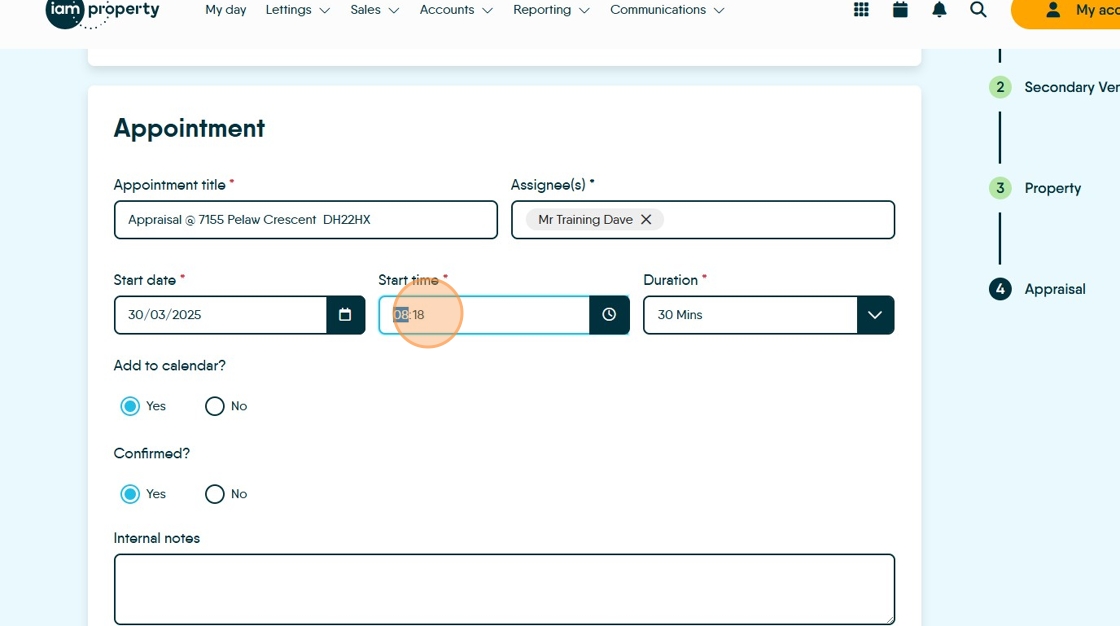
26. Click "Duration" to set the length of the appointment.

27. Click "Yes" or "No" to add to the calendar.

28. Click "Yes" or "No" to confirm the appointment in the calendar.

29. Click this field and add any notes you want to show in the Appraisal appointment.

30. Click "Create appointment"

Success
31. This screen is a summary of the information added, clicking the "View..." buttons will take you to the appropriate area of the CRM.
