This guide provides a straightforward process for adding a new sales property record in the iamproperty CRM system. By following the steps, users can input property details and vendor information, and create a basic property and vendor records. Obviously, the more information added to a record the better, here we look at the basic data required. It is essential for real estate professionals looking to streamline their operations and enhance productivity within the CRM platform.
Tip: Tip! This guide shows how to create a basic Property and Vendor record.
There are many more pieces of data that can be added to a record once the basic record is created than we are showing here. If you need information or training on these please refer to your Account Manager.
1. Navigate to https://crm.iamproperty.com/MyDay
Alert: There are 2 places that a new record can be added to the CRM from the 'bento' icon at the top right of the screen or from the MyDay screen and the Add New Record option. The key difference is that the 'bento' icon is always available wherever you are in the CRM and you can opt to open the new screen as a separate tab so you dont lose where you are currently working. This is done by pressing the ctrl key as you click the record you are creating.
2. To create a new record from anywhere on the CRM click the 'bento' menu

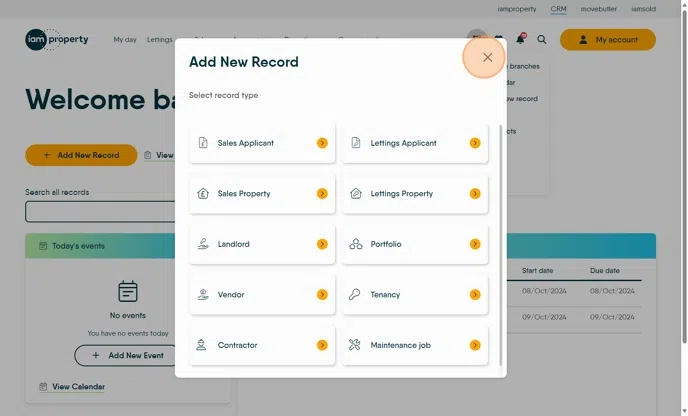
3. Click "Add new record"

4. From the menu select the type of record you wish to create. In this case
Click "Sales Property"
5. Once in the Property Record. Click the "Postcode" field. Add the Postcode for the property and click the search icon.
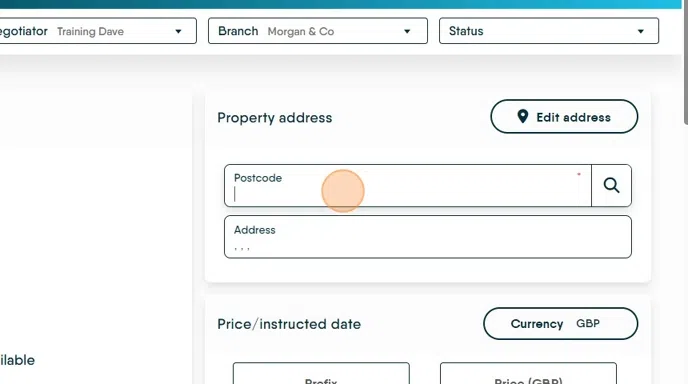
6. Select the address fro the drop down menu.

7. If the address of the property you are adding is not available or not correct, click "Edit address"

8. Edit the address as required.

Tip: Once you have added the Vendor and clicked 'Save' you will have created a basic property record. As previously mentioned there are many more options that you can complete to give a much better record of the property.
Alert: To create a Property Record, you need to have a Vendor. The Vendor record can be created before the property, or during the creation of a new property record.
Creating the Vendor Record
Alert: Alert! If you have a property with 2 or more Vendors, a separate vendor record should be created for each and added to the Property Record. This is to help when you link the property and vendors into Move Butler.
9. Scroll to the top of the Property Record screen and Click "View Vendors"

10. Click "Create new vendor" to create a new Vendor (as we will do here) or click into the search field to find an existing Vendor record.

11. If the Vendors are currently living at the address and this is their primary contact address Click "Yes".

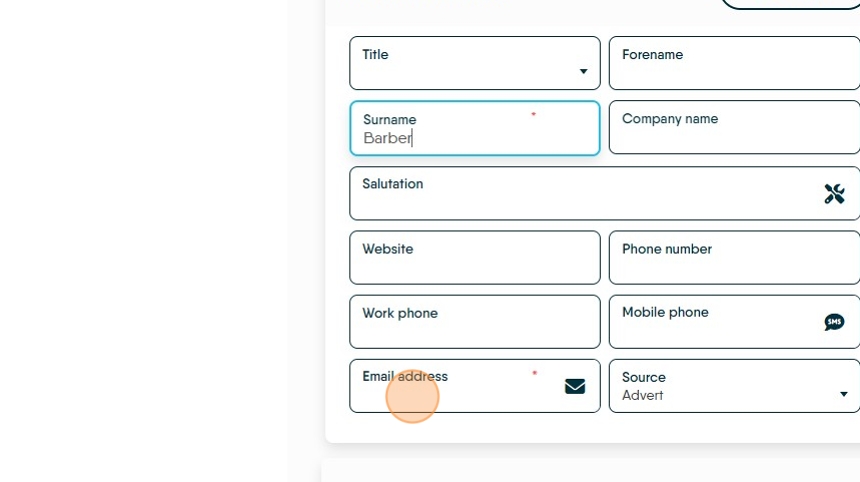
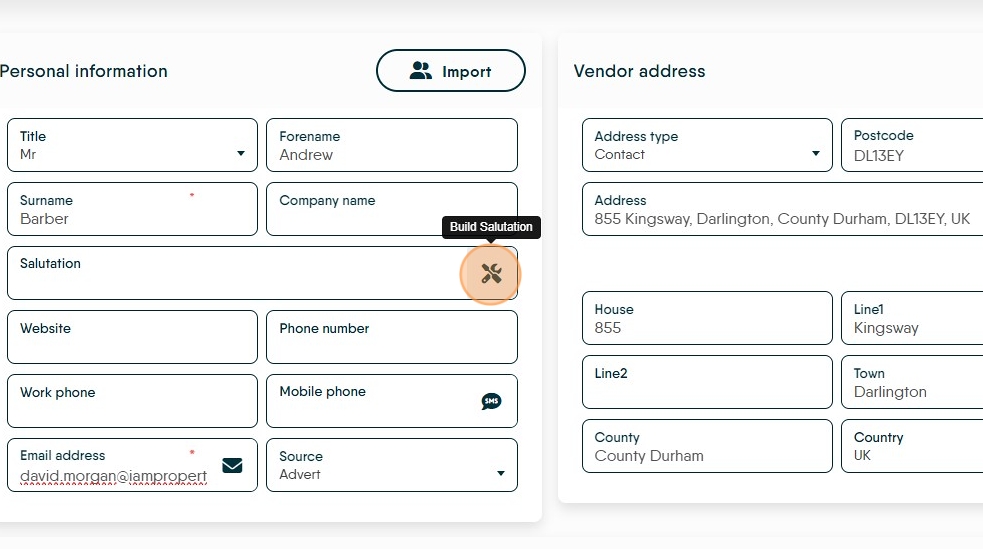
Tip: The minimum information we require is Surname and email address. Best practice is to complete as many of the information fields as possible.
12. Click the "Surname" field.

13. Click the "Email Address" field.
14. If the email address has been used before CRM will alert you and give the option to Use/Merge the original record or continue with the new record.

15. Complete as much of the record as possible. The minimum required is Surname and email address.
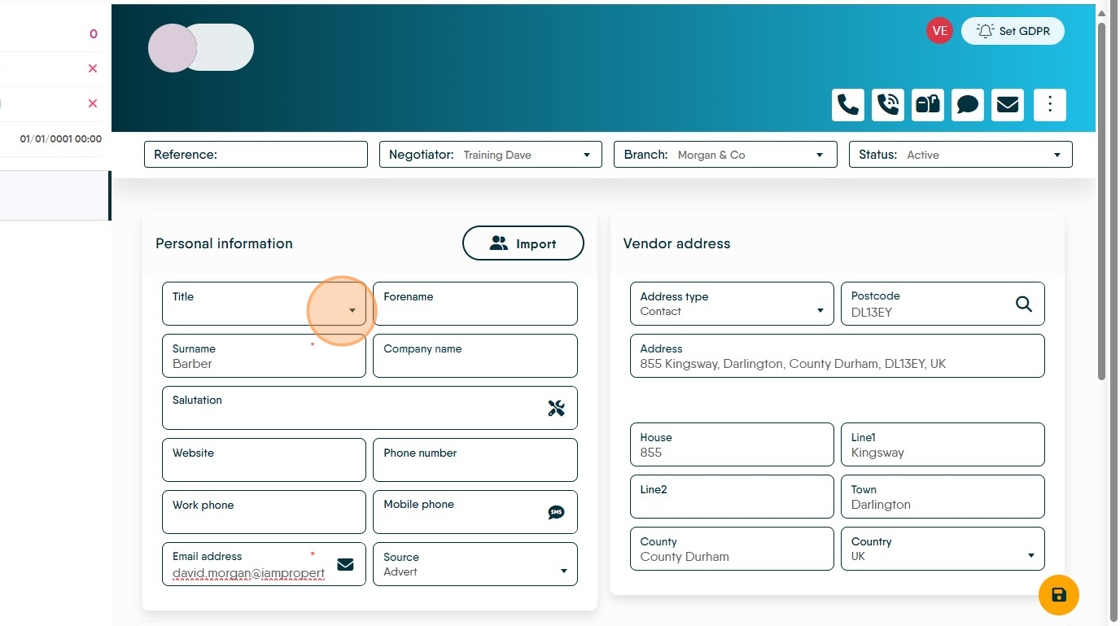
16. We advise creating the Salutation as it is one of the templates tags for letters, emails and SMS. If not created the field would show as blank. To create the Salutation click here.
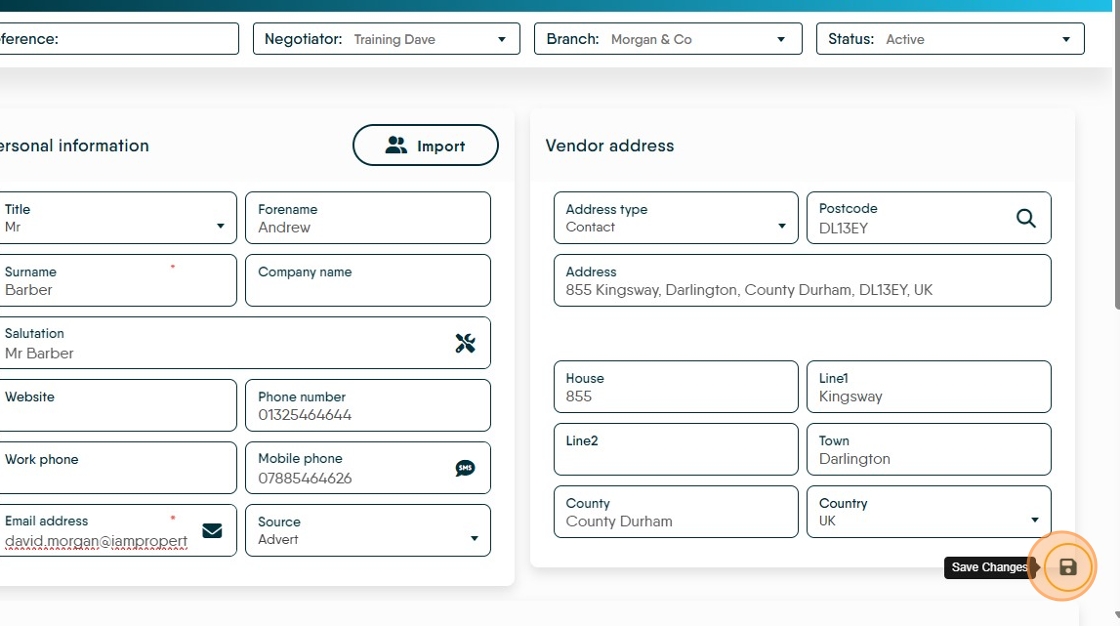
17. Click here to save your edits. This will create more menu options in the left menu.
As with the property record it is best practice to complete all of the fields that you have information for, either at this point or return to update.
18. Return to the Property screen and search for your Vendor

19. Select the Vendor you are adding from the drop down menu.
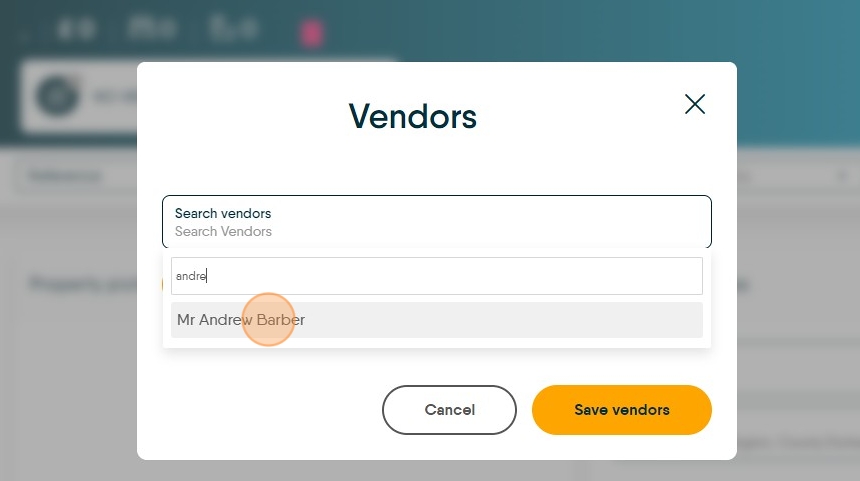
20. Click "Save vendors"

21. You can now save the Property Record and continue to create the property record.

Tip: Tip! Once saved the property record will have more options down the left side of the screen that can be completed to add further detail to the property. It is important that these are completed as soon as you have the appropriate information.