This guide offers a step-by-step walkthrough for adding a property appraisal in the iamproperty CRM, making it an essential resource for real estate professionals looking to streamline their appraisal process. By following the detailed instructions, users can efficiently manage property appraisals, ensuring accurate data entry and effective communication with clients. It simplifies the workflow within the CRM, ultimately enhancing productivity and organisation in property management.
Alert: Why Should You Create an Appraisal Appointment and add a Property?
Whilst it may seem like an unnecessary step, adding the property before conducting an appraisal/valuation visit helps build a sales pipeline for your business and gives you valuable data. For example an appraisal record in CRM allows you to track if you won the business and if you lose it track who you lost it to. This can lead to being able to see a trend, which you can investigate and build a strategy to combat.
If you are looking to gain a new Landlord adding their details and that of the property you can instantly match the property against the Applicants you have on your lists and when you meet with the landlord show them the potential clients you have for their property. Giving you a strong proposal to be chosen.
When you win the business, you can take the images from your mobile handset and upload them straight to CRM, match to your Applicants and send them the details straight away, without leaving the property.
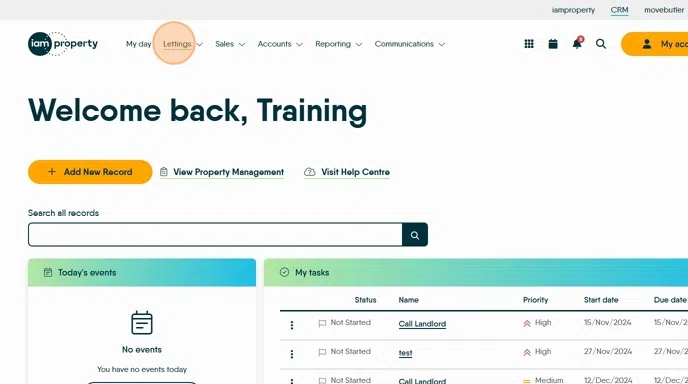
1. Navigate to https://crm.iamproperty.com/MyDay
Tip: Tip! This process is the same for Sales and Lettings properties and can be started from within a property record rather than searching from the My Day screen.
You can also start from the search function, or from a newly created property record.
2. To find a property from the the list of Properties you have on CRM. Click "Lettings", then click "General", then click "Properties" this will take you to a list of your properties
3. Search for and select the Property you are creating an appraisal for.

Tip: Tip! If you are already in a property record, start from here.
4. Click "Appraisals"

5. Click "Add Appraisal"

6. Click Valuers to select the Valuer/s for the property. Then click into the appointment date field to set the appointment date.
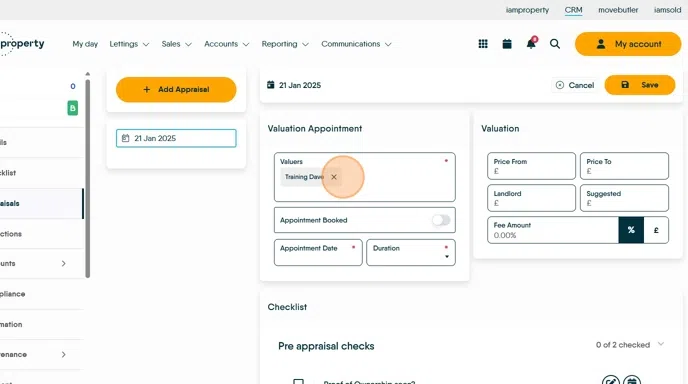
7. Click here to set the appointment date and time.

8. Click here to set the duration of the appointment.
For example click "45 Mins"

9. Click here to view and complete any checklists you have created and applied to this area of CRM.

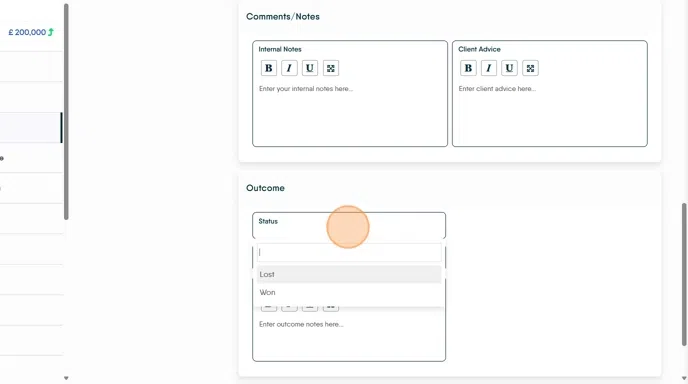
10. Click "Enter your internal notes here..." this will be available in the Calendar entry for the appraisal. These are notes added for your information.
Add any advice that you gave tot he Landlord (or Vendor) into the Client Advice field.

11. Click "Save" the appointment will now show in the property record and the Calendar.

Creating an Appraisal Appointment in the Calendar
12. Click "Calendar"

13. Find the date and time you are creating the appraisal for and right-click.

14. Click "Sales" or Click "Lettings"
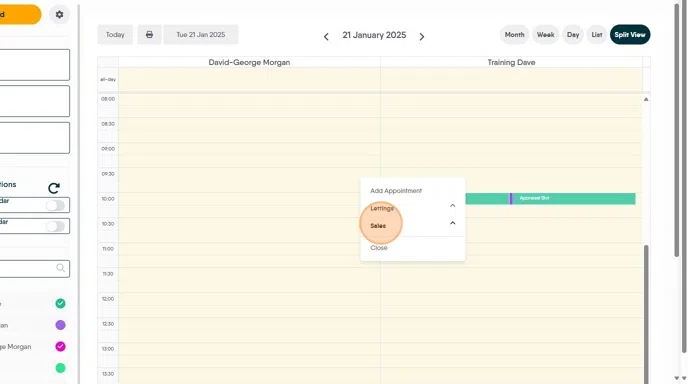
15. Click "Add Appraisal", as previously the process is the the same for Sales and Lettings

16. Click here and select the property. Clicking on the blue+ in the 'Select Property' field will allow you to add the basic details for a new property to the CRM.
Selecting the property details will auto populate the Vendor or Landlords screen.

17. Click the "Select valuers" field and select the valuers you are using.

18. Click "Appointment"

19. The Event Title is preset. Check the branch details are correct and then click the "Select calendar to assign to" field. Click Lettings or Sales (or the calendar you are using for your Appraisals) as required.
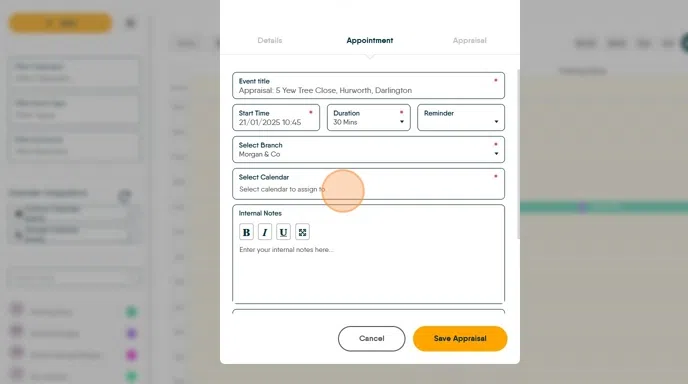
20. Click here to add any notes for the Valuer.

21. Click "Save Appraisal" The appraisal will then show in the Calendar and the Property record.

Add an Appraisal from the '+ Add' option in the Calendar
22. Click "Add"

23. Click here and select the type of Appraisal you are adding.
The process from here on is the same as shown above.

Sending Confirmation Emails/SMS
Alert: Alert! This process can be automated using CRM Automations, confirmations and reminders can be sent out at timescales to suit you with your wording. Ask Onboarding or your Account Manager.
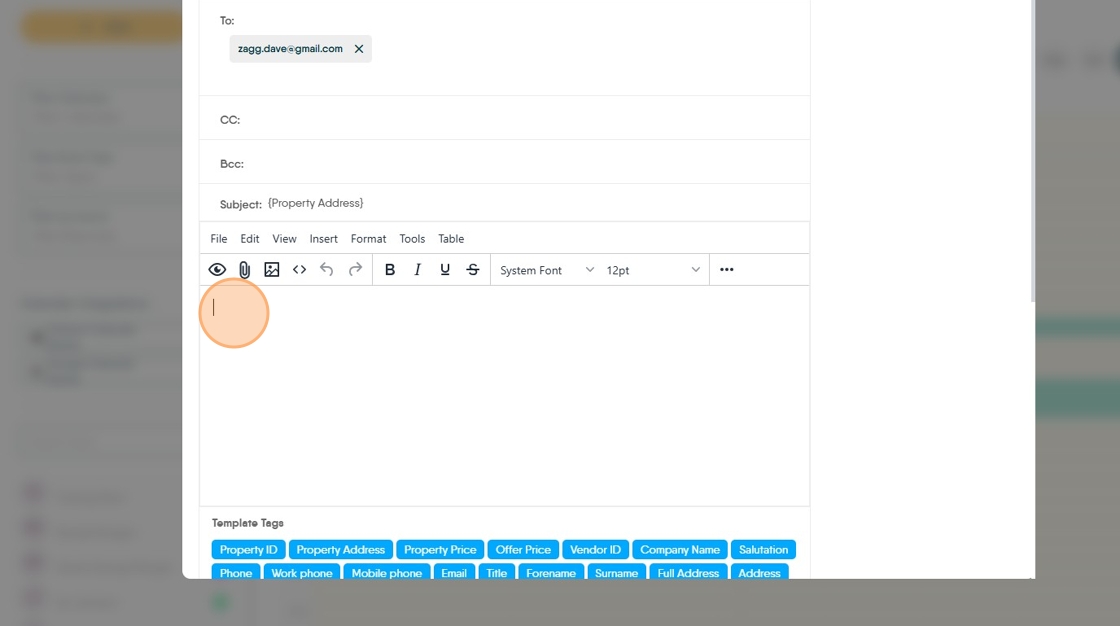
24. Once the Appraisal is saved, click on the email or SMS icons

25. Click here. Either type your message or use the Template option to use a pre set template, or create a new template.
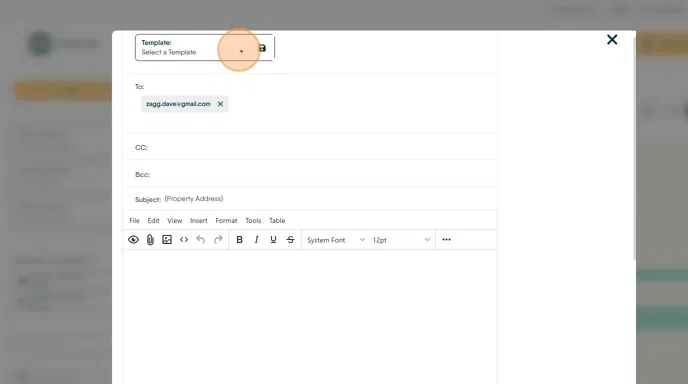
26. Click here to select a template.
Templates are created by you, there are no default templates.
Click "Appraisal Confirmation 2"
Click "Send Email"
27. If you want to send the email to other contacts for that property, scroll down the screen and select from the list.

Completing the Appraisal
28. The appraisal can be completed from anywhere that it is viewable in the CRM - Property Record, Calendar or Activity List.
Complete the Valuation fields.

29. Click here and complete any checklists.

30. Click here and complete any Notes and if you know, complete the Outcome..

31. Outcome is if you have won or lost the business and if lost who the business was lost to and why.
This is useful information to run a report showing if a competitor is gaining business from you and allowing investigations to be made.
This is also reported in the Activity list as Appraisal Not Concluded, noting this outcome either from here or the activity list clears the listing.