Learn how to manage and modify user access settings for staff members within your Dynamic Agent dashboard. This guide provides a clear walkthrough for adjusting operational roles and dashboard visibility for your team.
Alert: Alert! If you do not have sufficient user permissions it is possible you will not see the options to change user profiles.
This guide assumes you have full permissions to manage and configure Dynamic Agent.
There are some sections of this guide that are controlled by Dynamic Agent Support, these settings will be discussed as part of the Client Onboarding process and setup by Dynamic Agent Support.
1. Navigate to https://dynamic-agent.co.uk/
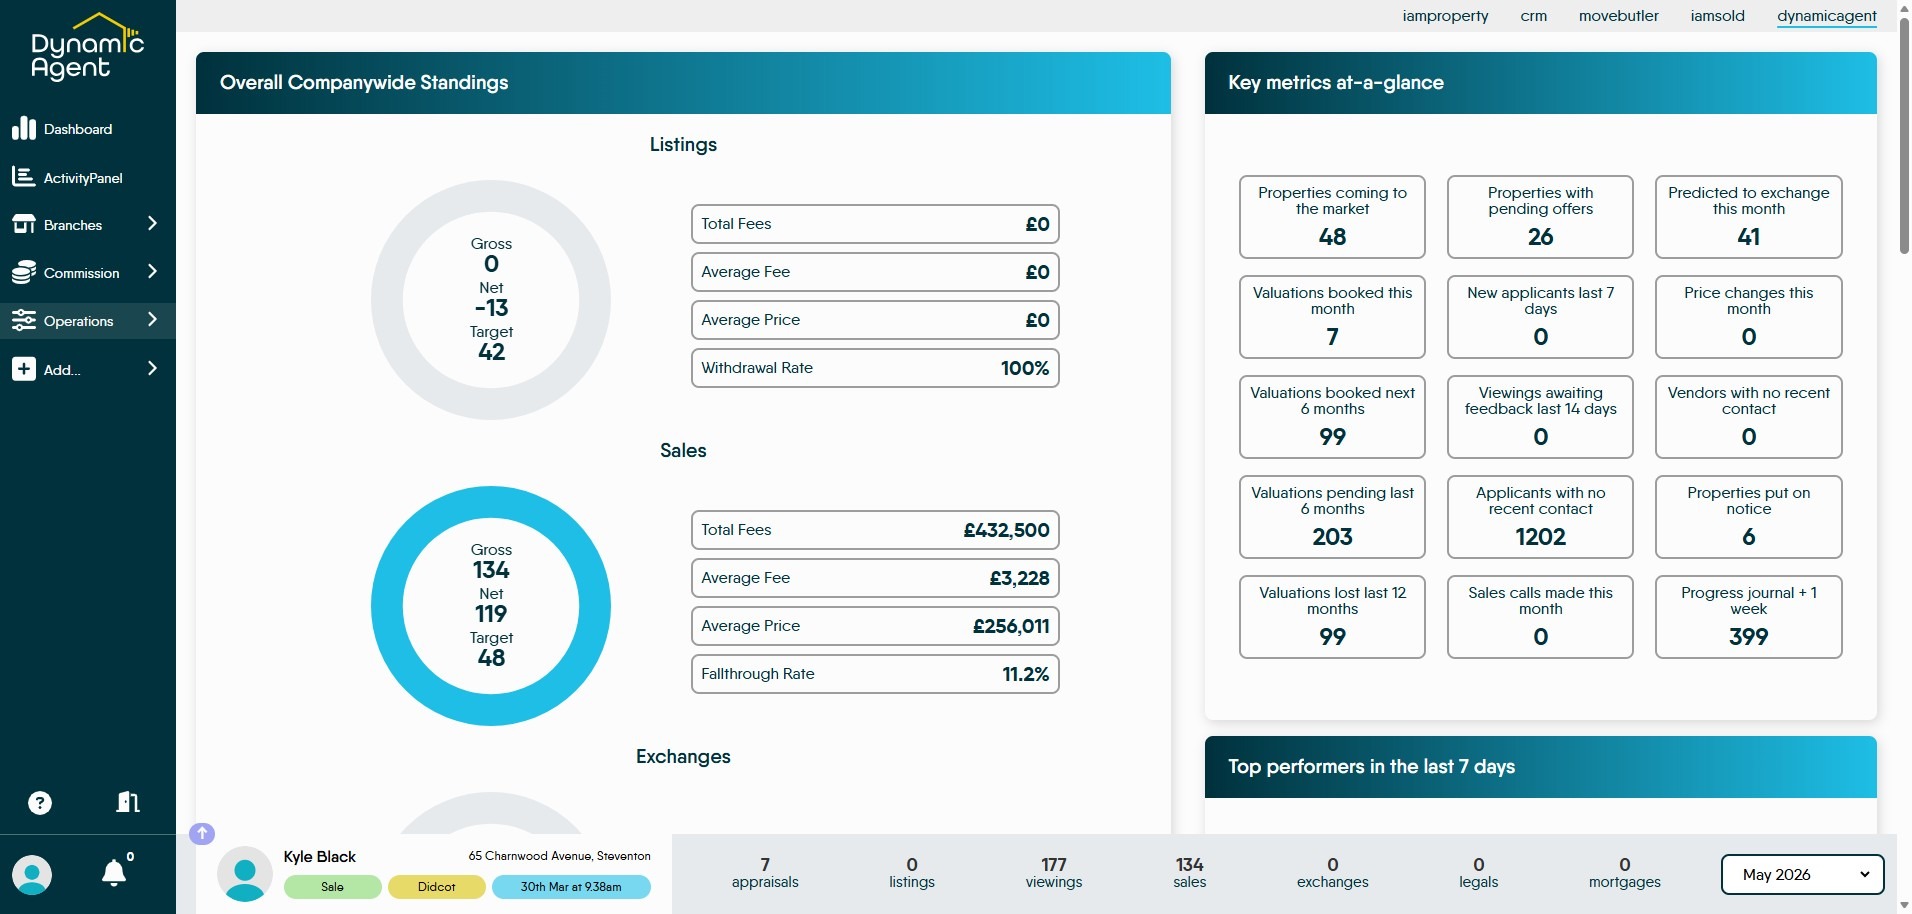
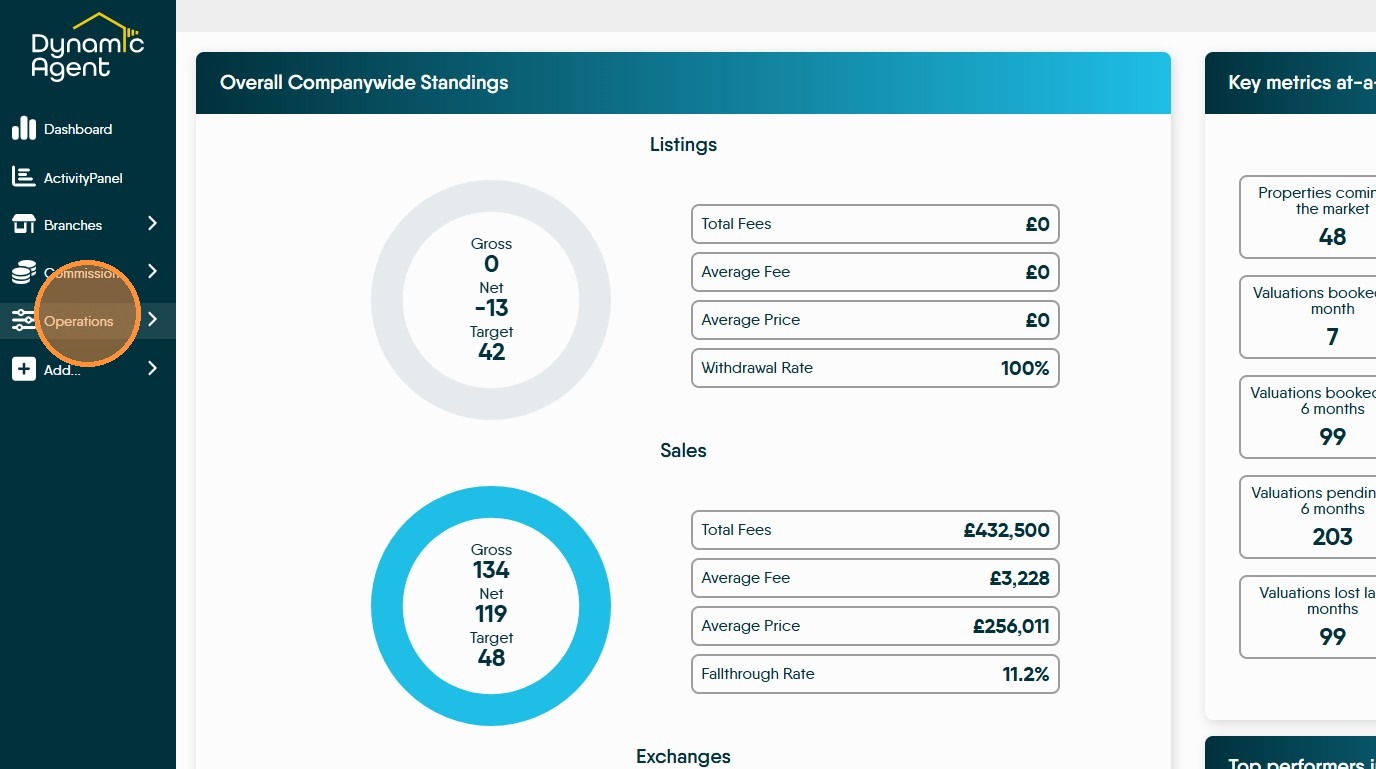
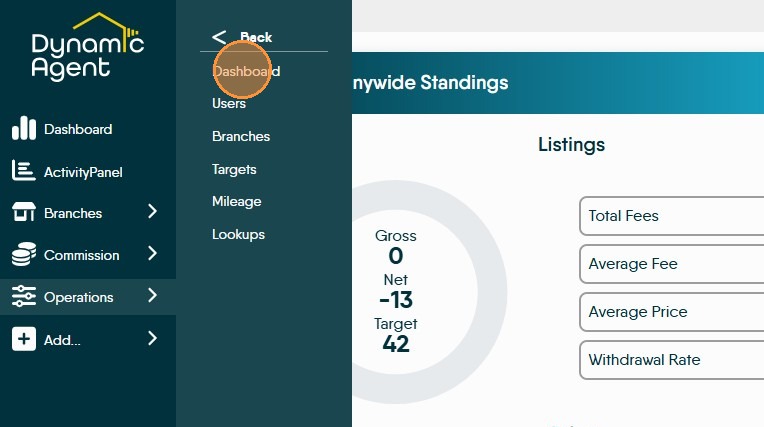
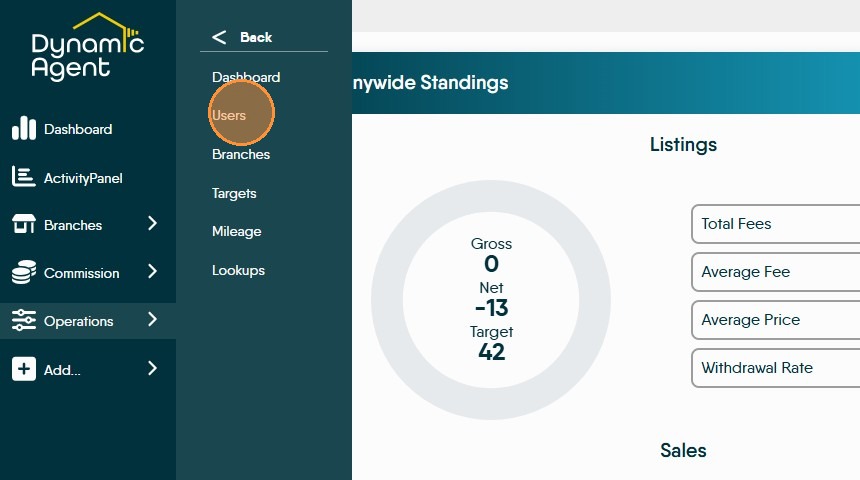
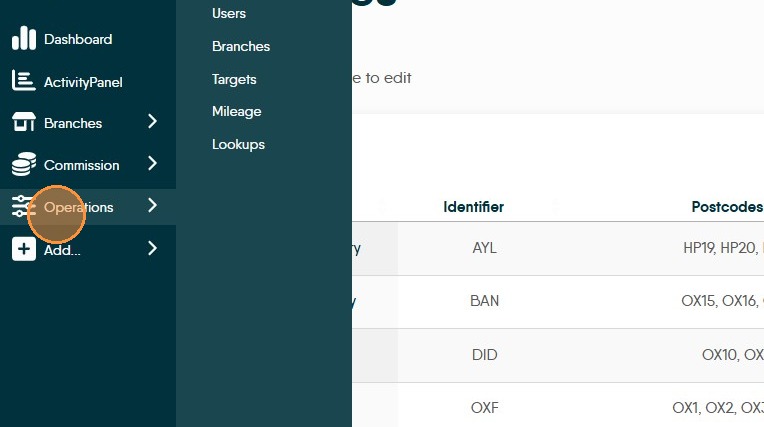
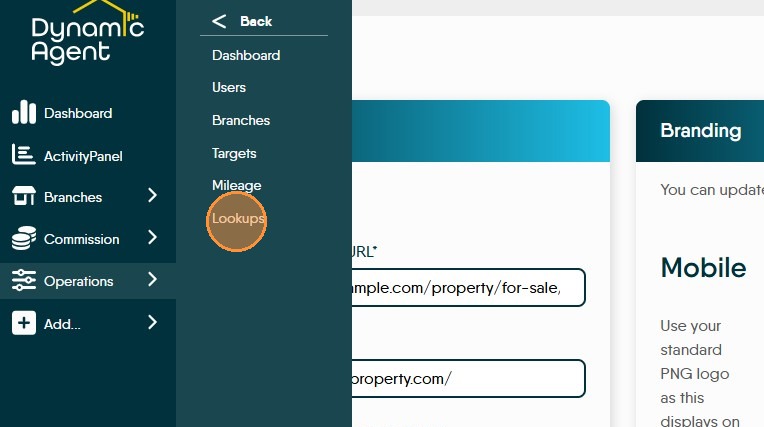
2. Click "Operations" in the side menu. This menu allows various items to be updated within Dynamic Agent such as adding Users, Branches etc.
Operations Dashboard
3. Click "Operations"
4. Click "Dashboard"
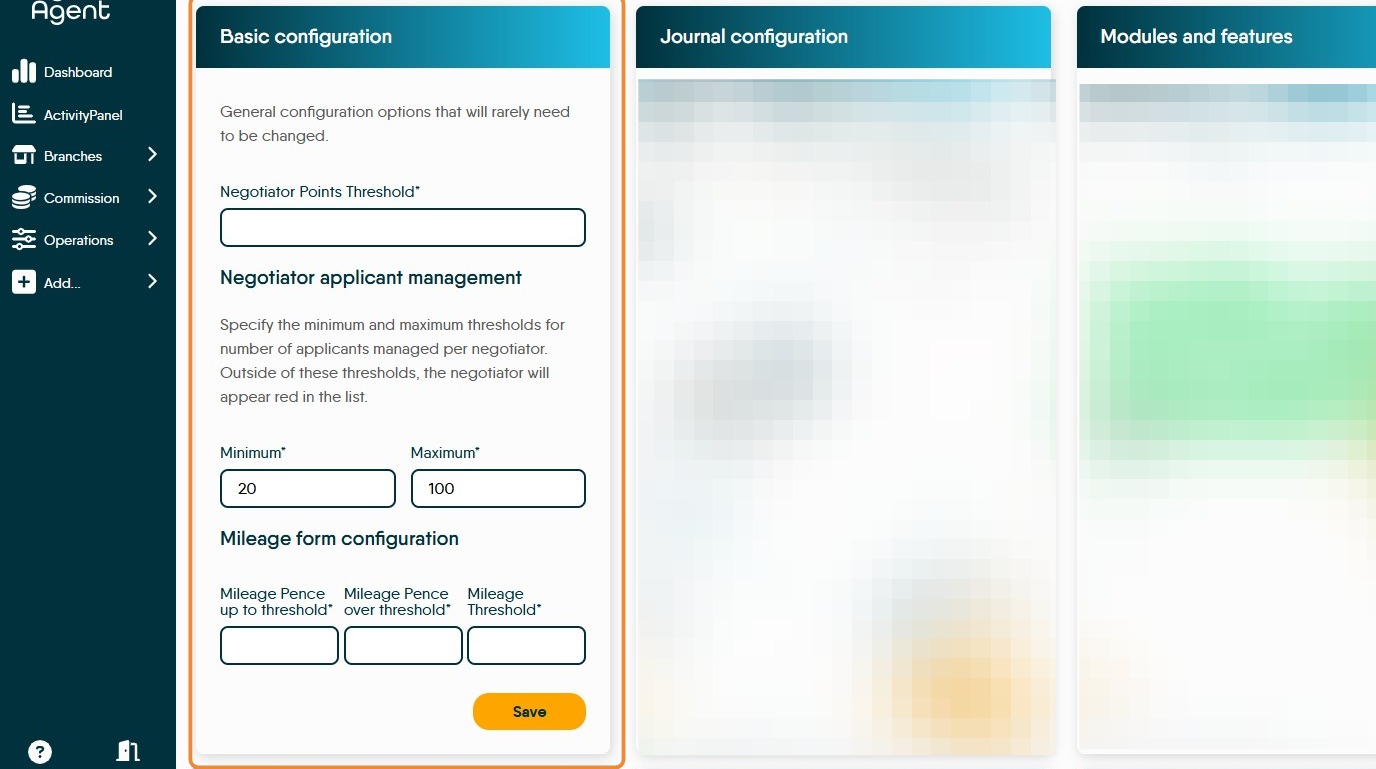
Basic Config.
6. Click "Basic Config" in this screen the URL for where your properties are displayed can be added. Along with the URL of your CRM.
Negotiator Points Threshold is the point where staff start to earn commission. Points are set to be earned per activity e.g. Sale. Once this target is reached then commission is earned by the staff member.
Negotiator Applicant Management this allows a minimum/maximum number of Applicants a negotiator can handle, ensuring a high quality service. Outside of these thresholds the Negotiator will show red in the Applicants list.
Mileage form configuration for employees claiming mileage for either a personal or business use vehicle and are set by you. Advisory figures are available from HMRC. The threshold is the point the mileage rate drops, for example using a personal car for business use after 10000 miles the rate drops from 45p per mile to 25p per mile.
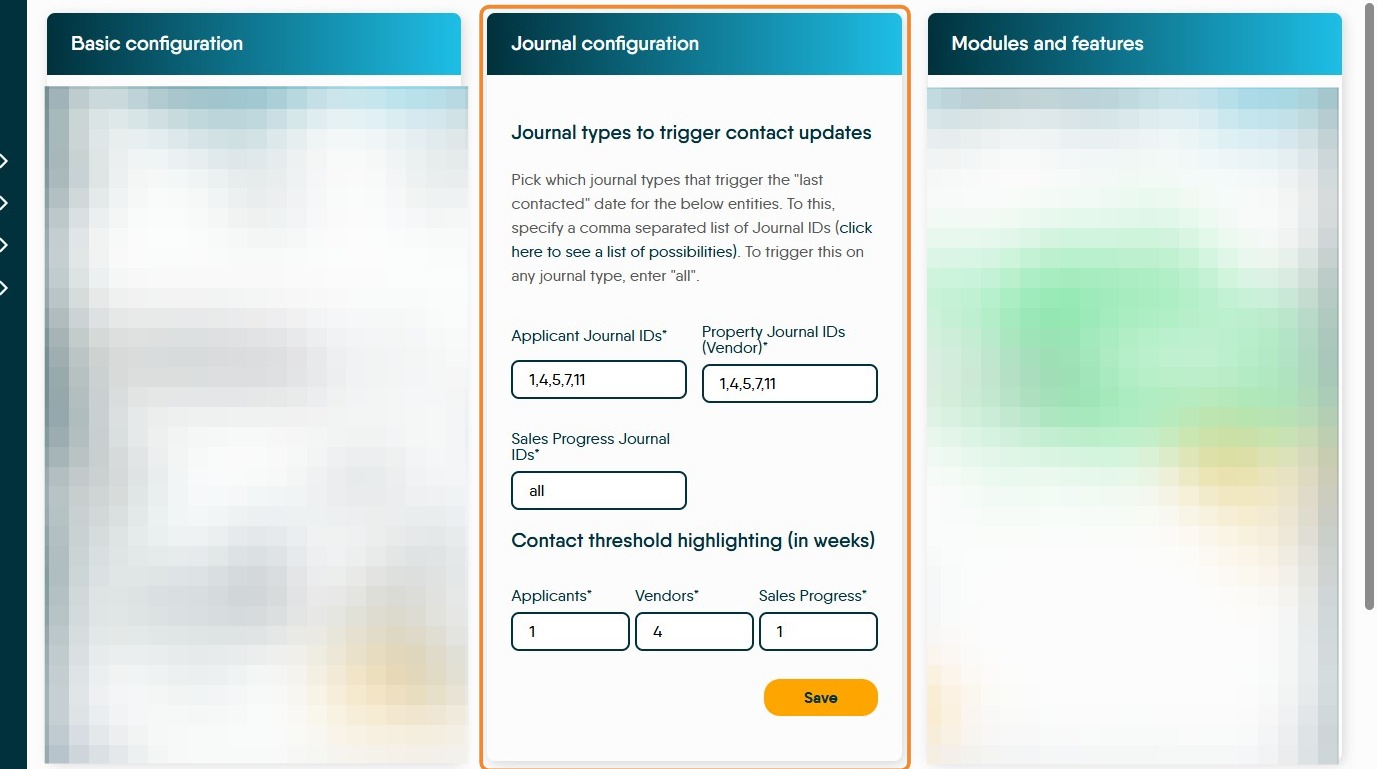
7. "Journal Configuration" allows you to set which journal types trigger the "last contacted" date for the Applicant, Vendor/Property and Progressions Journals. To do this, specify a comma separated list of Journal IDs (there is a list available from the screen). To trigger this on any journal type, enter "all".
8. N.B. This section is only available to users with Support Level Access
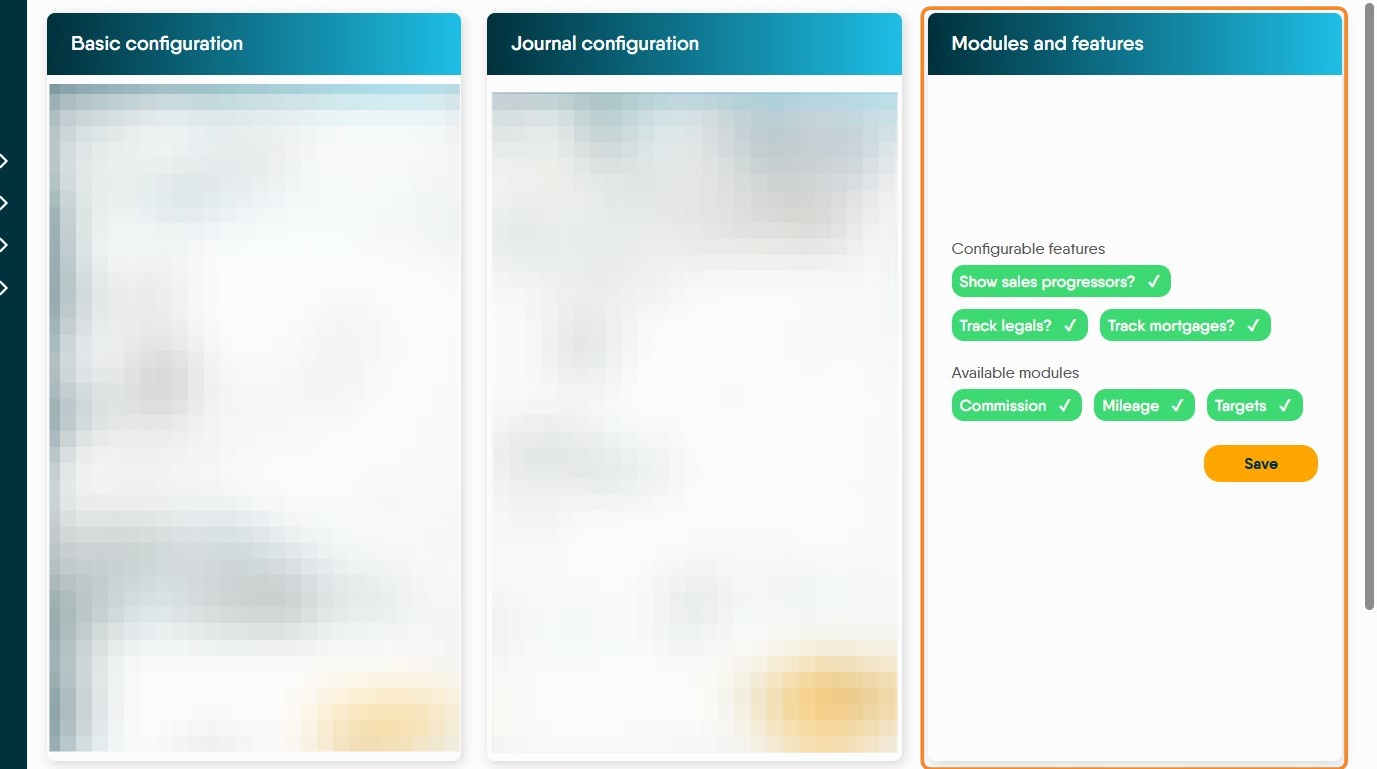
"Modules and features" this allows features to be not shown if they are not relevant, for example if you do not track Mortgage this can be deselected. Also allows other modules e.g. Commissions if you don't pay or use Dynamic Agent to track commissions.
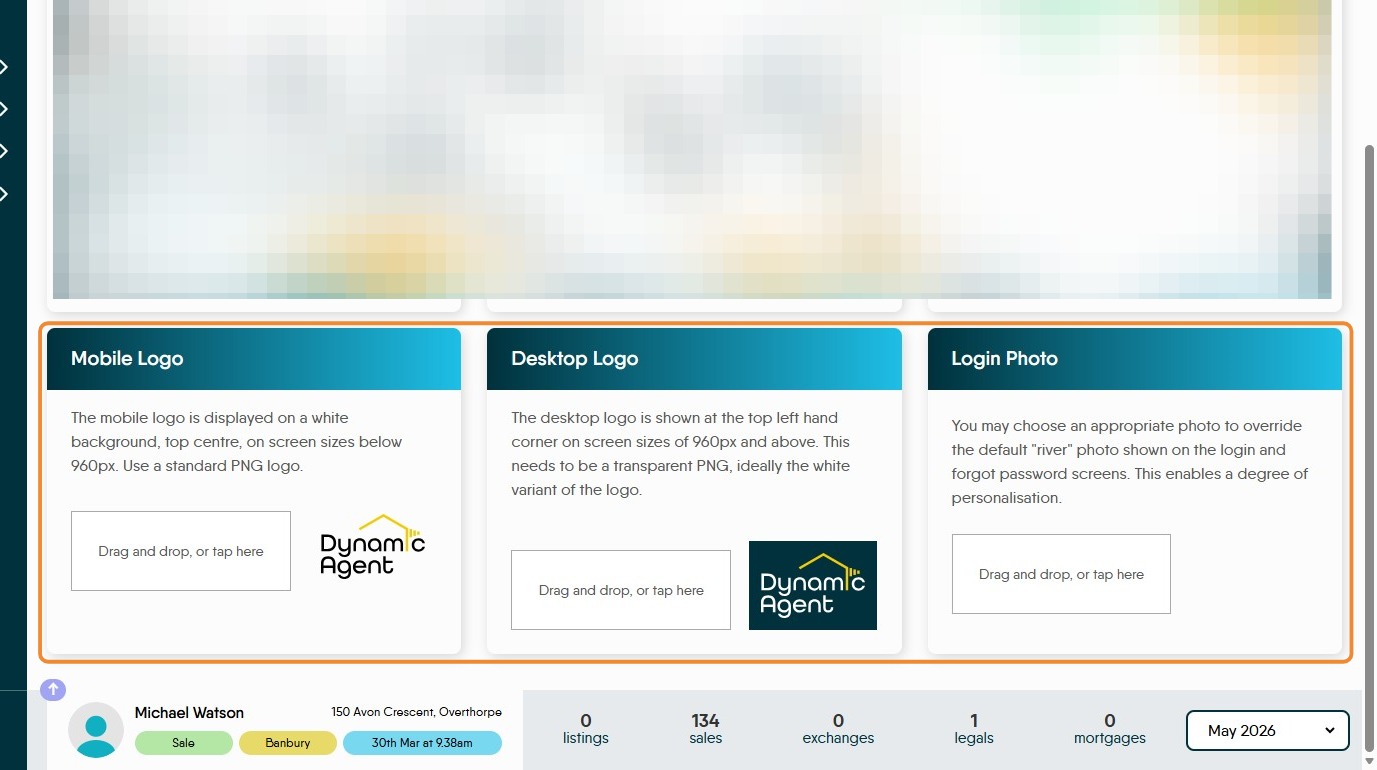
9. The "Mobile Log", "Desktop Logo" and "Login Photo" allow you to add your company logo for the web and mobile Dynamic Agent logins. Also add a personal image for the login.
Users
Alert: Alert! This section is only available to users with Support Level Access or above.
The Config Dashboard (Permissions), Config-Users & Config Branches will only be available to support level user access. These settings will be determined as part of Client Onboarding, then set by Dynamic support. If the client then needs settings changes, they will put in a support request.
The Config types of Targets, Mileage and Lookups will be available for client use for staff with the appropriate permissions.
ONLY Available to 'Support' Level users.
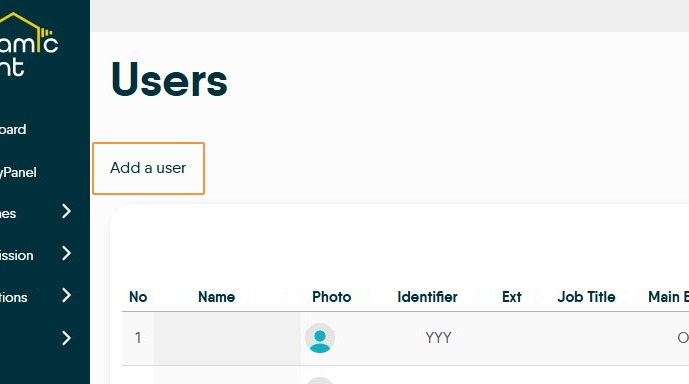
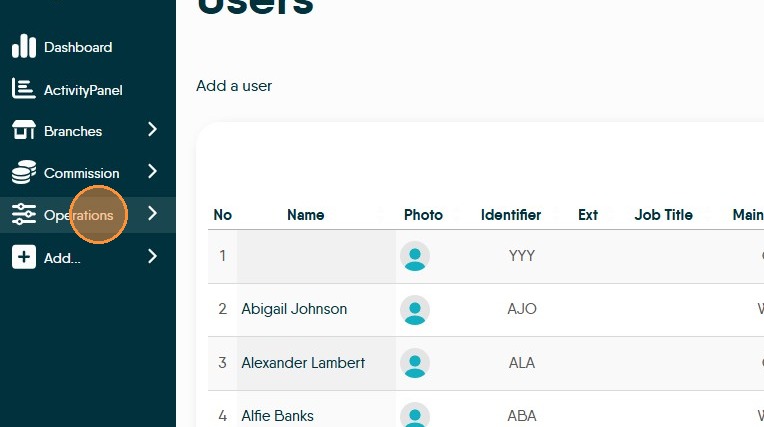
The Users screen allows all users of Dynamic Agent to be managed, permissions granted and removed and new users added to the system.
11. Select "Users".
12. Once in the Users screen to add a new user to Dynamic Agent click "Add a user" you will be diverted to a screen where a new user can be added.
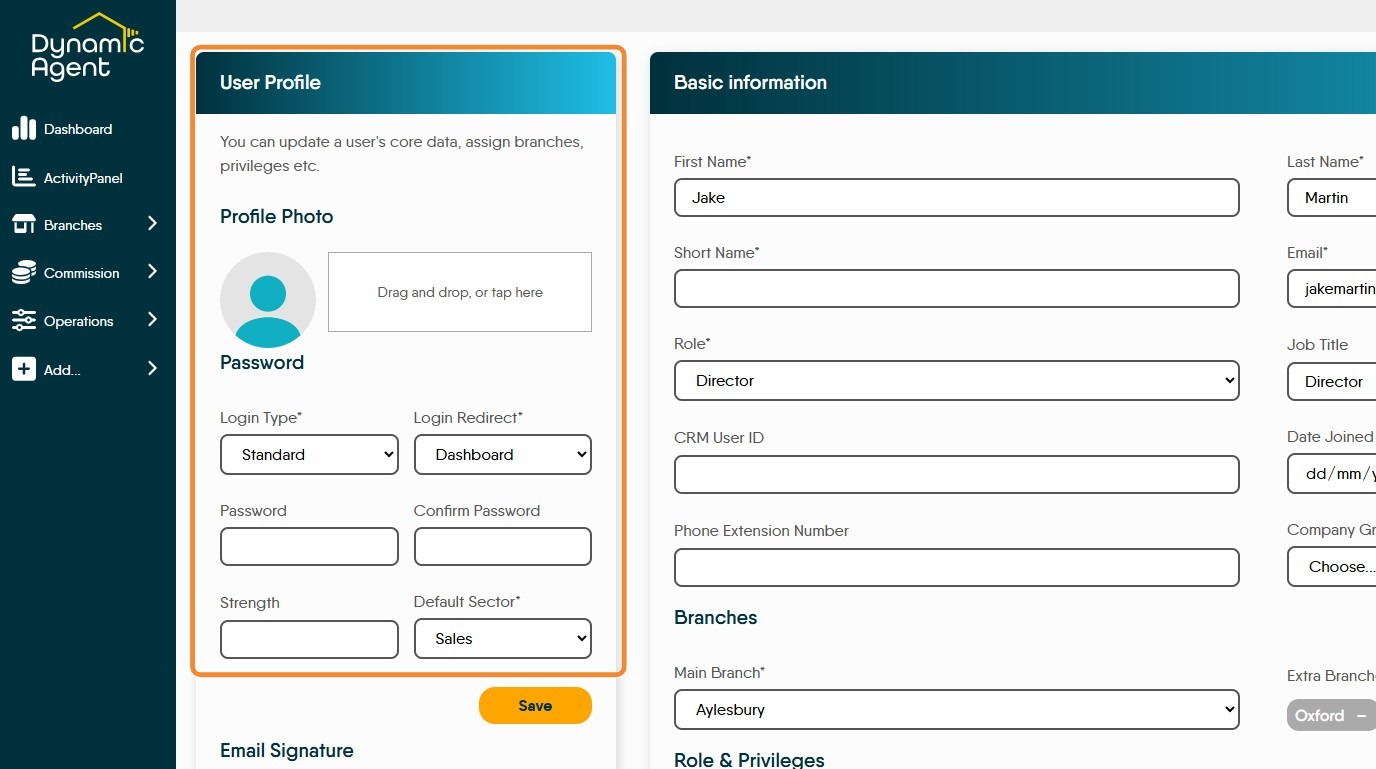
User Profile
14. Find the User whose details you want to update. Click on the users name e.g. "Jake Martin"
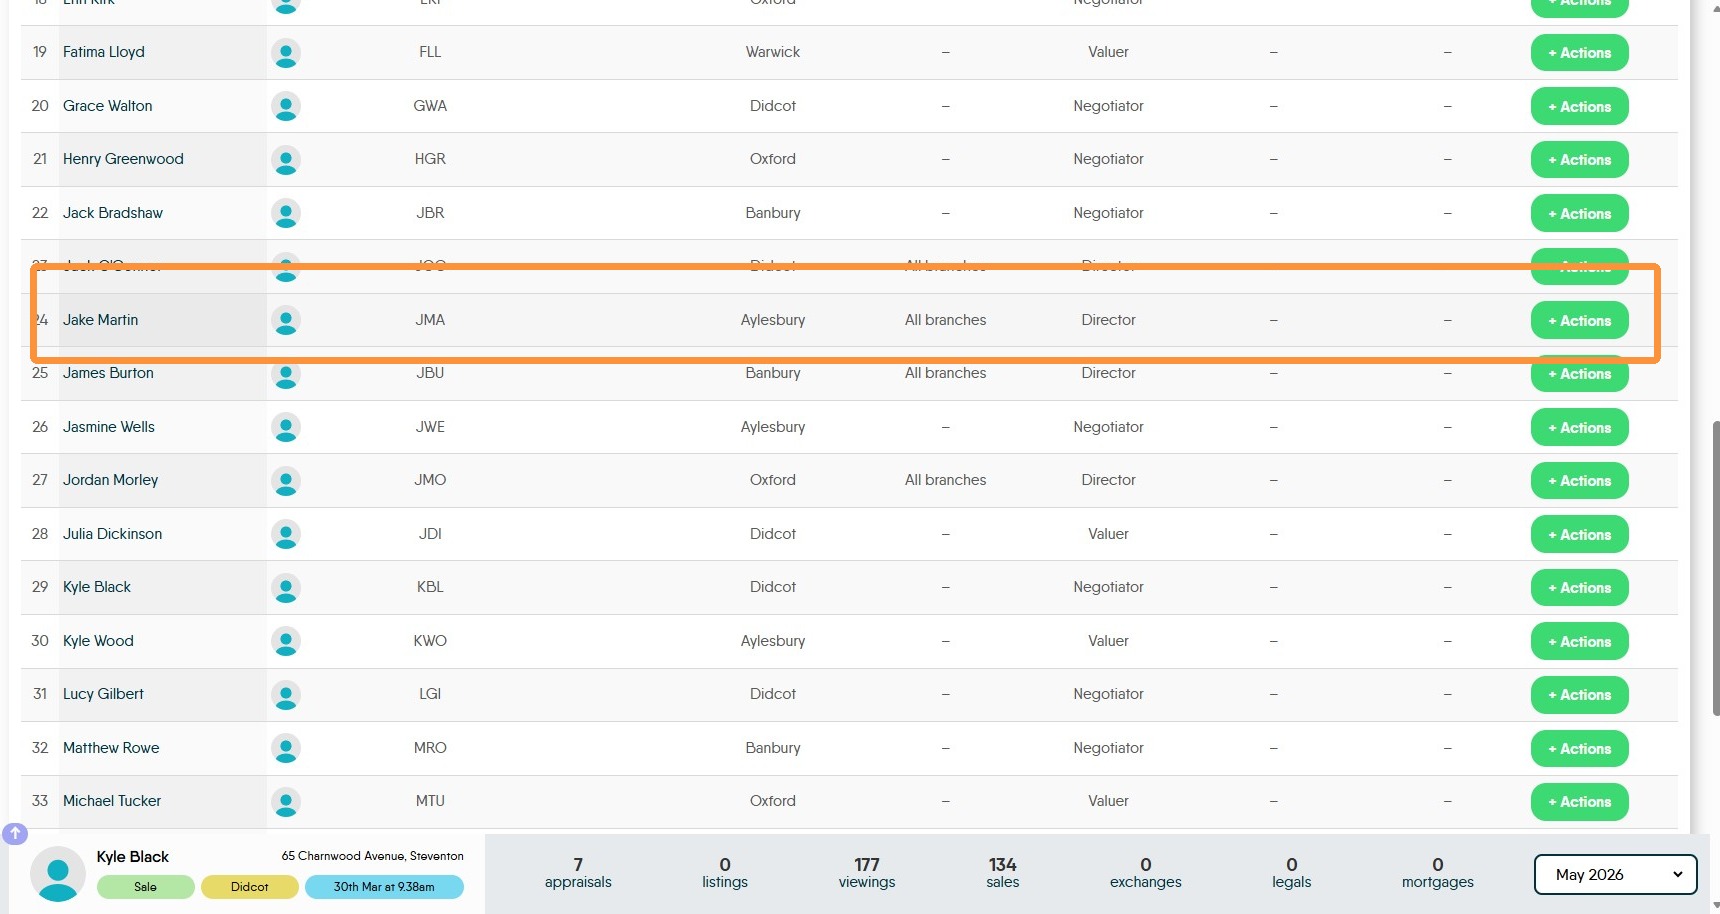
15. The "Actions" option allows the main branch of a user to be changed easily and quickly.

16. Clicking onto the users name will take you to this screen. User Profile. In this section you can add a photo to the users record.
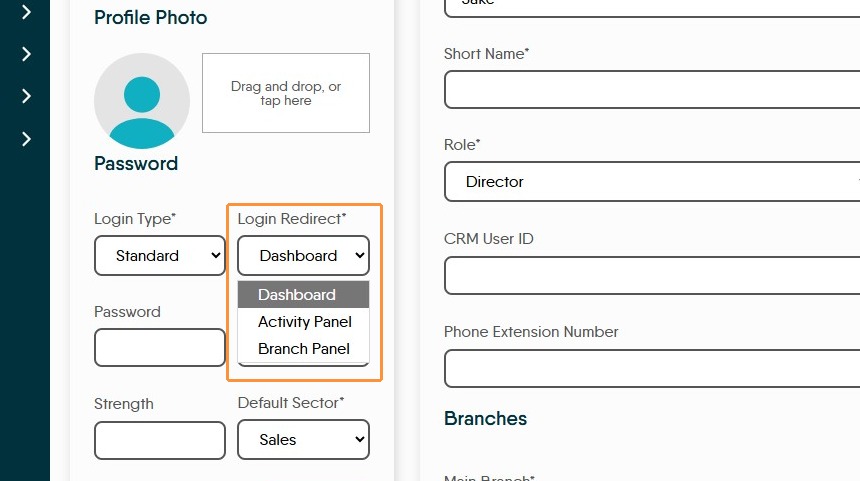
17. By clicking into the Login Redirect field you can select where the user id directed to on login. Dashboard, Activity Panel or Branch Panel
18. The user can update their Password by clicking the "Password" field and also ensure the passwords strength via the 'strength' indicator.

User 'Basic Information'
20. "Basic Information" screen allows data to be added or updated in a User record.
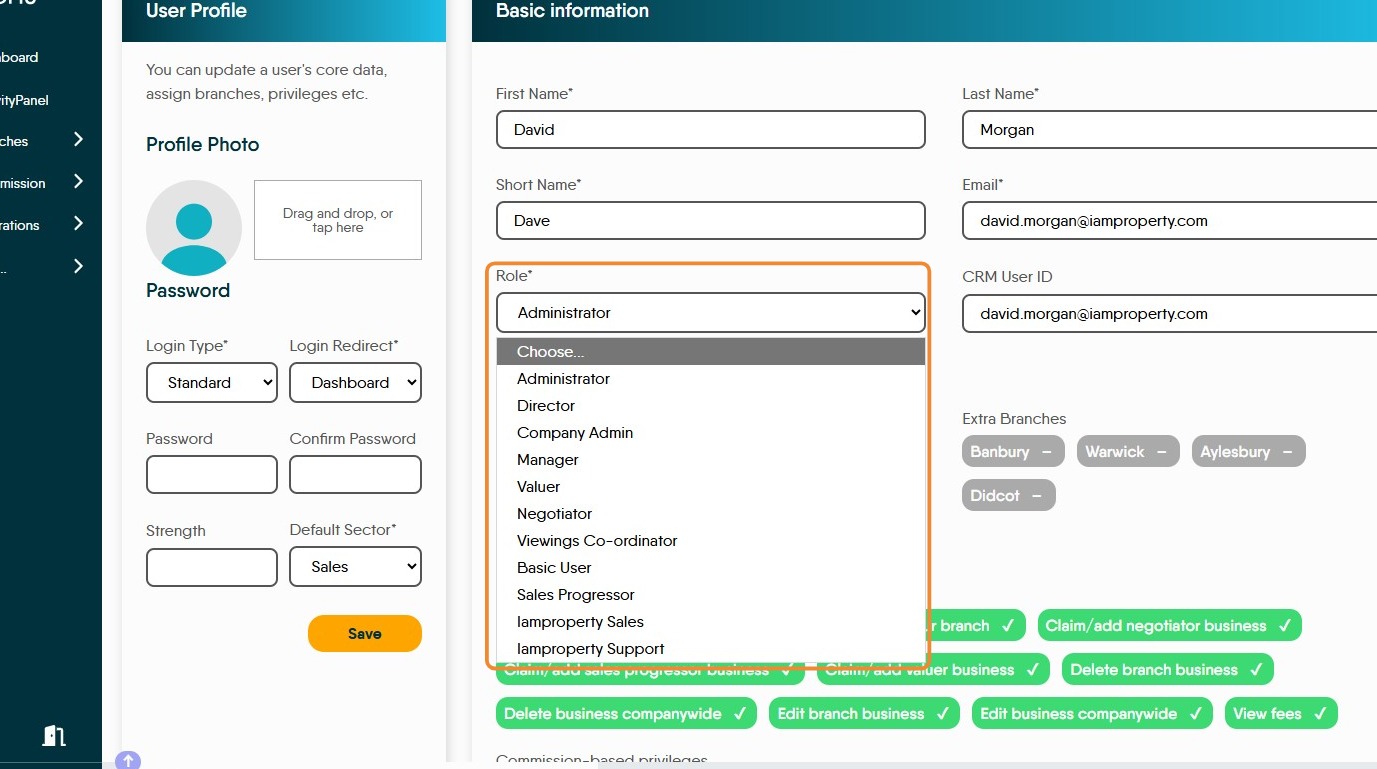
Add/Edit the users First Name, Last Name and Email. A 'Short Name' is a required field. Choose the users 'Role' from the drop down menu
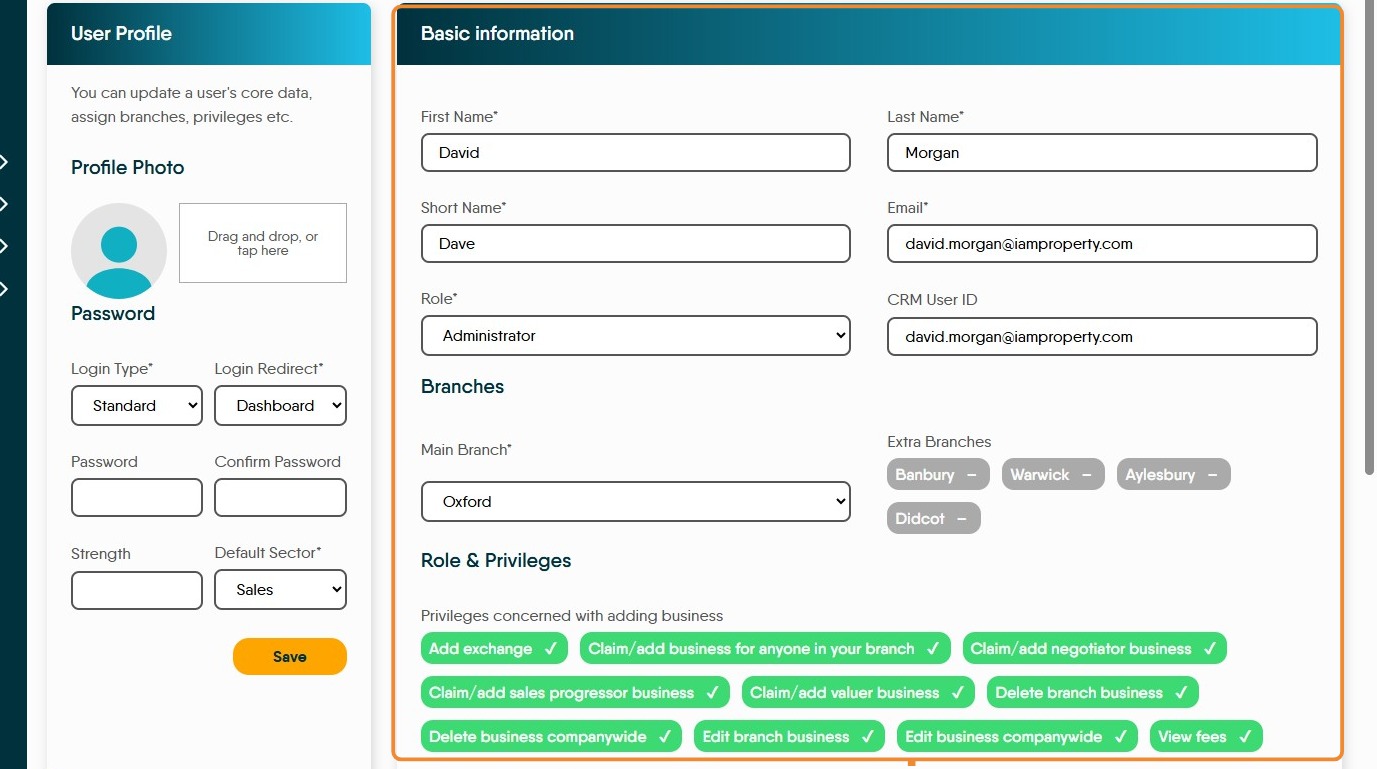
21. Roles controls the information users can see on screen e.g. Administrator will have more access than a Negotiator.
22. Branches. Select the users 'Main Branch' from the drop down menu. If the user works across multiple branches, select those in the 'Extra Branches' section.
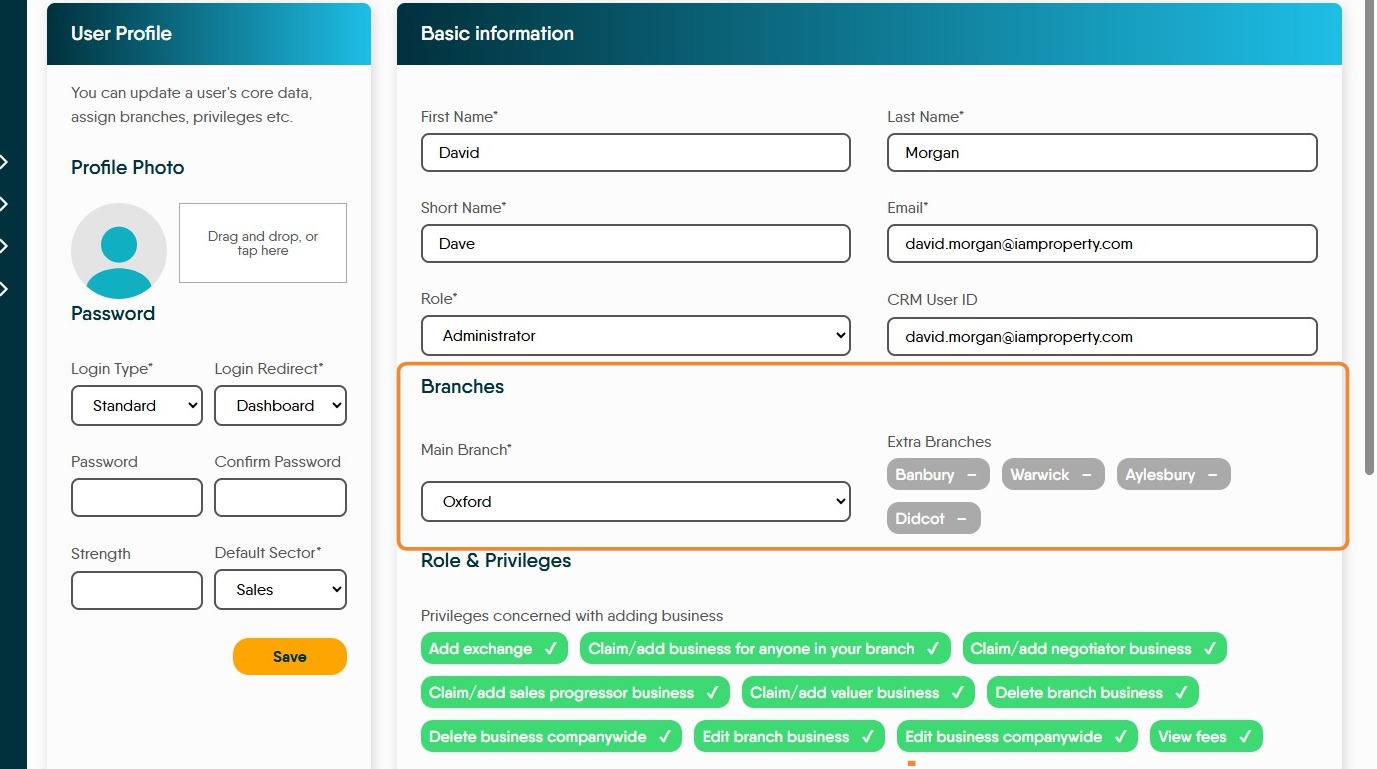
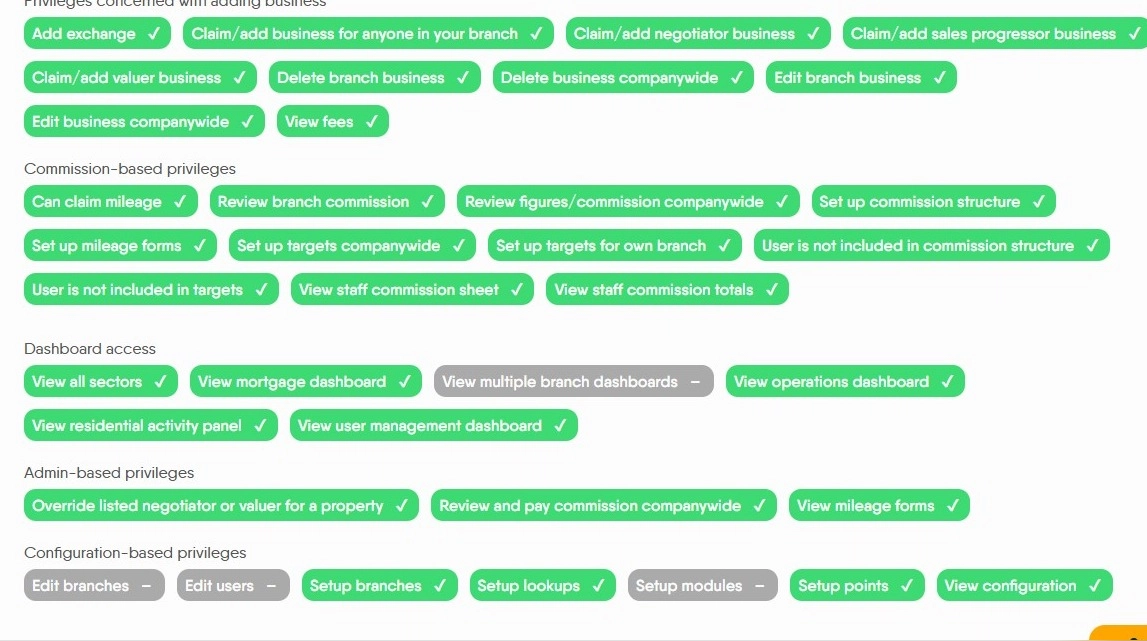
23. Roles and Privileges. This section allows user permissions to be granted/removed as required. These are enabled by clicking on the options and clicking 'Save'
Click "View operations dashboard✔"
Click "View mortgage dashboard–"
Branches
Alert: Alert! ONLY Available to 'Support' Level users.
24. Click "Operations"
25. Click "Branches"

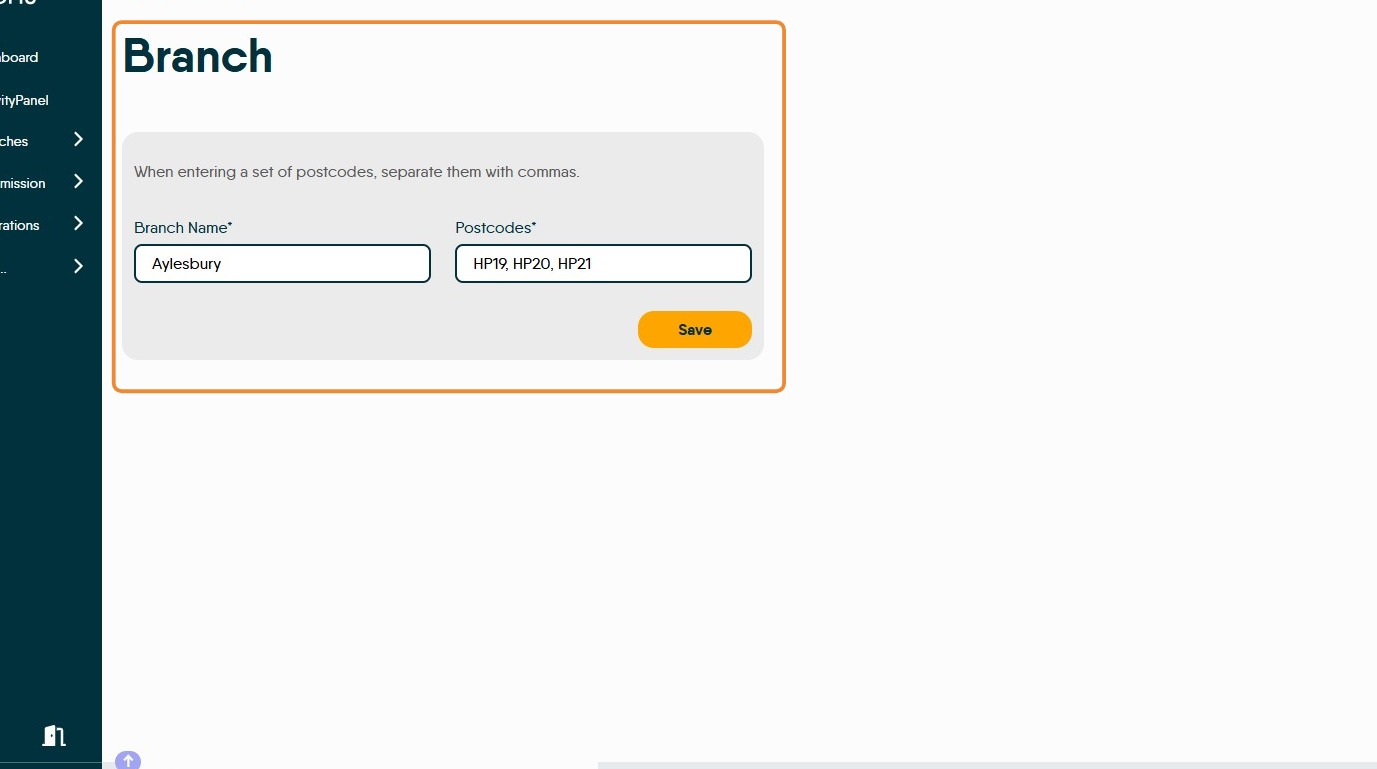
26. Click Branch "Name." to edit the branch details
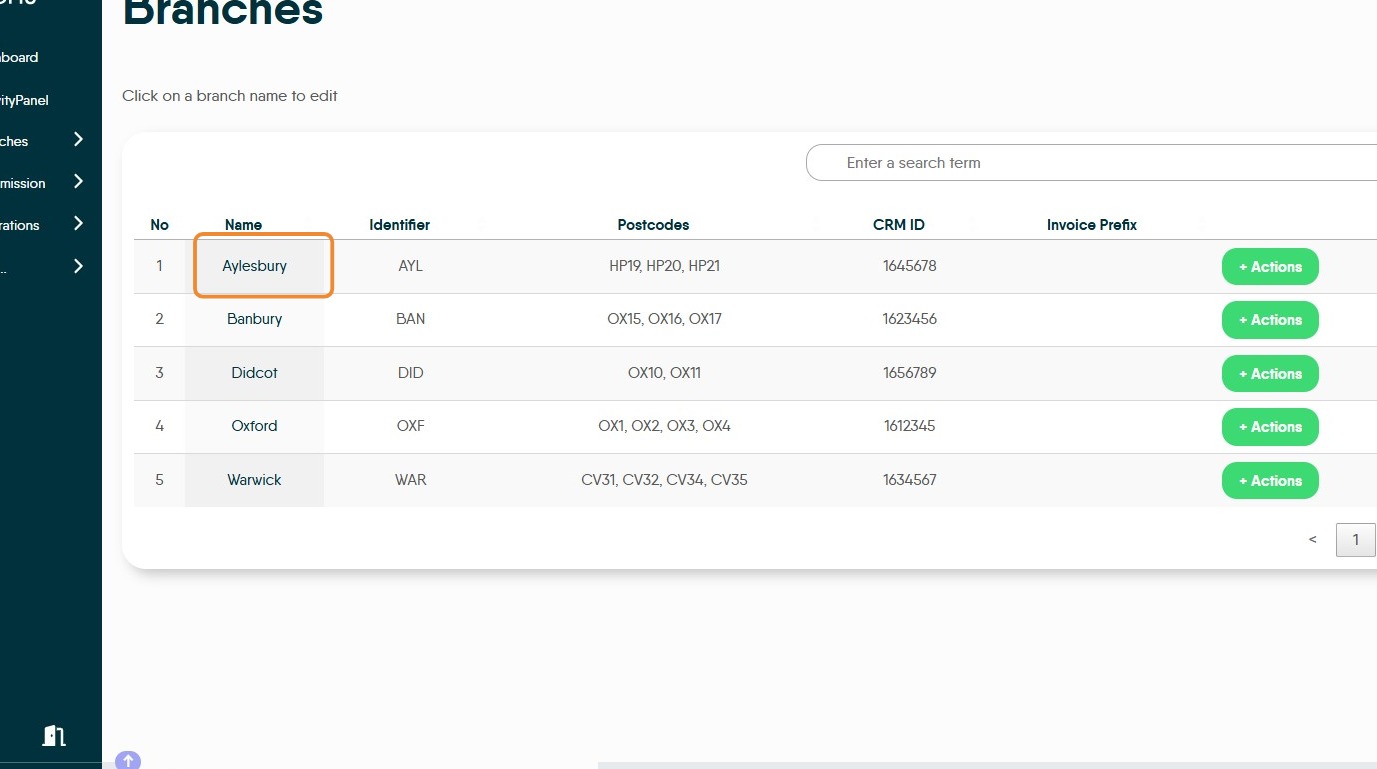
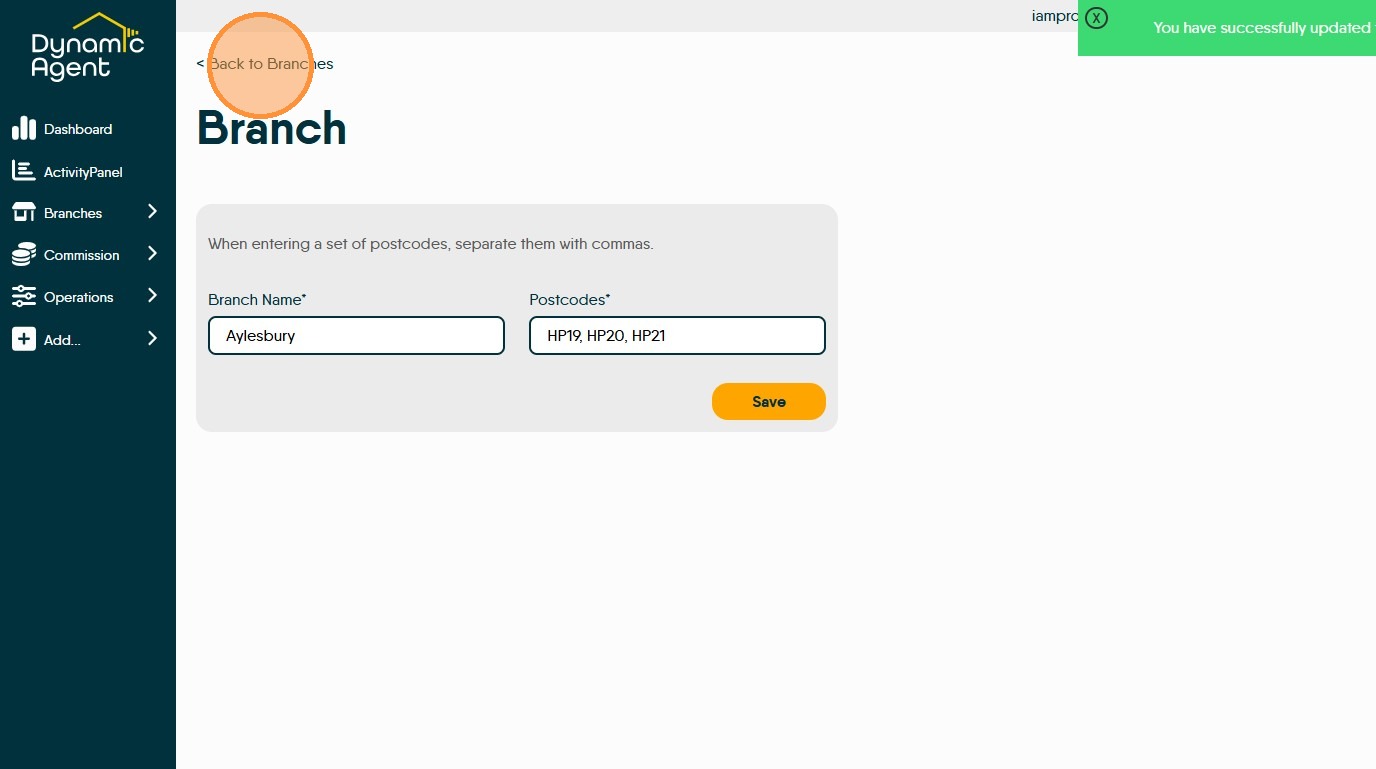
27. Here you can edit the branch name and the postcodes that the branch works in. Click "Save"
28. Click "< Back to Branches"
Targets
29. Available to any user with suitable permissions.
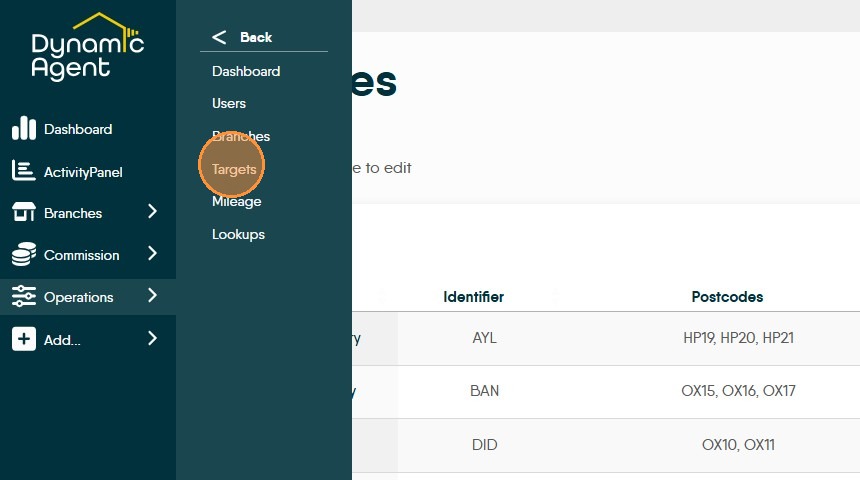
30. Click "Operations"
31. Click "Targets"
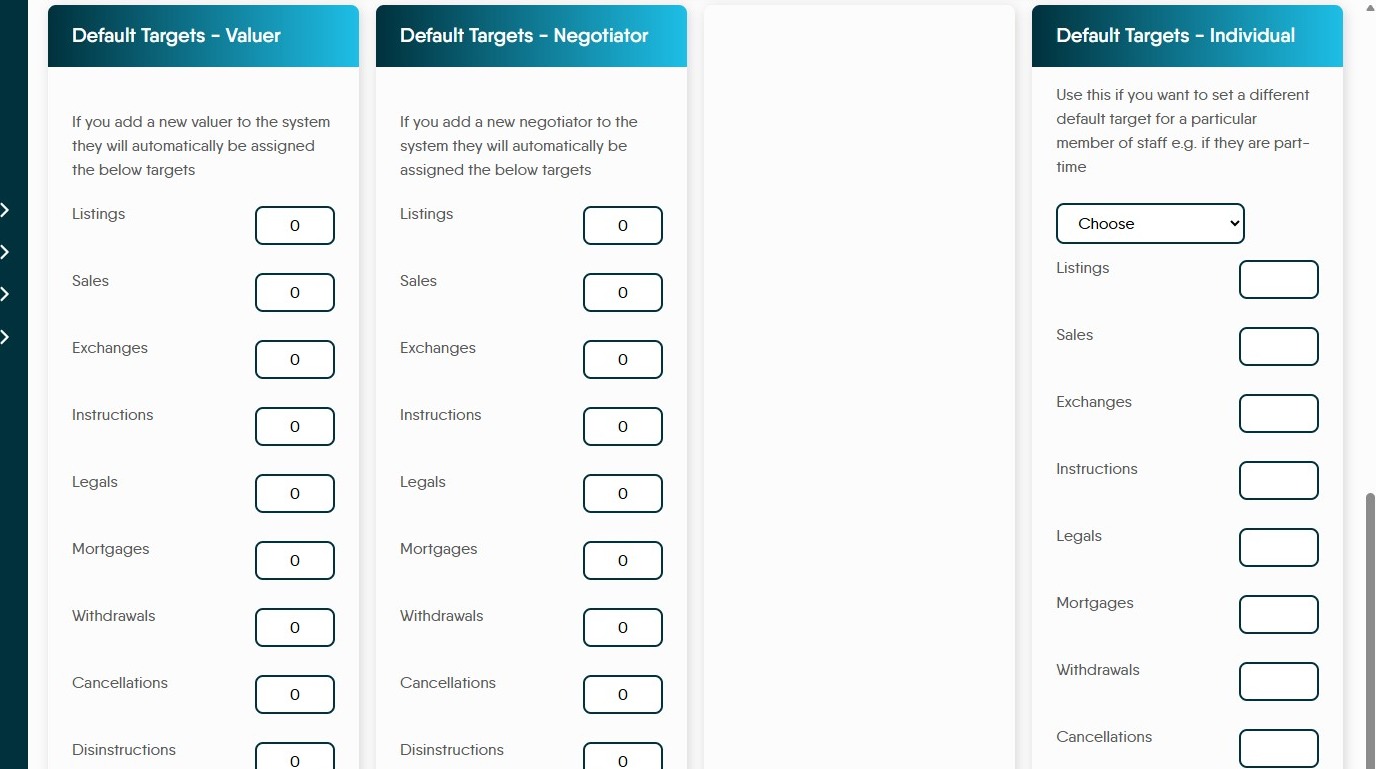
32. This screen allows you to set targets for each metric, on a per-role or per-user basis. Start by specifying default targets for each role; and these can be altered on an individual basis if you have a part-time member of staff.
The default targets you create are then used in the monthly Target Matrix. You then have the option of setting precise targets for particular months, in line with your expected staffing and business processes. If you do not do this, then the default targets will be used for every month.
Targets are used to display progress charts in the companywide, branch and individual statistics; and also in the various higher level reports.
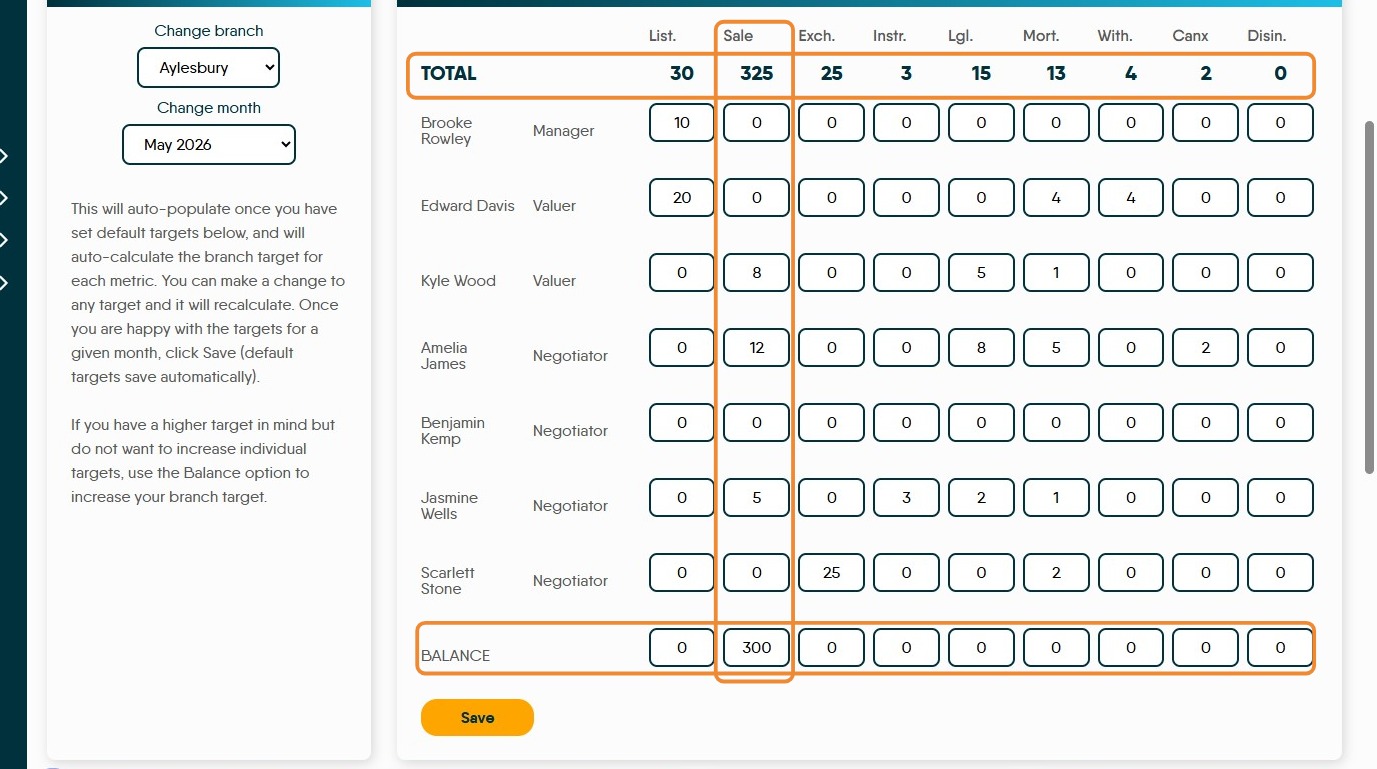
33. Target Matrix allows you to select a branch and a set a monthly target that is default for Valuer, Negotiator or Individual users this is then the target moving forward.

34. This screen is where you can set all the targets for each of the user types. If required individual user targets can be added as required.
35. Once set the targets will show in the "Targets for the selected month" screen.
The 'Total' are shown at the top of the screen, showing the total number of (for example) Sales targeted for that month. If required, the figures can be edited on this screen and the totals will update.
The Balance option at the bottom of the screen allows additional targets to be set which are over and above the individual targets eg the 'Sale' column has a target of 25 for all the users and a 'Balance' of 300 making the total 325.
Mileage
36. Available to any user with suitable permissions.
37. Click "Operations"
38. Click "Mileage"

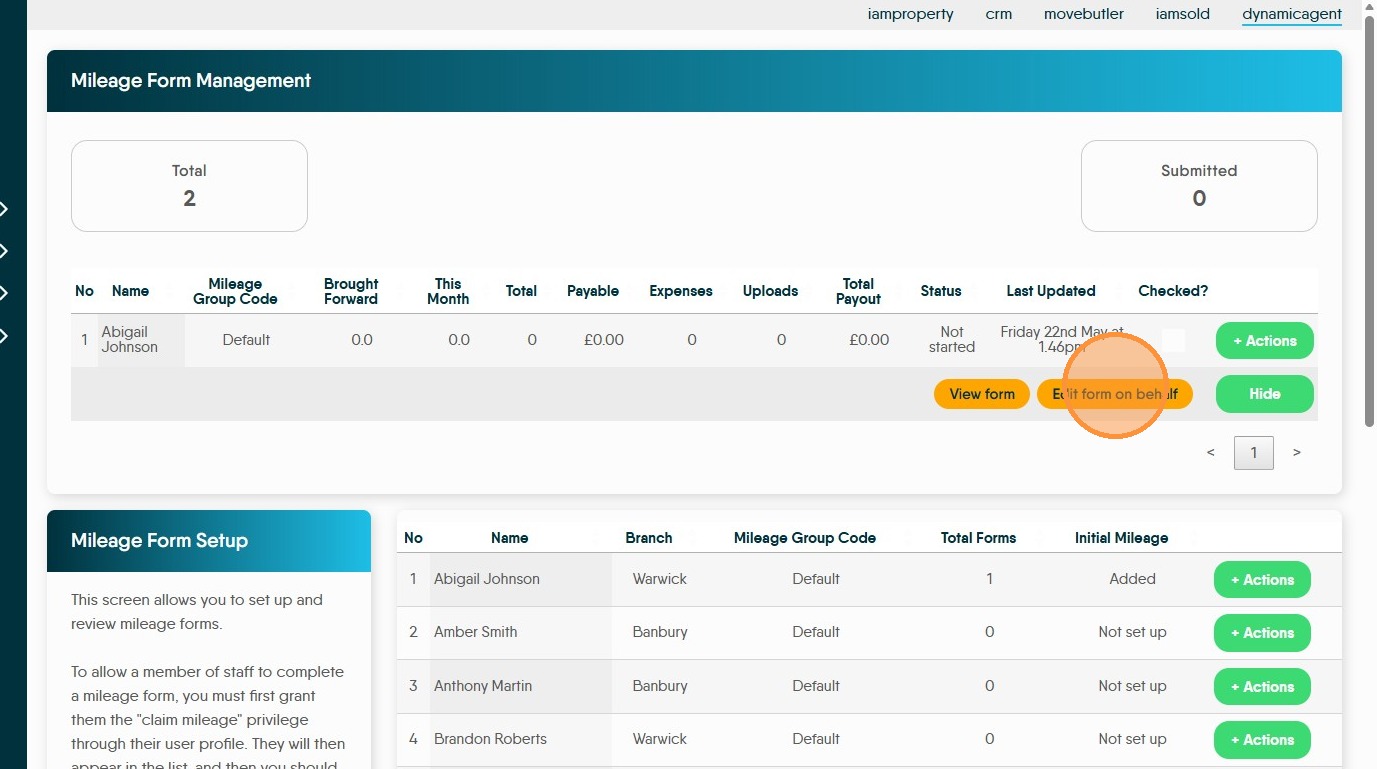
39. Mileage Form Management this screen allows you to review mileage claims and give users the ability to claim mileage.
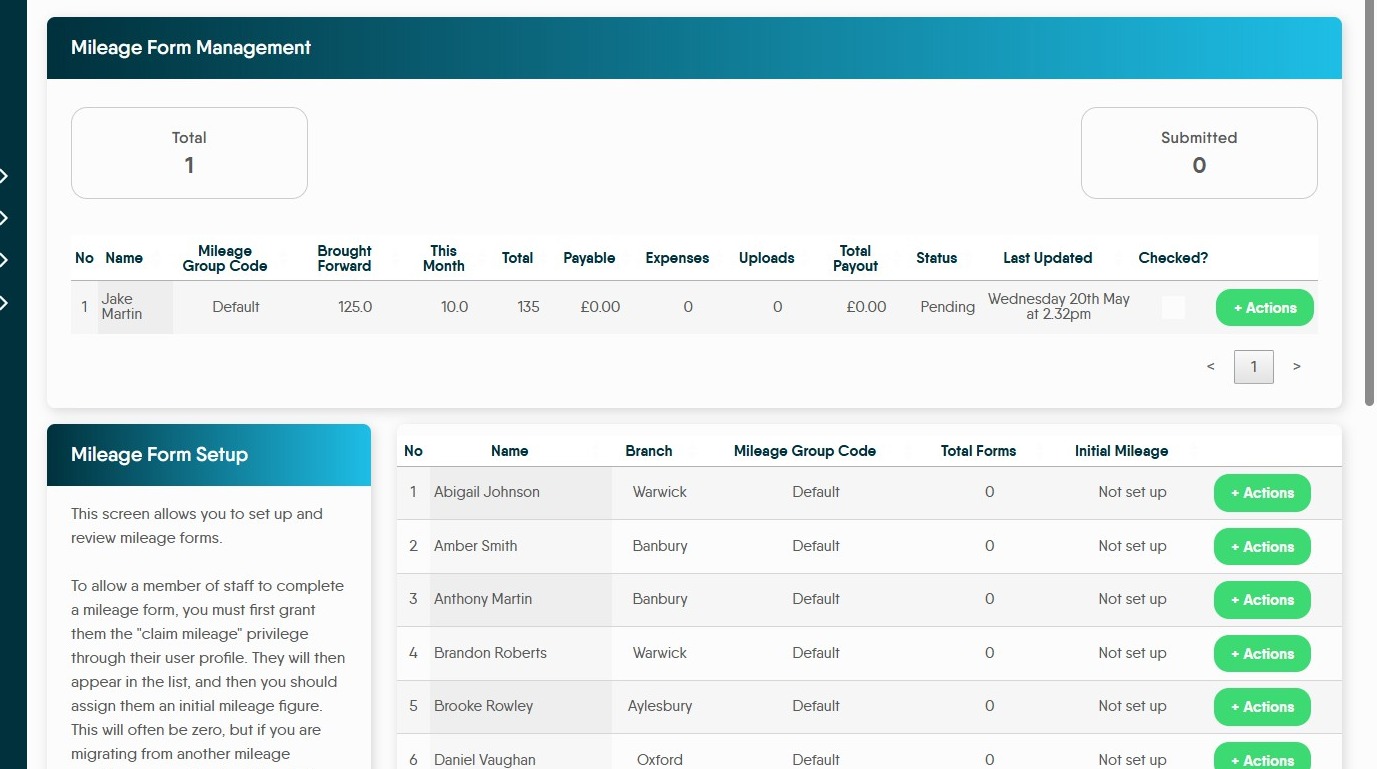
40. The Mileage Form Setup screen. To claim mileage a user must be given permission to claim mileage in their User Profile. They will then appear in this list, once they show in this list click the '+Actions' button. If the User has 'Added' in their row they have been set up to claim mileage, if 'Not Setup' shows, they are not.
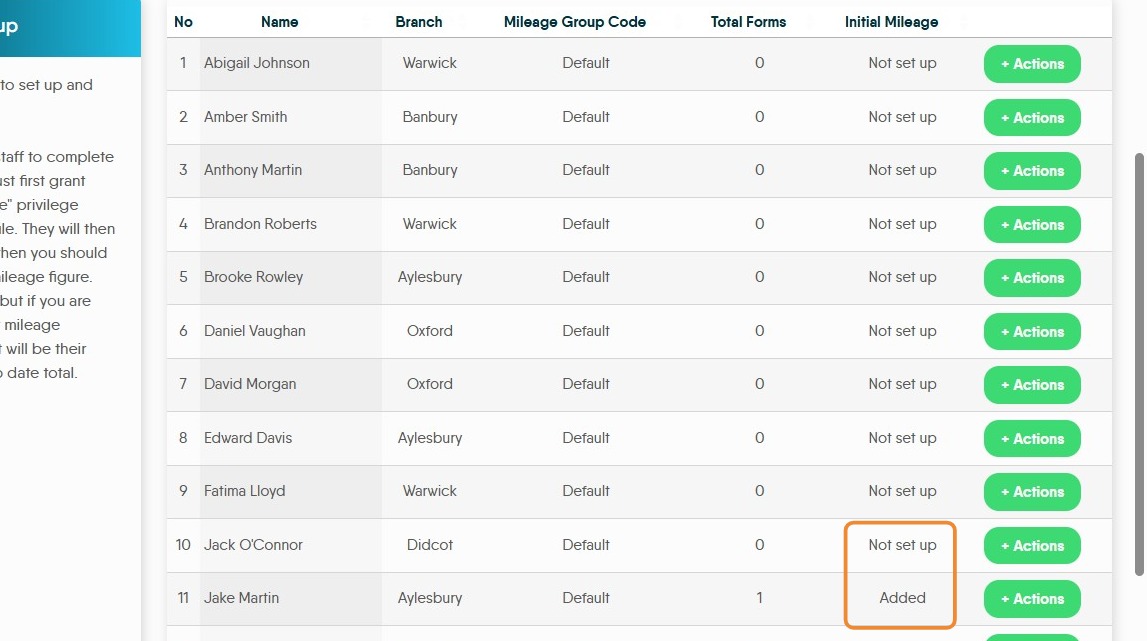
41. To set up/enable the user to claim mileage an initial starting mileage needs to be added. This helps to track the users business mileage for any thresholds they might hit. If you are moving from another platform this enables you to keep continuity of records.
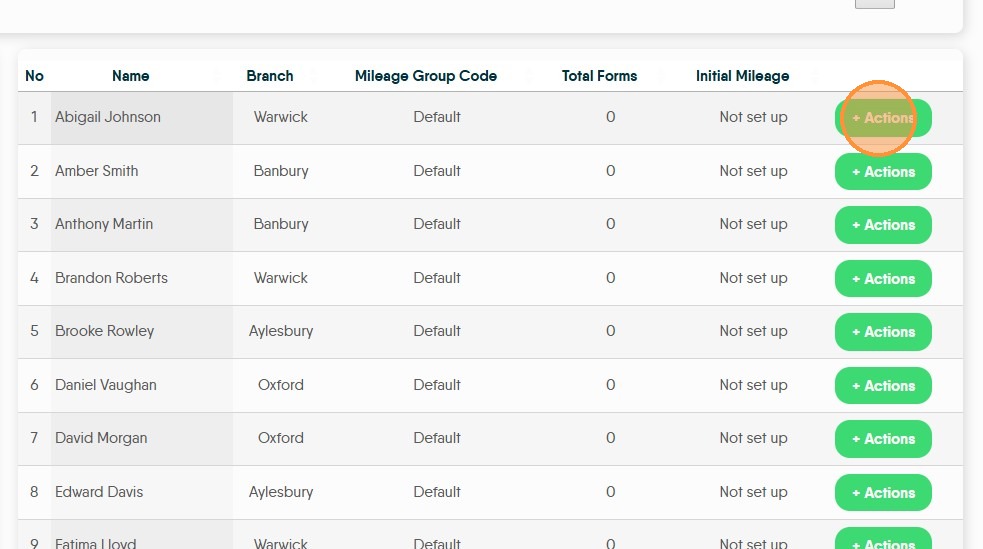
Click "+ Actions"
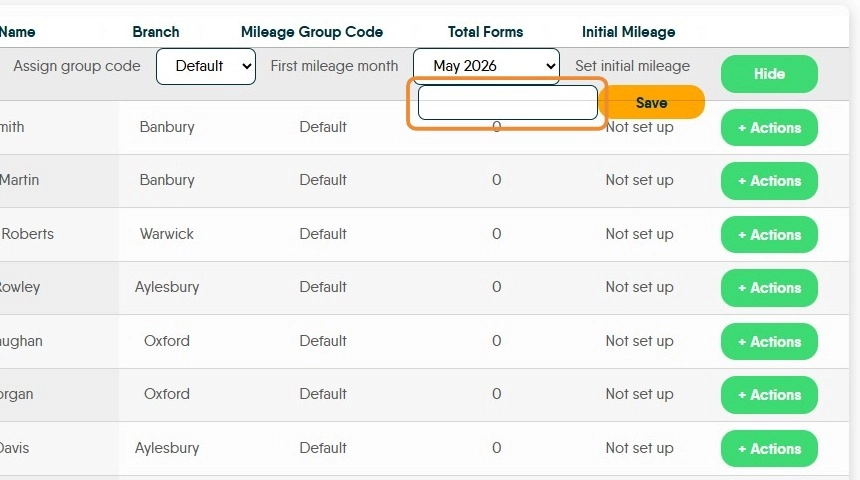
42. Complete the option shown on screen, if applicable. To set initial mileage, click this text field and add the initial mileage. This will most likely be 0 to start
Click "Save"
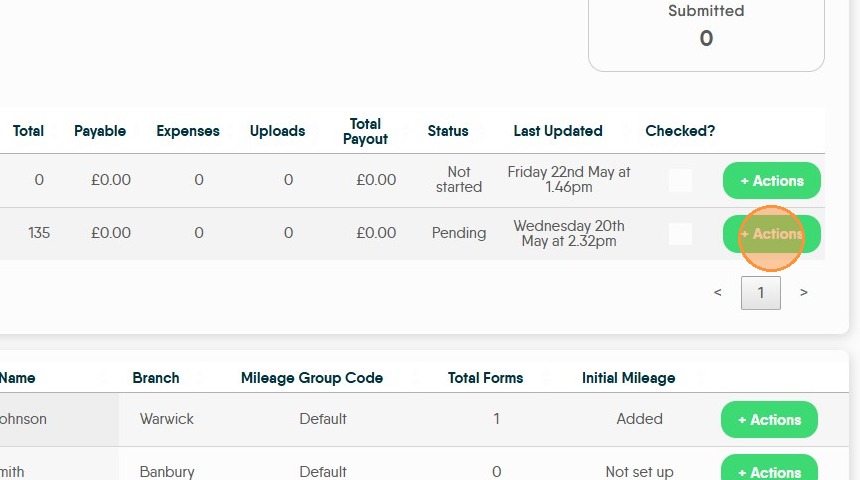
There will now be a number 1 in the Forms column.
43. To review a mileage form. Click "+Actions"
44. Click "View form" This will show the mileage form and allow you to review all the entries for mileage and if enabled expenses, including any receipts uploaded.
This is not where the mileage from is approved from.
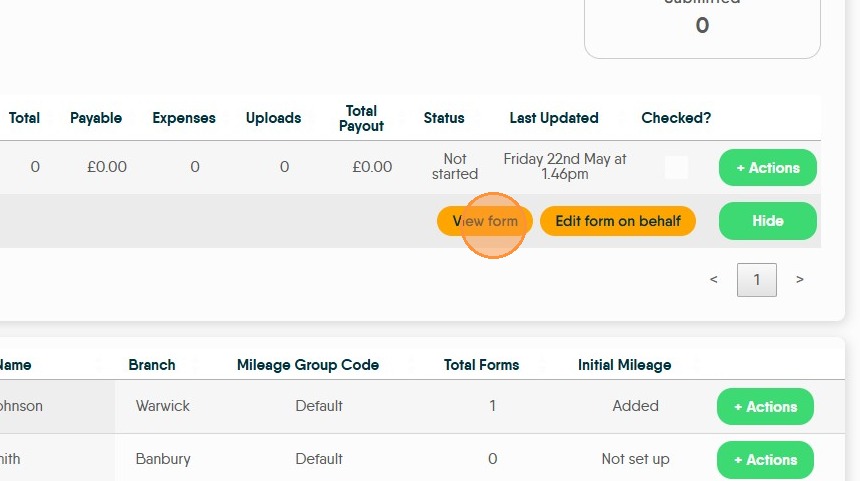
45. Click "Edit form on behalf" to edit the form for the User.
This allows you to add mileage to a users form, as well as adding expenses.
46. The form shows any mileage brought forward, total this month so far and total.
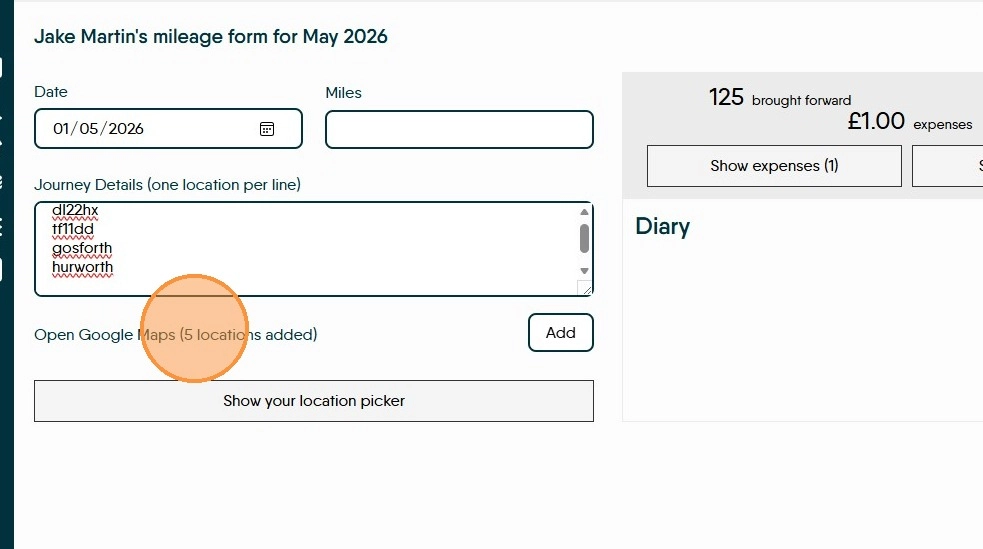
To add a mileage claim, click into the journey details and add your journey, add the mileage to the 'Miles' field. Add 1 leg of the trip per line.
Click the "Journey Details (one location per line)" field.

47. At this point if you know the distance travelled, click into the 'Miles' field and add the distance. If not, or you want to check, click "Open Google Maps...." This will take you to a screen showing the trip on google maps, where you can get the mileage.
Click here.
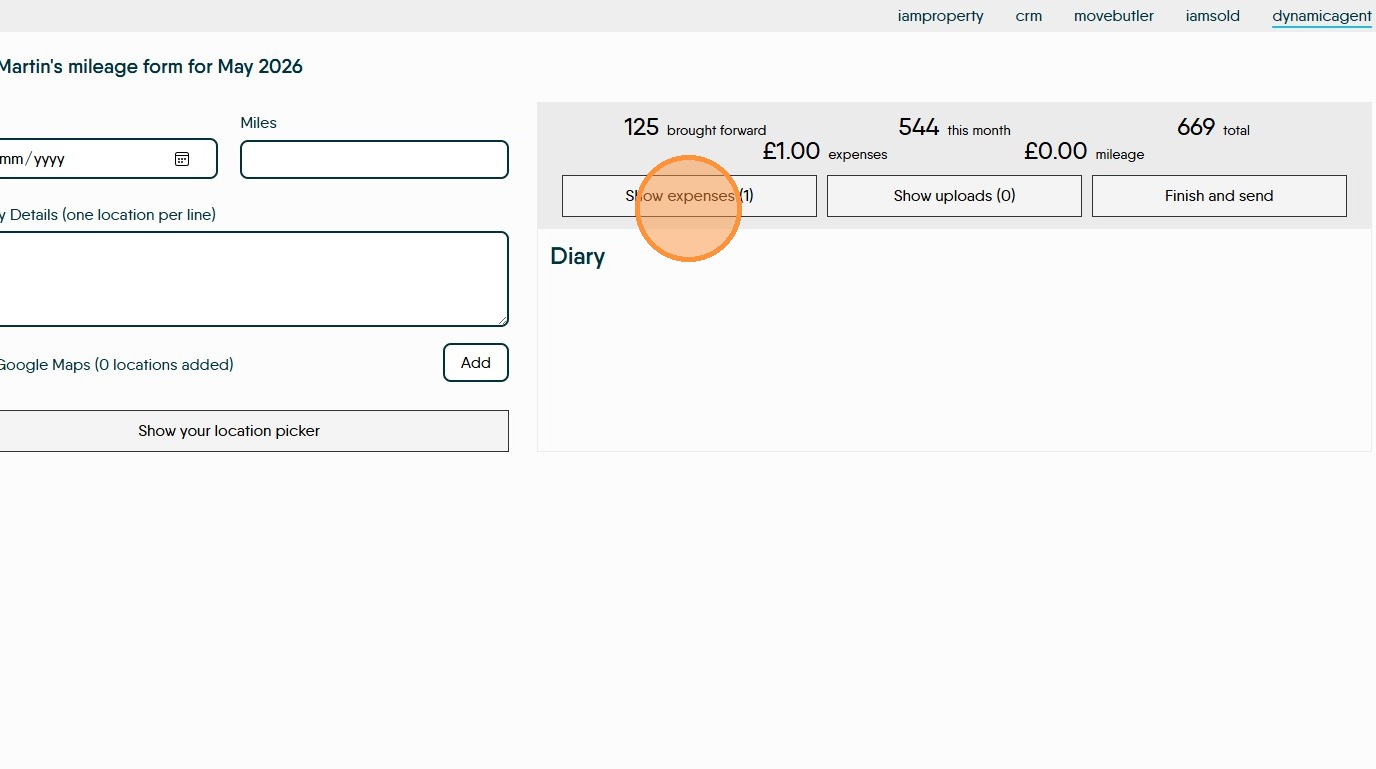
48. To claim 'Expenses' click 'Show Expenses' this will show any expense currently claimed, this could be parking, coffee, milk etc it is not mileage.
To add an expense record
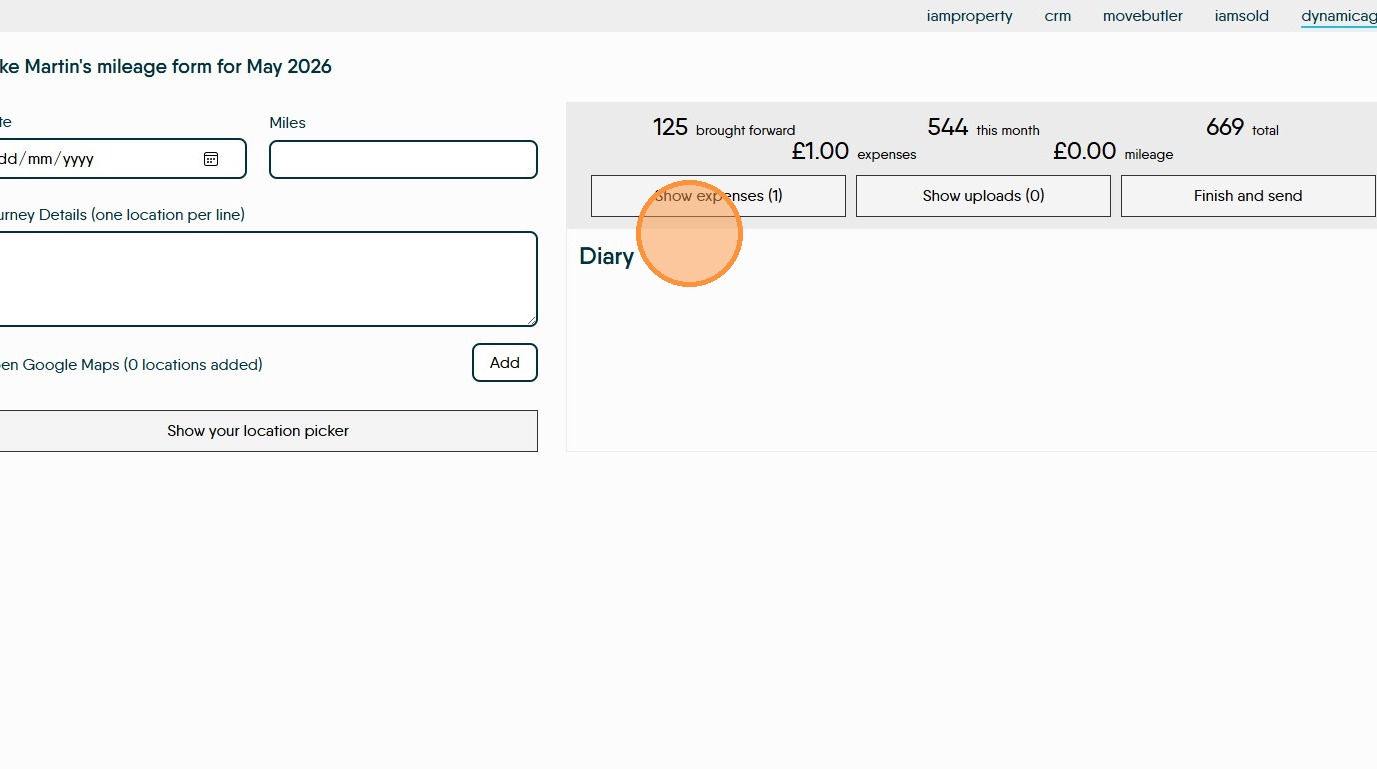
49. Click "Show expenses"
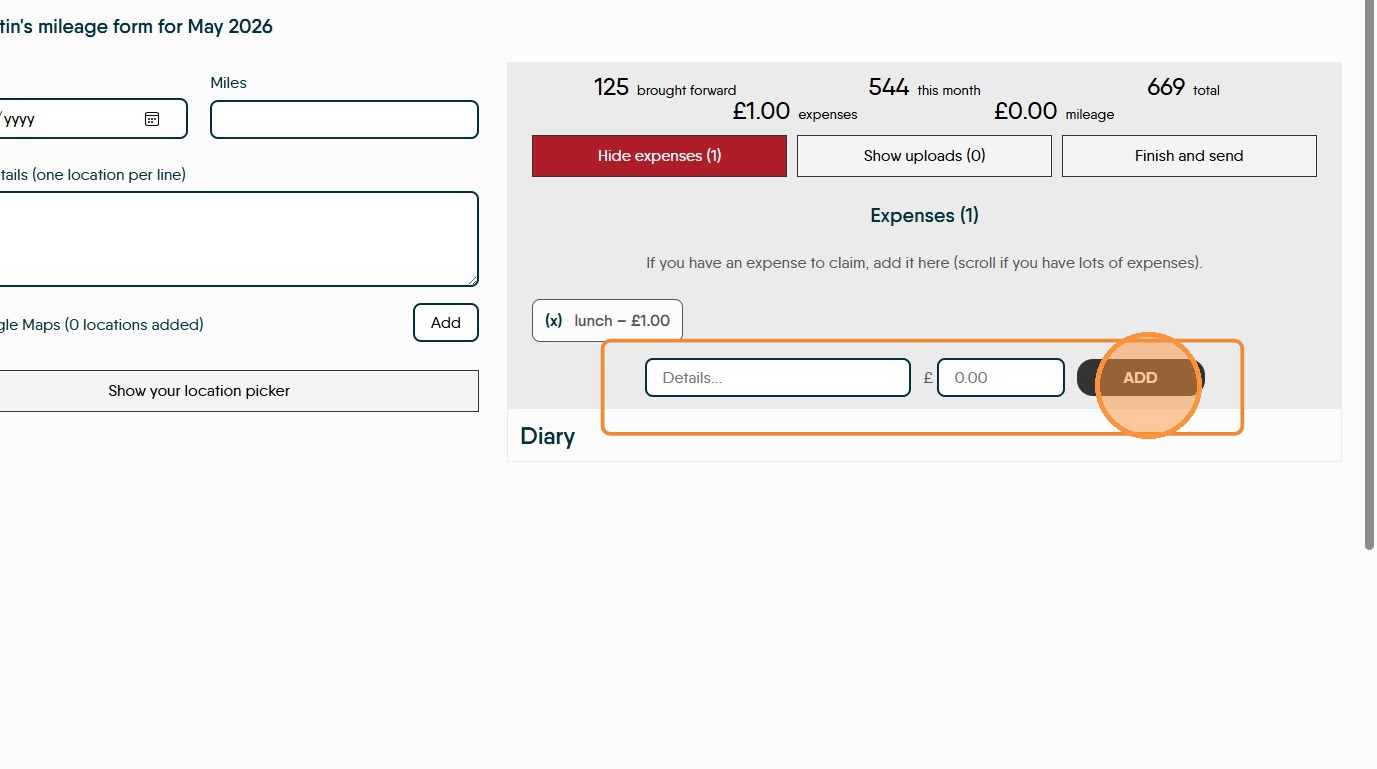
50. Add the details of the expense into the 'Details' field and the amount into the '£' field then click 'Add'
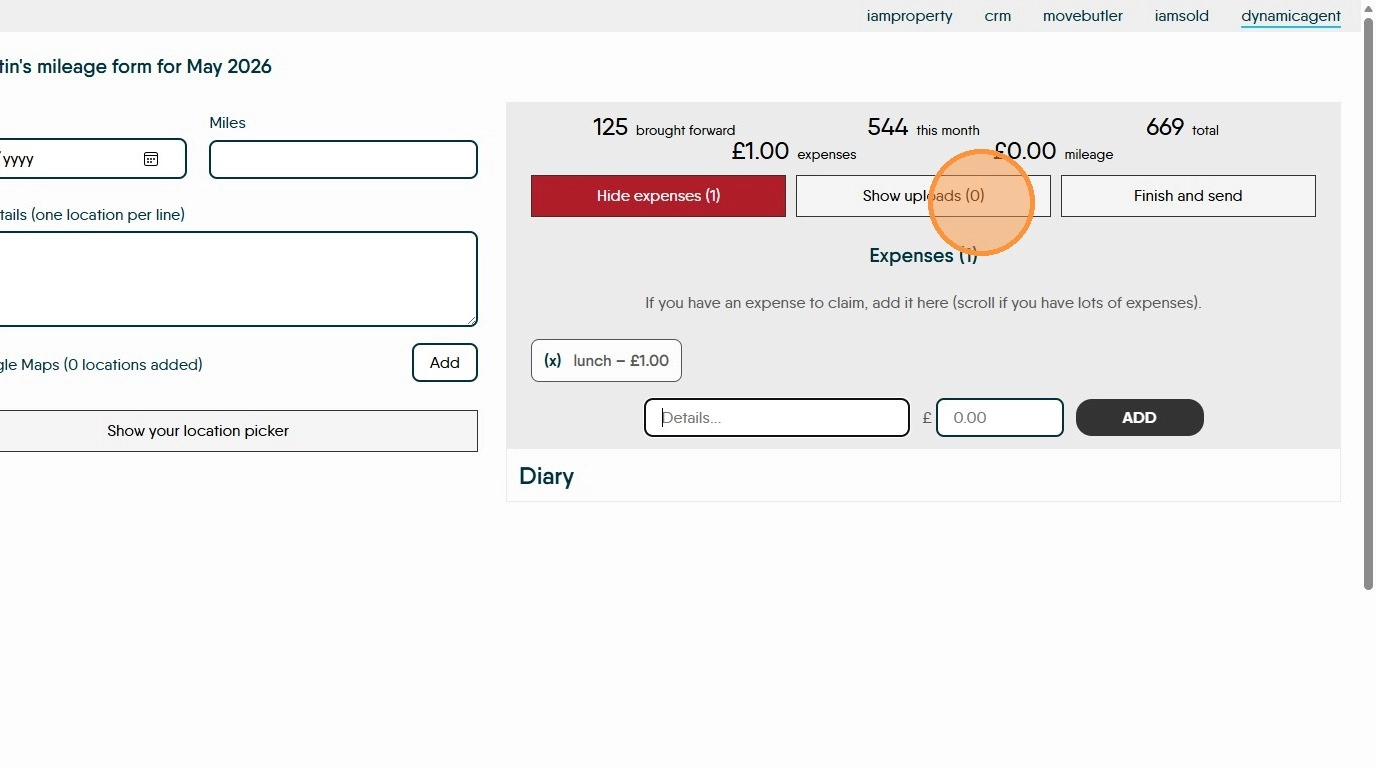
51. To add receipts for expenses or mileage. Click "Show uploads" click into the field that shows and either drag and drop or search your device for the images. If you are using a mobile device, an option to use the camera will show.
Click "Tap here to add your photos (or drag & drop)"
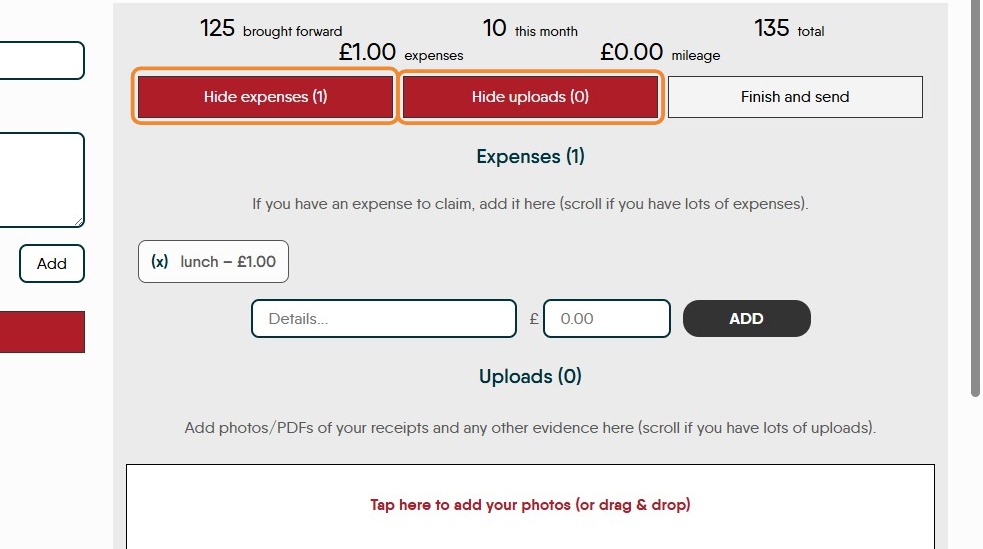
52. Click "Hide expenses" or "Hide Uploads" to close this screen.
53. If you need to complete and submit the expenses on behalf of your user. Click "Finish and send"

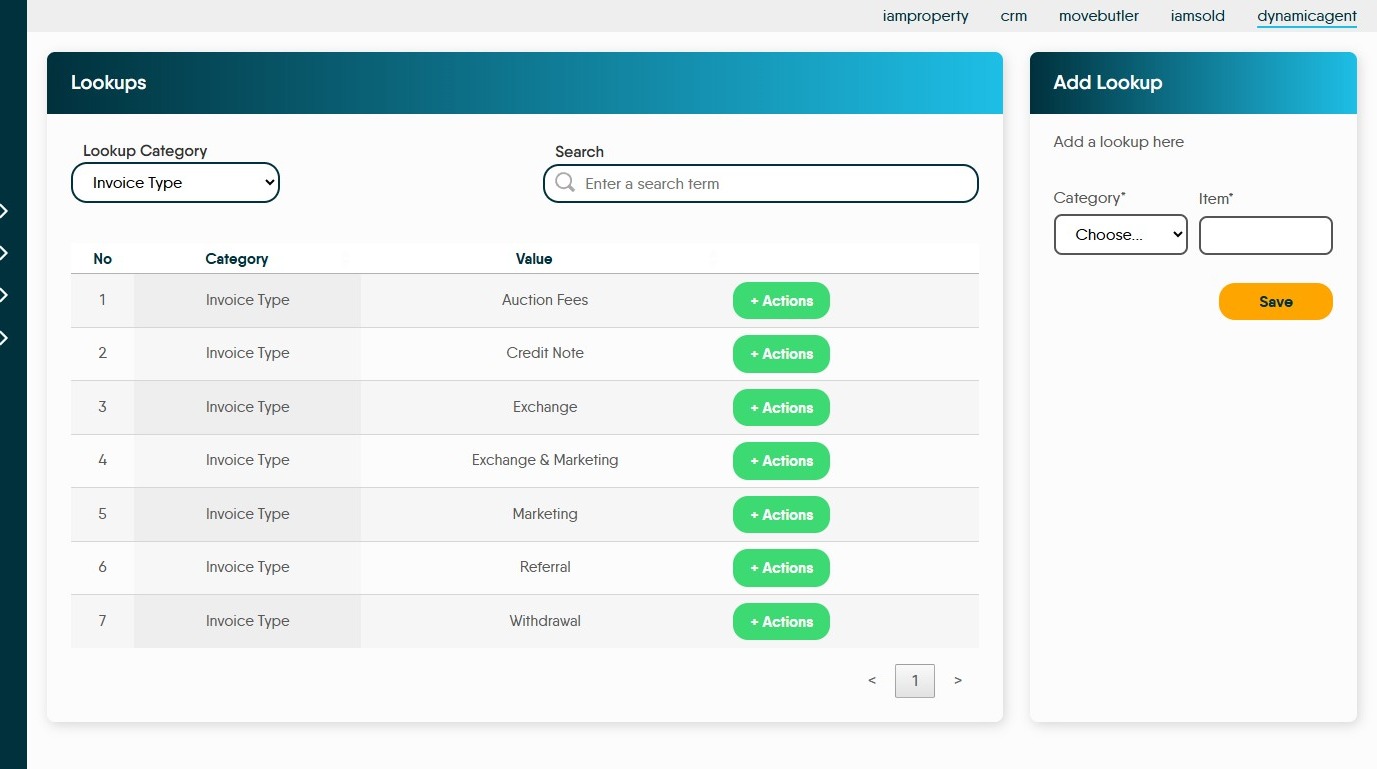
Lookups
54. Available to any user with suitable permissions.
55. Click "Lookups"
56. This screen allows new 'Lookups' to be added
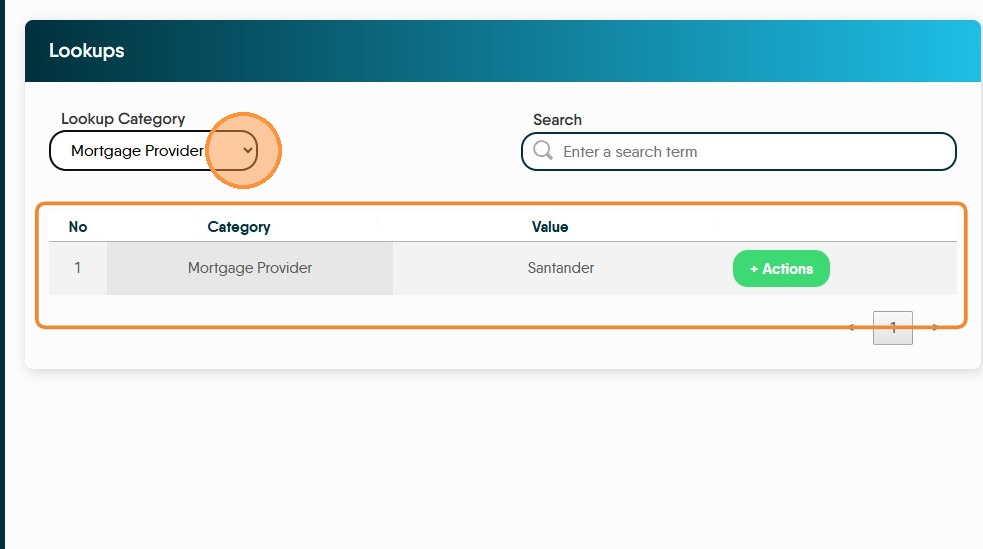
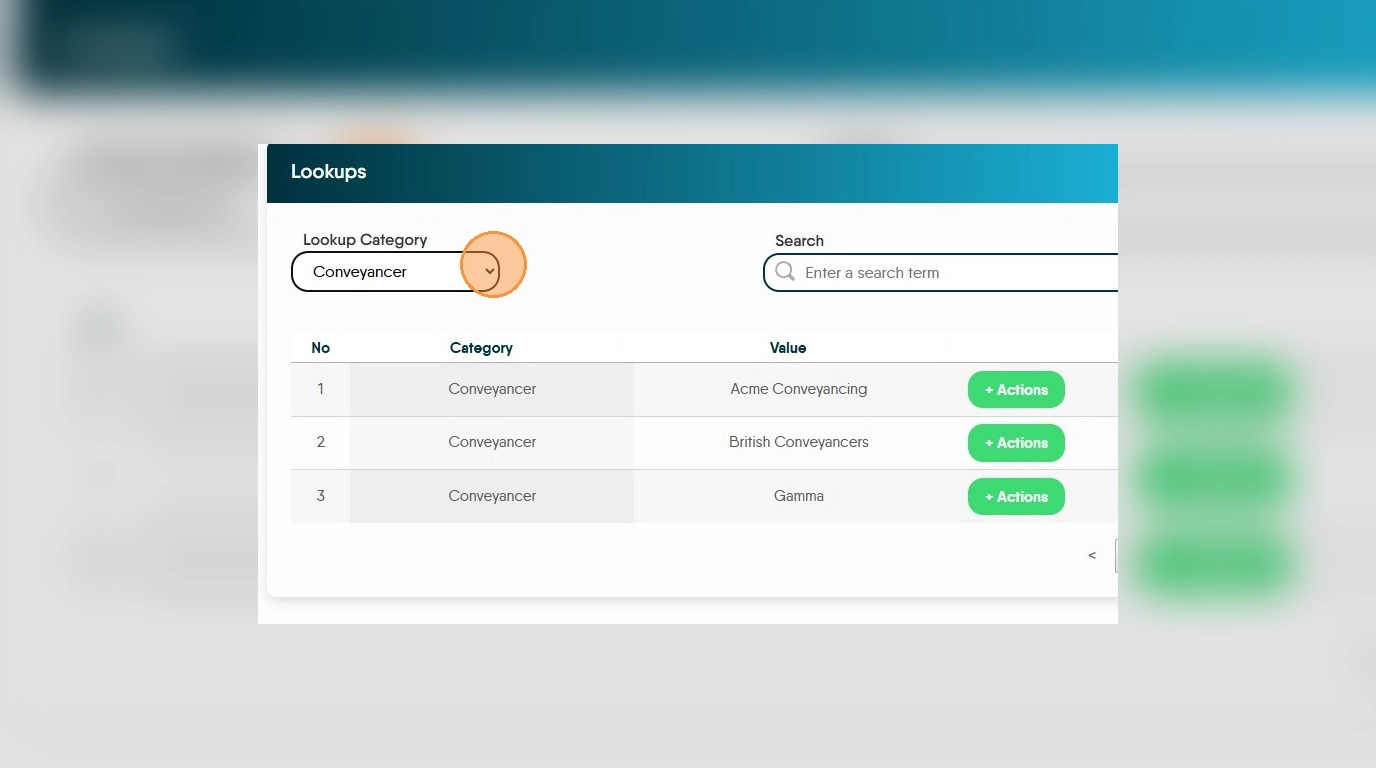
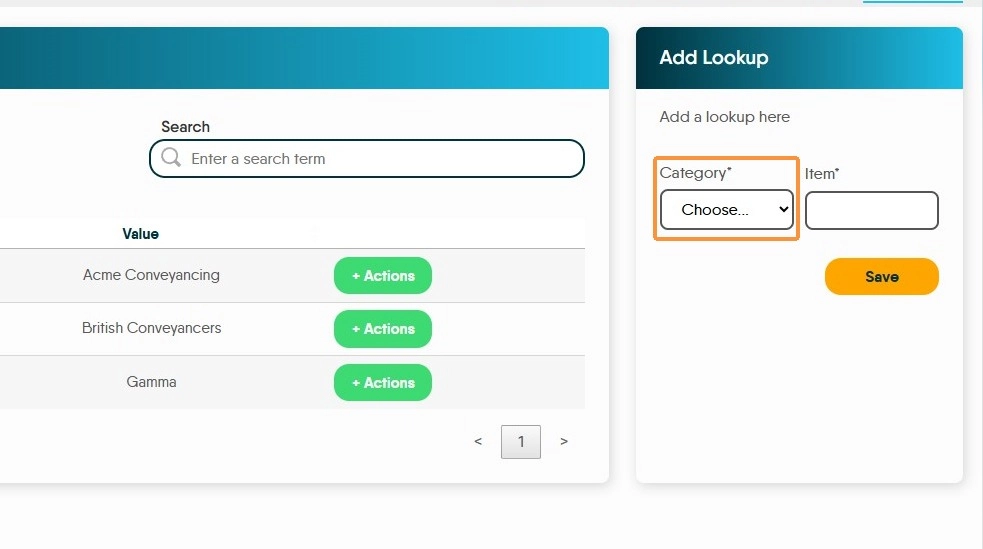
57. To review the Lookups that are already in Dynamic Agent. Click 'Lookup Category' and from the drop down menu select the option e.g. 'Conveyancer'
There are 3 options Conveyancer, Mortgage Provider and Surveyor
Click "Category" to see the categories.
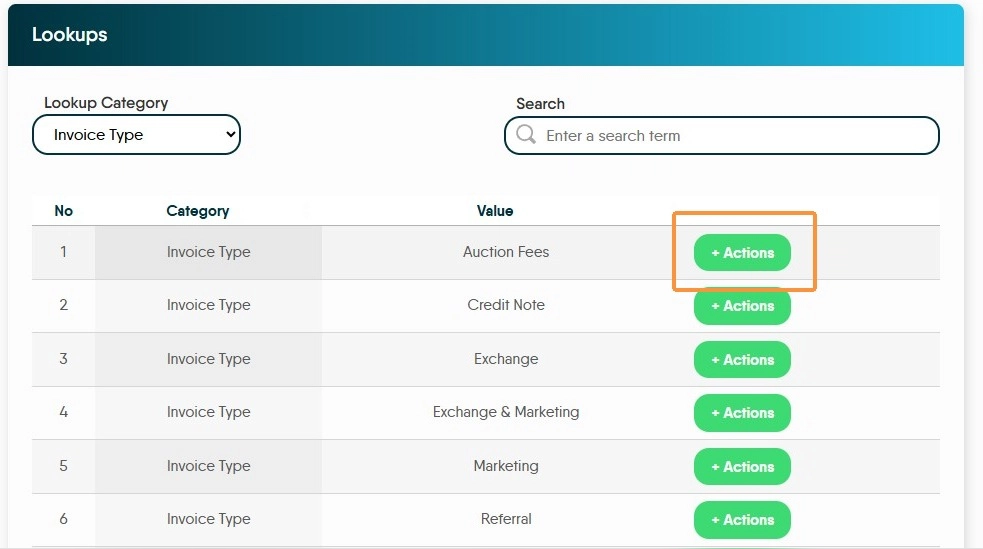
58. Click "+Actions" to delete the lookup from Dynamic Agent.
Click "Delete Lookup" to remove the lookup from the list.
59. Add Lookup
Tip: Tip! Lookups are the drop down menus in Dynamic Agent.
60. The 'Add Lookup' screen allows new lookup items to be added.
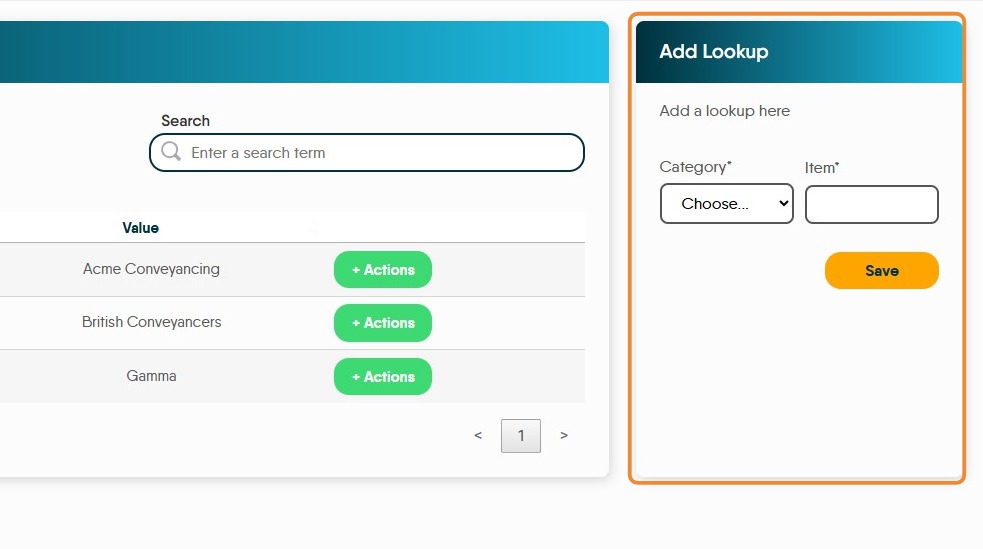
61. Click "Category" Choose from Conveyancer, Mortgage Provider, Surveyor.
Click the "Item*" field and add the detail of the new lookup, in this case a new 'Mortgage Provider'
Click "Save"
62. The new lookup will show in the 'Lookup Category' field.
In this case select the "Mortgage Provider" option and the new option shows.