This guide provides a step-by-step process for creating a checklist in the iamproperty CRM, making it easier for users to organise and manage their tasks effectively. By following these instructions, users can streamline their workflow, enhance productivity, and ensure no important steps are overlooked in their tasks.
1. Navigate to https://crm.iamproperty.com/MyDay
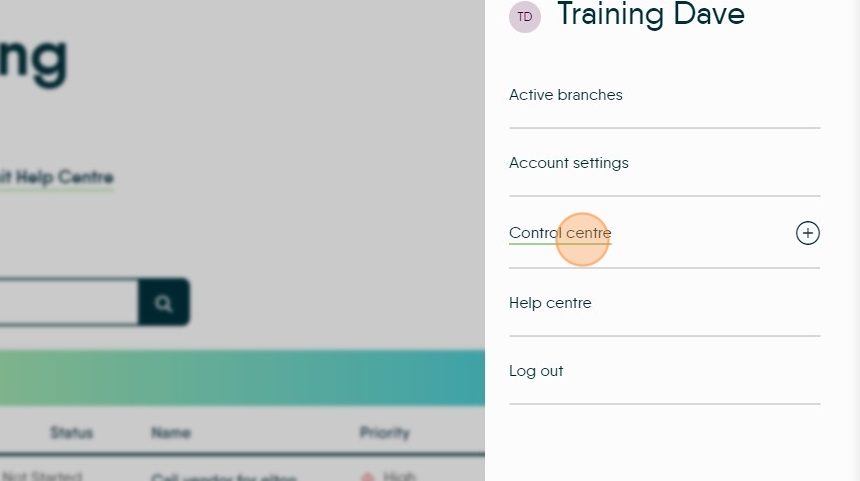
2. Click "My account"

3. Click "Control centre"
4. Click "Configuration"

5. Click "Checklists"

6. Click "Sales Property" or whatever checklist type you are creating. The checklist will only show in the area it is created for e.g. Sales Property only shows in a Sales Property.

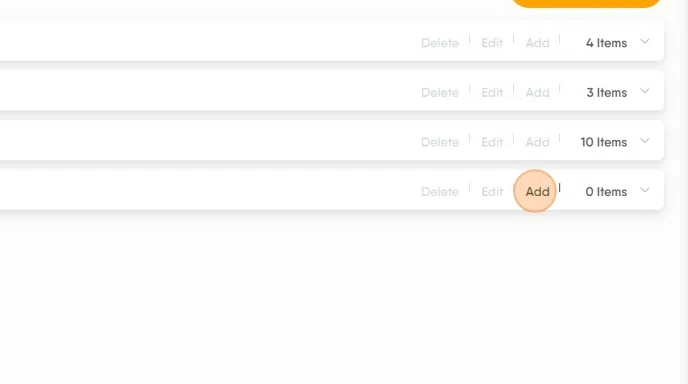
7. To add a NEW checklist, click "Add Group"

8. Click the "Type group title here..." field. Add the name of your checklist.

9. Click "Save" This will then create and name the empty checklist, to add the individual checklist items.

10. Click "Add" you will then have a line to add the first checklist item to. Add the subject to that line and then save and move on.
Click "Add" to add the next line...
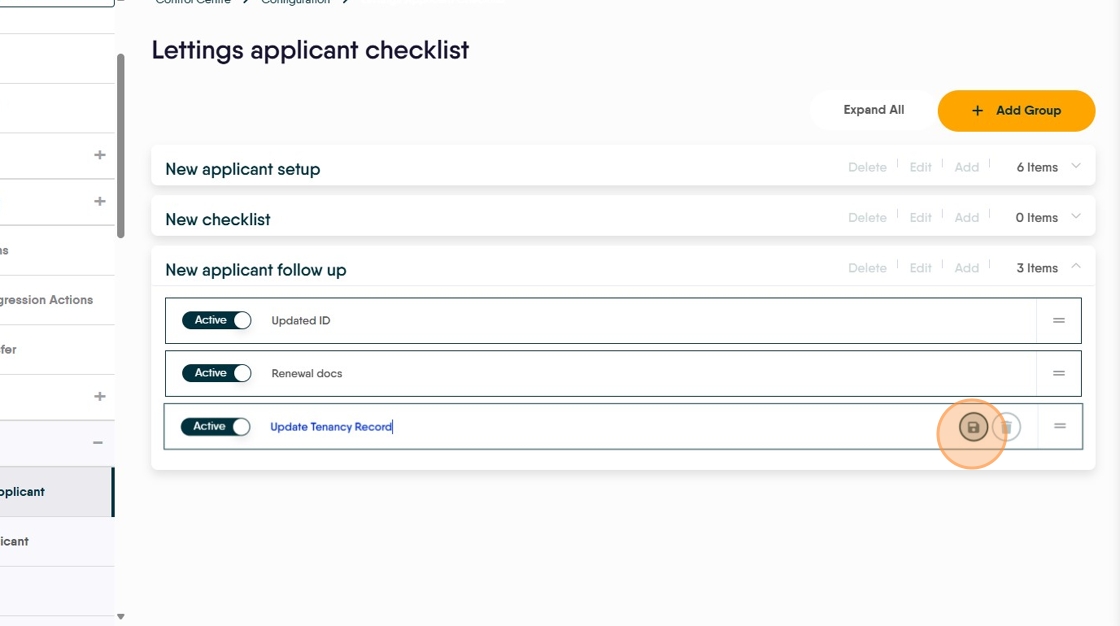
11. Then click the save icon to save the item
Editing the Checklist
12. Click "Edit"

13. Click here.

14. Click here.

15. Click "Edit"

16. Click "Save"
