This guide provides a straightforward approach to generating a Contractor Statement using the Reports feature of the CRM. By following the concise steps outlined, users can efficiently create and customise their statements, ensuring accurate financial reporting. Accessing this guide will streamline your property management tasks, save time, and enhance your professionalism in dealing with landlords.
Tip: A Statement Merge can also be created for a Contractor to send statements to ALL Contractors at the same time, this process creates a statement for one particular Contractor.
1. Click "Reporting"

2. Click "Reports"

3. Click "Accounts"

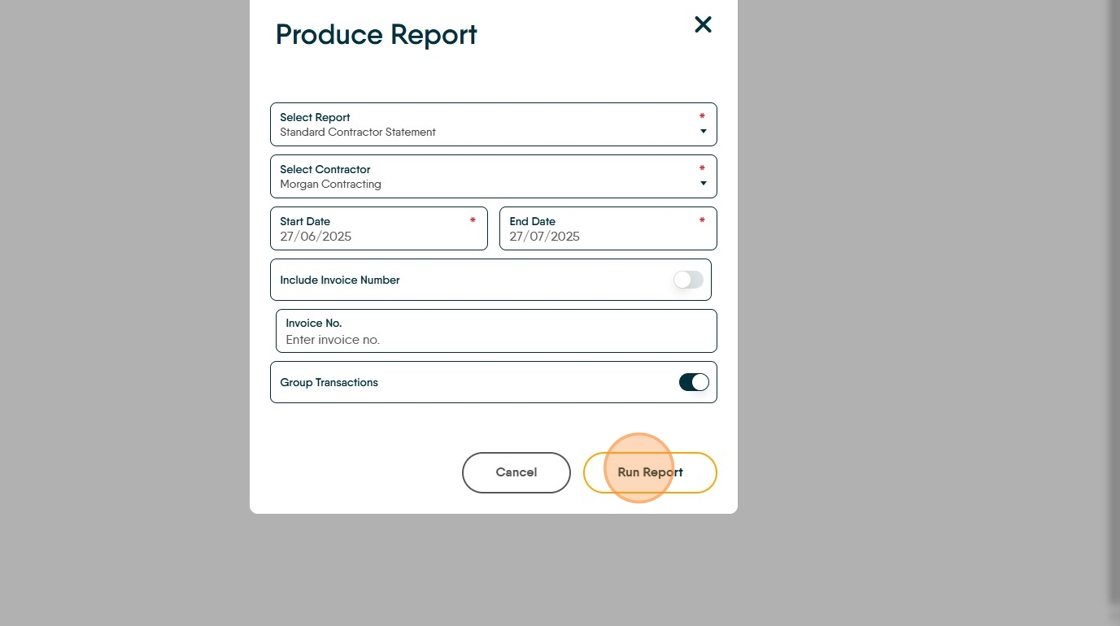
4. Click here, search for and select the report to run.

5. In this case, click "Standard Contractor Statement"

6. Click here to select the contractor you are creating the report for. Search and select from the drop down menu.

7. If you want to group similar transactions, click here.

8. Click "Run Report"
9. The report will show on the screen, you now print the report or export it. To print click here.

10. To export the report to a different file format e.g. PDF or Excel. Click "Export"
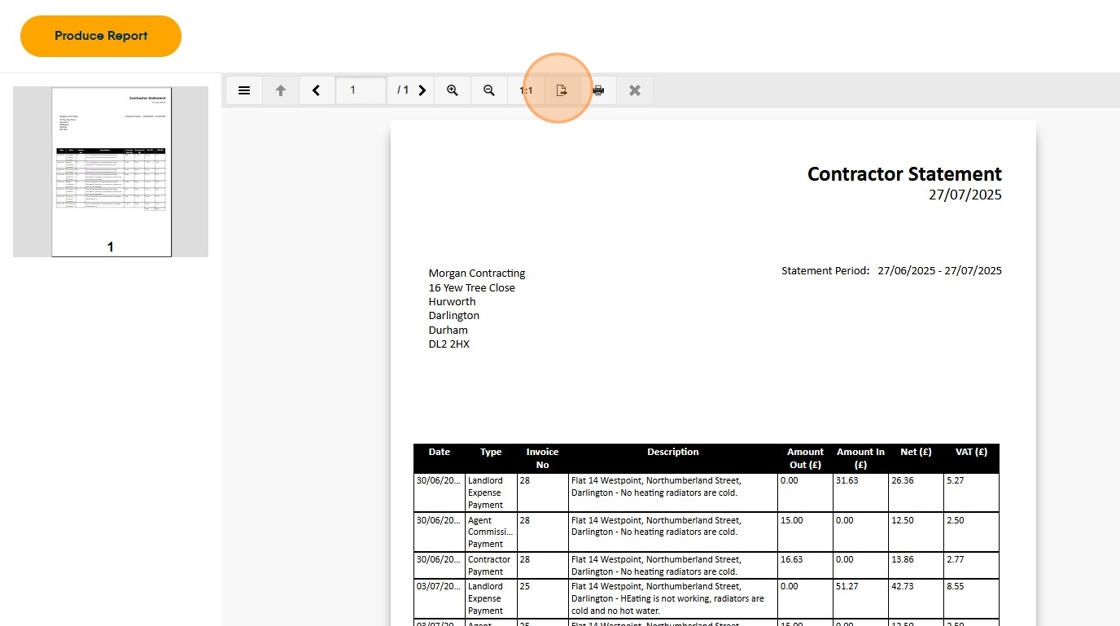
11. For example. Click "Adobe PDF Format" and the file will be exported to PDF and saved in your Downloads folder.
You could export the file to any of the file formats shown in the list, our example shows PDF as this would be the usual type used.

12. Click here to complete creating your Contractor Statement.

Sending the Statement to your Contractor via CRM.
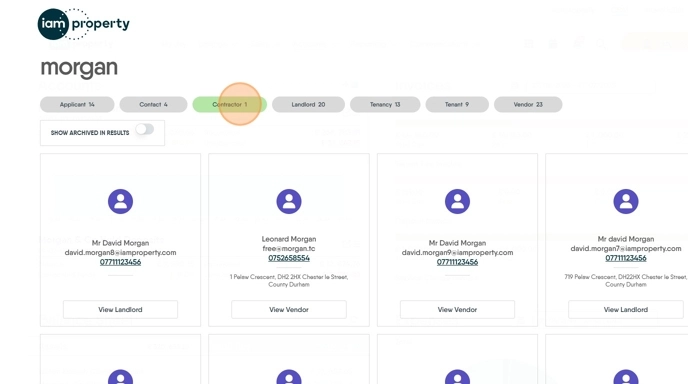
13. Click "Search"

14. Type your contractor name and search, then select it. To make it easy to find the Contractor record, click the 'Contractor' tab.
Click "View Contractor"
15. To email the statement, click here.

16. On this screen click here to attach a file. You can also select additional recipients from the right side of the screen and select a message template if you have one created.

17. Click "Drag and drop files here or click to upload media" to search for the report, if not moved prior the file will show in the 'Downloads' folder of your PC. You will also see any files uploaded to the Contractor record.

18. Once selected the file detail will show in the box, you can repeat this to add further files.

19. Click the "Subject:" field and add the email subject.

20. If you have selected a previously created message template it will show here, otherwise type your message.
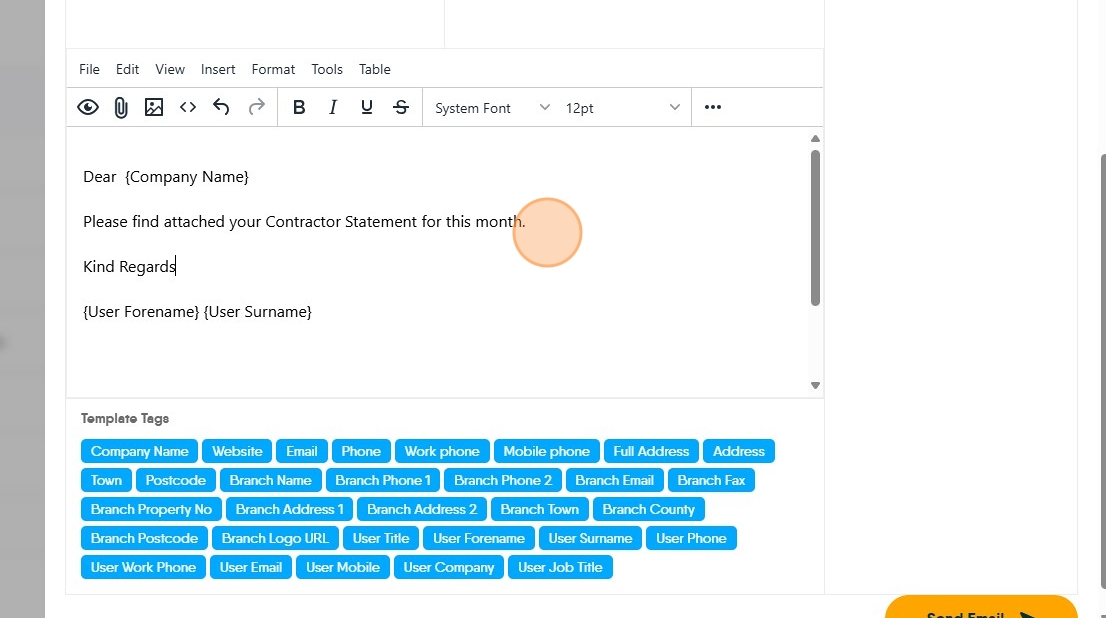
Tip: Tip! The Template Tags will automatically show the information shown on the tag e.g. Company Name will show the Contractor Company Name, User Forename will show the forename of the branch user sending the message.
21. Once complete click "Send Email"

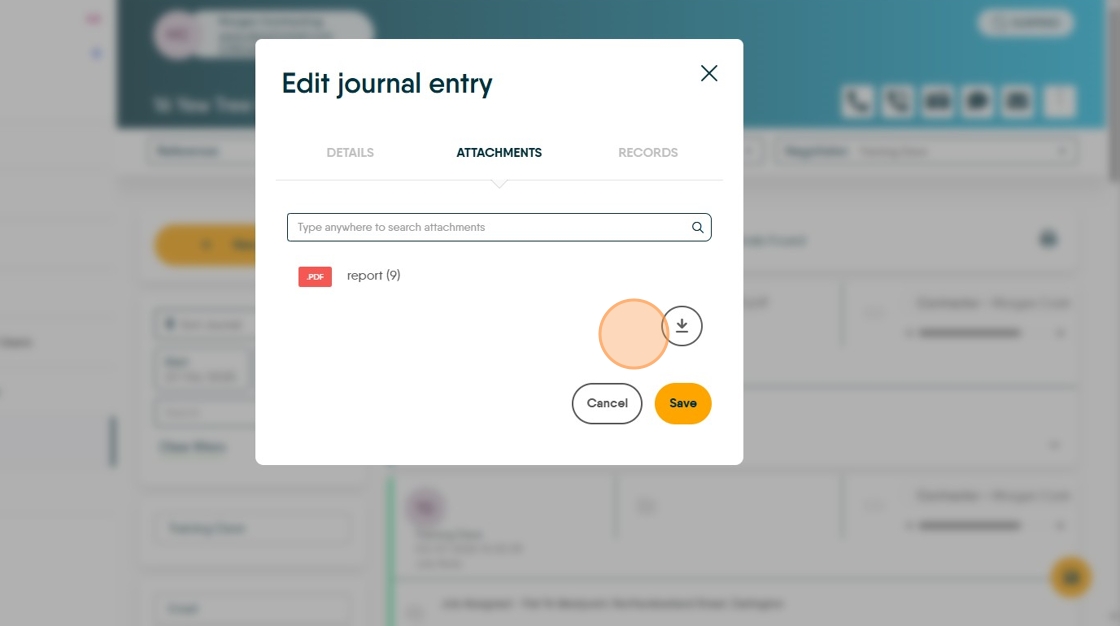
22. The message sent will show in the Journal. Click "Journal" to view

23. Click the report detail, in the middle field.

24. You will then see the report file uploaded. Click ".PDF report (9)" to open the file