This guide how to use the Sales Progression Actions feature, specifically for managing the 'Contracts Exchanged' and 'Completion' stages of property sales. It provides step-by-step instructions for triggering and customising automation actions, ensuring that users can efficiently track their sales processes. By following this guide, users can enhance their workflow, minimise manual updates, and ensure compliance with their configuration settings.
1. The automations are triggered on the Sales Progression 'Conveyancing' tab.
Navigate to the offer you wish to perform the automation on via Sales Progression, or the Property Offer tab.
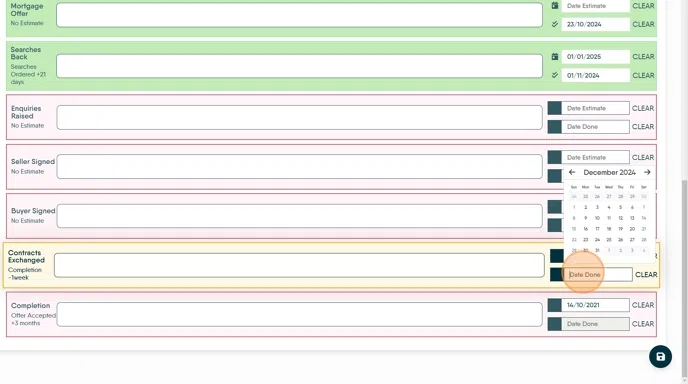
2. Your offer will need to have progressed to the Contracts Exchanged stage in order to trigger the automation.

3. To trigger the Exchange actions, against 'Contracts Exchanged', click the "Date Done" field.
Select your date of exchange in the pop-up calendar
Click 'Save'.
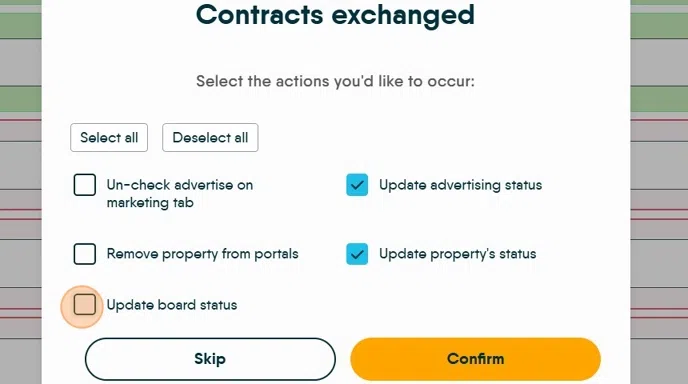
This will trigger the 'Contracts Exchanged' window, if it is enabled in configuration.
4. In the Contracts Exchanged window, the actions will be ticked in accordance with your configuration.
You can tick or untick any actions that you would or would not like to complete.
Note: If any of the 'update status' options are greyed out, you will need to set which status to update to, via configuration.
Click "Confirm" to complete the actions.
5. Click "Dismiss" to close the confirmation.

6. To trigger the Completion actions, against "Completion", click the "Date Done" field.
Select your date of completion in the pop-up calendar
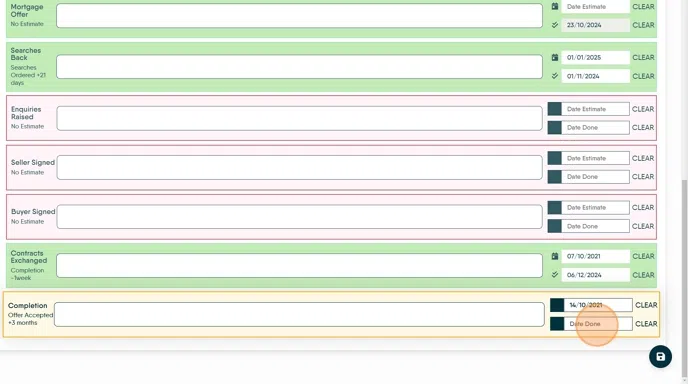
7. Click "Save".
This will trigger the 'Completion' window, if it is enabled in configuration.

8. In the Completion window, the actions will be ticked in accordance with your configuration.
You can tick or untick any actions that you would or would not like to complete.
If you opt to archive the vendor, the property must also be archived.
Note: If any of the 'update status' options are greyed out, you will need to set which status to update to, via configuration.

9. Click "Confirm" to complete the actions.
10. Click "Dismiss" to close the confirmation.
