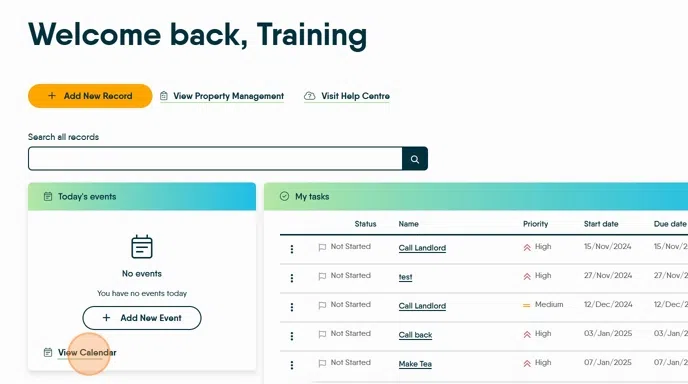
This guide offers a step-by-step process for efficiently scheduling viewings in CRM, which is crucial for real estate professionals managing client appointments. By following the instructions, users can streamline their workflow, ensure timely communication with clients, and enhance their overall productivity. Viewing this guide can save time and reduce errors in the scheduling process, allowing agents to focus on closing deals.
1. Navigate to https://crm.iamproperty.com/myday then click on the Calendar icon
Different Ways to Create a Viewing Appointment
2. A viewing appointment can be made directly in the calendar and also be made from the Property or Applicant Record. The process to actually create the appointment is very similar in each way.
From the Property Record. Click here, or click "Viewings" then click "Add viewing"

3. Or from the Applicant record. Click "Viewings" then click "Add viewing"

Adding a Viewing from the Calendar
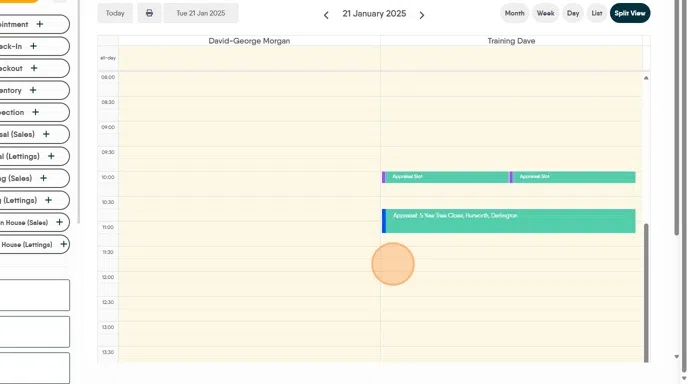
4. There are 3 ways you can access the Calendar to add a new Viewing.
Click "View calendar"
Click "Add new event"
Click "Calendar"
5. Then either click here on the 'new...' option on the left of the screen or.

6. Right-click here, ideally on the date and time you want the viewing created. Click "Sales" or click "Lettings" then click "Add Viewing"
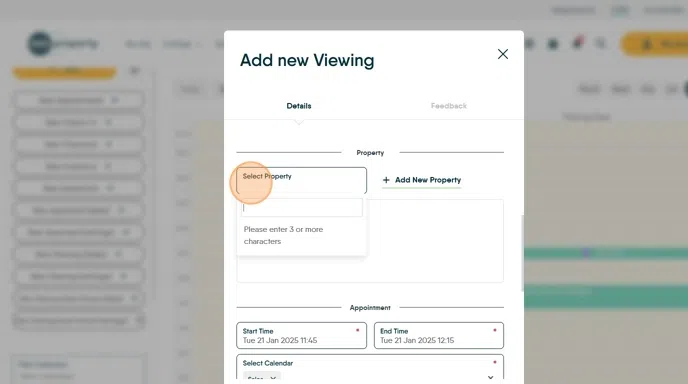
Creating the Viewing
7. From here the process is the same for both Sales and Lettings.
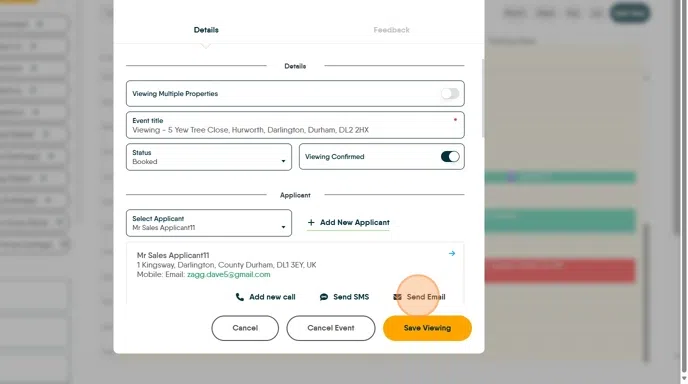
Click here. Set the status of the appointment from the drop down menu.

8. Click here and search for the Applicant or '+ Add New Applicant' to add a new applicant to CRM.

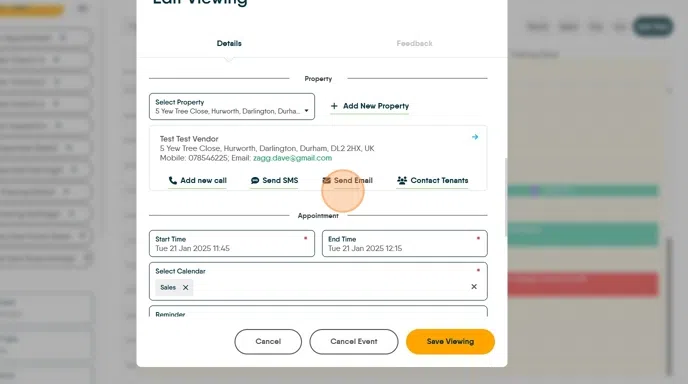
9. Click here to add the property the viewing is for or '+ Add New Property' to add a new property.
10. If you have used the option of 'right click' on the Calendar to create the appointment this will already be set based on where you clicked on the screen, otherwise set the date and time for the appointment.
Click this text field.
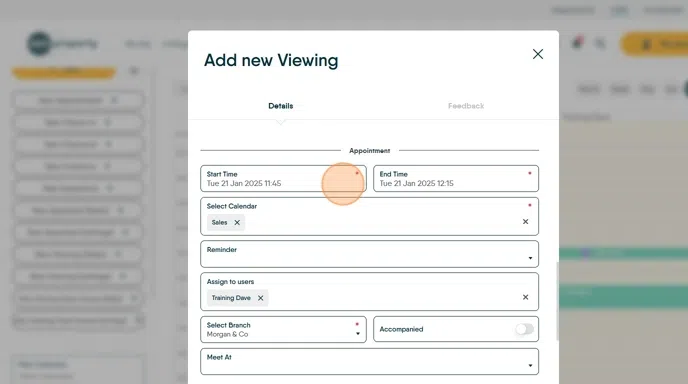
11. You may need to change the Calendar the appointment is being added to if so click into the 'Select Calendar' field. Click here to set a reminder
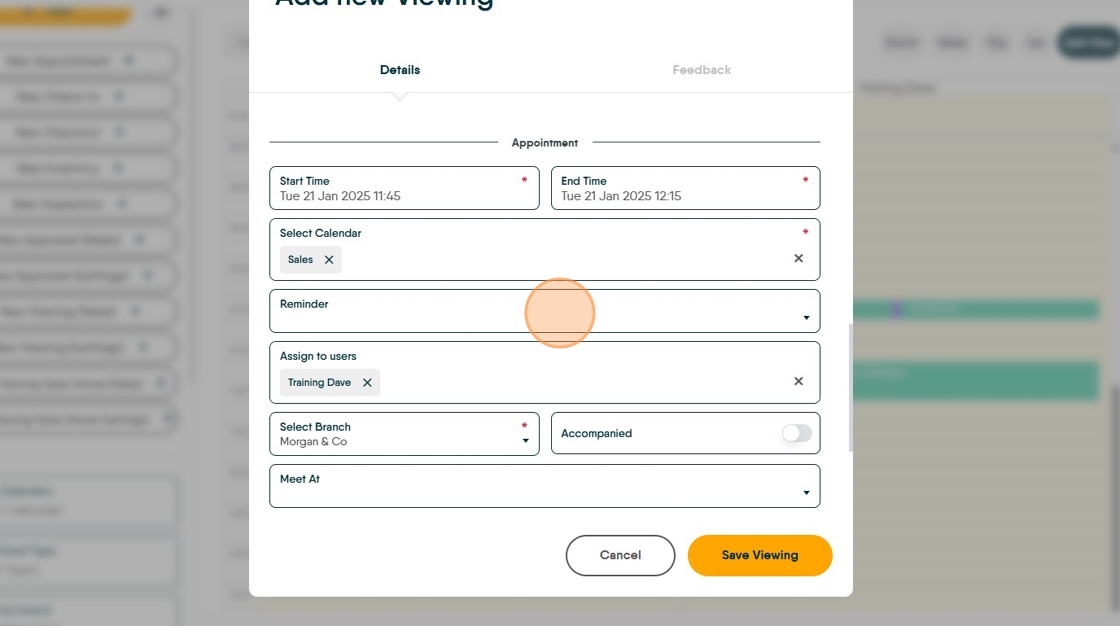
12. Click this search field to assign the viewing to a Negotiator.

13. If the viewing is accompanied click here.

14. Set where you are meeting, click here.

15. Click the "Viewing Arrangements" field to add any viewing arrangements.

Tip: Tip! If there are any viewing arrangements added to the 'Viewing Arrangements' field in the Marketing screen of the property record, they will show in the Viewing Arrangements field of the appointment.
16. Click "Save Viewing"

17. The viewing will show on the Calendar. It will also show in the Applicant Record and the Property Record. If the appointment is not set as confirmed it will show in red (as here).
To confirm the appointment click here to open the record.

18. Opening the Viewing gives a few options. Click here to confirm the viewing, this can also be done from the Property Record and the Applicant record.
Click 'Save Viewing' to return to the Calendar screen.

19. To send a confirmation email click "Send Email". There is the option to create a template here to quickly send a message to the applicants.
Click "Select a Template"
Click the template you want to select
Click "Send Email"
20. Click "Send Email" to email the Vendor or Landlord, if there are tenants in the property they can be contacted as well.
21. Click "Save Viewing" and the viewing will now be shown in the colour of the Negotiator allocated the viewing.
