This guide provides a step-by-step process for booking property inspections from within the Property record and updating tenancy details efficiently within the CRM system. By following these instructions, users can ensure timely property visits and maintain accurate records, which are crucial for effective property management. The clarity of the steps helps streamline the workflow, saving time and reducing errors in managing tenant information.
Tip: Tip! If you are using CRM Inspections module this process will add the Inspection to the Inspection module record as well as into the Property record.
1. There are 2 places you can start this process
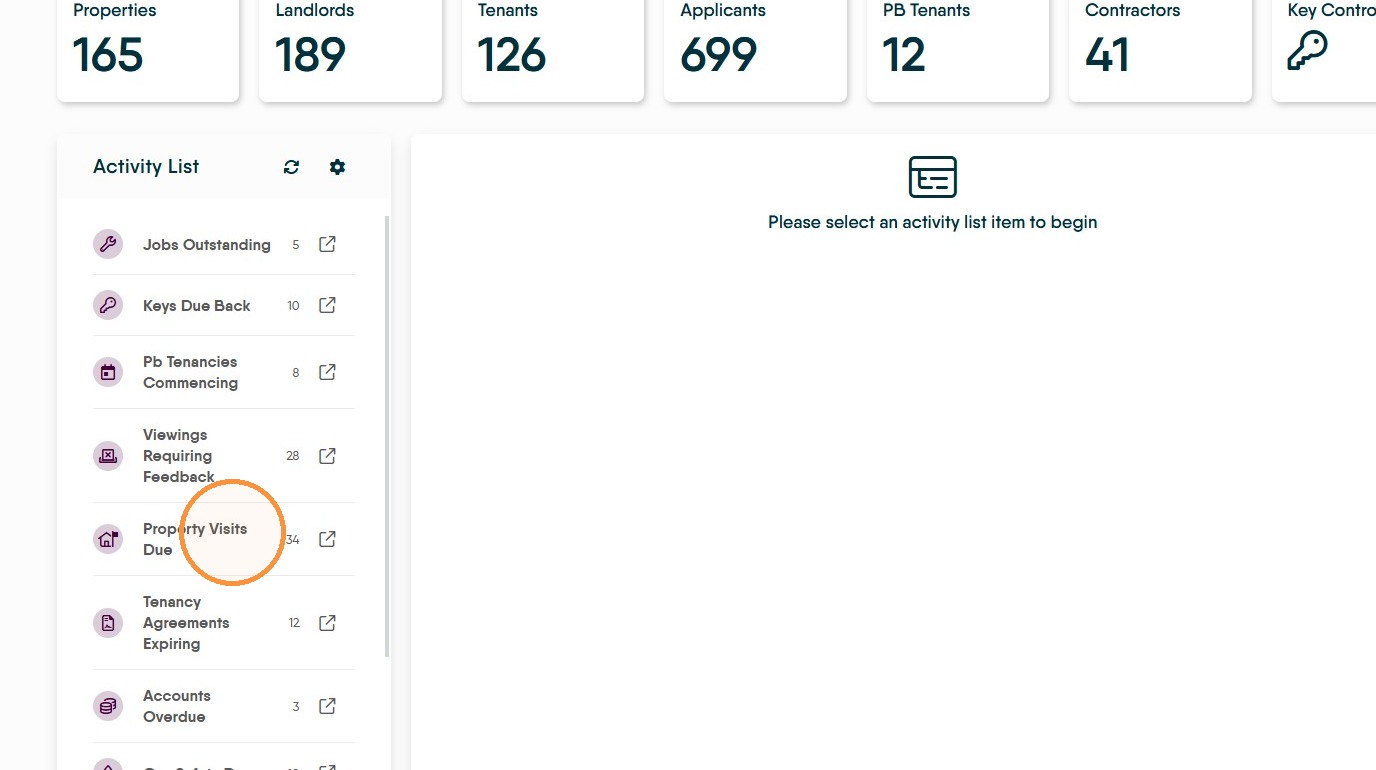
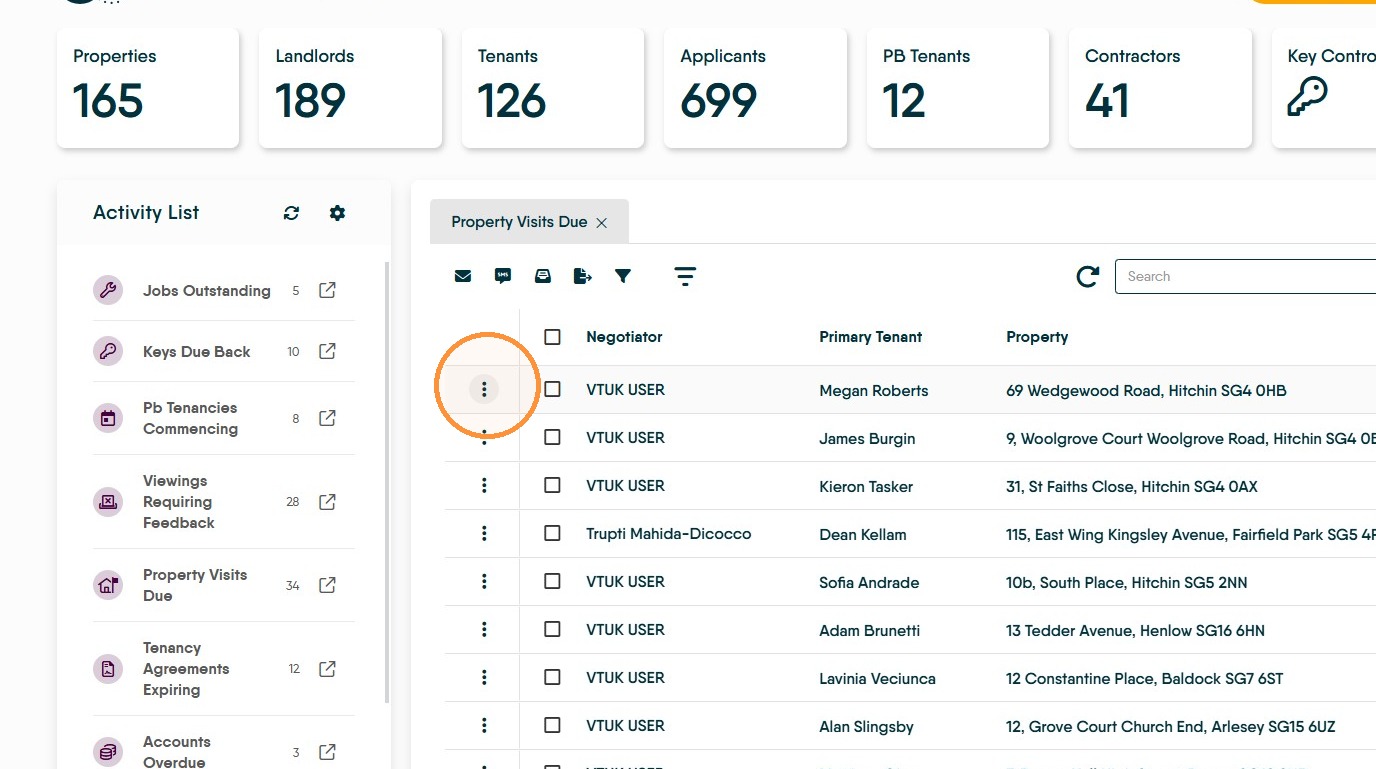
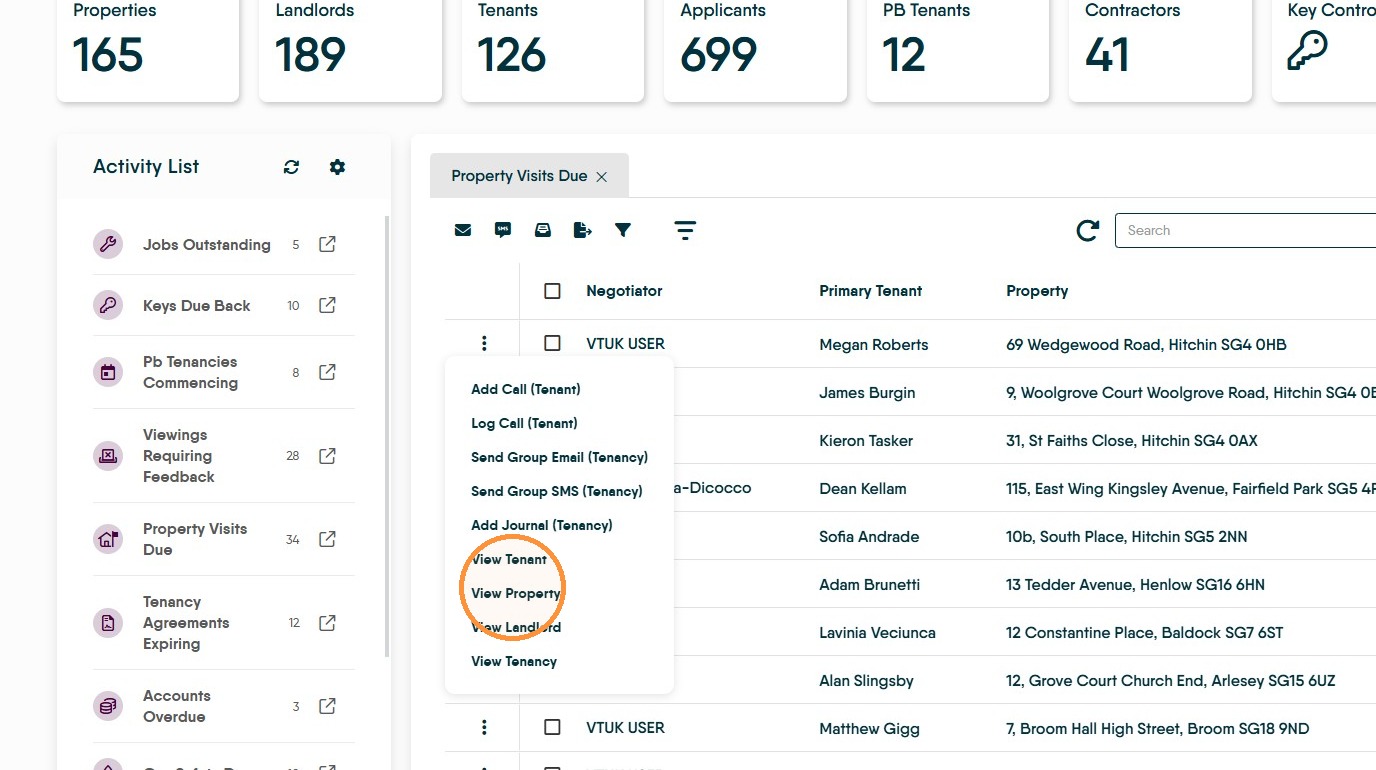
- From the Activity List, using the "Property Visits Due" option. This will show all property visits due in the next 30 days (or overdue), this is the default setting and can be changed. Using the 3-dot menu to navigate to the property record to add the inspection record.
- From the Property record and adding to the Inspections tab.
Both options are shown below, they start differently but complete the same way.
2. To manage Inspections from the Lettings Dashboard. Navigate to https://crm.iamproperty.com/Dashboards/Lettings
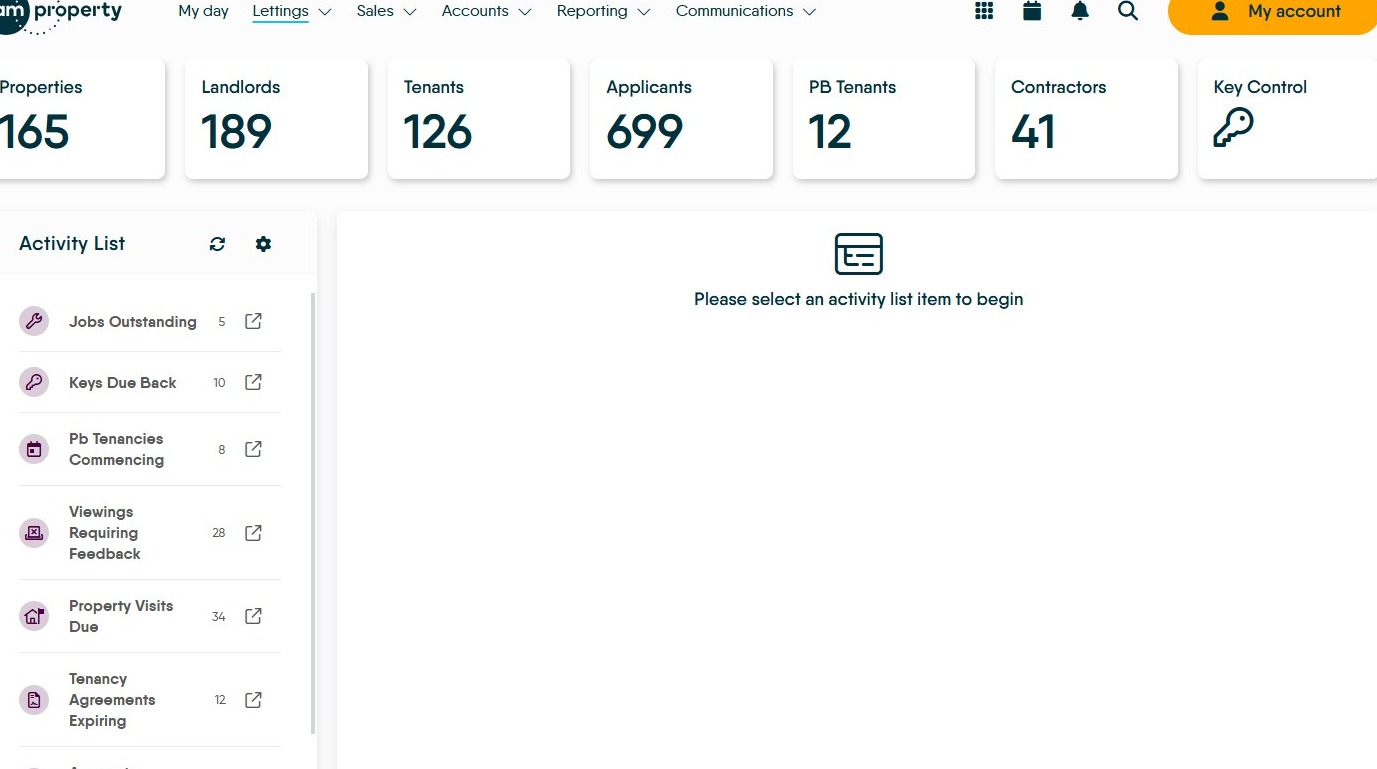
3. Click "Property Visits Due" this will show you all the property visits that are due within the next (by default) 30 days. This timescale can be extended or shortened.
4. Click here.
5. Click "View Property"
6. OR Navigate directly to the Property record
7. Once in the Property record, scroll down the left menu. Click "Inspections"
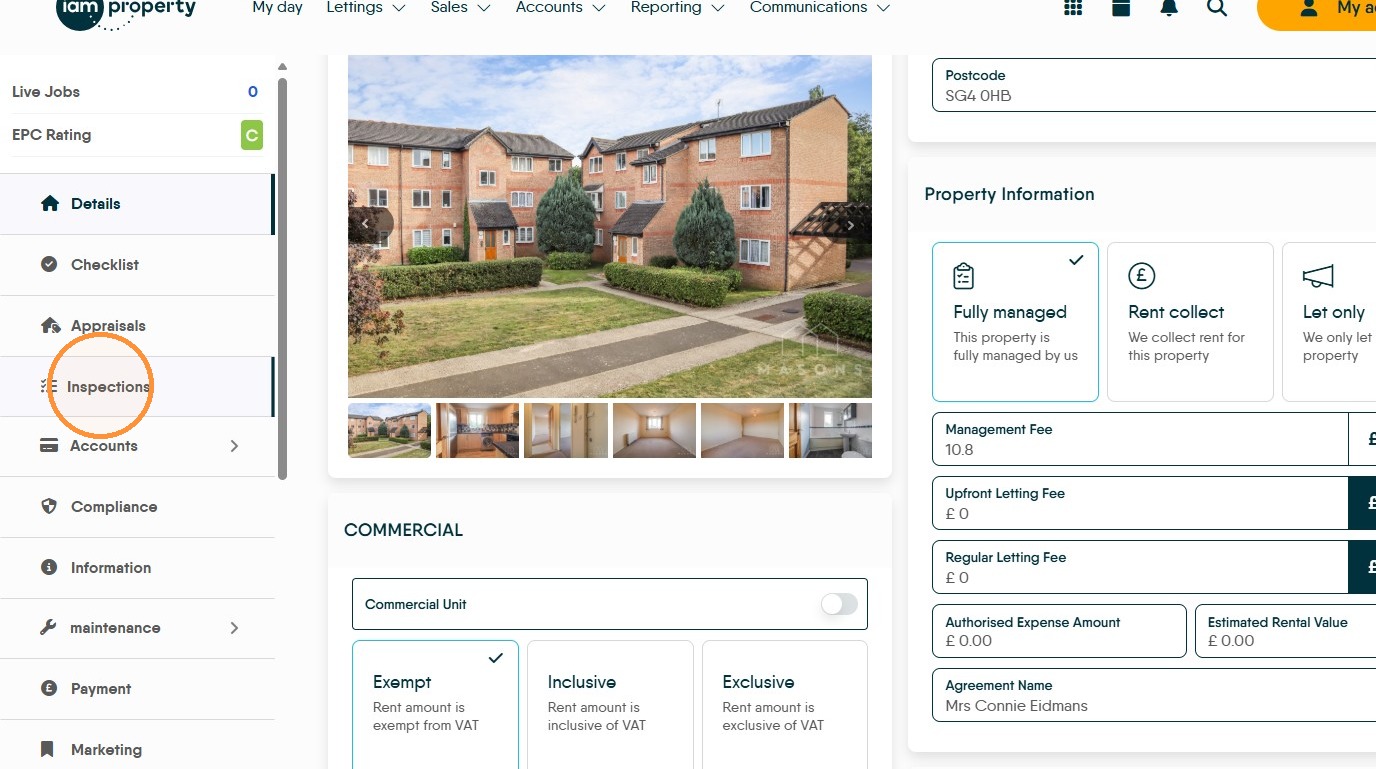
8. To add a totally new inspection. Click "Add Inspection"
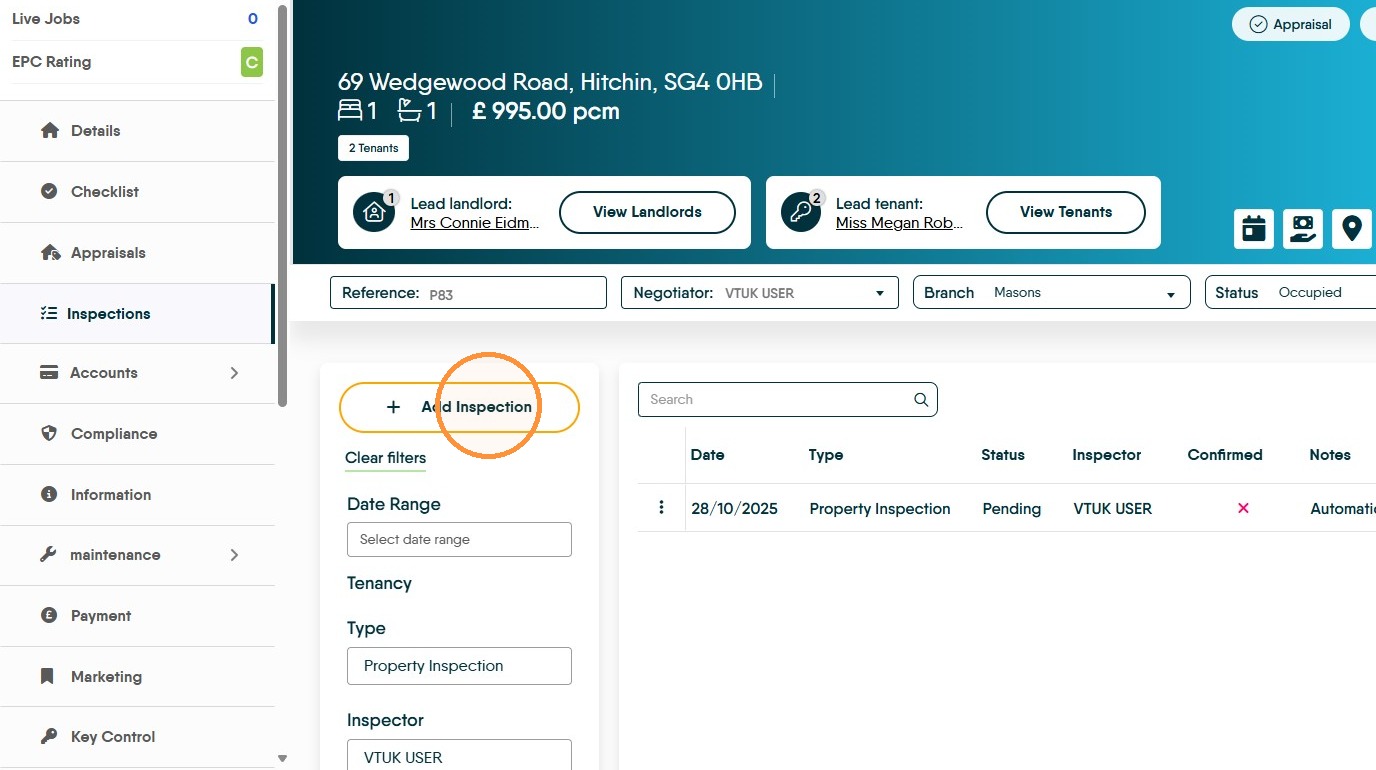
9. Click "Type" and from the drop down menu select the appropriate Inspection type in this case "Property Inspection"
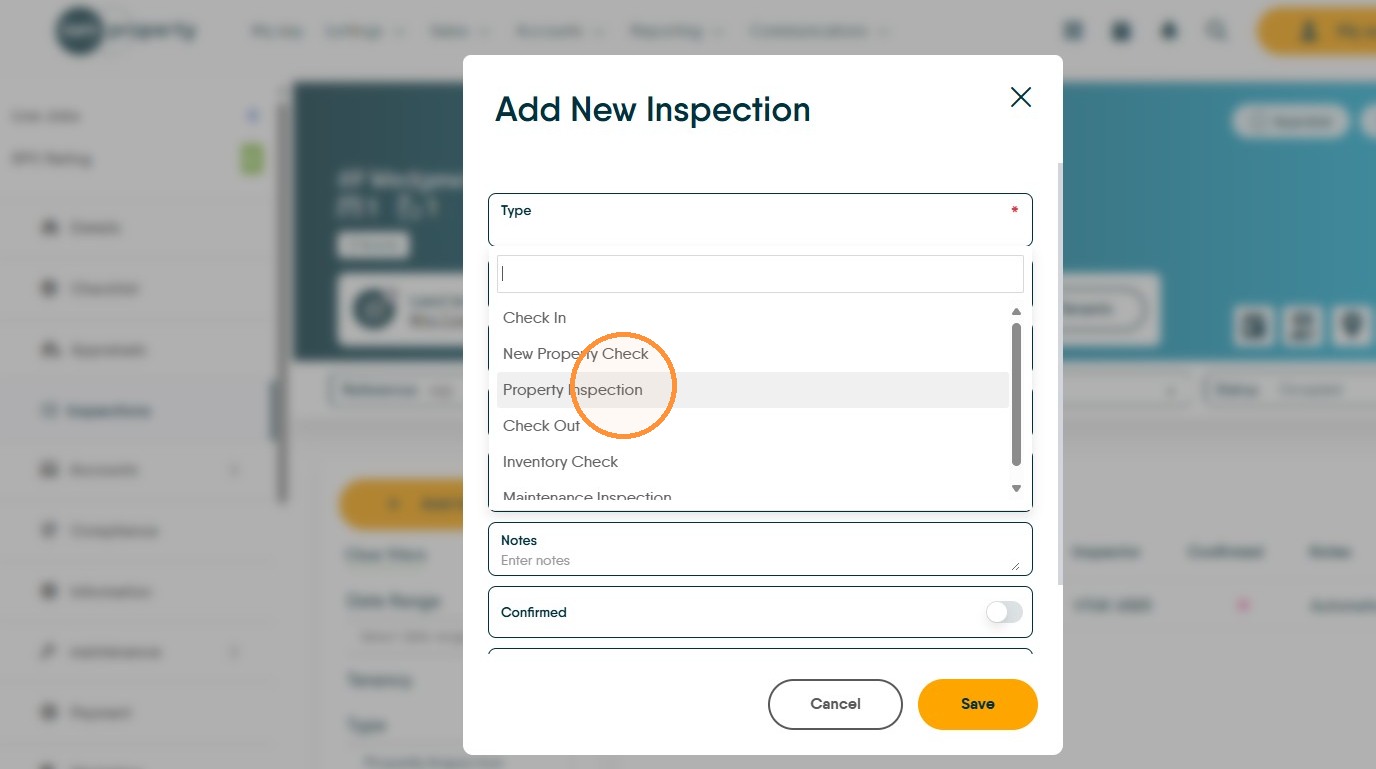
10. Click into "Status" and select the status from the drop down menu. In this case we are using "Booked" you may have different options.
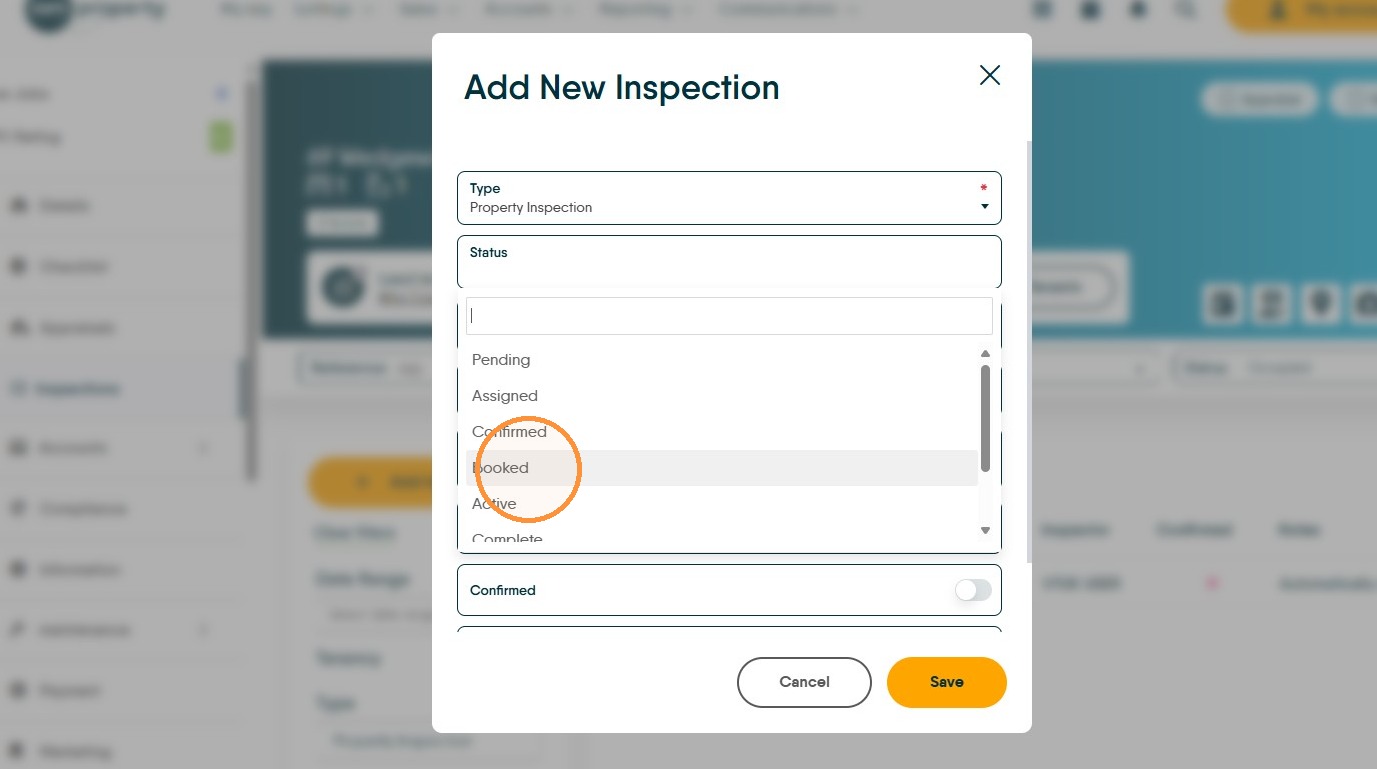
11. Click "Tenancy" and select the tenancy details from the drop down menu.
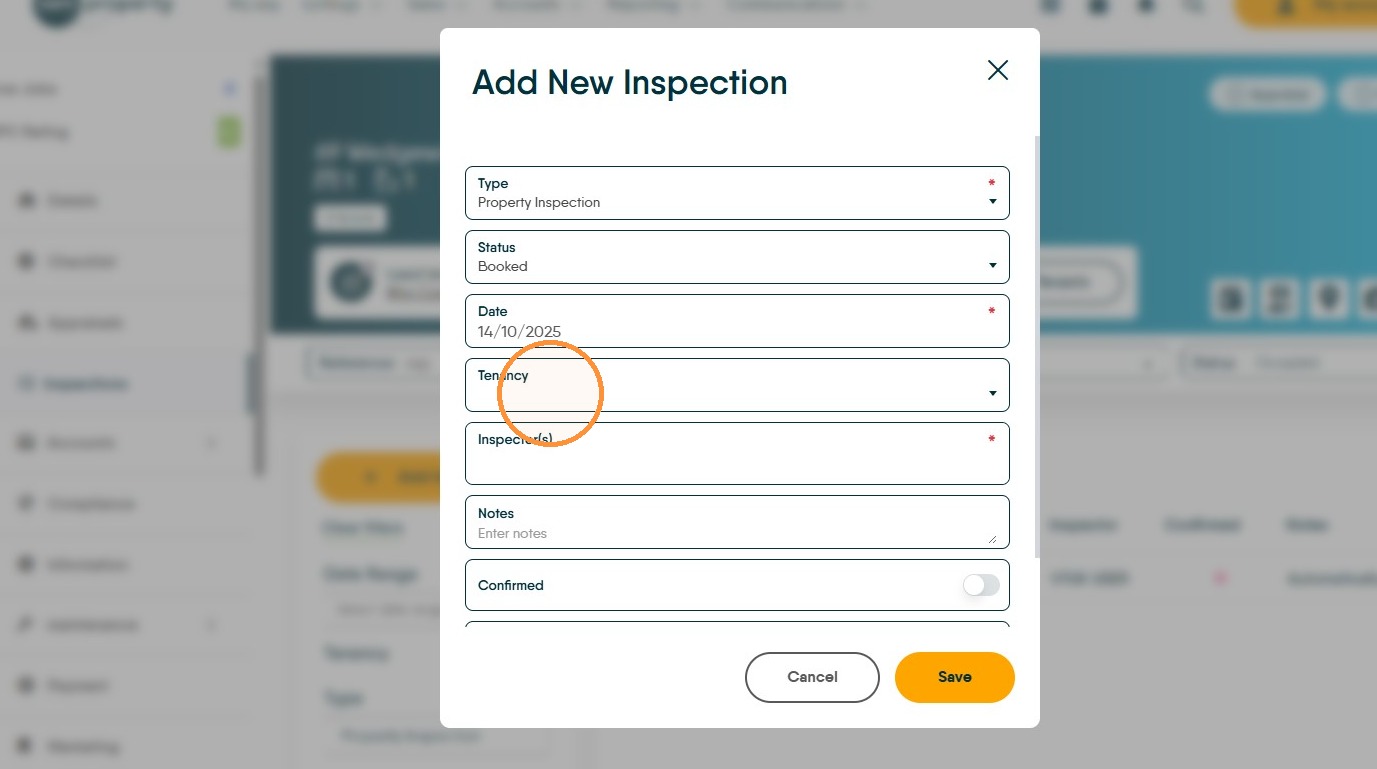
12. Click "Inspectors" and select the name for the Inspector from the drop down list.
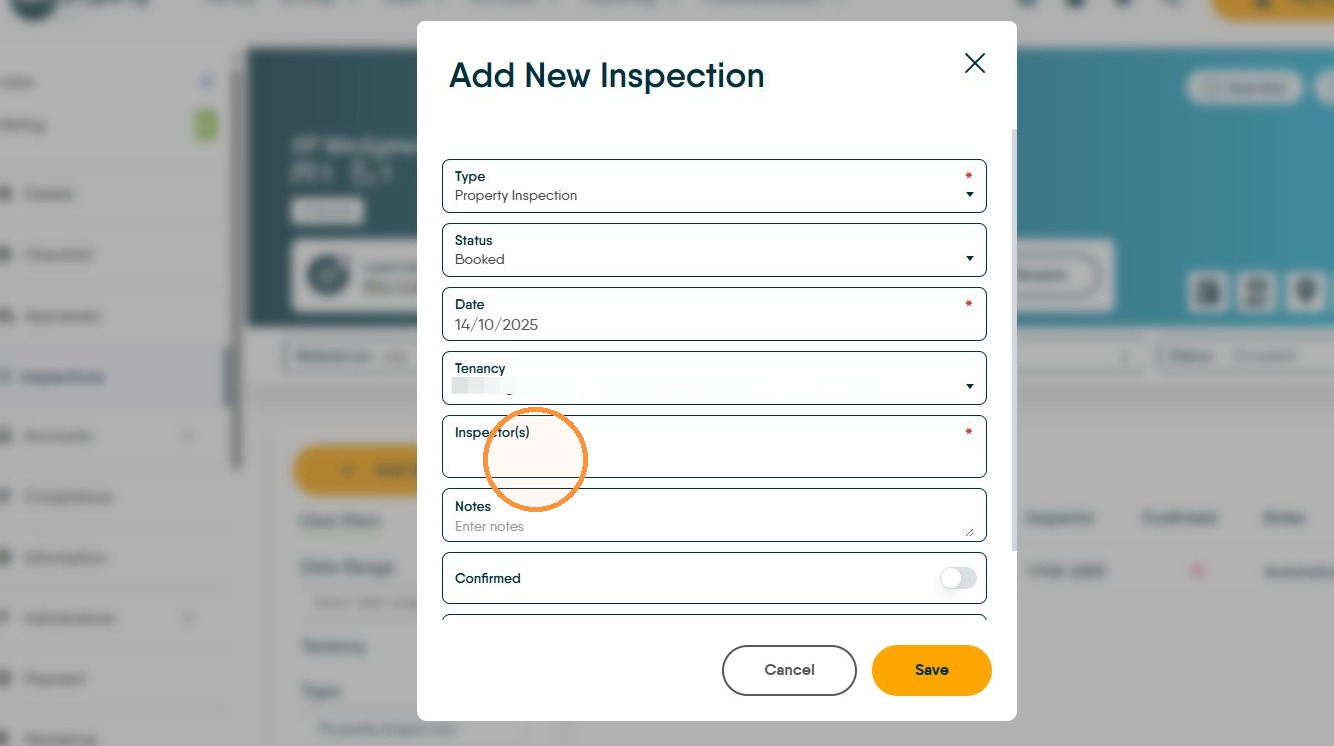
13. Click the "Notes" field. Add any notes that relate to the inspection.
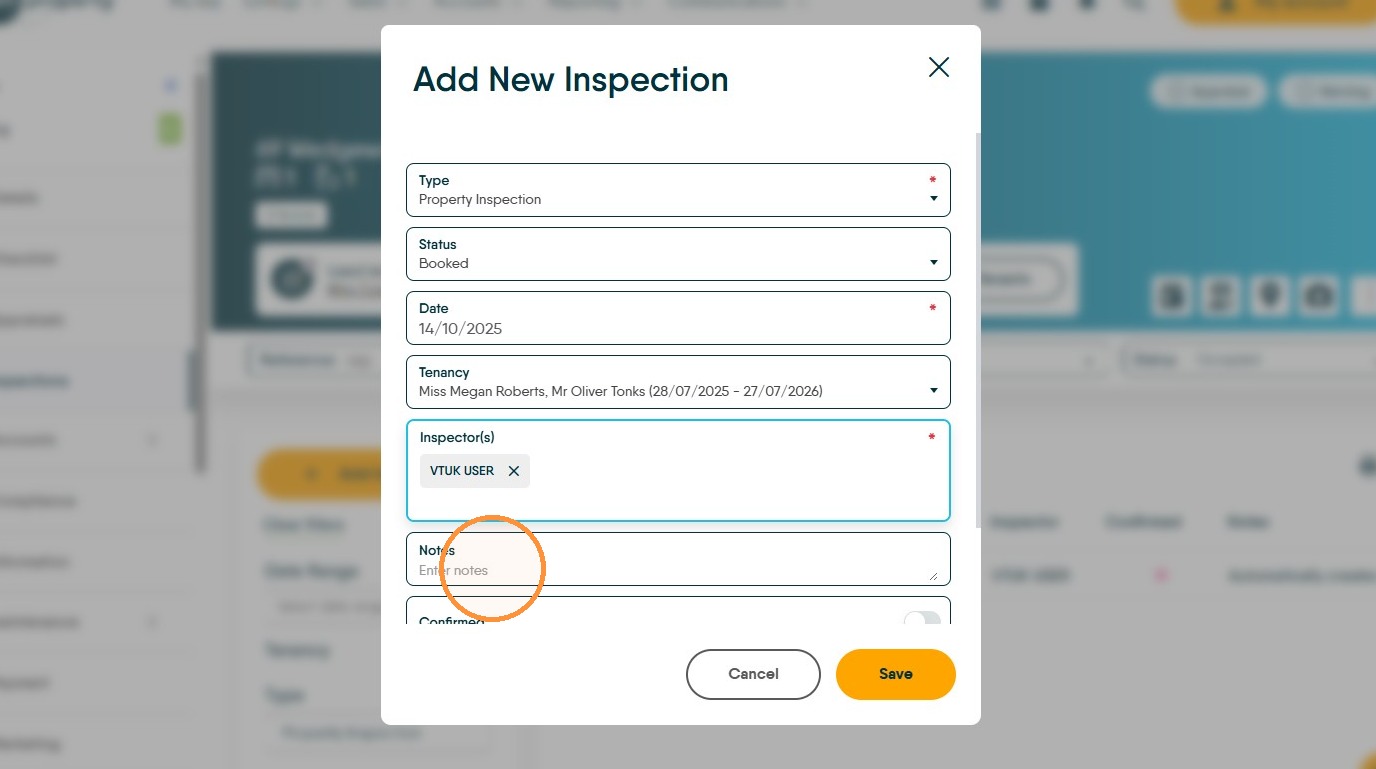
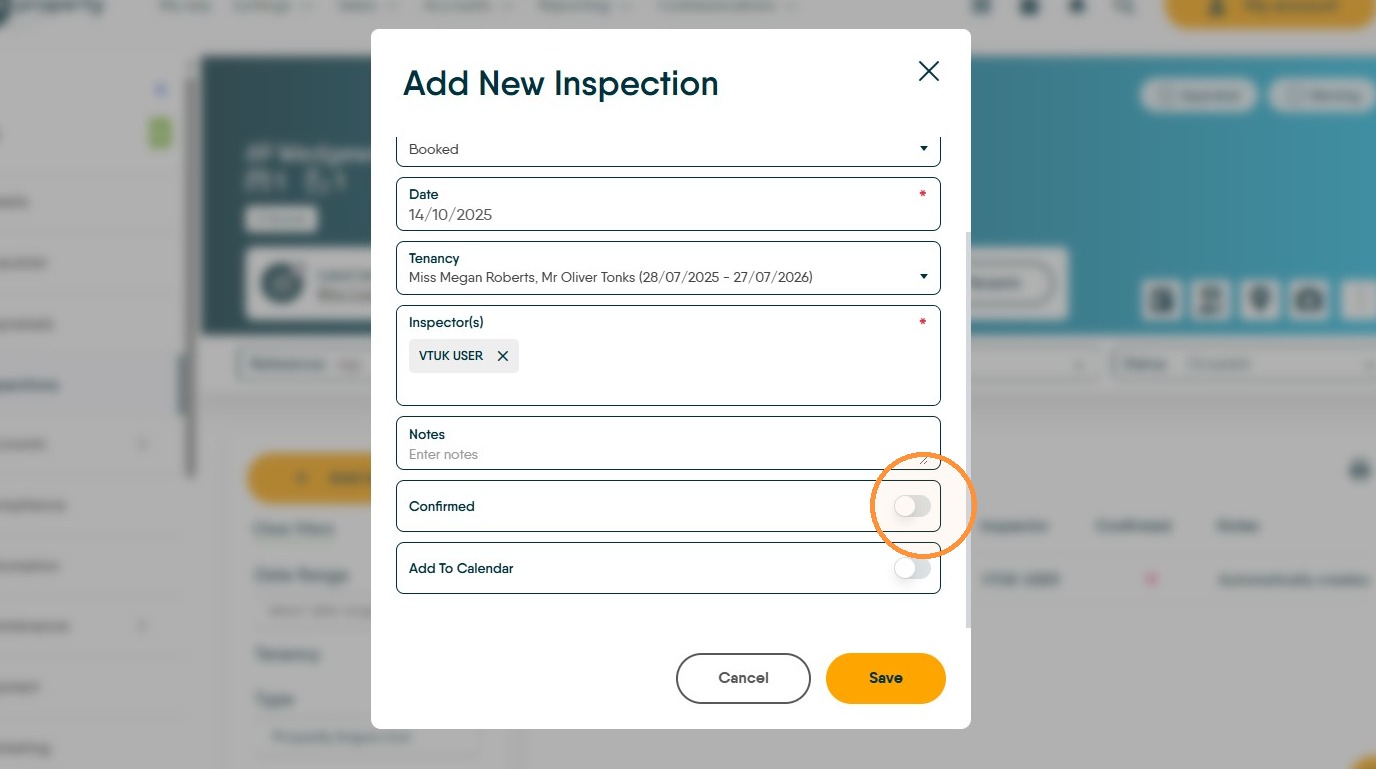
14. Click here to show the appointment as "Confirmed".
N.B. if you have an automation to send out Inspection notifications, these will usually only action AFTER the 'confirmed' option has been toggled on.
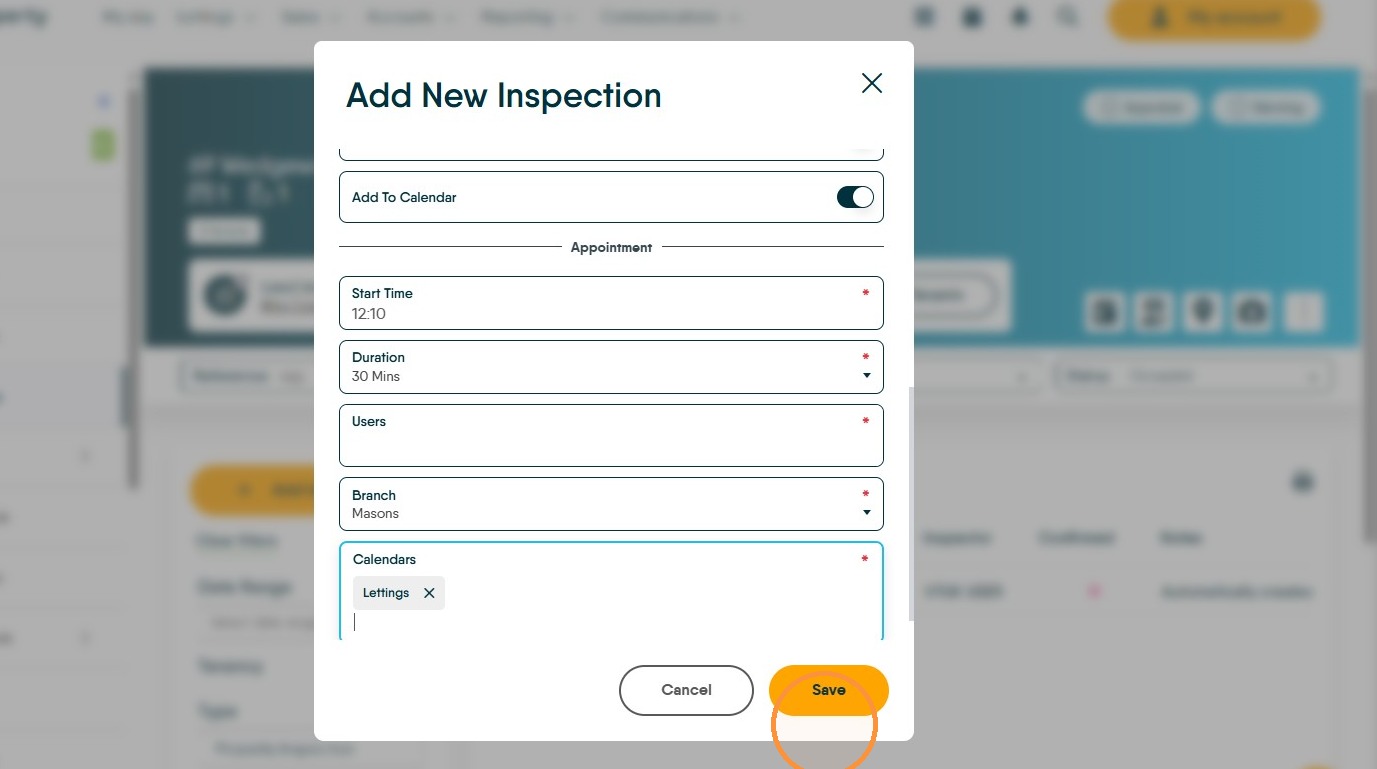
15. Click here to add the appointment to the CRM Calendar. If adding to the calendar there will be additional information to add.
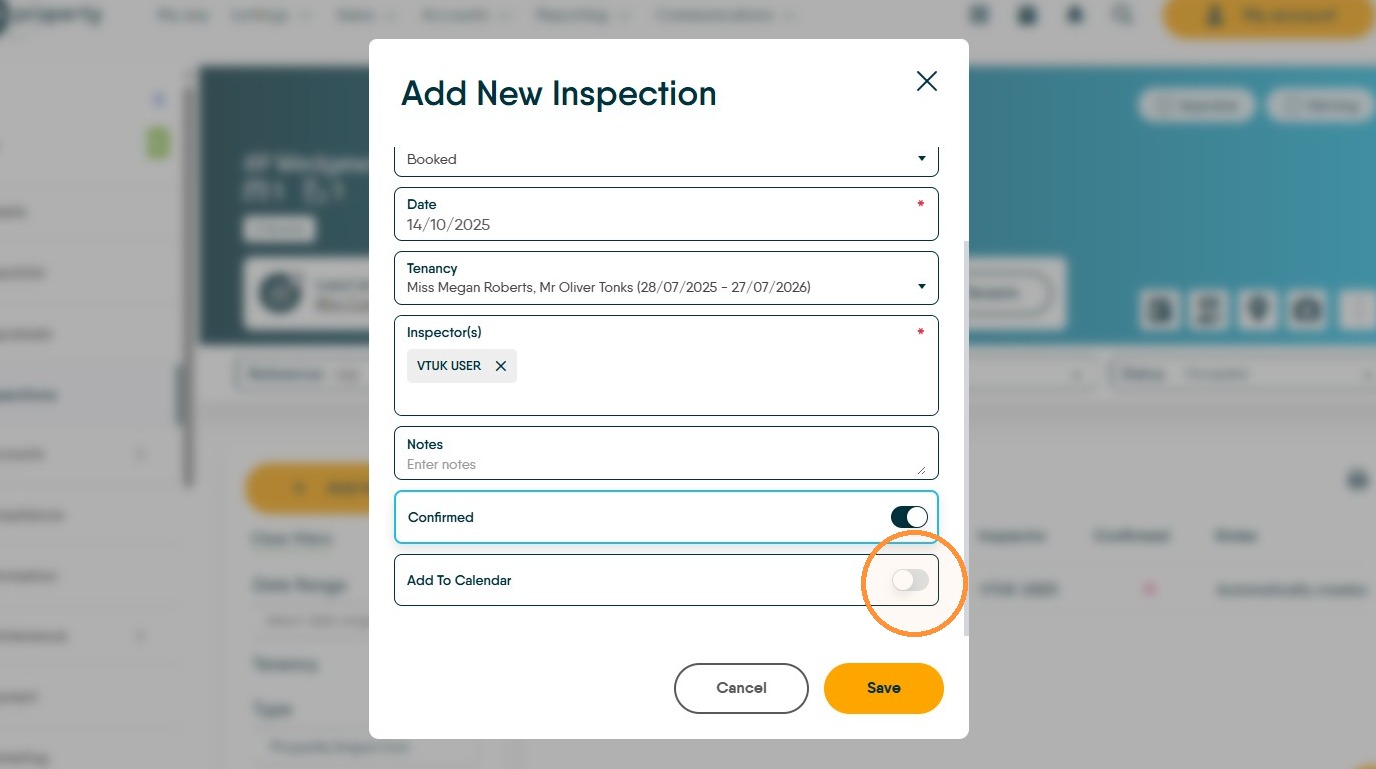
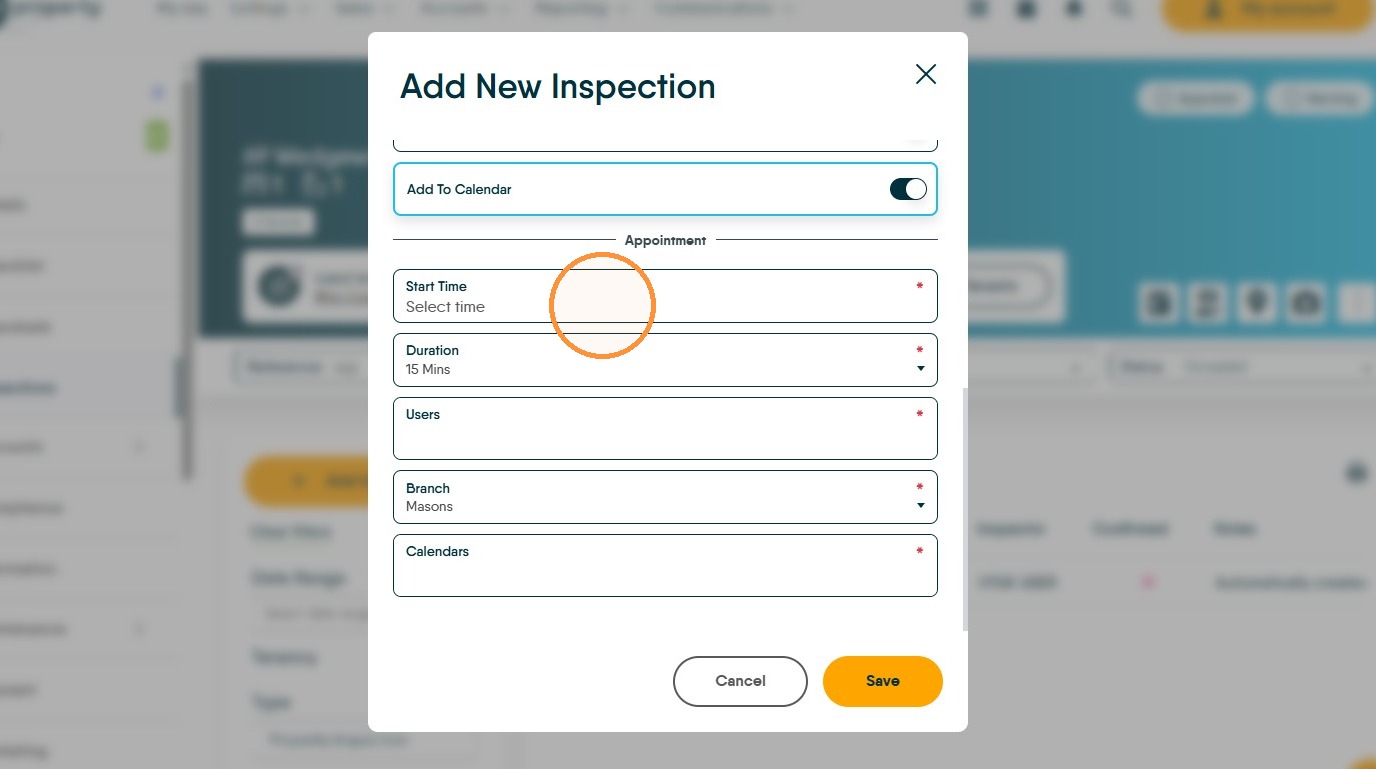
16. Adding appointment to the CRM Calendar
17. Click the "Start Time" field and select the start time.
18. Set the time either using the arrows or over type the time on screen.
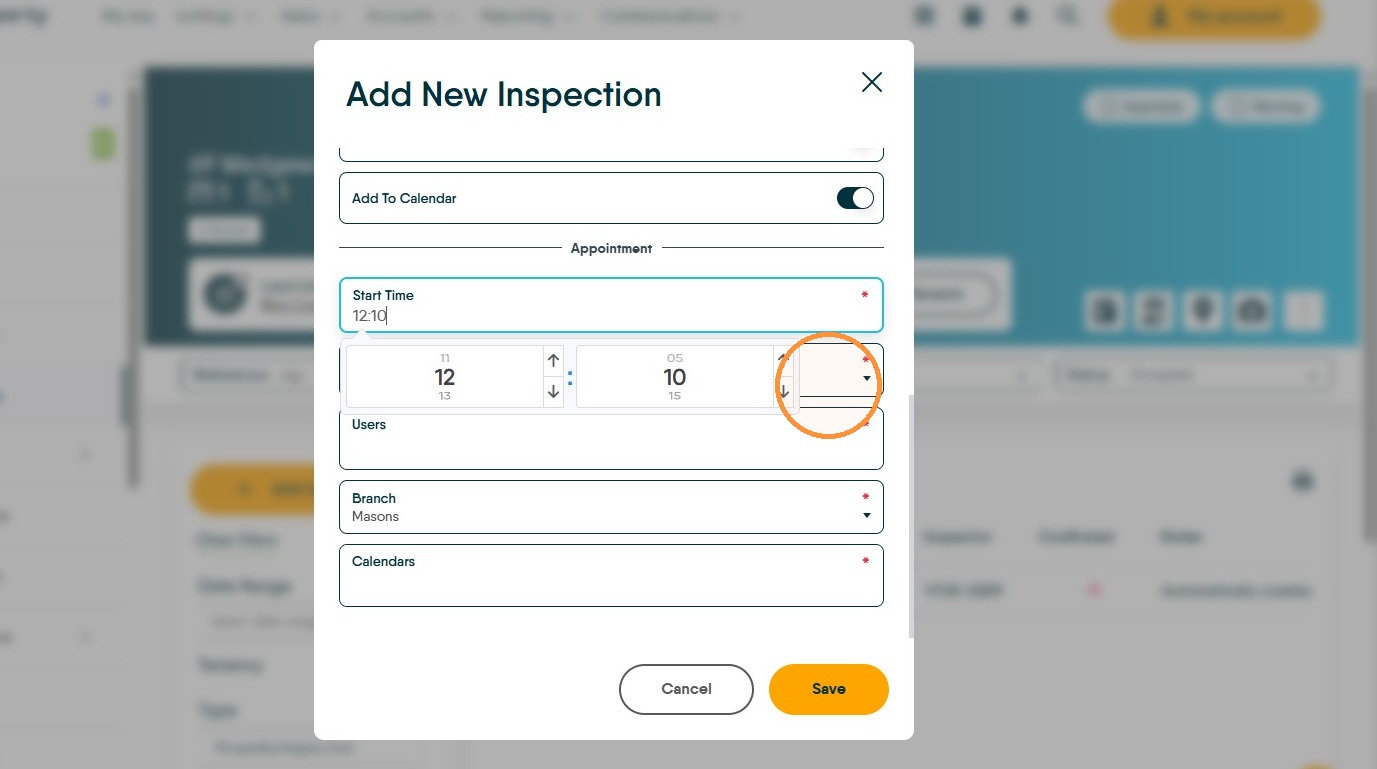
19. Click "Duration" and set the duration of the visit from the drop down menu
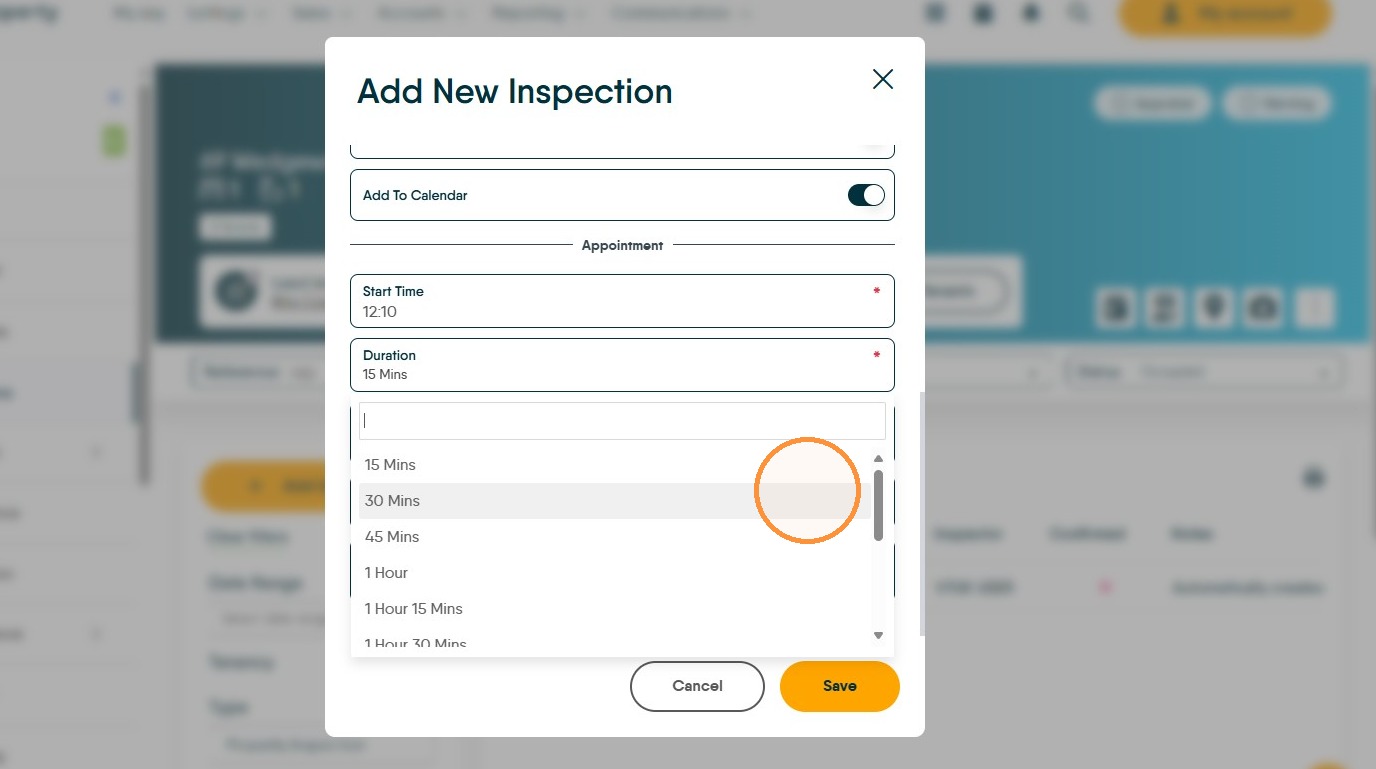
20. Click "Branch" to set the branch you are allocating the Inspection to.
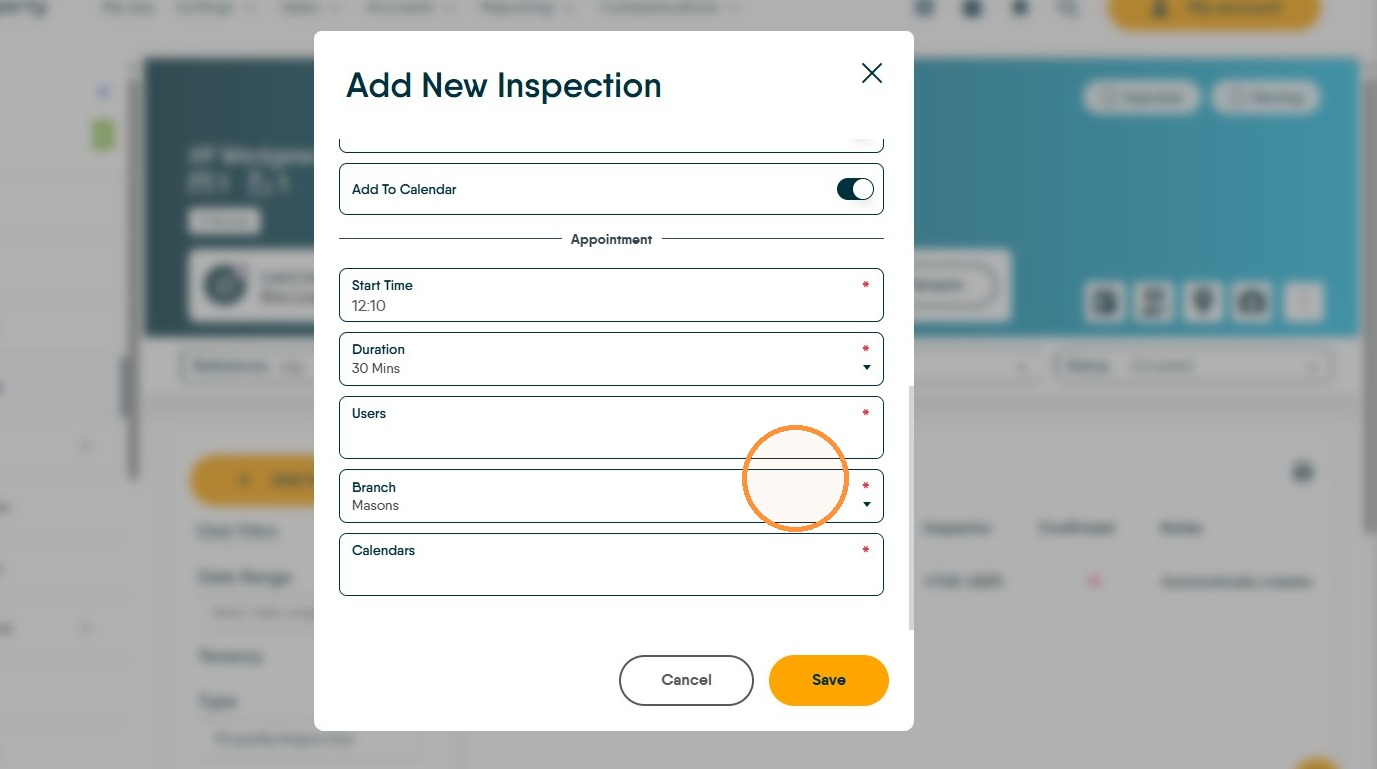
21. Click this search field.
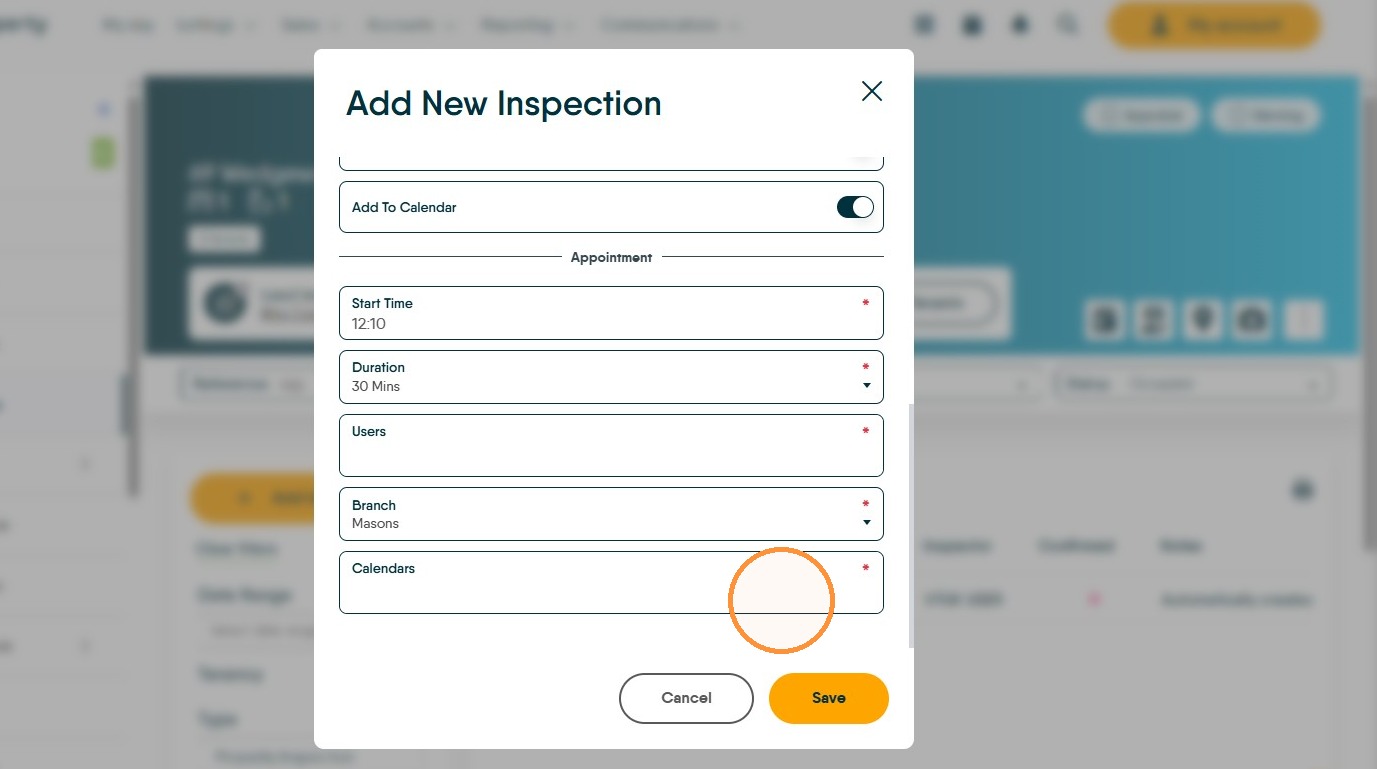
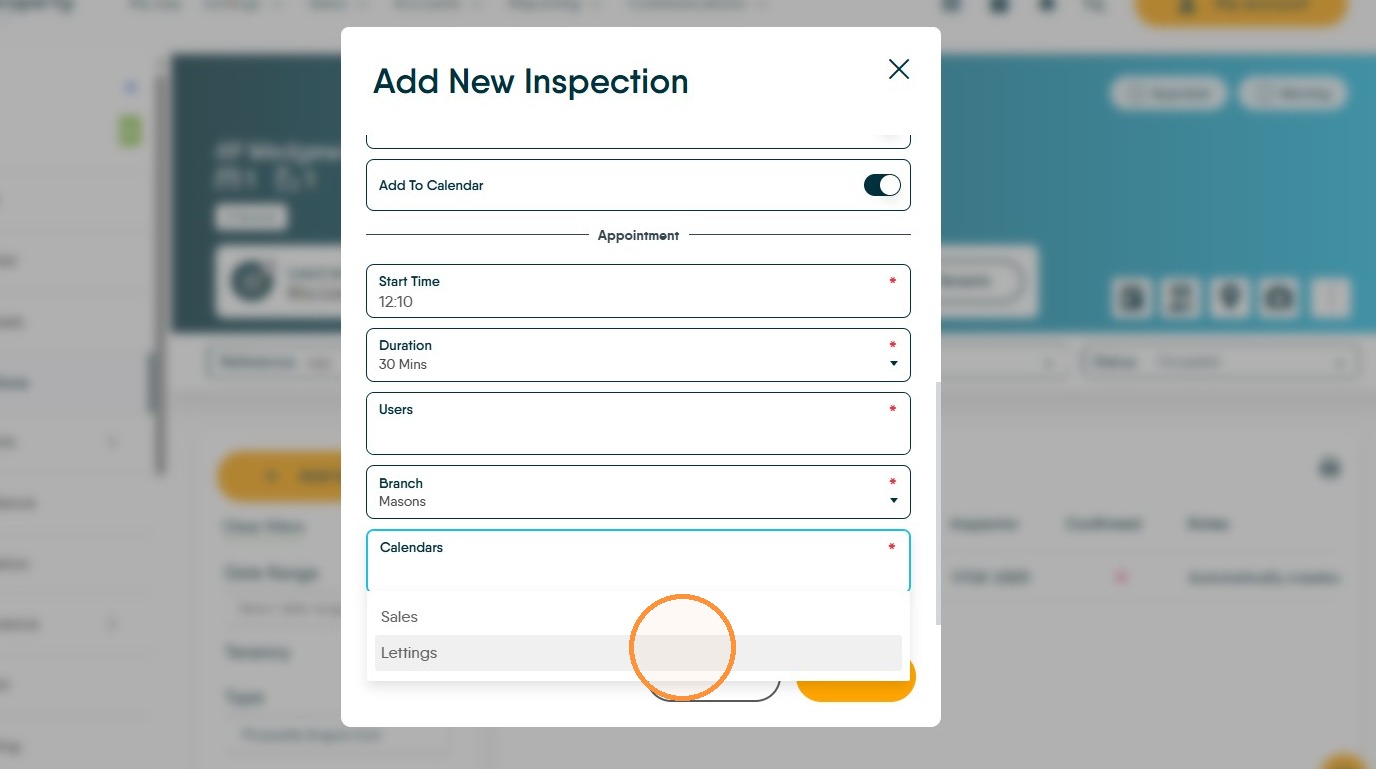
22. Click the calendar you are adding the appointment to, usually this would be the Lettings calendar.
23. Click "Save"
To Update the Next Visit Due Date in the Tenancy Record
24. Scroll down the left side menu and select the "Tenancies" tab
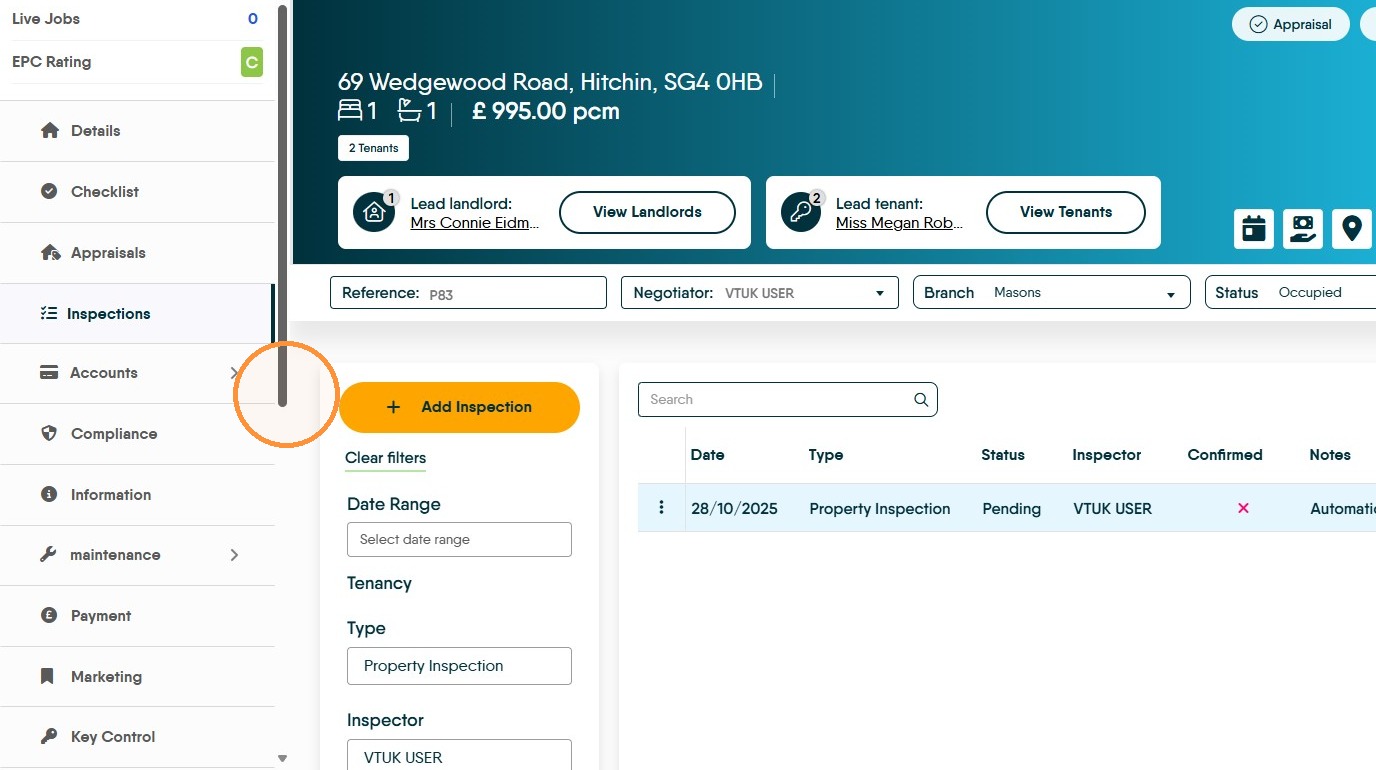
25. Click "Tenancies"
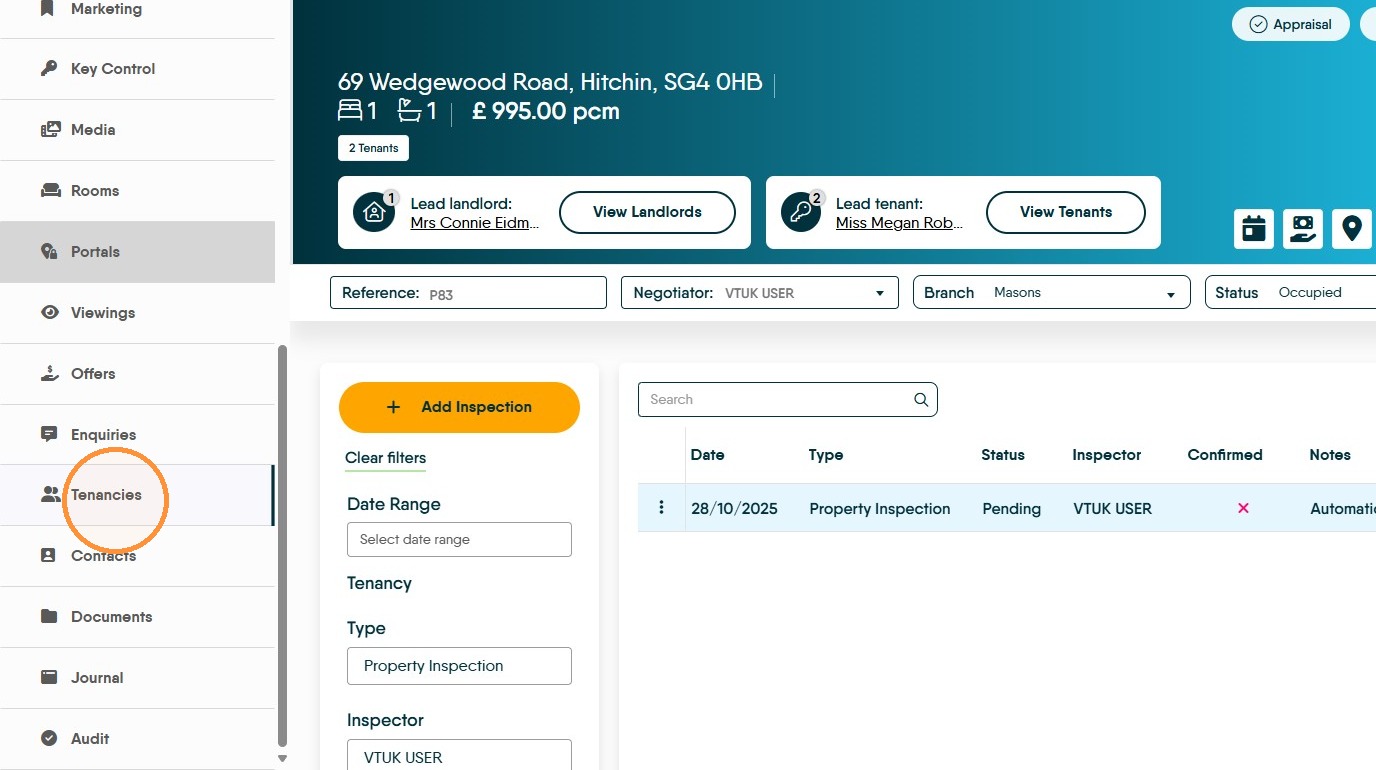
26. Click "View Tenancy"
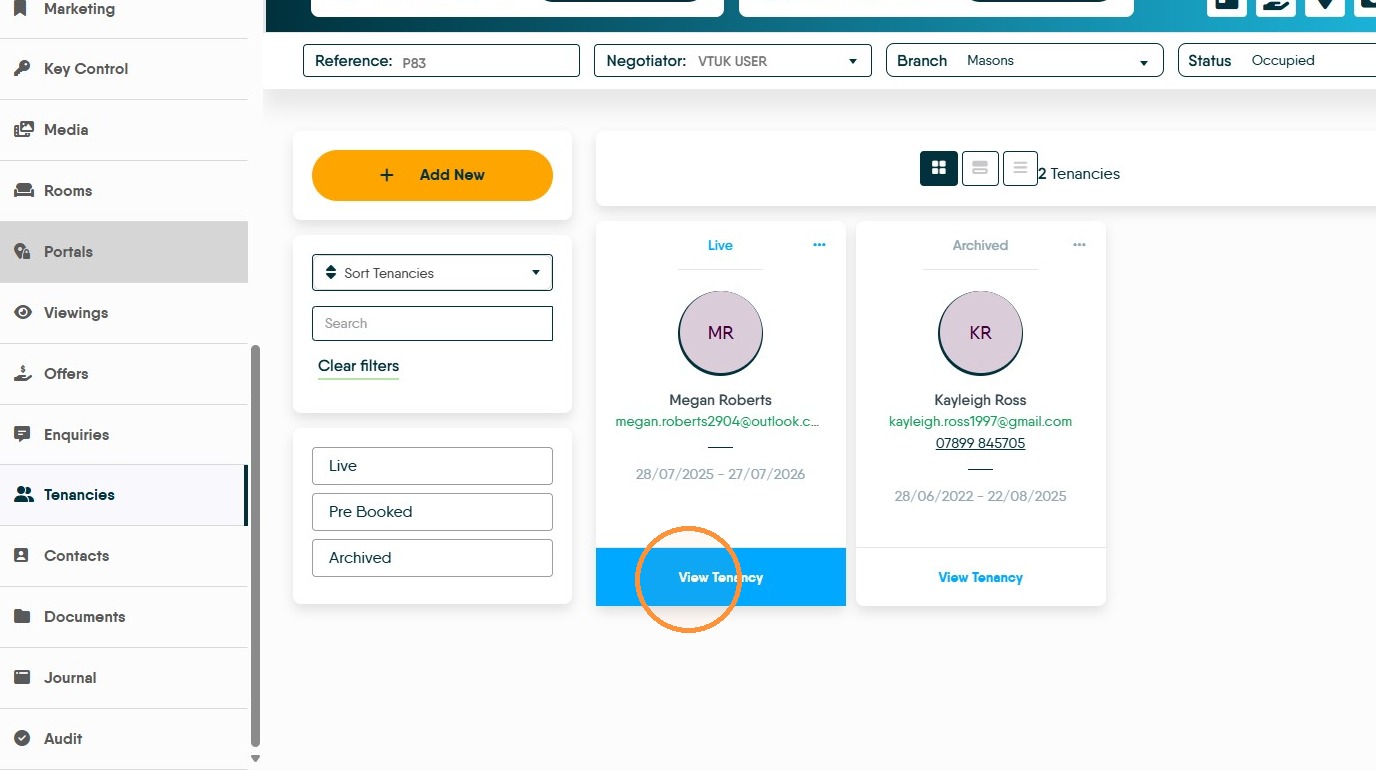
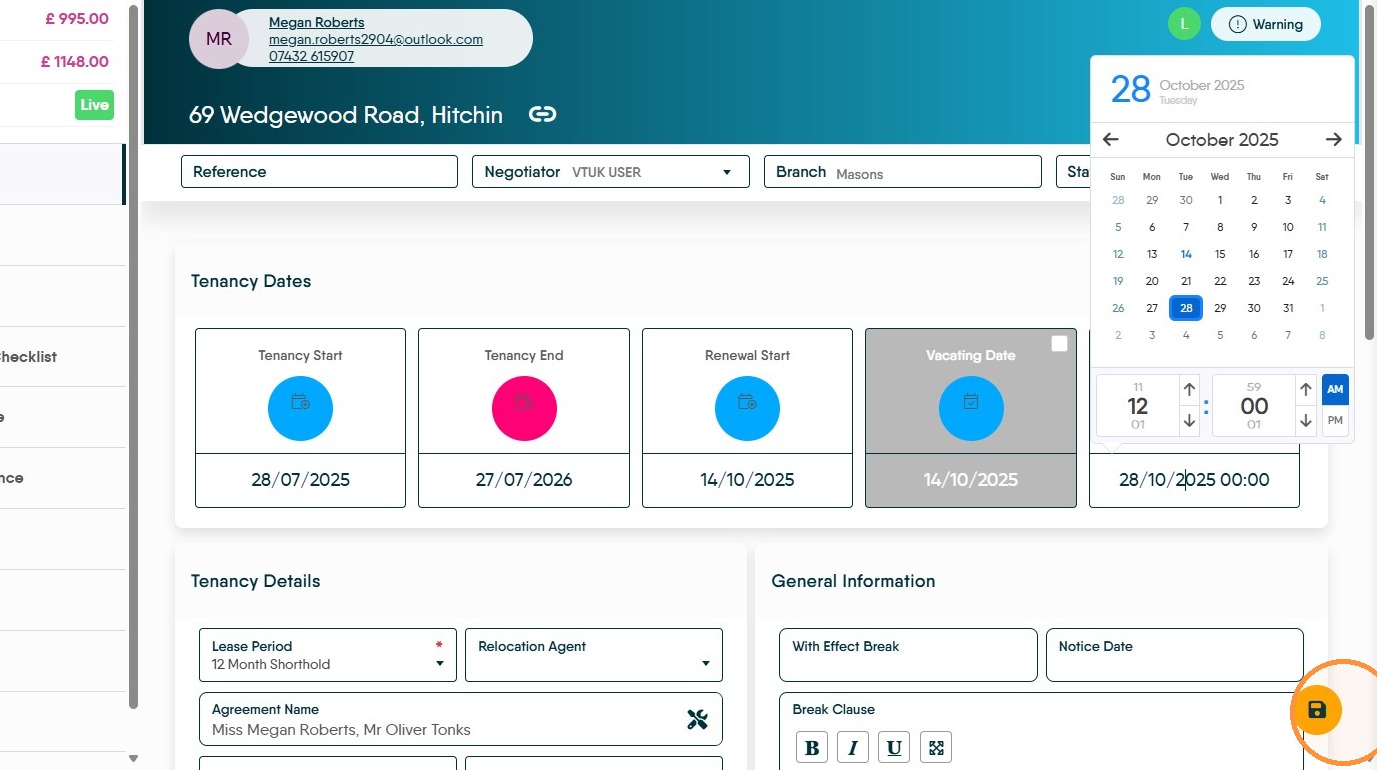
27. Click the "Visit Next Due" option
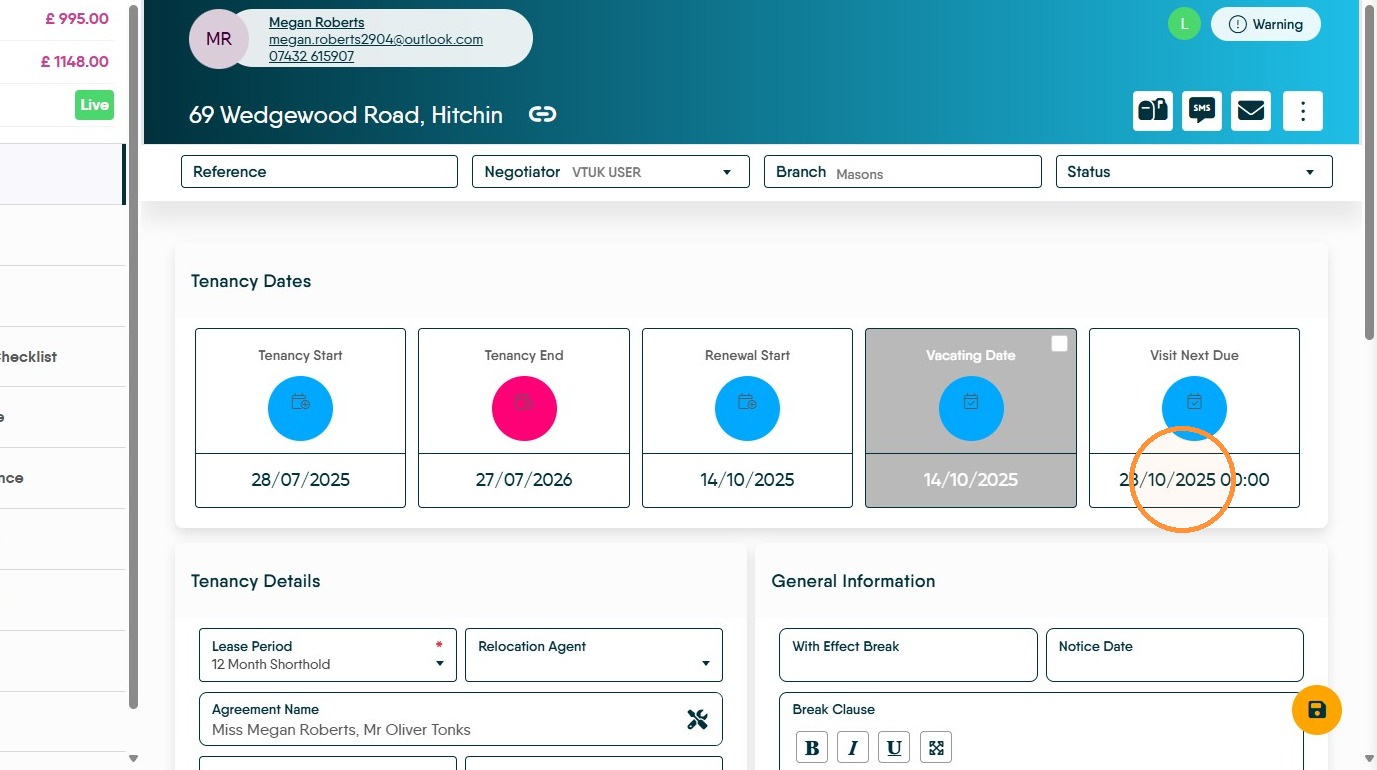
28. Click date the next visit is due and 'Save' the screen. This will update the Activity List.