Learn how to efficiently book and organise a property inspection for your lettings portfolio. This guide covers selecting inspectors, setting dates, and saving your appointment details directly into the CRM system.
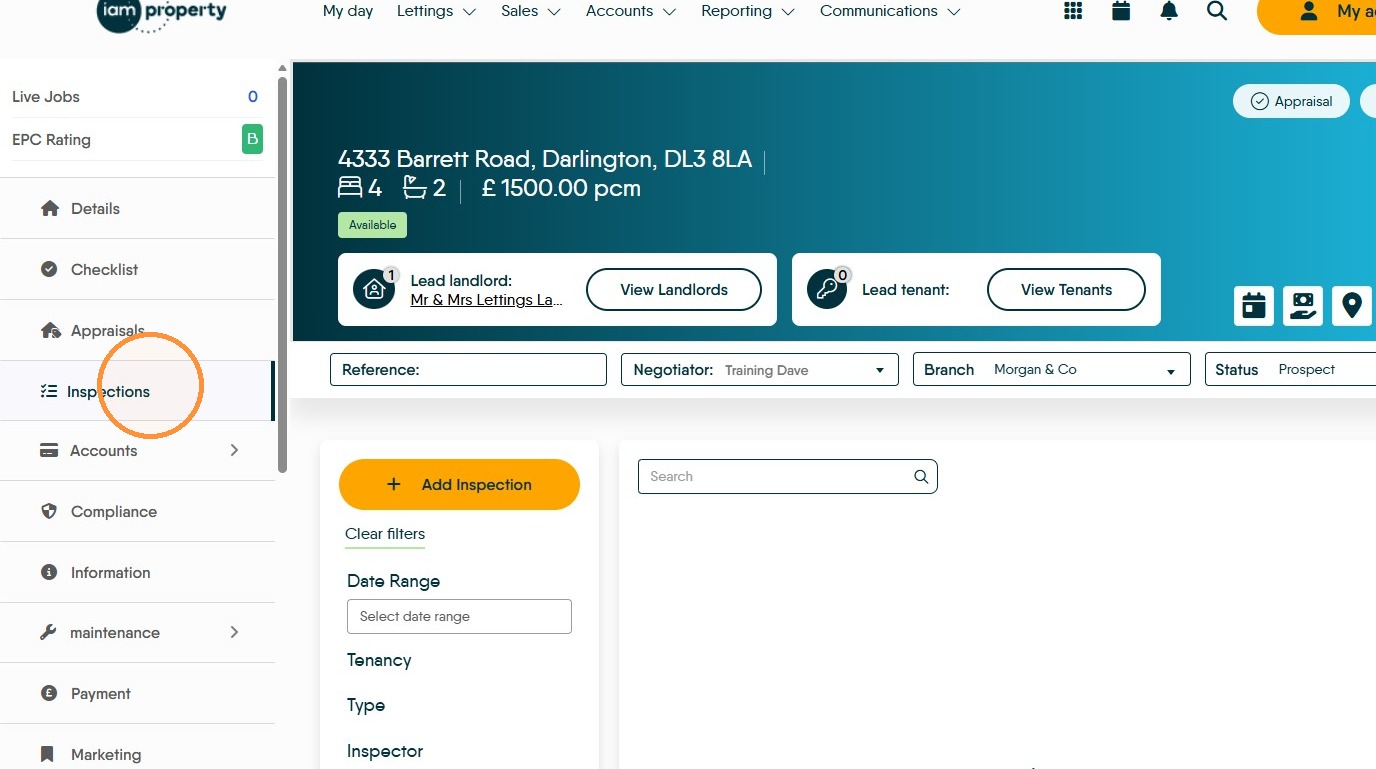
2. Click "Inspections"
Inspection Setup
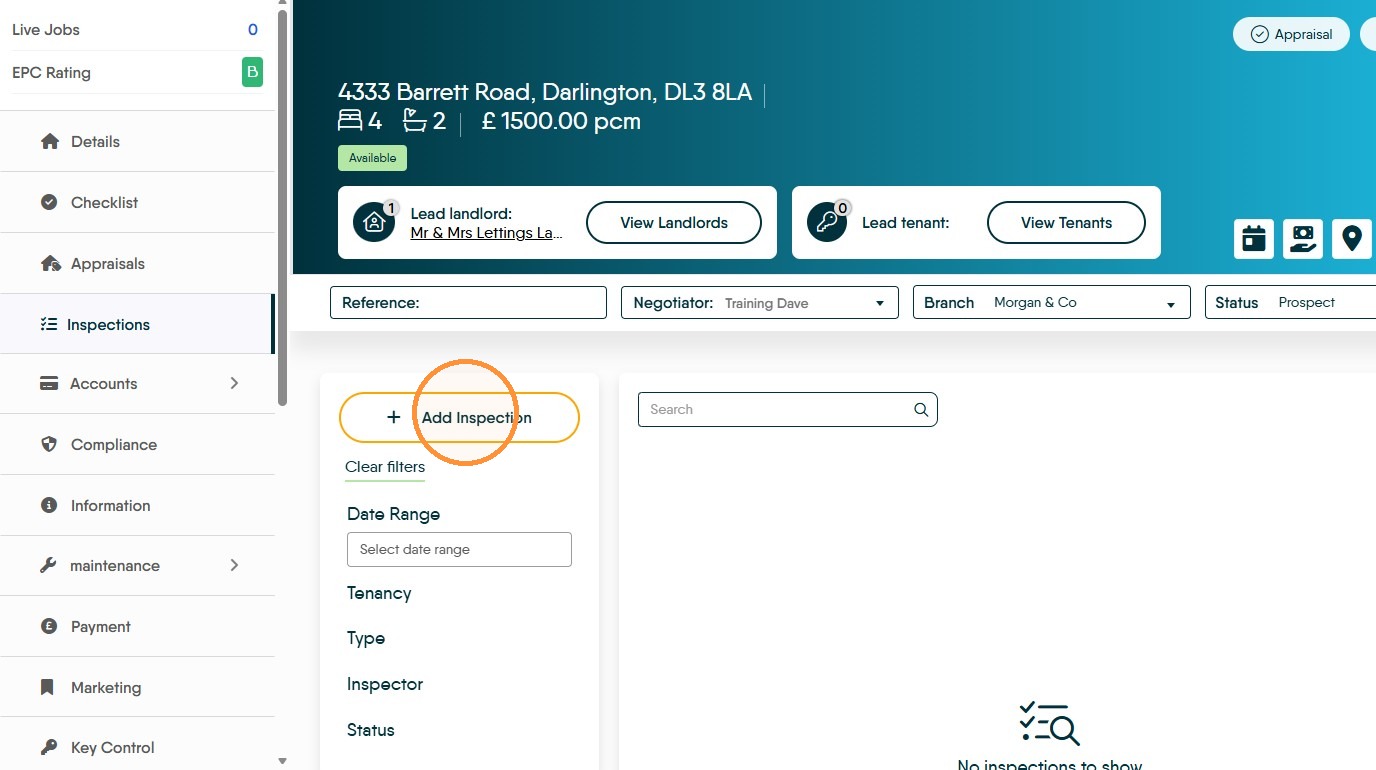
3. Click "Add Inspection"
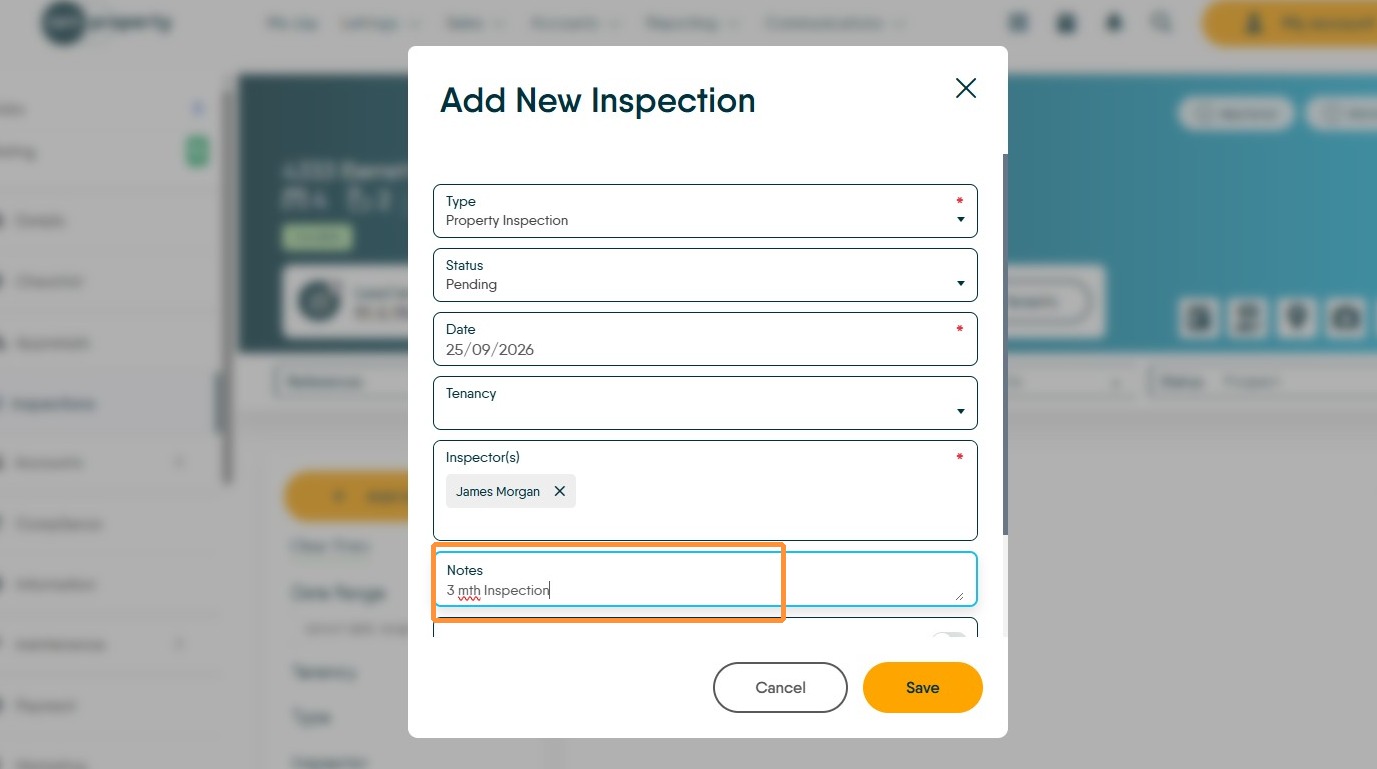
4. Click "Type" and from the drop down menu select the type of Inspection you are planning e.g. "Property Inspection"
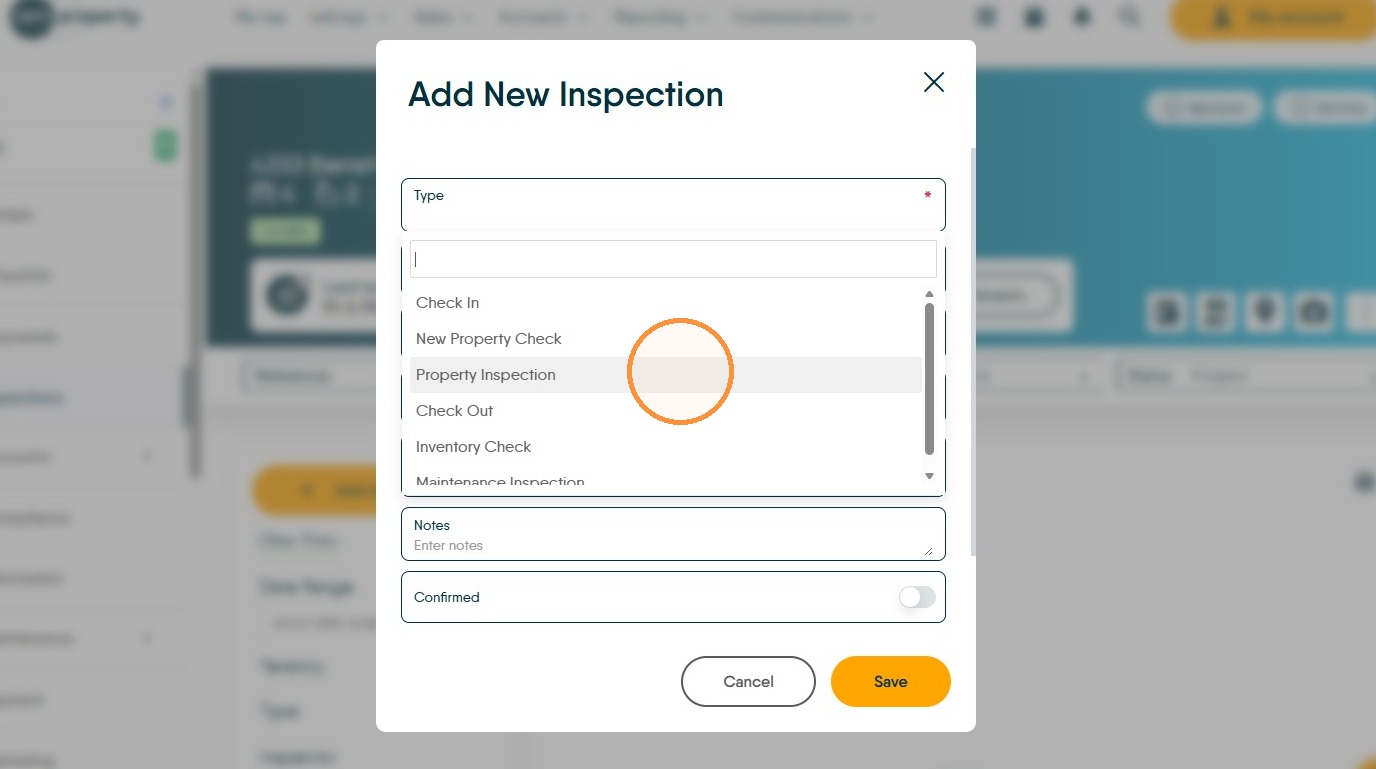
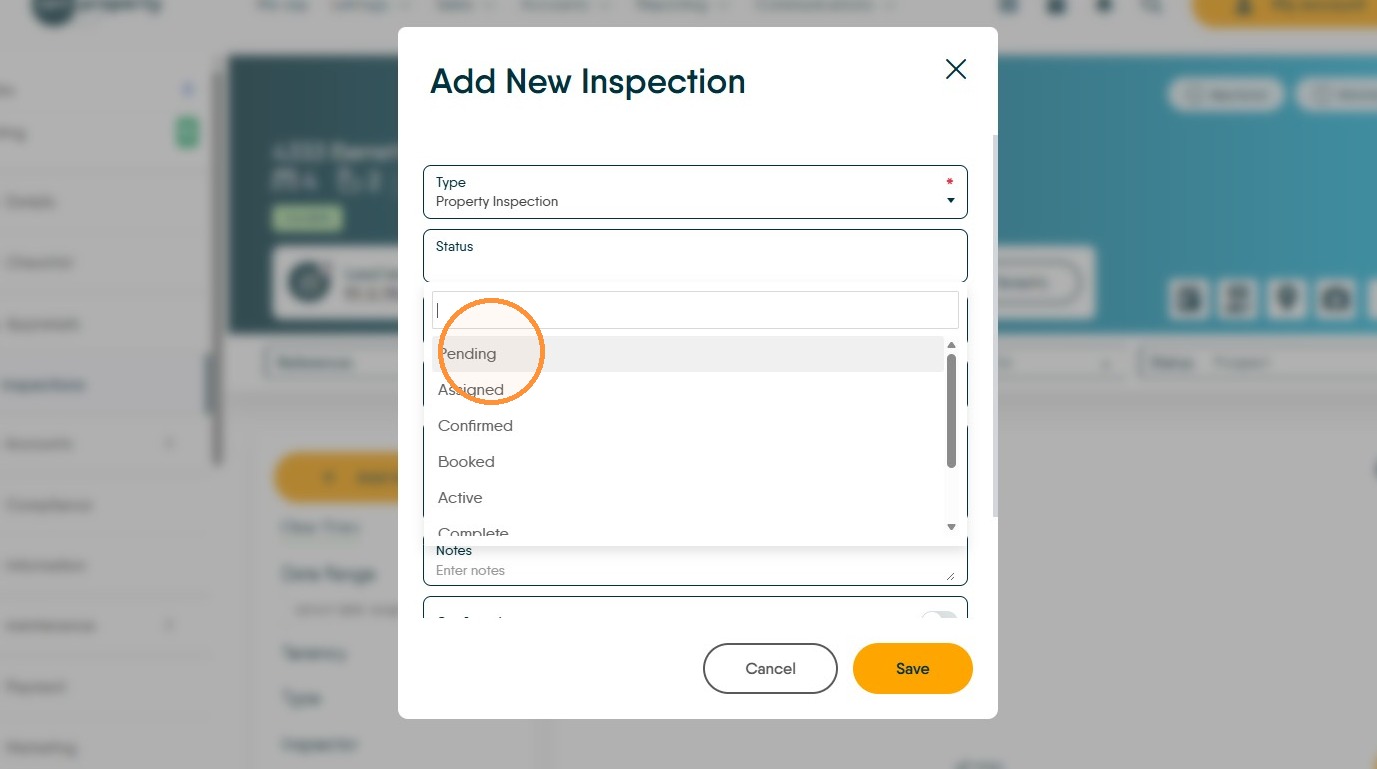
5. Click "Status" and set the status of the visit from the drop down menu, e.g. select "Pending"
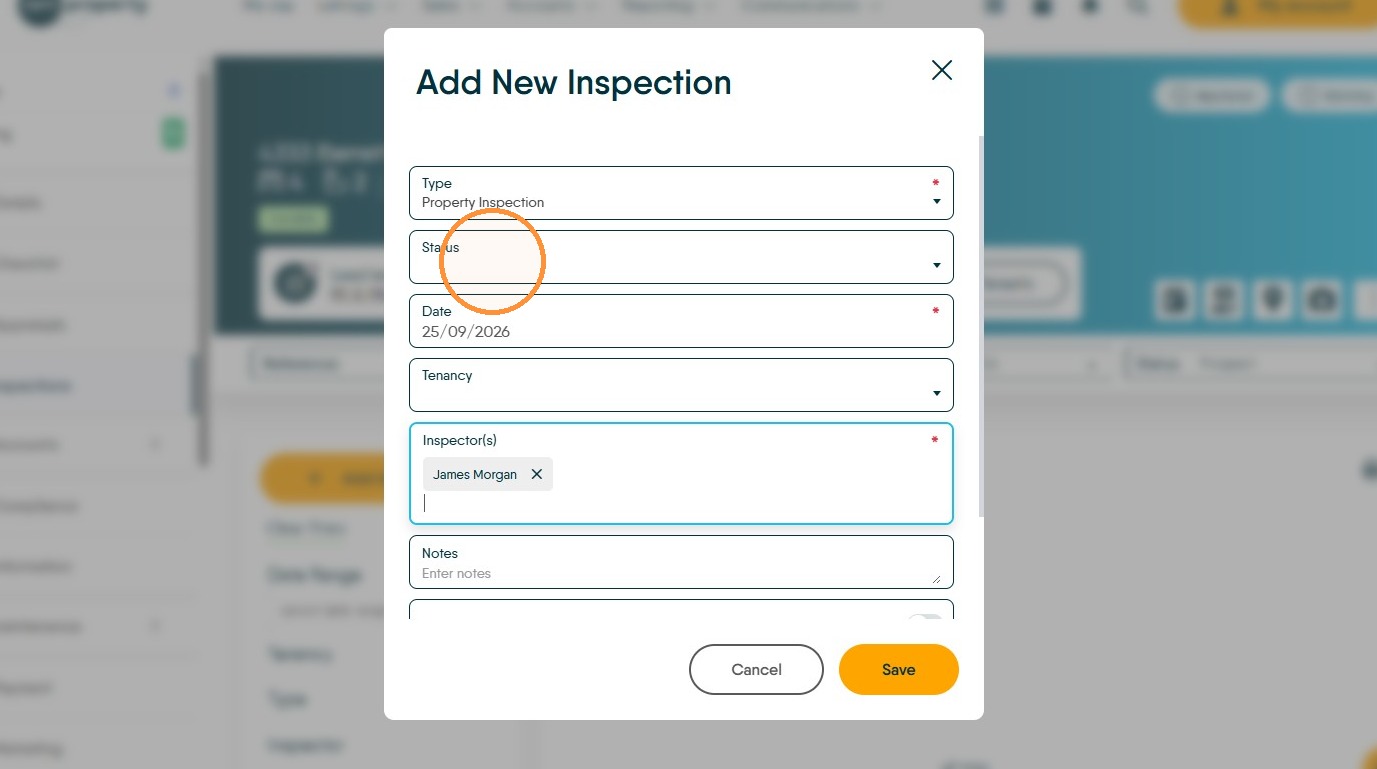
6. Click the "Date" field to set the date of the visit. The date should be the date the visit is due, however it is just an indicator of when the inspection is planned.
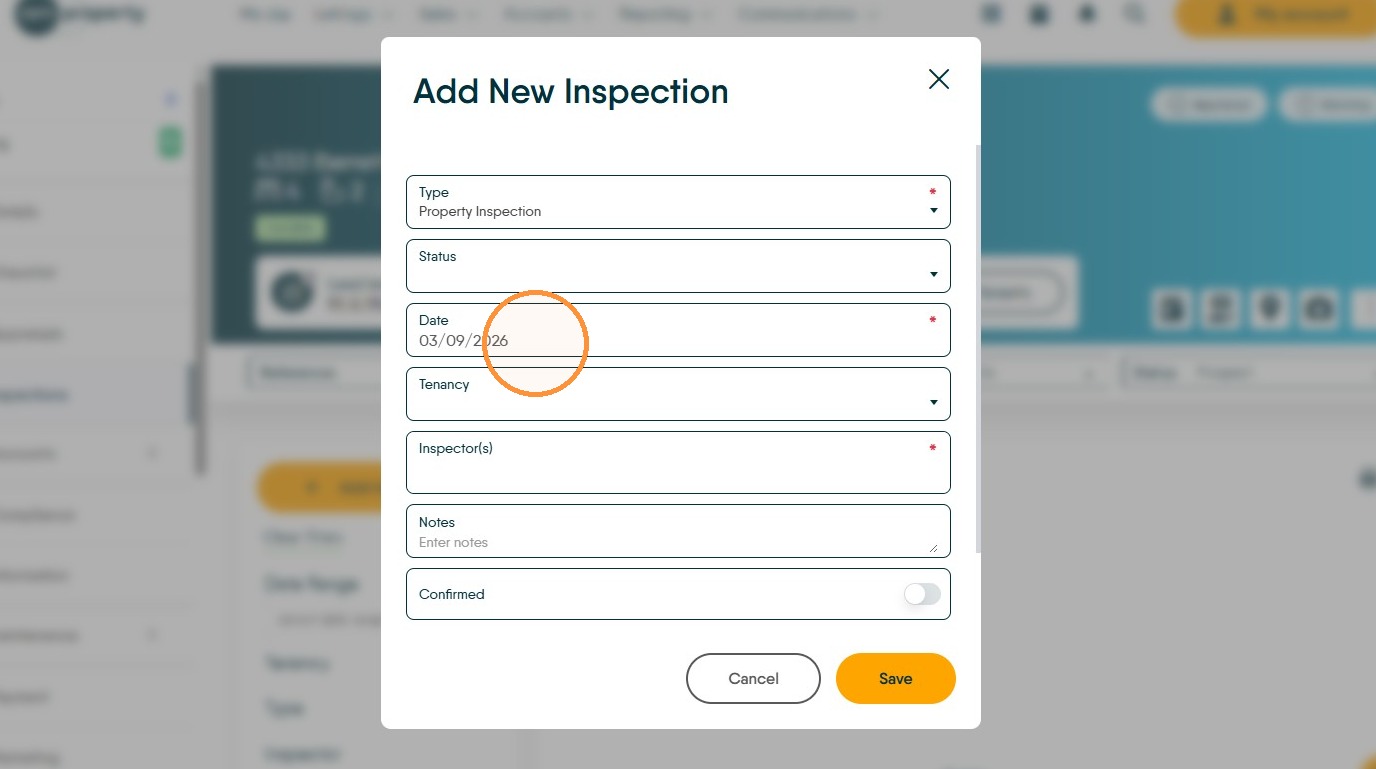
7. If there is a tenancy on the property then you can select that in this menu.
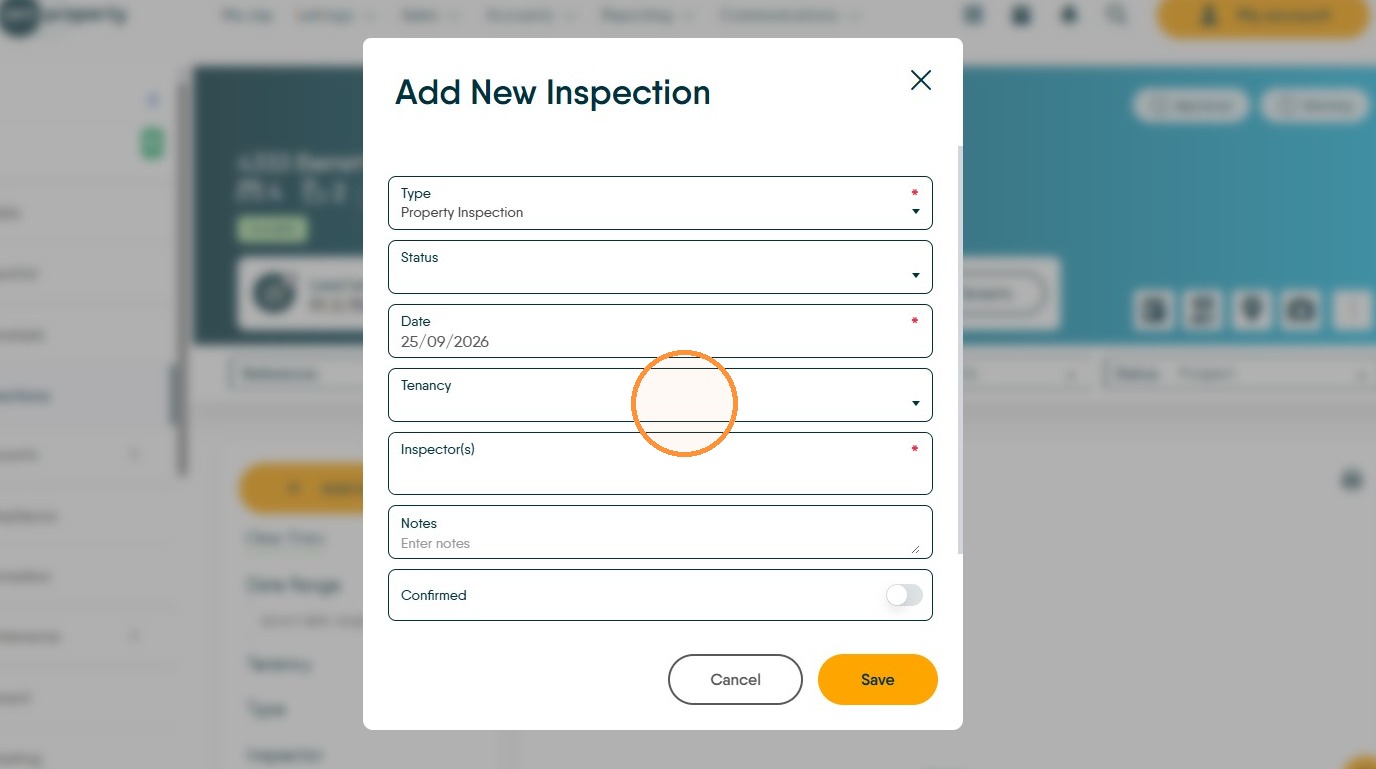
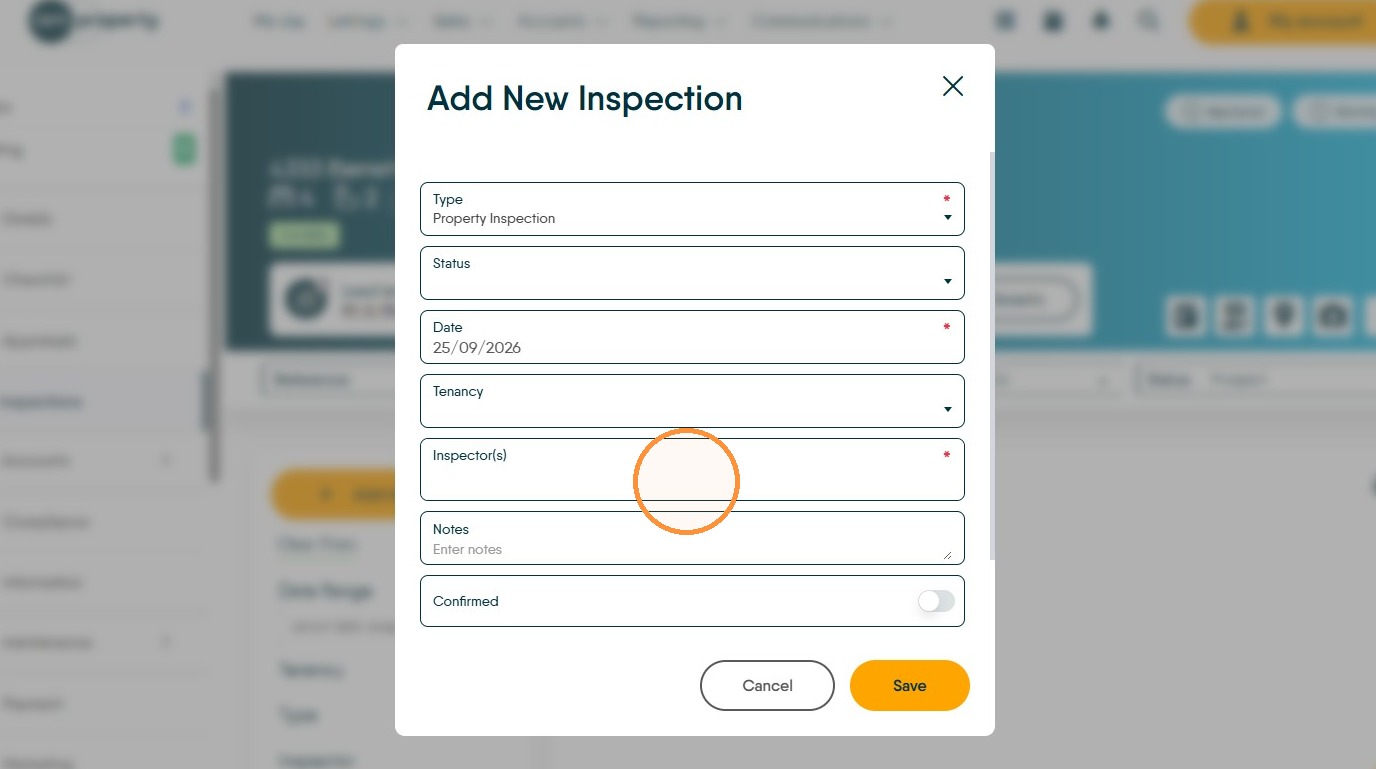
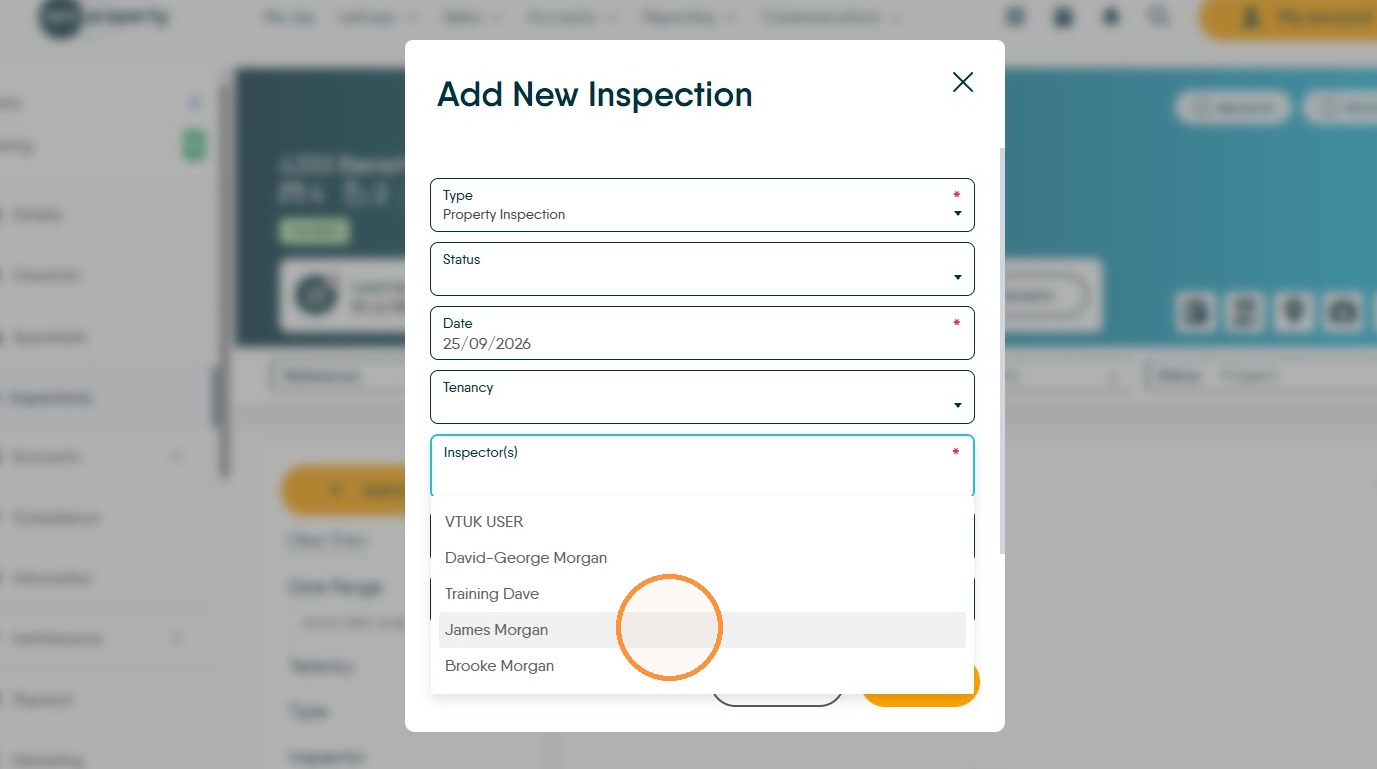
8. Click into the "Inspectors" menu and select the person you are planning on completing the inspection.
At this point, this doesn't need to be the person who will perform the inspection, the name could just be a placeholder for pre planned inspections, for example if you plan 3/6/9 month Inspection all at the same time, you might use the name of the person planning the inspections and change this later on.
9. Click the "Notes" field and add any notes on the inspection.
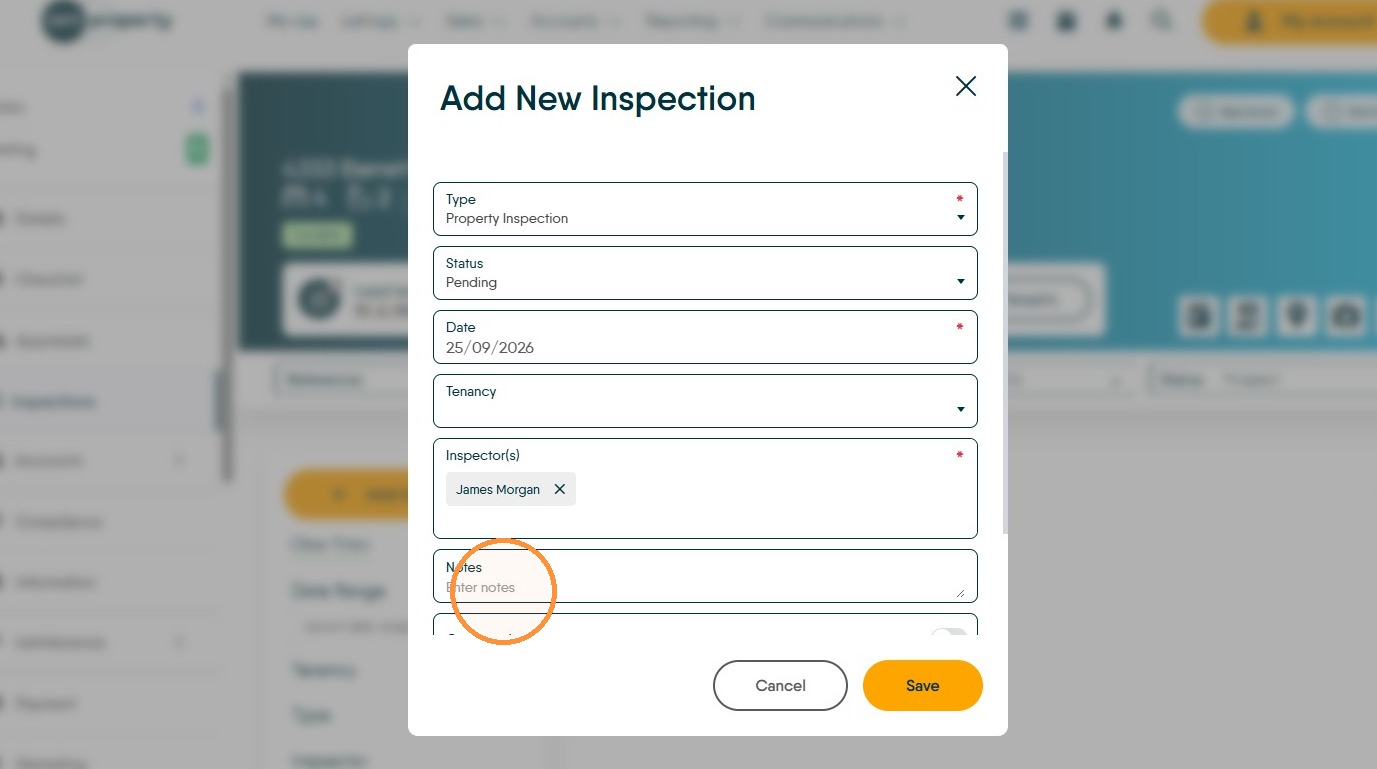
10. If the visit has been "Confirmed" with your tenant select the confirmed option.
If you want to add the Inspection to your "Calendar" in CRM then select the Calendar toggle.
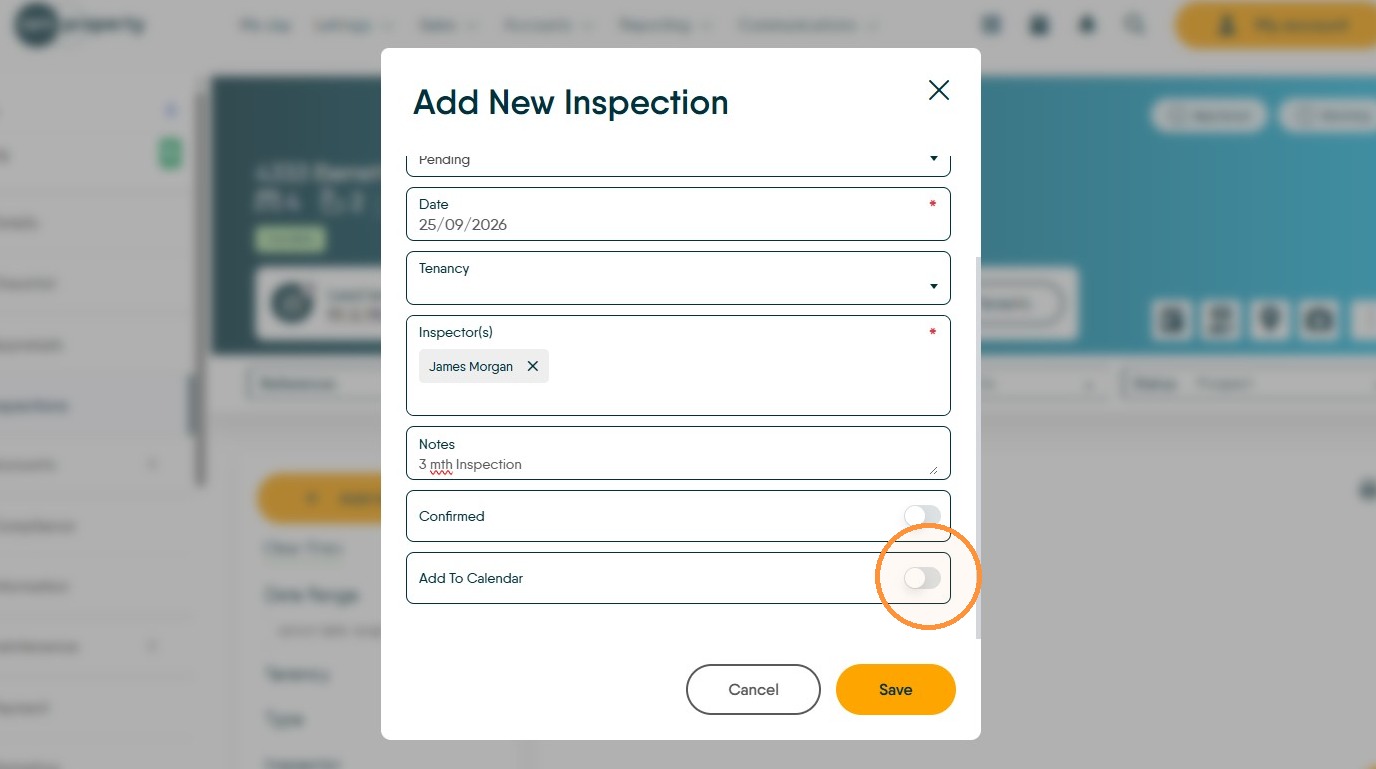
11. If you are not adding the Inspection to the calendar at this point then select "Save" and save the record.
Calendar Appointment
12. Selecting the "Add to Calendar" toggle gives you the option of
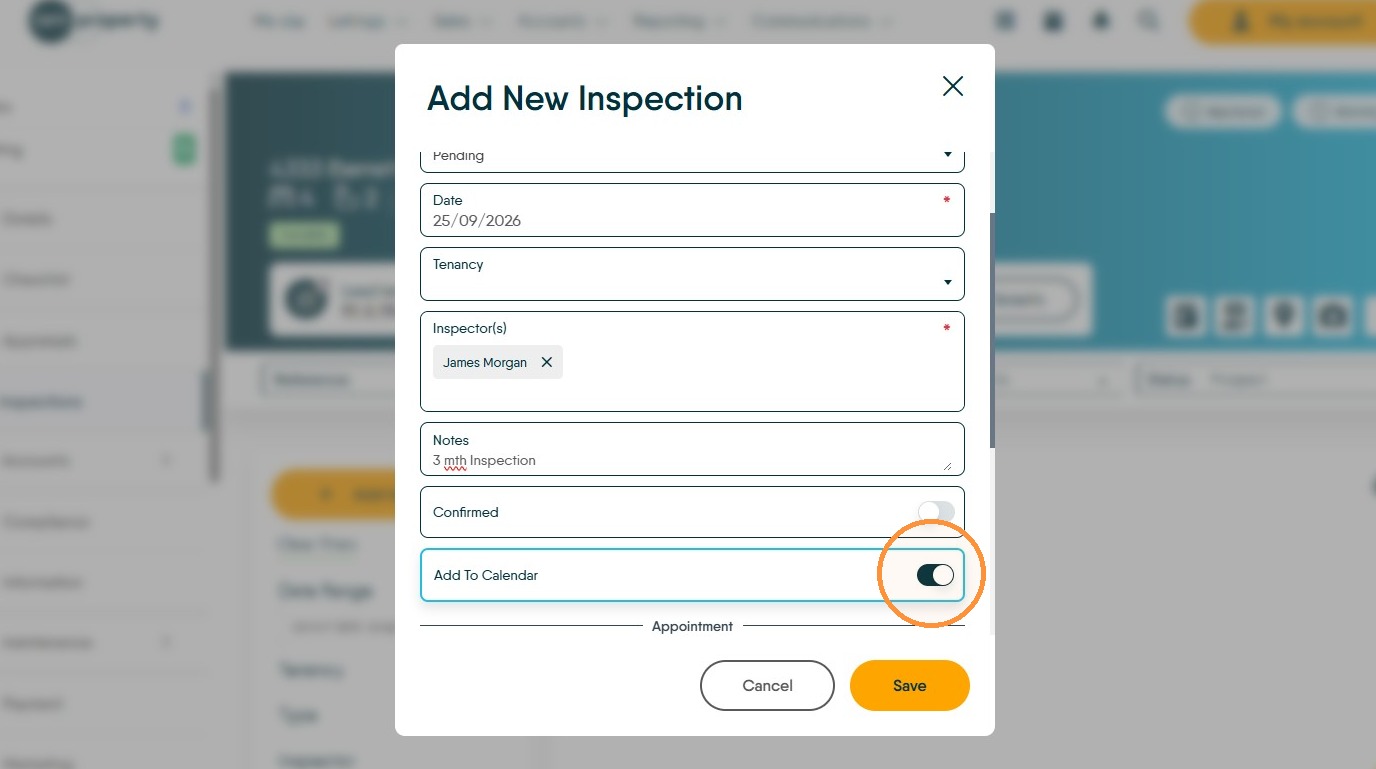
13. The date for the appointment is the date that was set earlier in the process.
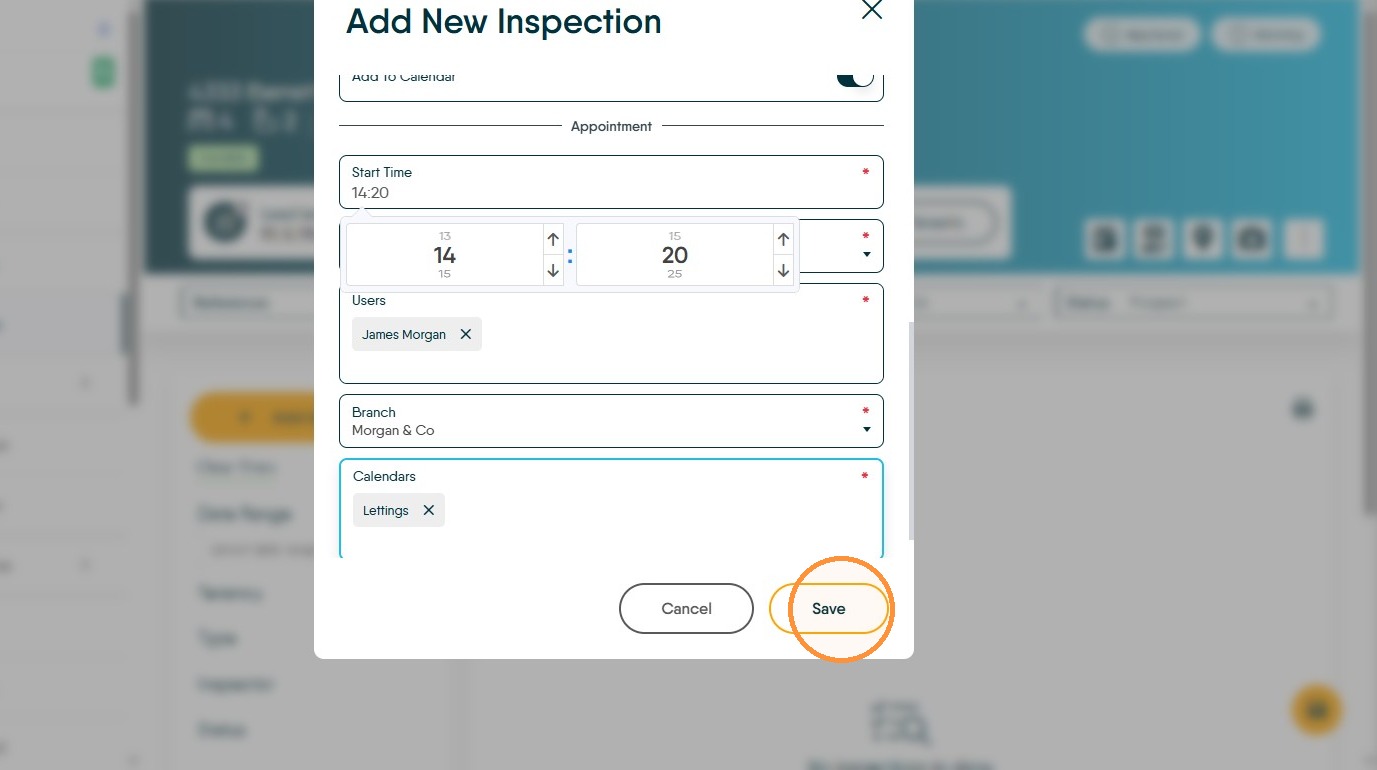
14. Click the "Start Time" field and set the time for the appointment
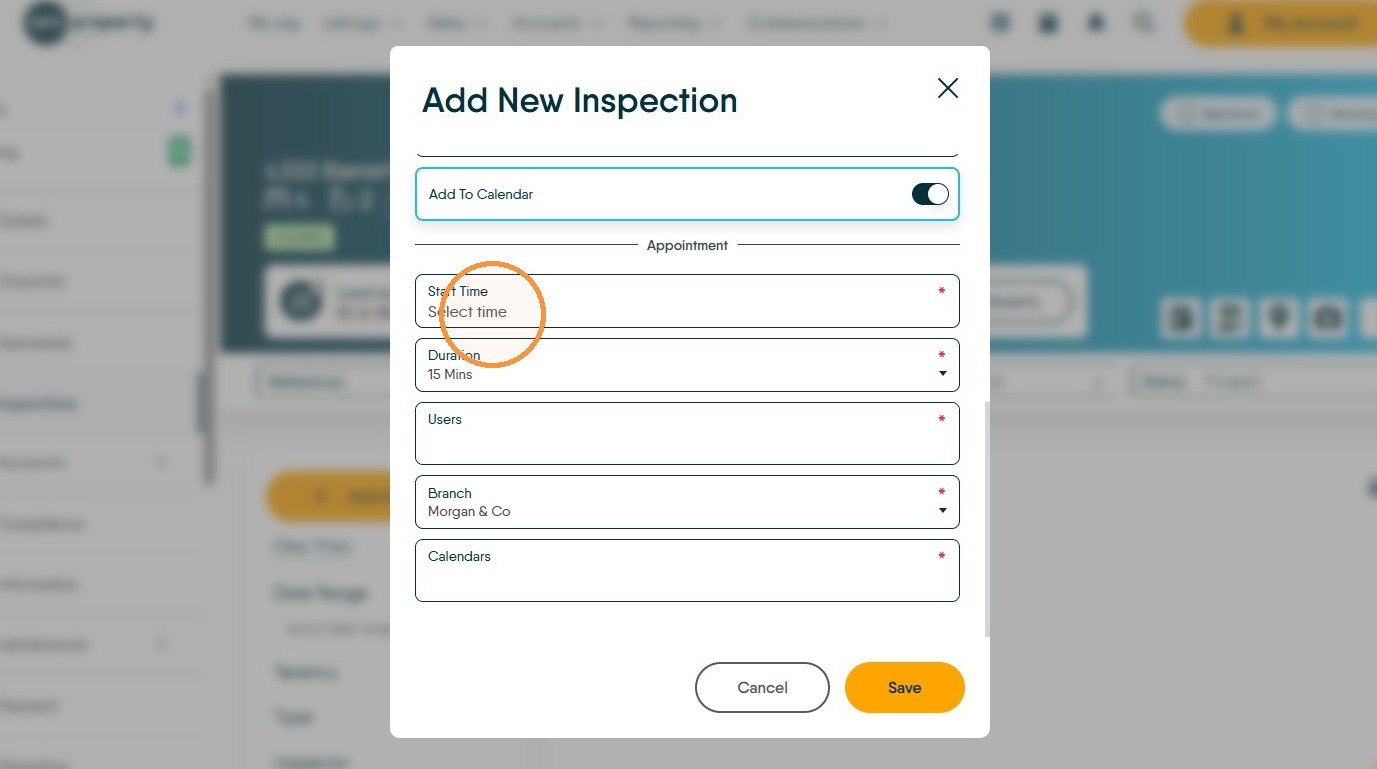
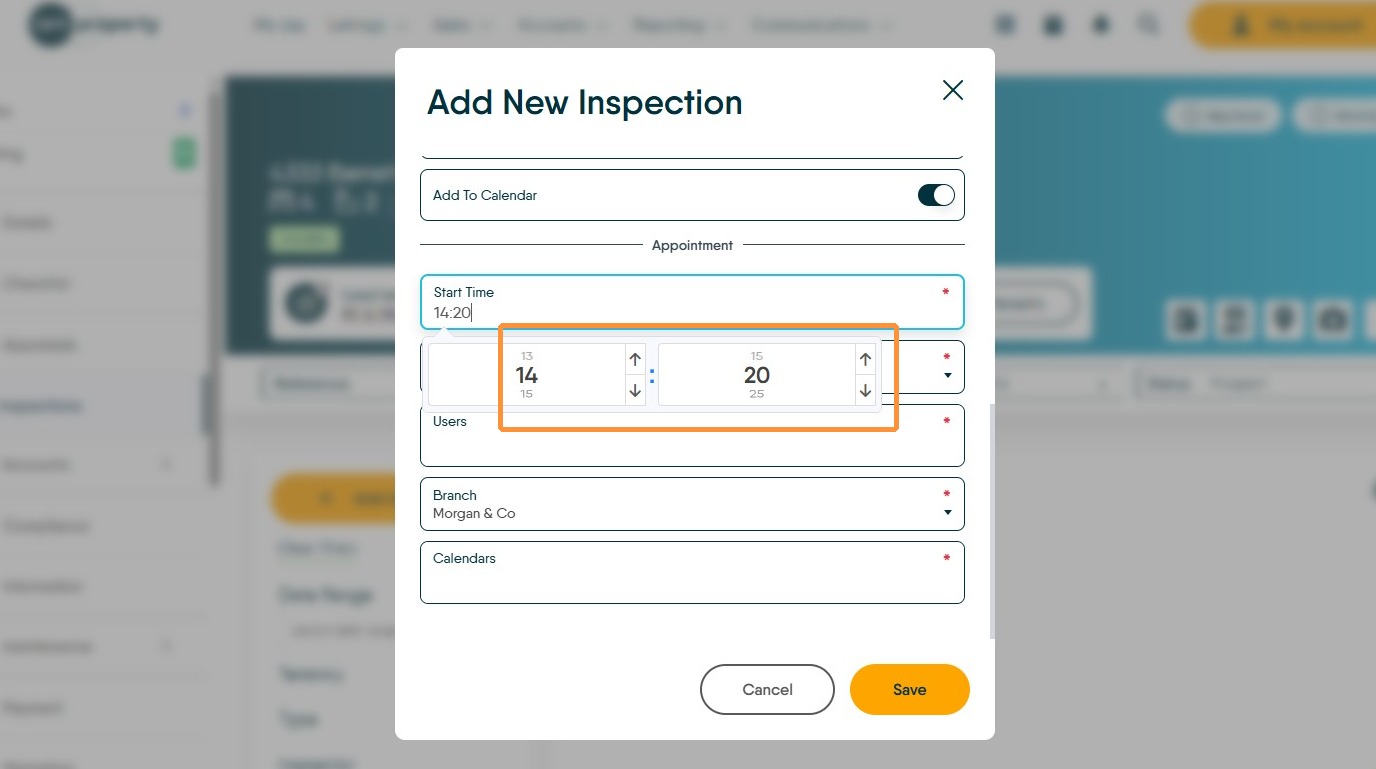
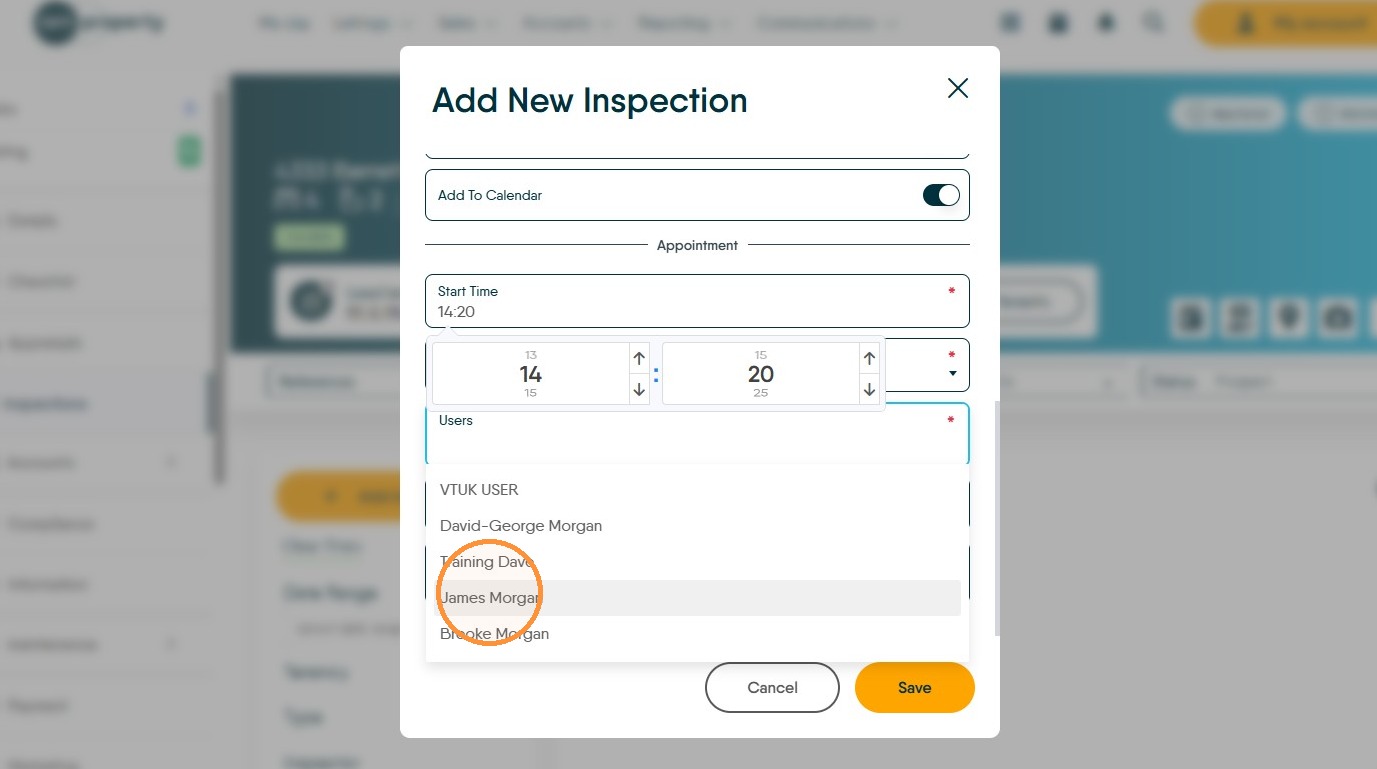
15. In "Users" select the actual person conducting the appointment.
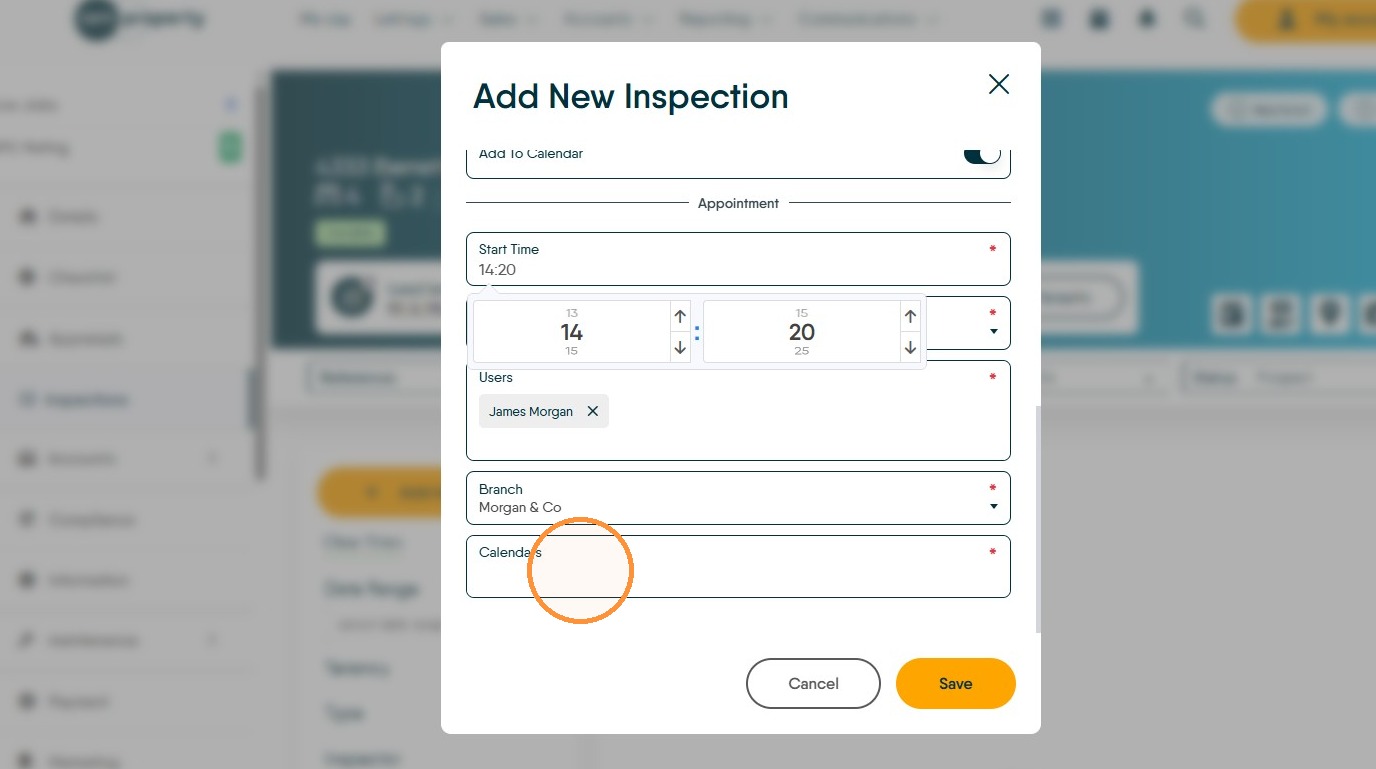
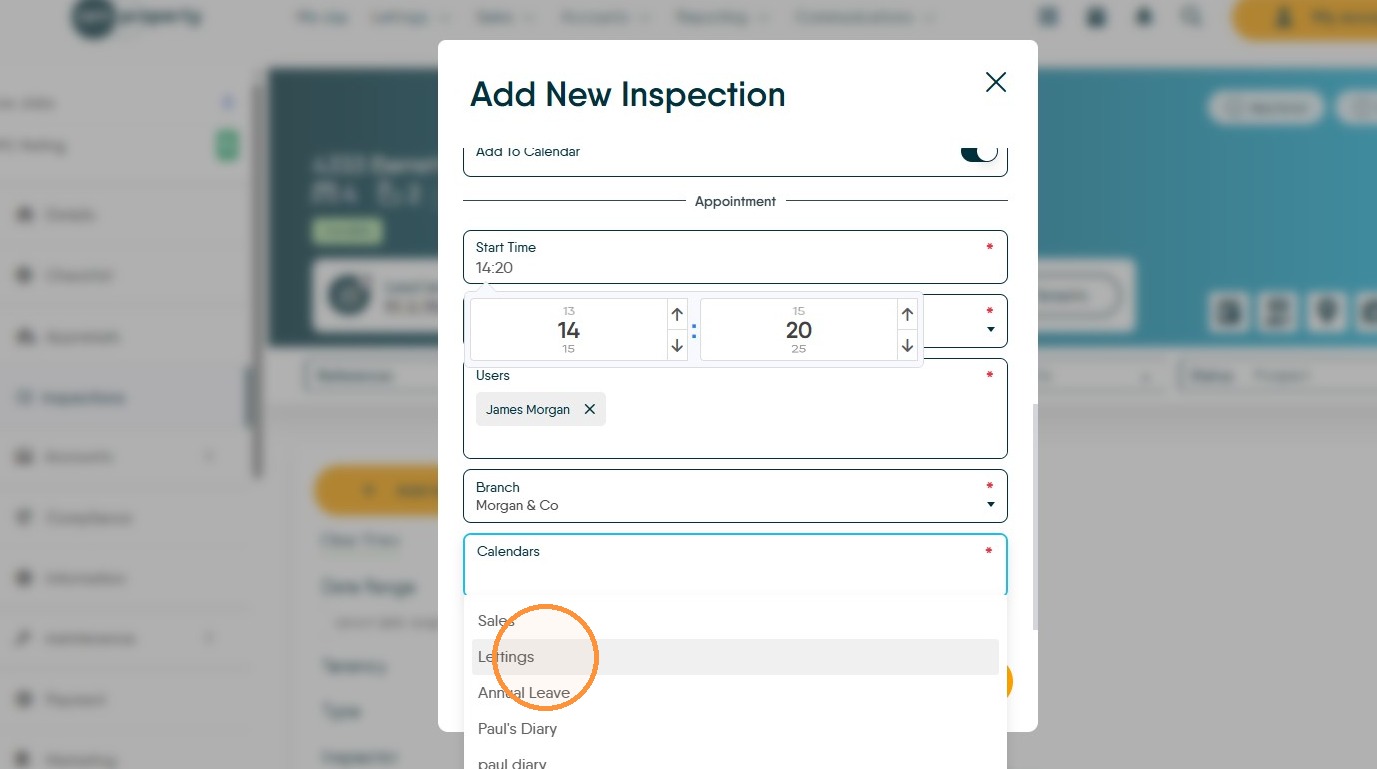
16. Click the "Calendar" field and select the Calendar you want to add the appointment to, this would normally be the 'Lettings' calendar.
Save Inspection
17. Click "Save"