This guide simplifies the process of creating a property inspection appointment within a CRM system. It provides a step-by-step approach that ensures even those unfamiliar with the system can easily navigate and complete the task. By following these instructions, users can streamline their workflow, saving time and reducing errors in scheduling inspections. Overall, it's a valuable resource for enhancing productivity in property-related tasks.
1. Navigate to https://crm.iamproperty.com/InspectionsV2/Dashboard

2. Click "Add inspection"

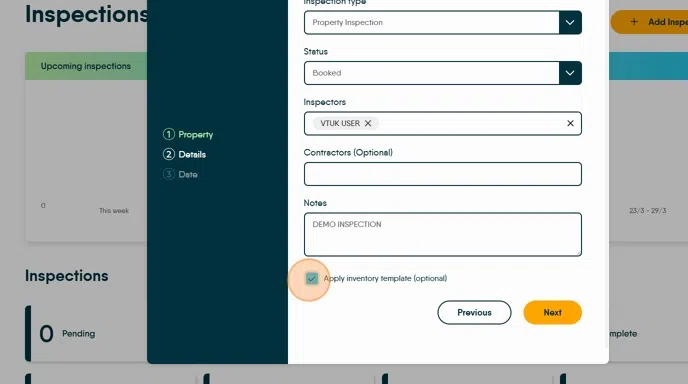
3. Select the "Property Inspection" option and pick the Inspection type from the drop down list.

4. Select the "Status" from the drop down list. This option can be set to automatically show as booked if the property being inspected has a current tenant, via the Inspections configuration.

5. Click "Inspectors" and pick the Inspector from the list of your staff.

6. Click "Contractors" to select a Contractor to accompany you on the visit. This is optional.

7. Click the "Notes" field to add any inspection notes.

8. If you want to add an Inspection Template at this point. Click "Apply inventory template (optional)" and then click the "Select which template you'd like to apply:" and search for the template you want to use.
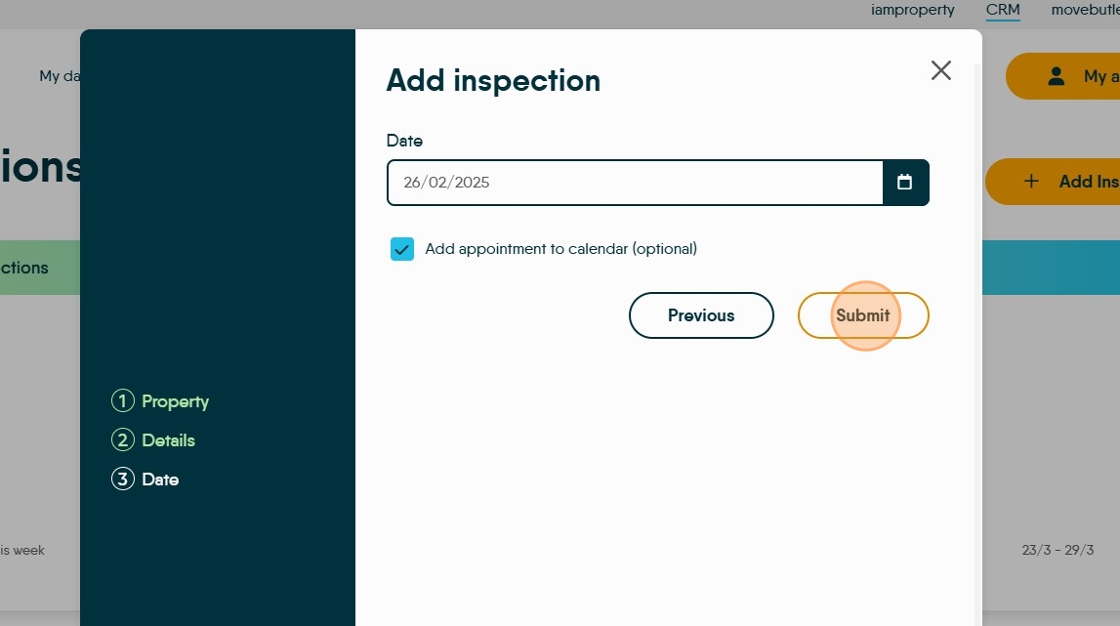
9. Click "Next"

10. Click the "Date" field to add the date of the visit to the planned inspection.
This date could be an indicator of when the inspection is due. If the 'Add appointment to calendar' option is selected then you will be asked to set a time, calendar and Inspector so the Inspection can be planned into the calendar.

11. Click "Submit" if not adding to the calendar
12. If adding to the Calendar . Click the "Start time" field.
You can opt to set the Appointment in the calendar for All Day if required by selecting the All Day option.
Select the Duration from the drop down menu.
Click "Submit"
