This guide is essential for new contractors using the Property Management module, as it provides step-by-step instructions for setting up their passwords and navigating the portal effectively. By following the outlined steps, contractors can efficiently manage tasks, view notifications, and submit invoices, ensuring smooth communication with agents. Utilising this guide will streamline their workflow and enhance their overall experience in property management.
Alert: Alert! A new Contractor user of the Property Management module will need to create their own password when they are sent the initial login email. This guide shows how to do this.
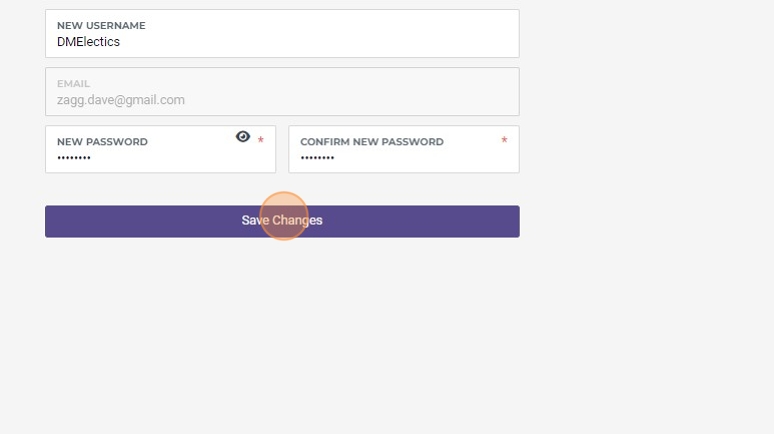
Setting Password
1. Click "Set Password"

2. Click the "New Password" field.

3. Click this button.
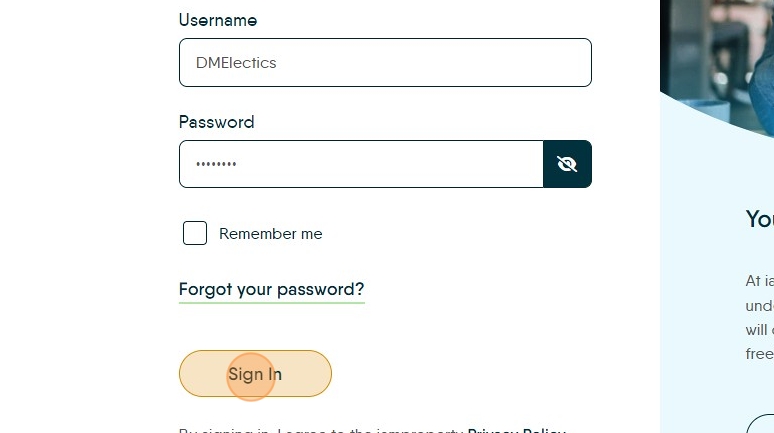
Logging Into the Contractor Portal
4. From this point onwards the Contractor will see this screen when they login. Click "Sign In"
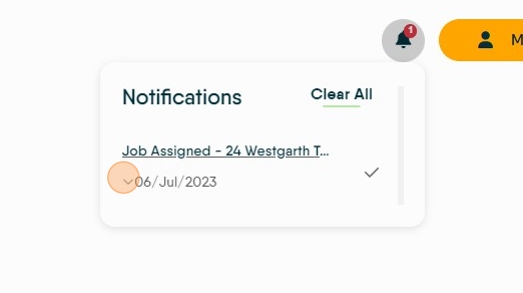
5. Click here. Once logged in click "Notifications" and this will show any notifications re; new jobs, updates and messages from the Agent.
6. Click "Electrical Fault" and this will take the contractor to that specific job.

7. Click "New to Task Manager? Please click here for assistance." This will take the contractor to a downloadable guide.

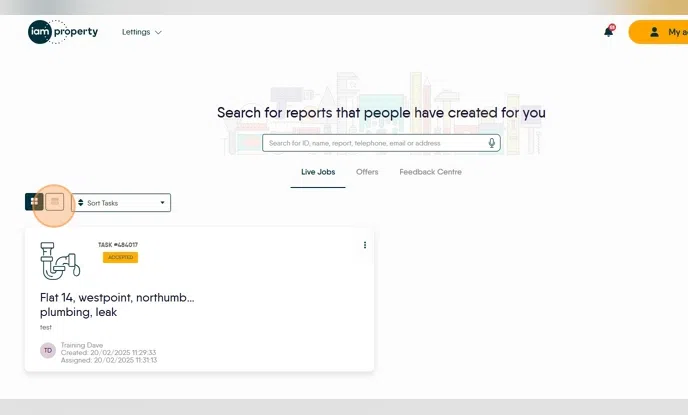
8. Click "Live Jobs" this will take the Contractor to their currently allocated jobs.

9. This screen shows all the currently assigned jobs.

10. There are 2 views available. The tile view or a list view
11. To open the assigned task click onto the property name

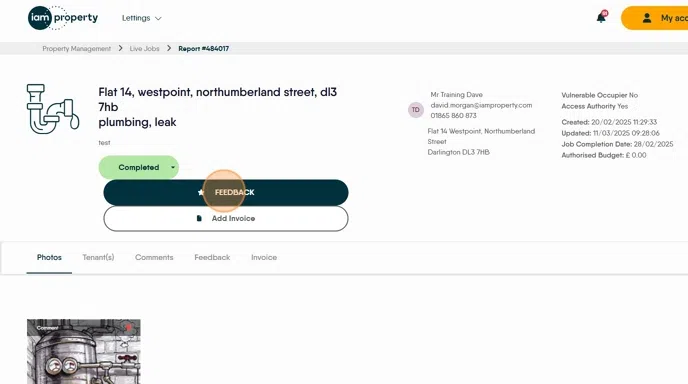
12. Once in the property record you can see a variety of information. All of the contact information for the tenant, plus job description.
Photos tab; Any photos uploaded to the maintenance report

13. Click "Tenant(s)" to view the tenant details.

14. Click "Comments" to access the 'chat' function, this allows a chat between the Agent and the Contractor

15. Click the "Comment......." field. to have a text chat

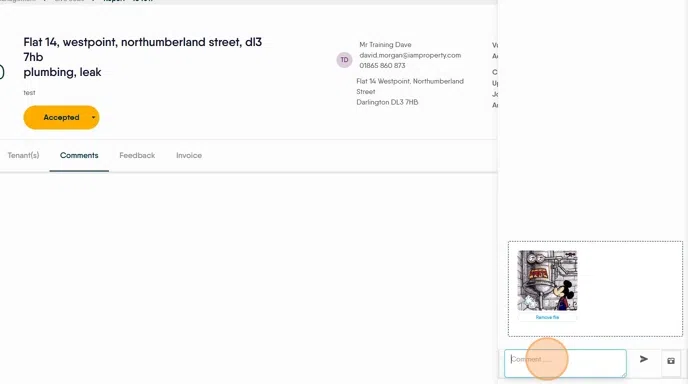
16. Click here to upload a photo
Click "Upload Photo"
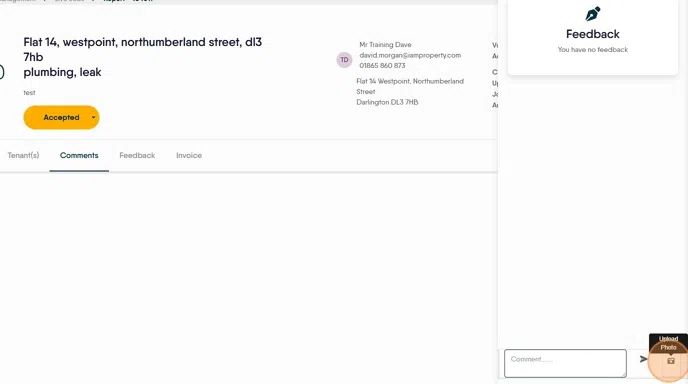
17. Click the "Comment......." field.
Click here.
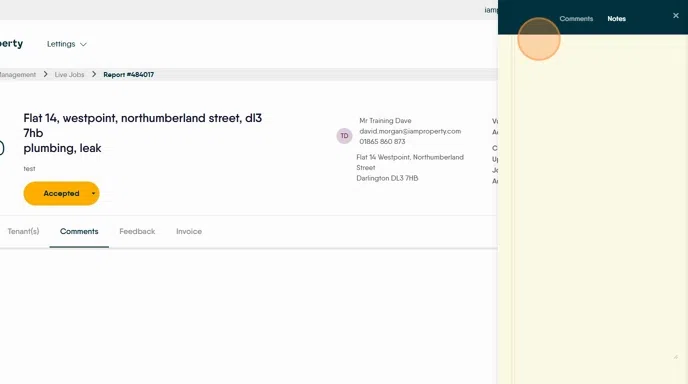
18. Click "Notes". Notes allows personal notes to be left against the job record.

19.
Click this field.
Click "Save"
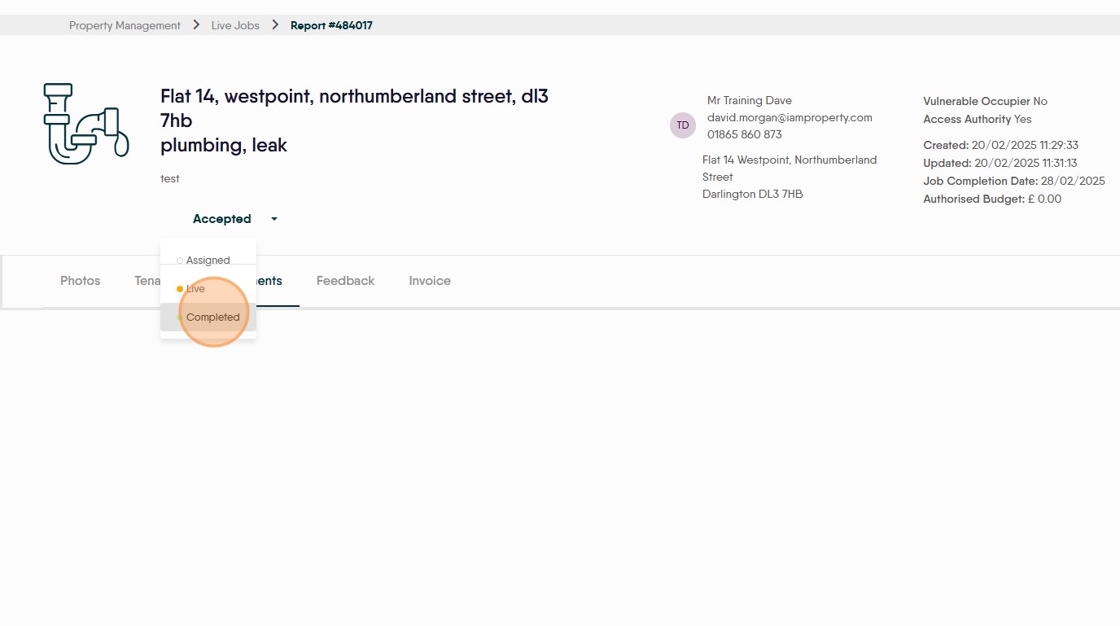
20. Click here to change the job status.

21. Click "Completed" once the job is complete. Once a job is completed it will disappear from the jobs list.
Tip: Tip! Although adding the Invoice and Feedback is optional it is highly advised that Contractors do this as it can help speed up the payment process.
22. This will give options to leave feedback on the the job as well as add the invoice. The job is also added to Jobs Outstanding in the Accounts module.

23. Click "Add Invoice" adding the invoice allows the job to be immediately chargeable to the Landlord.
Click "Add"
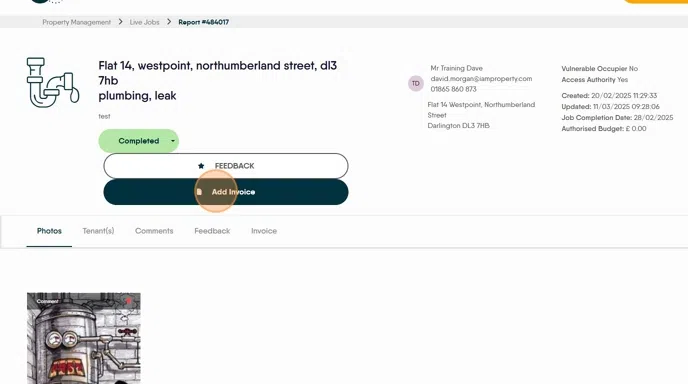
24. Click "FEEDBACK" to leave feedback on the job, both text and images can be added.
Click the "Write a Review......" field.
Click "Submit"
25. Once all the options are completed. Click "Property Management"

26. Click here. to open the filter, this will allow visibility of Completed tasks as well as the ability to search by different terms.

27. Click "Offers" is where any jobs that are offered will show.
Offered jobs are those that the Agent has offered out to (possibly) 5 other contractors and is requesting a Quote.
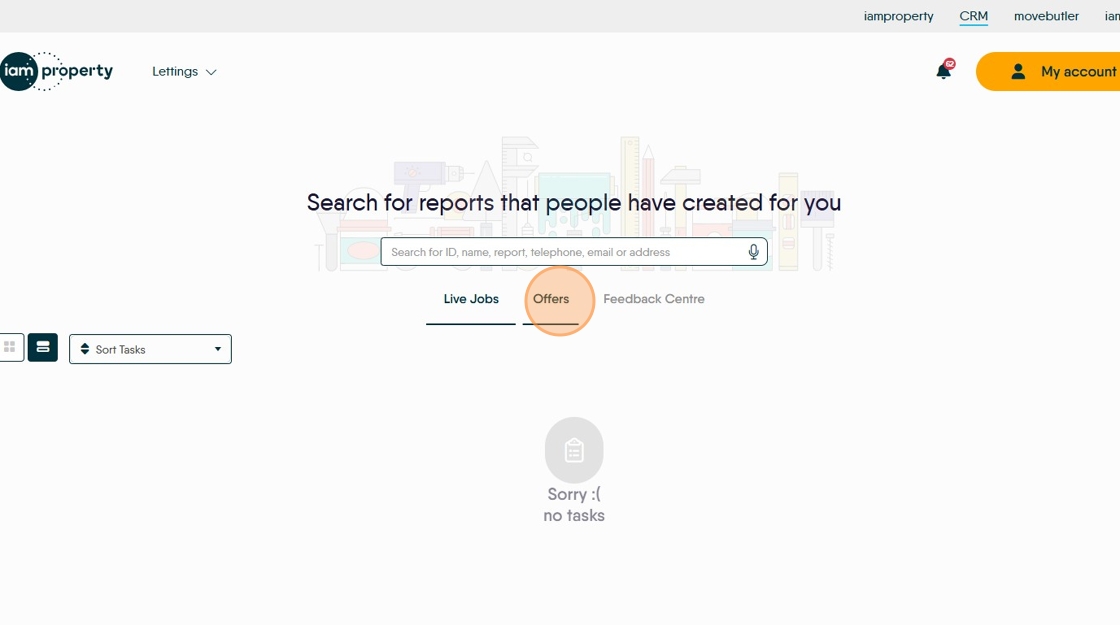
28. Click "Feedback Centre" to see any feedback left about the contractor by clients.
