As of August 2026. The Matching process in CRM has been updated, this guide shows the updated process. This guide demonstrates how to effectively match property listings to potential applicants within the CRM. Learn how to update matching criteria, manage applicant preferences, and send automated notifications to interested parties.
Tip: Tip! There are some basic things that NEED to be setup for matching to work correctly.
Applicant
The applicant record must be
- Active
- GDPR Must have Marketing ON
- Status - any status that is NOT Inactive or Archived
-
Minimum of
- Price range
- Bedrooms
Property
The property needs to have/be (at minimum)
- Active (Status)
- Price
- Bedrooms/Bathrooms
- Property Type and Style set
Property Setup
1. To make sure a property is properly setup so a good match is made.
Navigate to the Marketing section of a property to match.
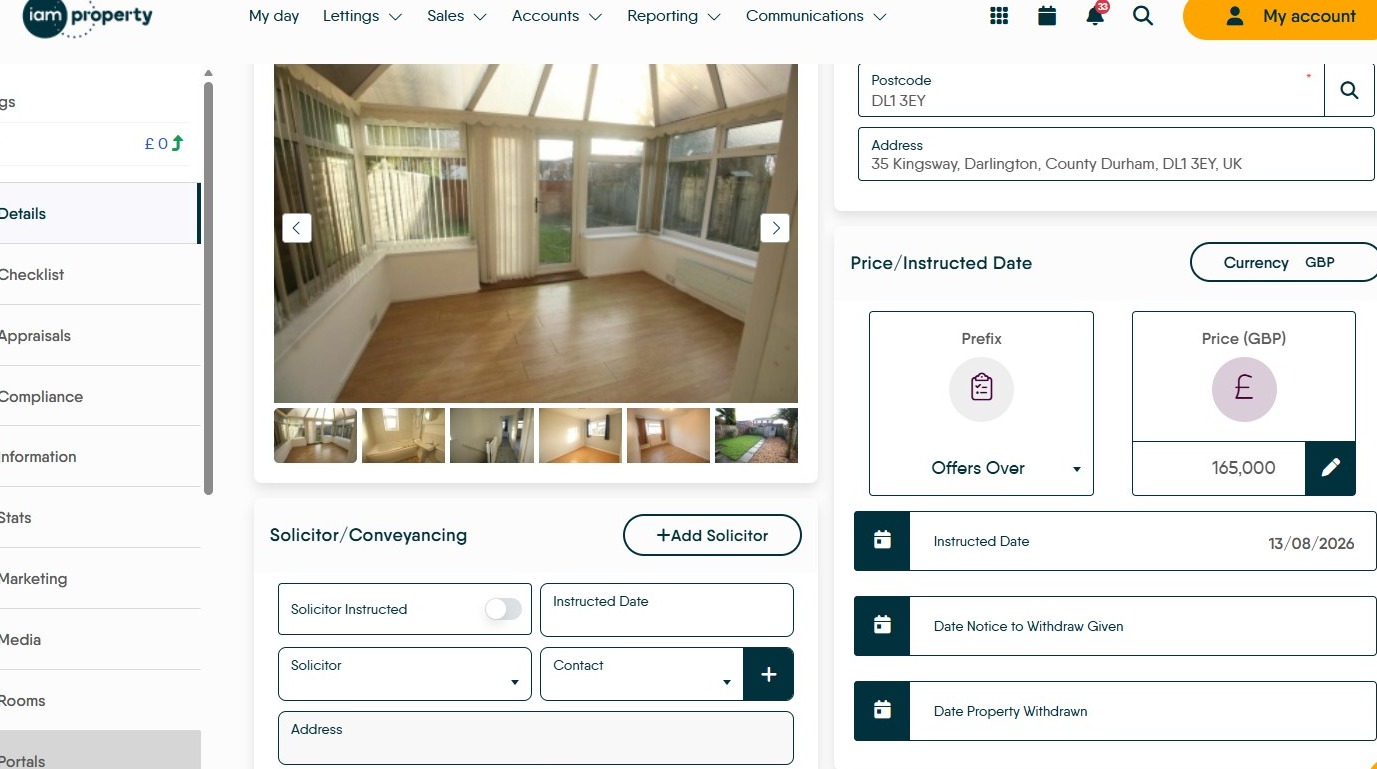
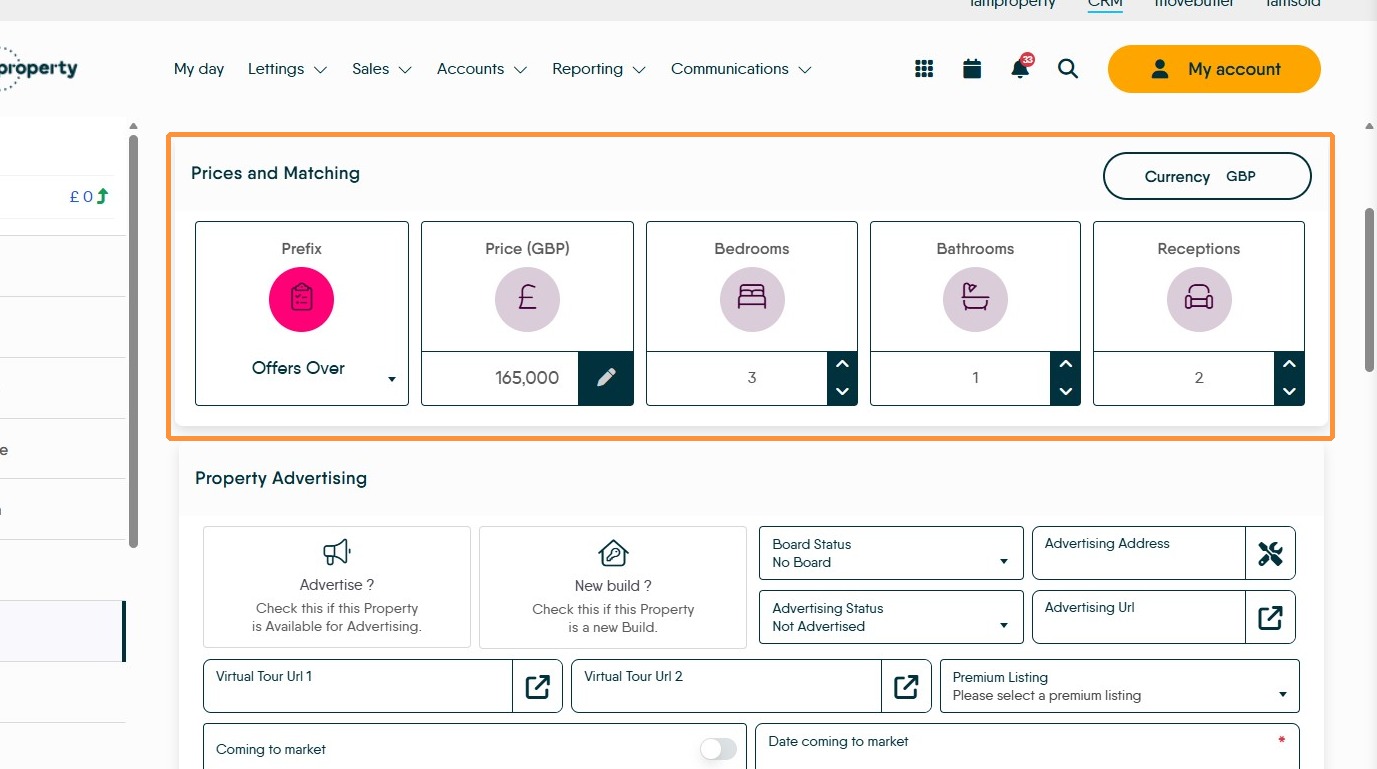
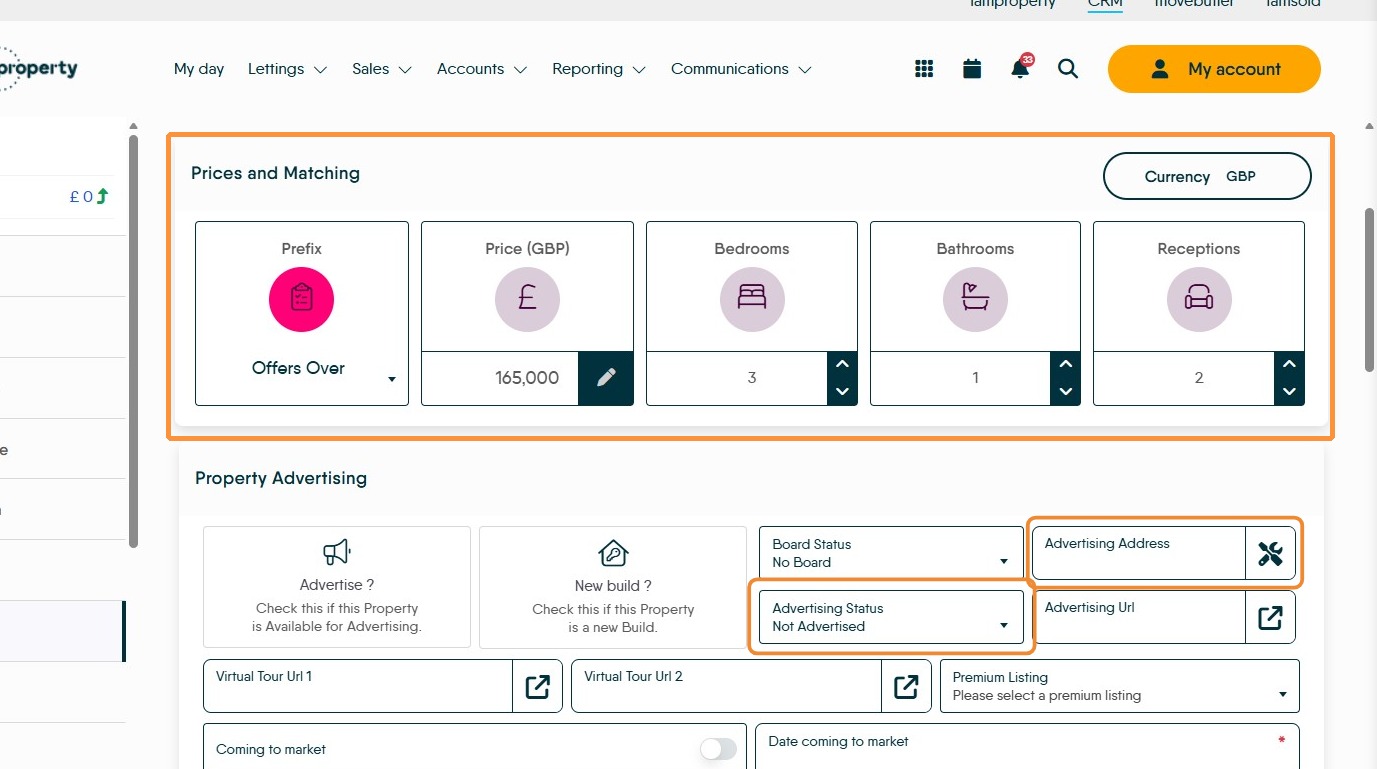
2. In "Prices and Matching" in the Marketing section. Make sure all these options are set correctly
While non of these options are required, they are best practice when creating a matchable property as price and bedrooms are a key initial match criteria.
Make sure that the 'Advertising Address' is created and the that the 'Advertising Status' are also sections that should be completed for matching.
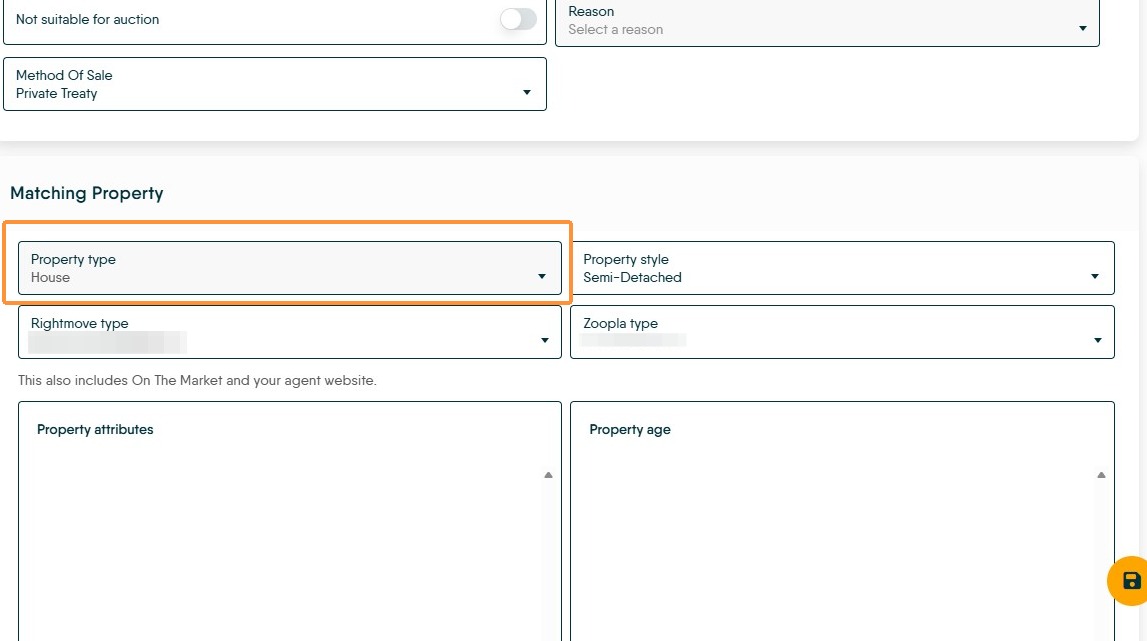
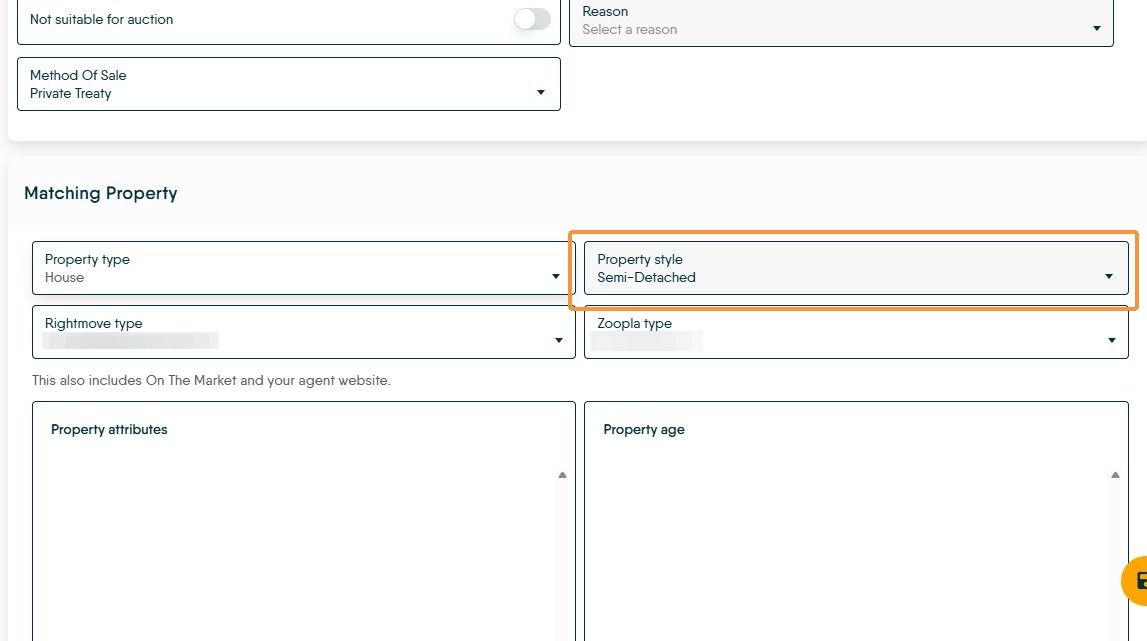
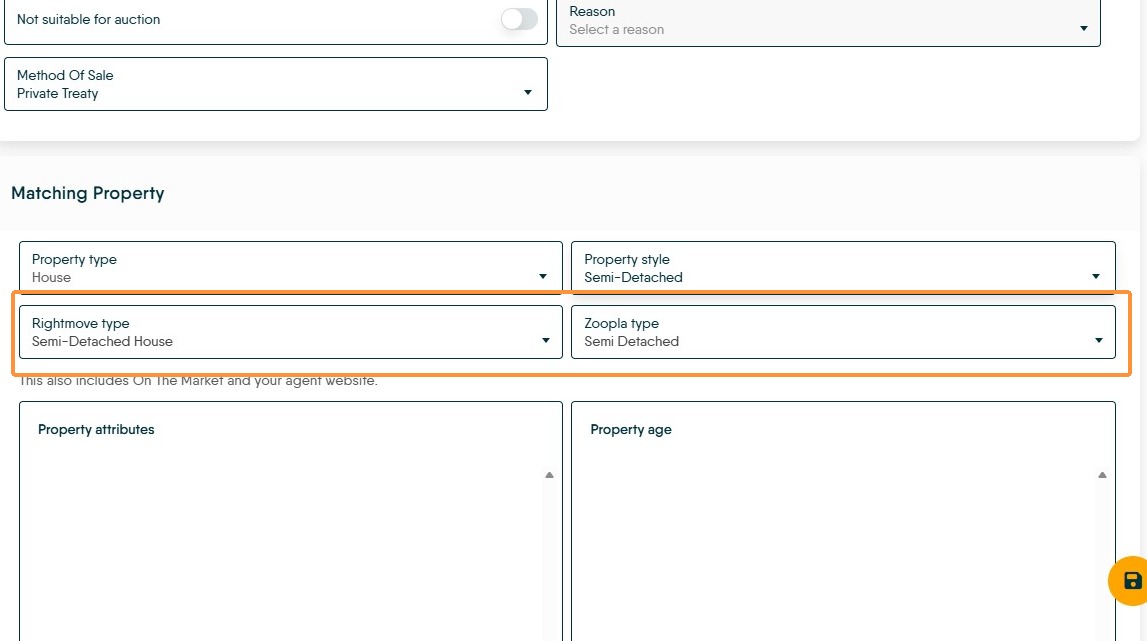
3. Matching Property. Set the 'Property type' and 'Property Style' this will complete the 'Rightmove...' and 'Zoopla...' field automatically.
Scroll down the screen and review the Property attributes, Property age, Custom style, and Other criteria fields. If there is data in these screens, you can select items to provide a further filtered result and gain an extremely accurate match. N.B. this data is used as a secondary sort, selecting the 'Additional Filters' option
The options are identical in both records (Applicant and Property) and need to be selected in both to match
Applicant Matching to Properties
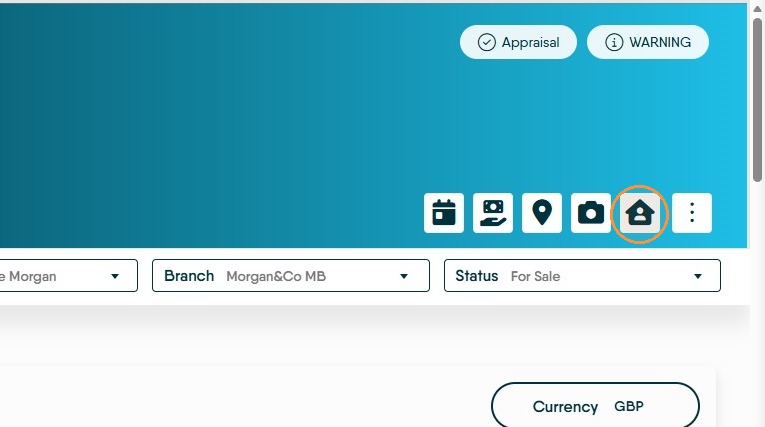
4. From a Property record. Click the Match icon
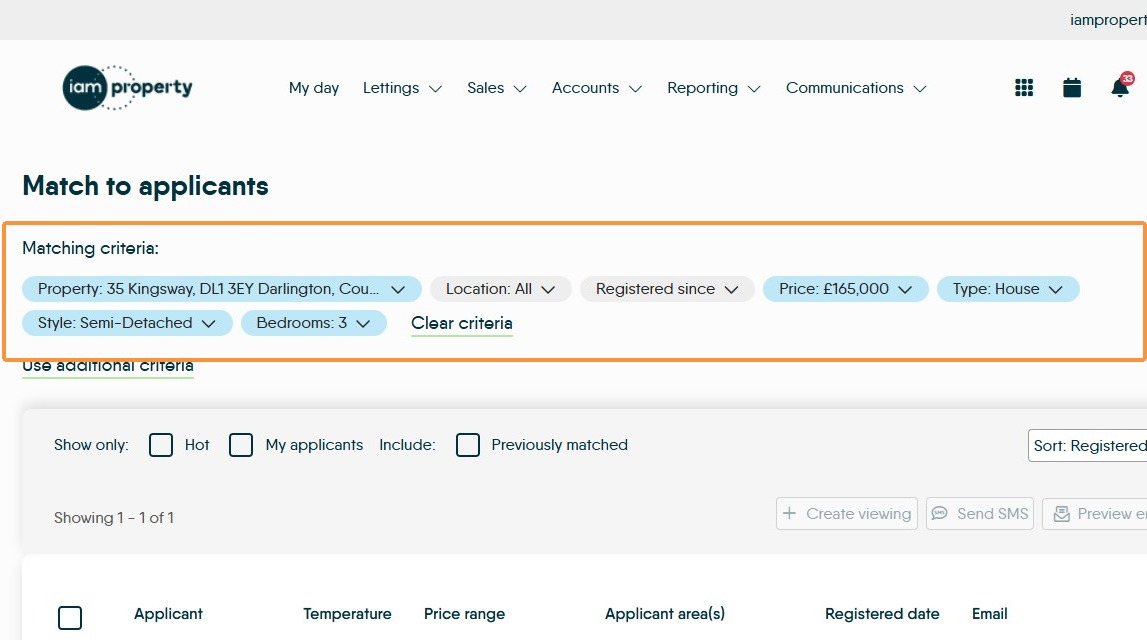
5. This will show a match to all applicants that have the correct criteria. The basic match is based on (info set on property record);
- Property Location
- Price of property
- Property Type
- Property Style
- Bedrooms Required
Versus (info in Applicant record)
- Location chosen by Applicant (if any)
- optional - Registered Since (date applicant added to CRM)
- Price range of applicant
- House Type
- House Style
- Bedrooms
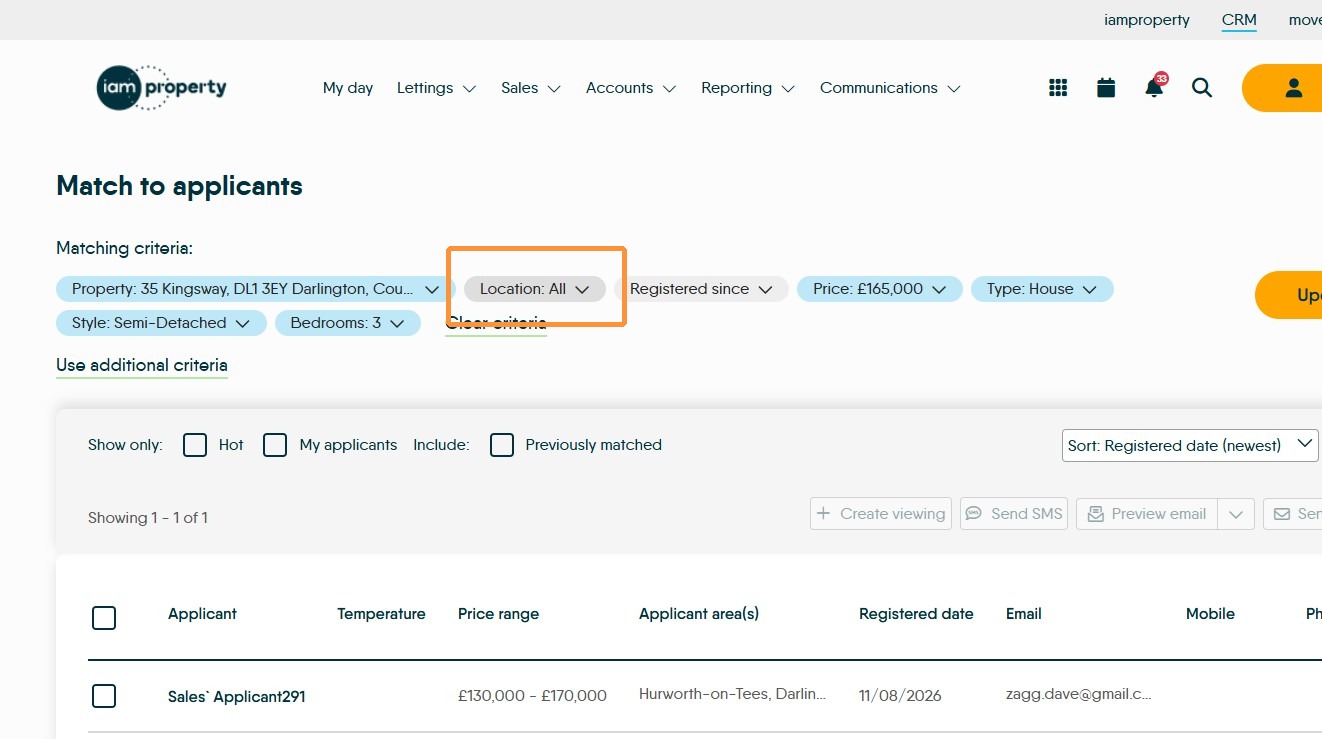
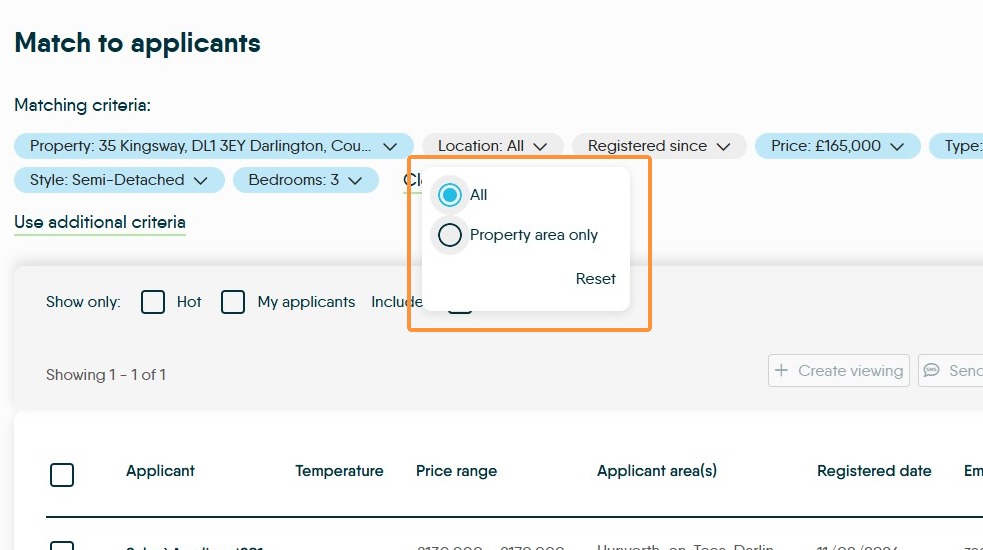
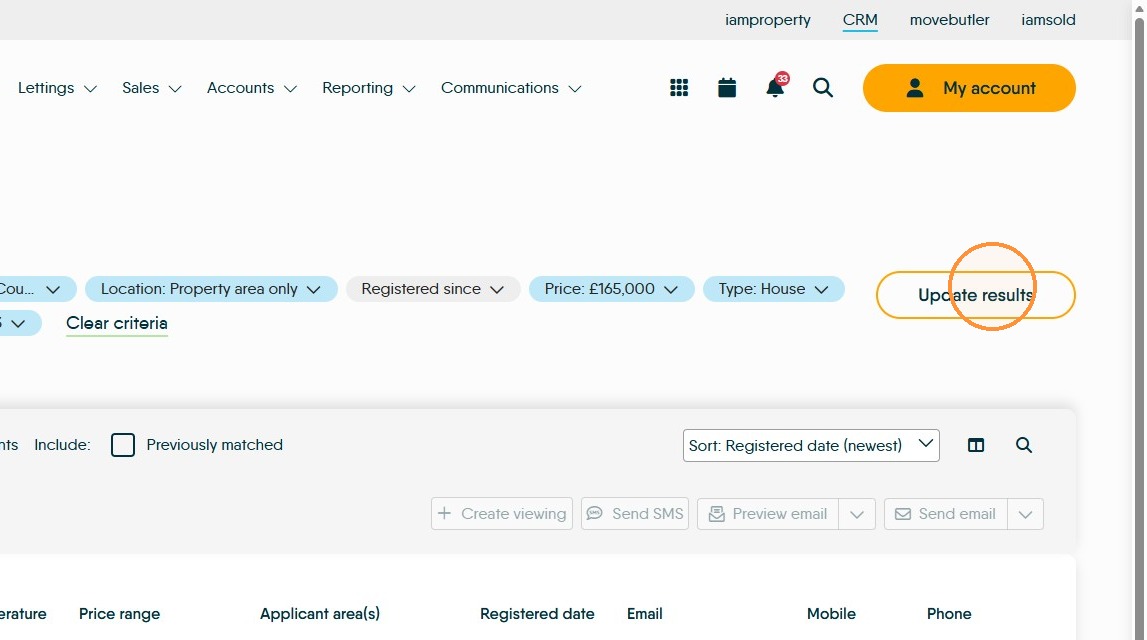
6. The Location filter, this allows the area specified by the applicant to be used, or not used. It is an option in configuration and can be enabled as a default ON so the customers area choice is used for the match, or OFF so the customers default area choice is not used as part of the match.
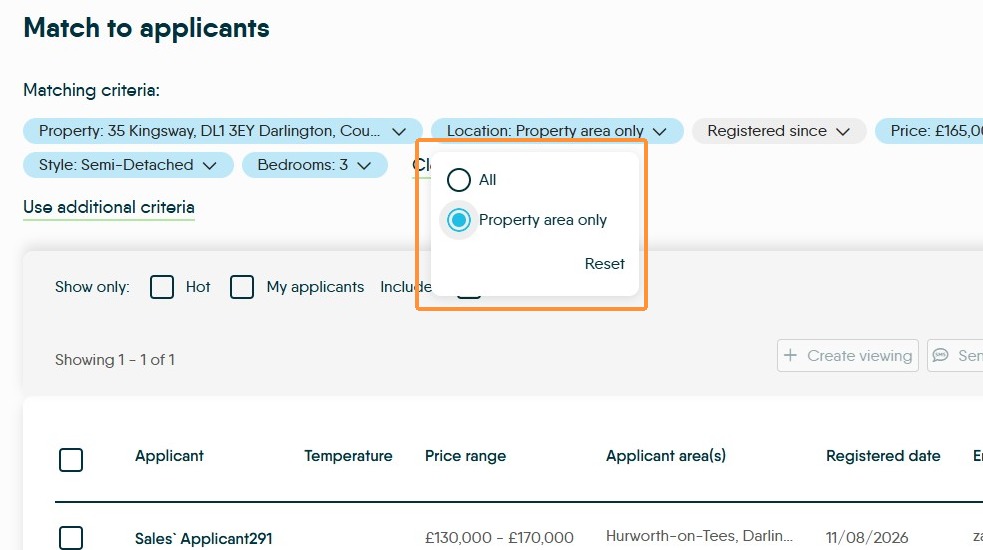
Click "Property area only"
Close the Location filter with Property area only selected
Click 'Update Results'
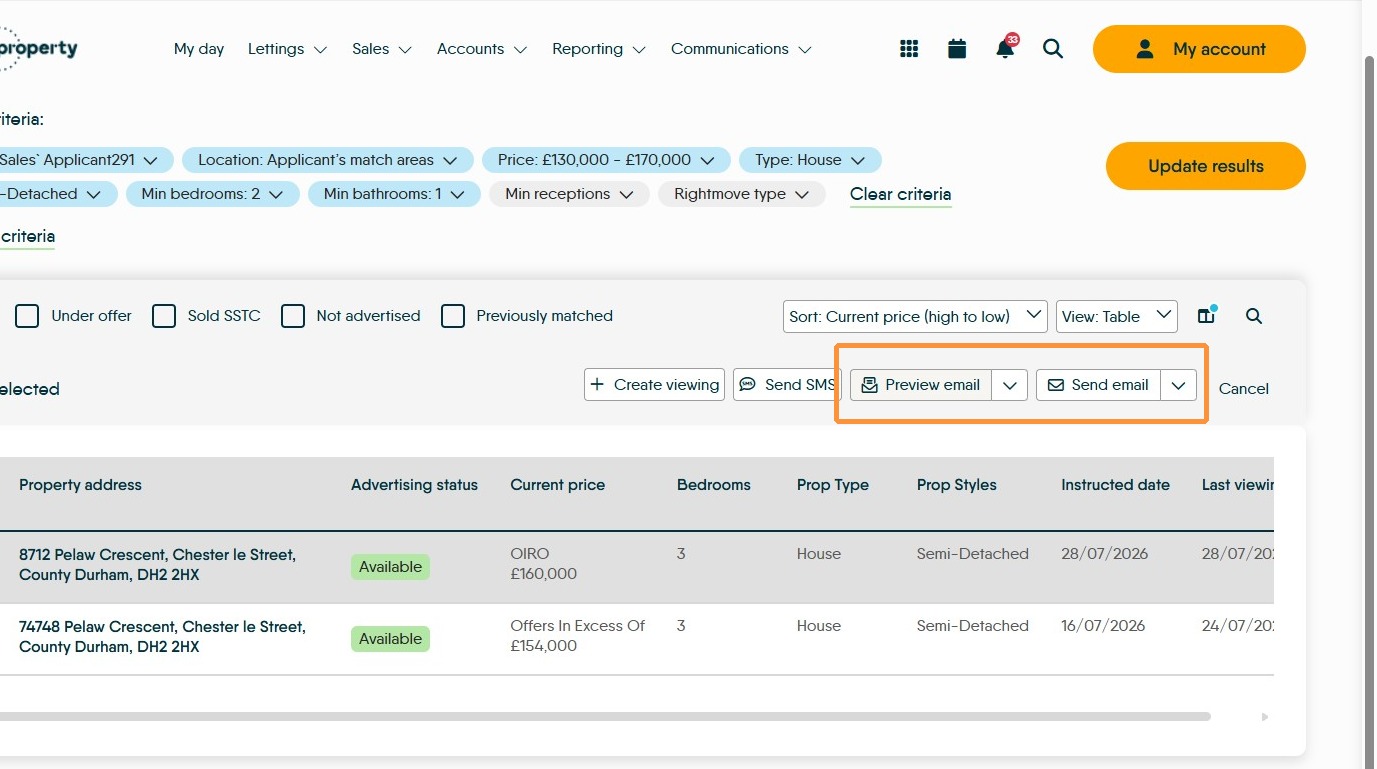
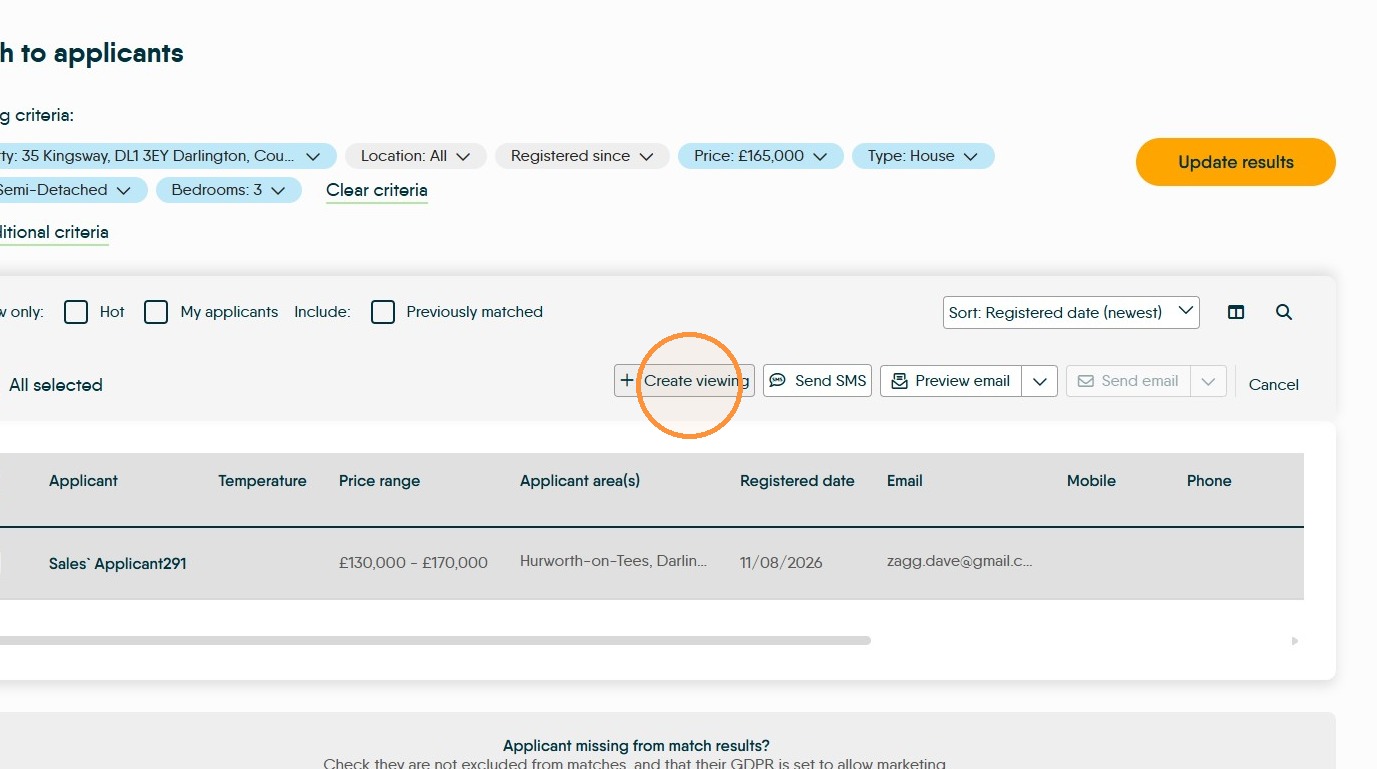
7. Once a match has been made, there are various options.
- Create a Viewing
- Send the Property Details by Email (tracked or not tracked)
- Send details by SMS
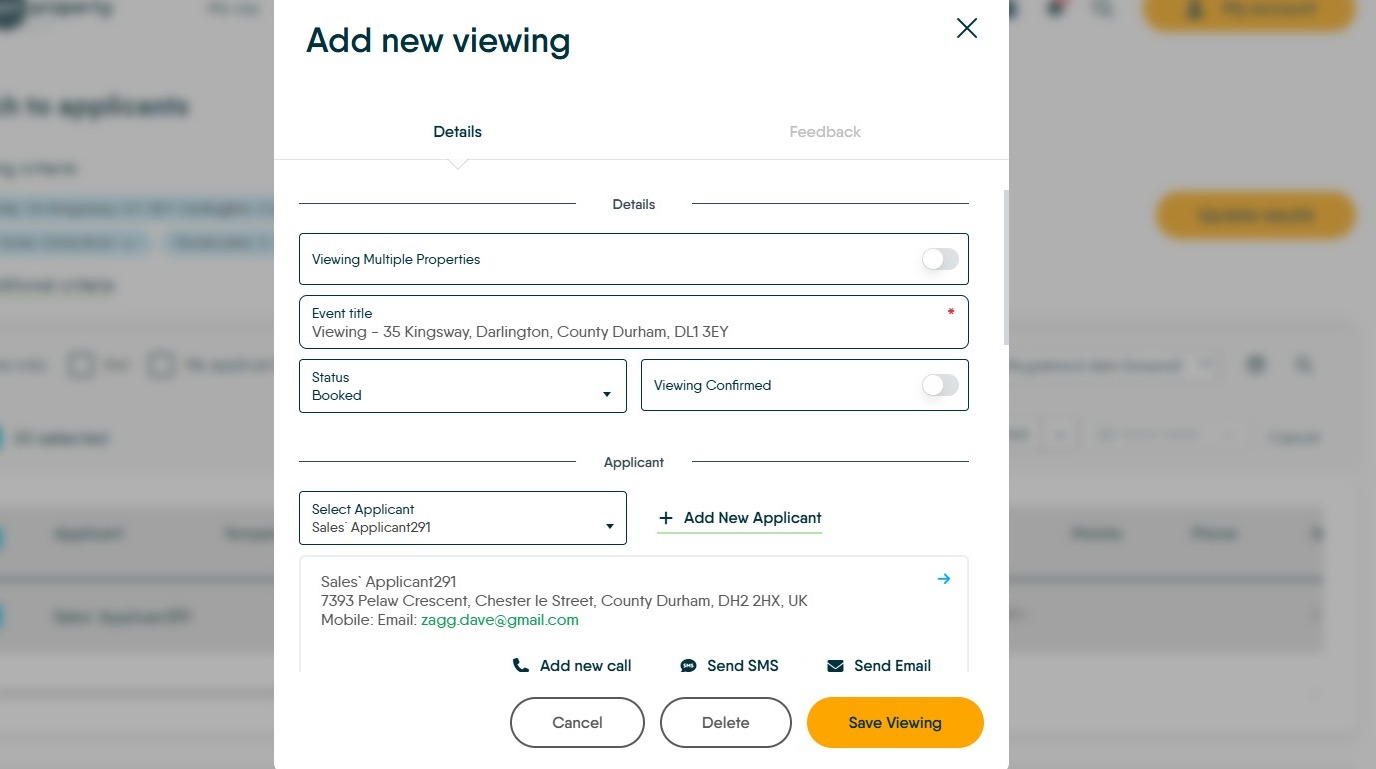
8. Click "Create viewing"
Complete all the detail required to book a viewing, property/vendor and applicant details will already be showing.
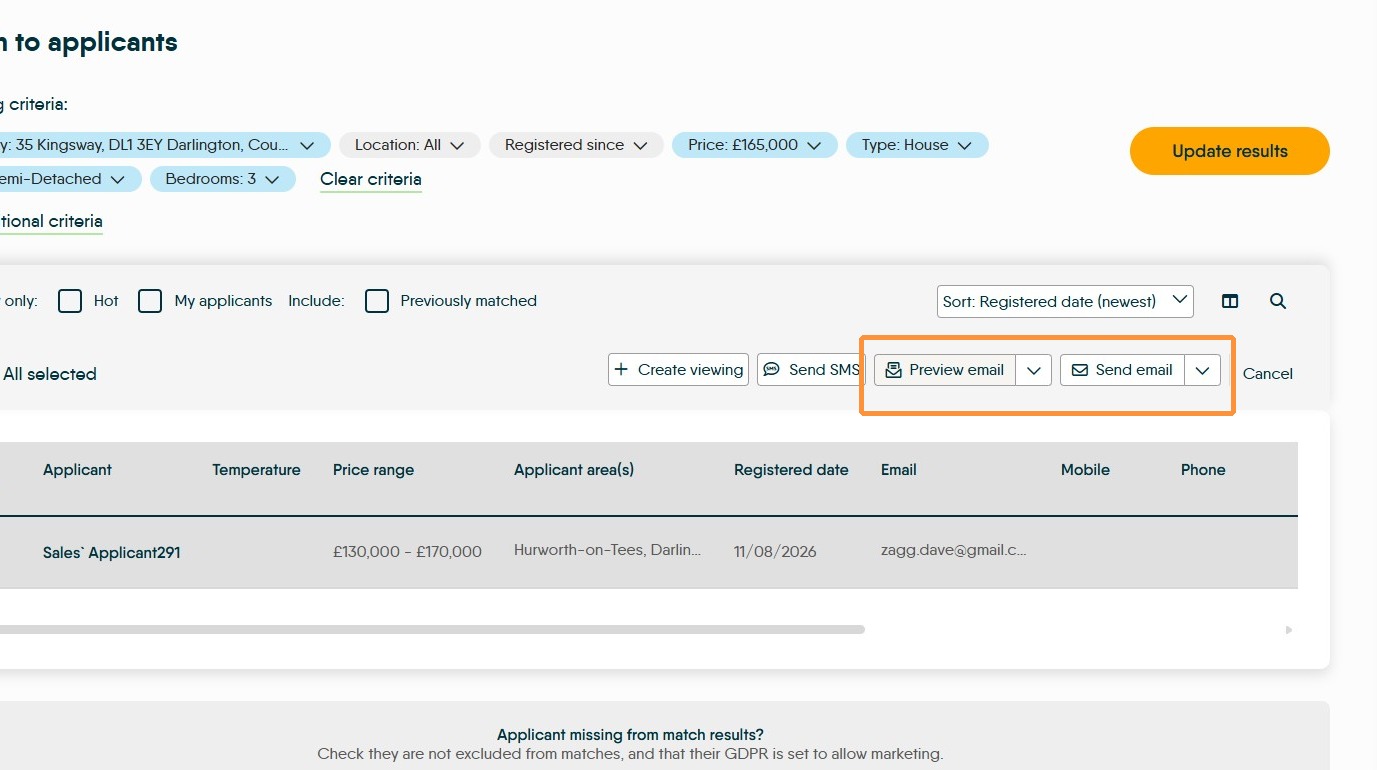
9. Click either "Preview email" to send a message containing the property detail in a template. Reviewing the message before sending it.
Or "Send Email" will send an email (tracked if required) without you previewing first.
Applicant Criteria
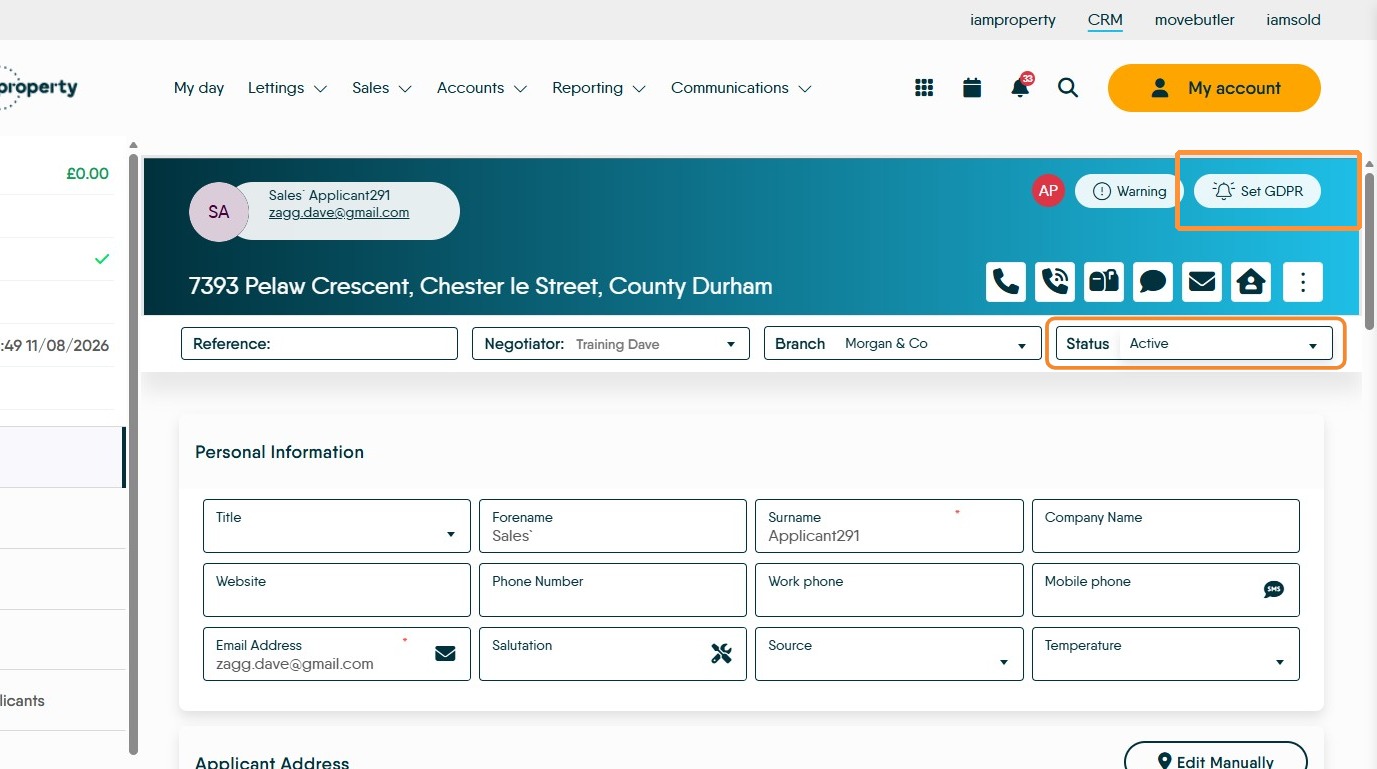
10. Applicant Criteria is set on the "Details" screen of an Applicant record. There are some basic settings that must be made to make an applicant record able to match with property records.
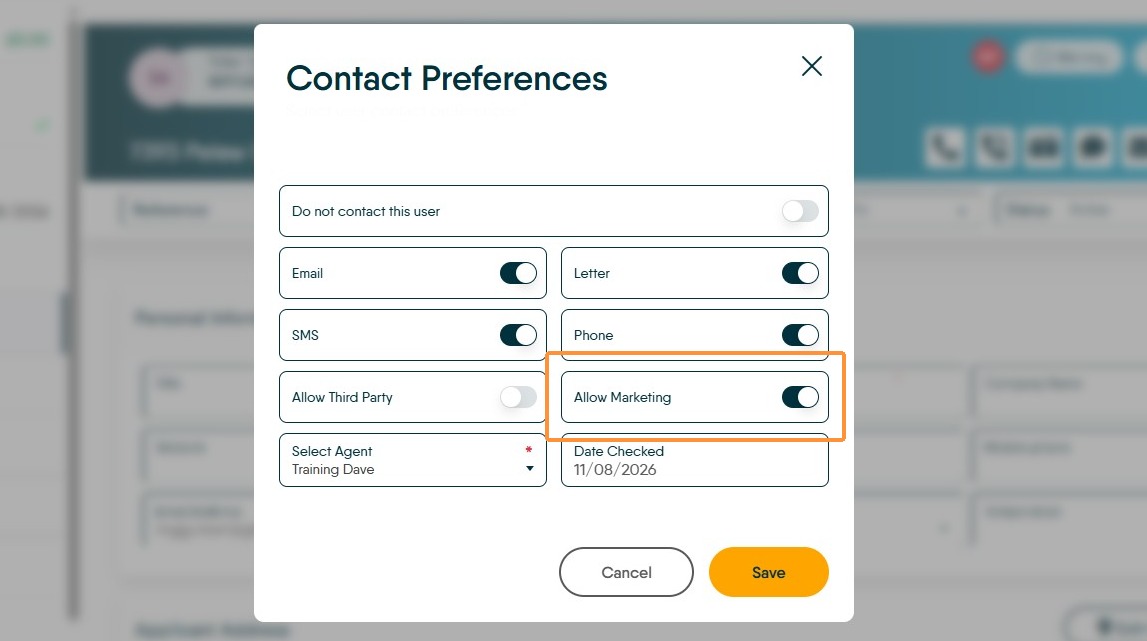
Click "Set GDPR"
Ensure the "Allow Marketing" is selected.
Click "Save"
Make sure that the "Status" on the Applicant screen is set to Active
It is good practice to enable these settings as default through all of your records from the 'Configuration' menu.
11. On the "Details" screen of an Applicant record scroll down the screen to 'Applicant Criteria'
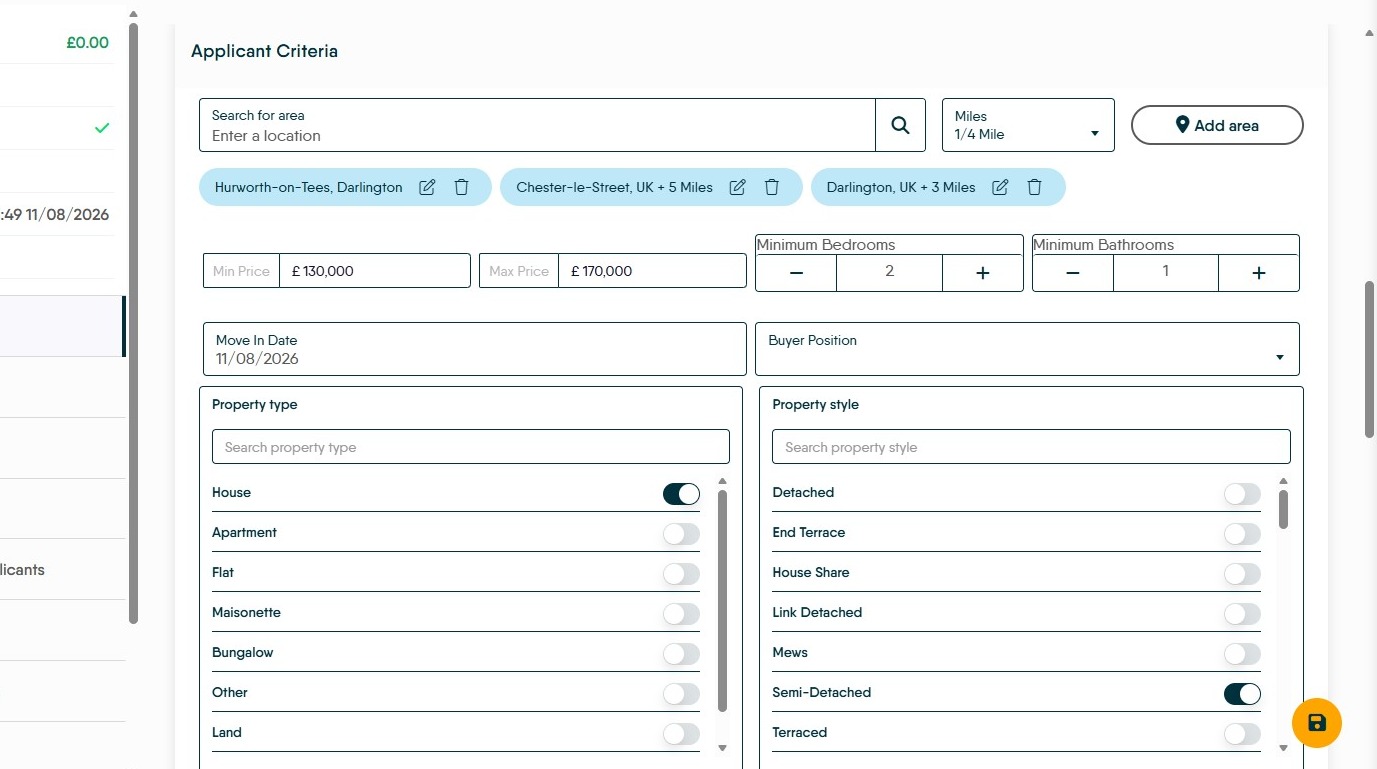
12. Click the "Search for area" field. This allows the applicant to specify an area where they are looking for a property. This can be a point of interest (school, church etc), a street, postcode (part or full), town.
Open the Miles drop-down, select a radius around the search area set, from 1/4 mile to 40 miles.
Once area and radius is set click "Add area" the detail will show on screen. You can add as many areas as required, these areas can be very specific e.g. a street or a school or just a particular town.
We can then add in the min/max price range, minimum number of bedrooms and bathrooms required. It is best practice to add this information, if no price is set you limit your matches to properties advertised at £0 and if the lower number is £0 then you will get a lot of irrelevant matches.
Move down and set the Property Type and Property Style if required. These are not important, however can help create a very accurate match if used in conjunction with the same option in a property record. There are further options that can be set if required to help with accurate matching.
The options are identical in both records (Applicant and Property) and need to be selected in both to match
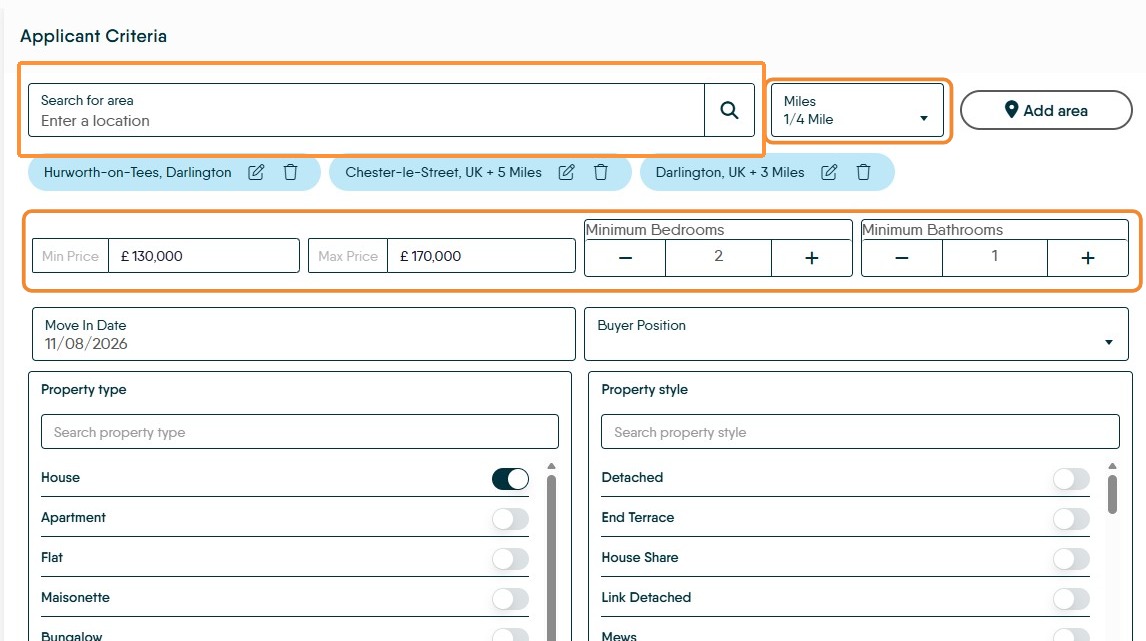
Tip: Tip! For Information - the area selected is the centre of a square shape, although it can be edited it will always be square/rectangular.
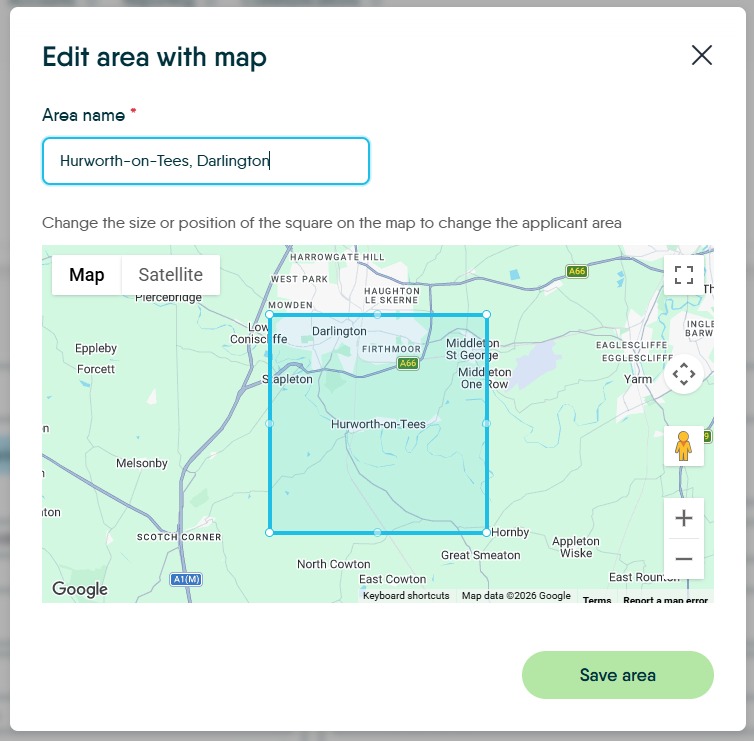
Alert: Alert! No applicant is looking to spend £0 on a property, if they have no lower limit please create one. It will make your matches more accurate and better for your client.
The same applies for Bedrooms and bathrooms, for bedrooms this is the minimum number of bedrooms the match will show anything with more than the number you add and never less.
13. To match your applicant against the properties you have on your CRM click the 'Match' icon.
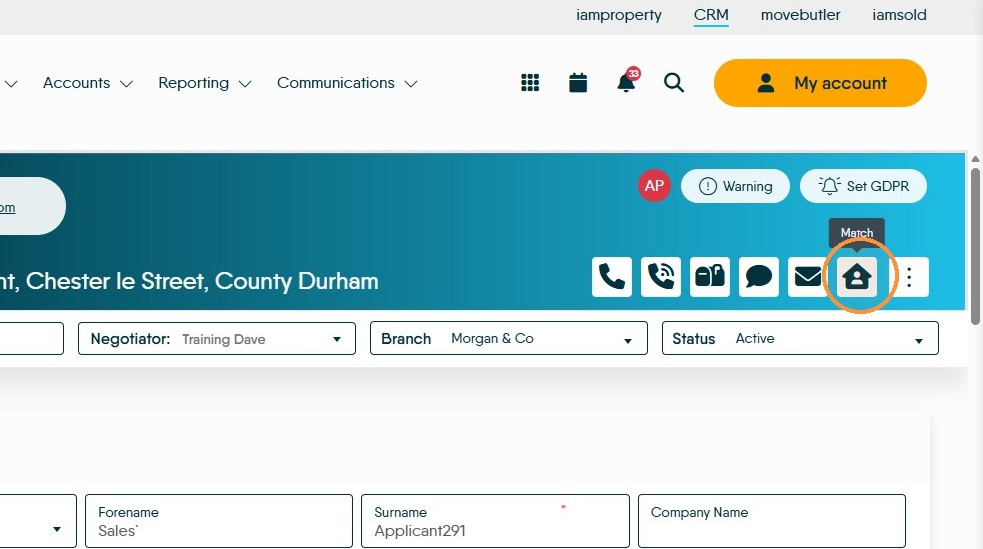
Property Matching
14. This will create a match based on the highlighted 'Matching Criteria'
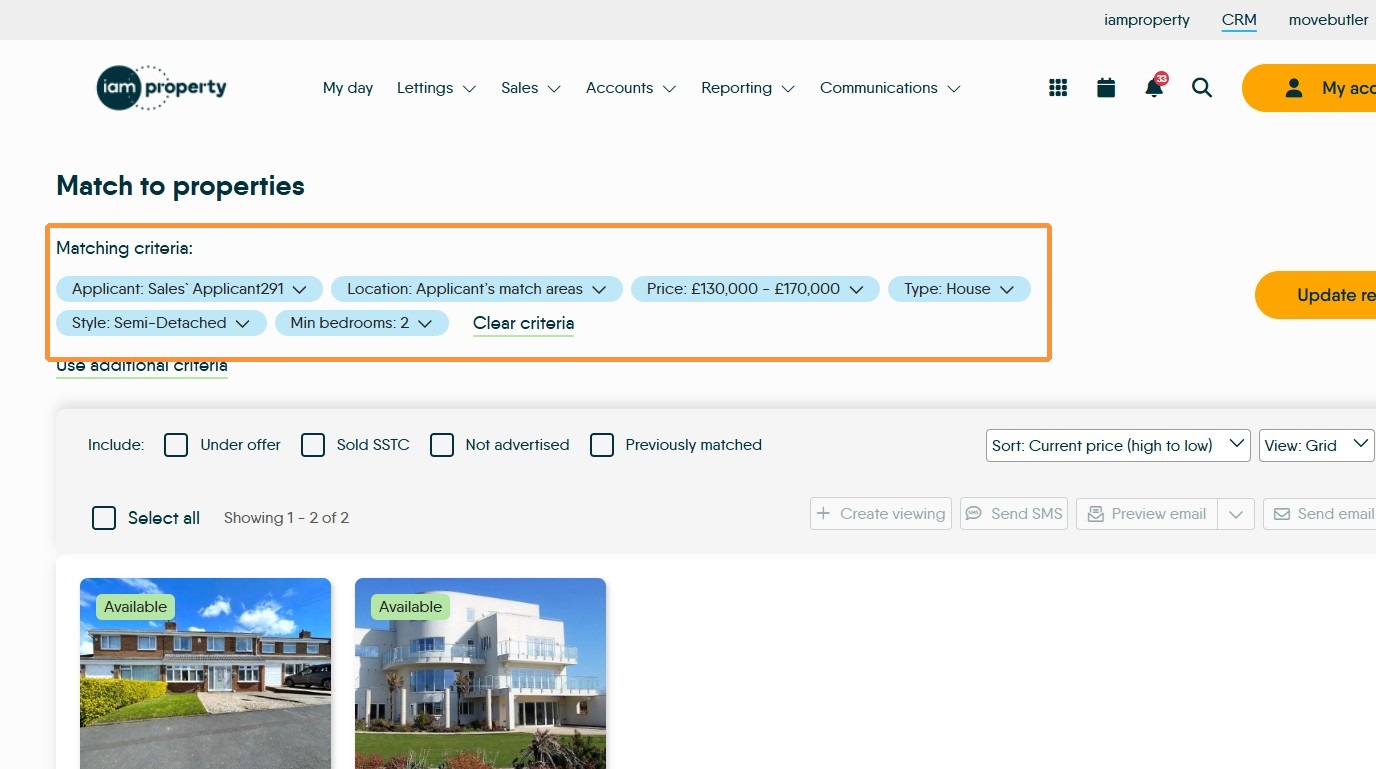
15. To further filter the match, click "Use additional criteria" This uses any further data added in the Applicant and Property records to refine the match.
N.B. If using "Use additional criteria" you MUST have the same data in a property record and an Applicant record for it to match. The options are identical in both records (Applicant and Property) and need to be selected in both to match
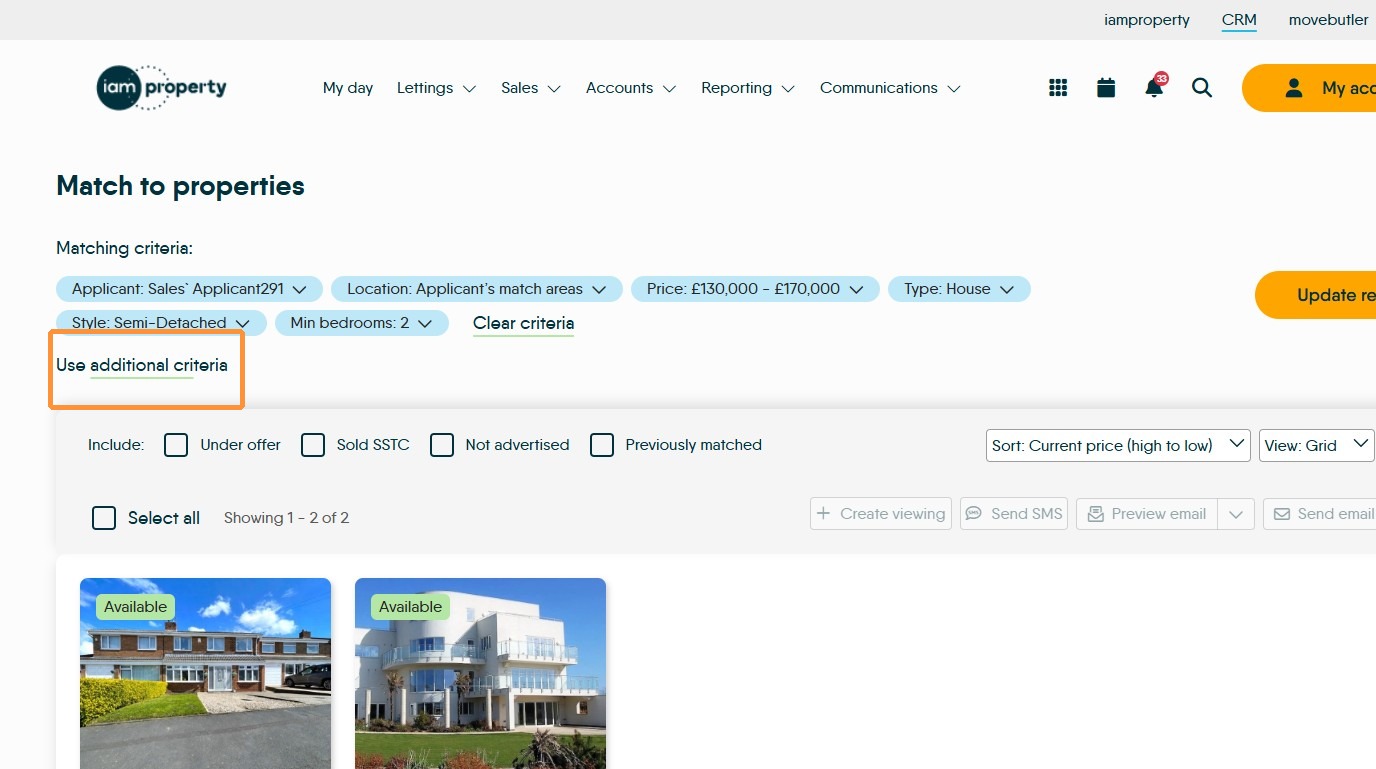
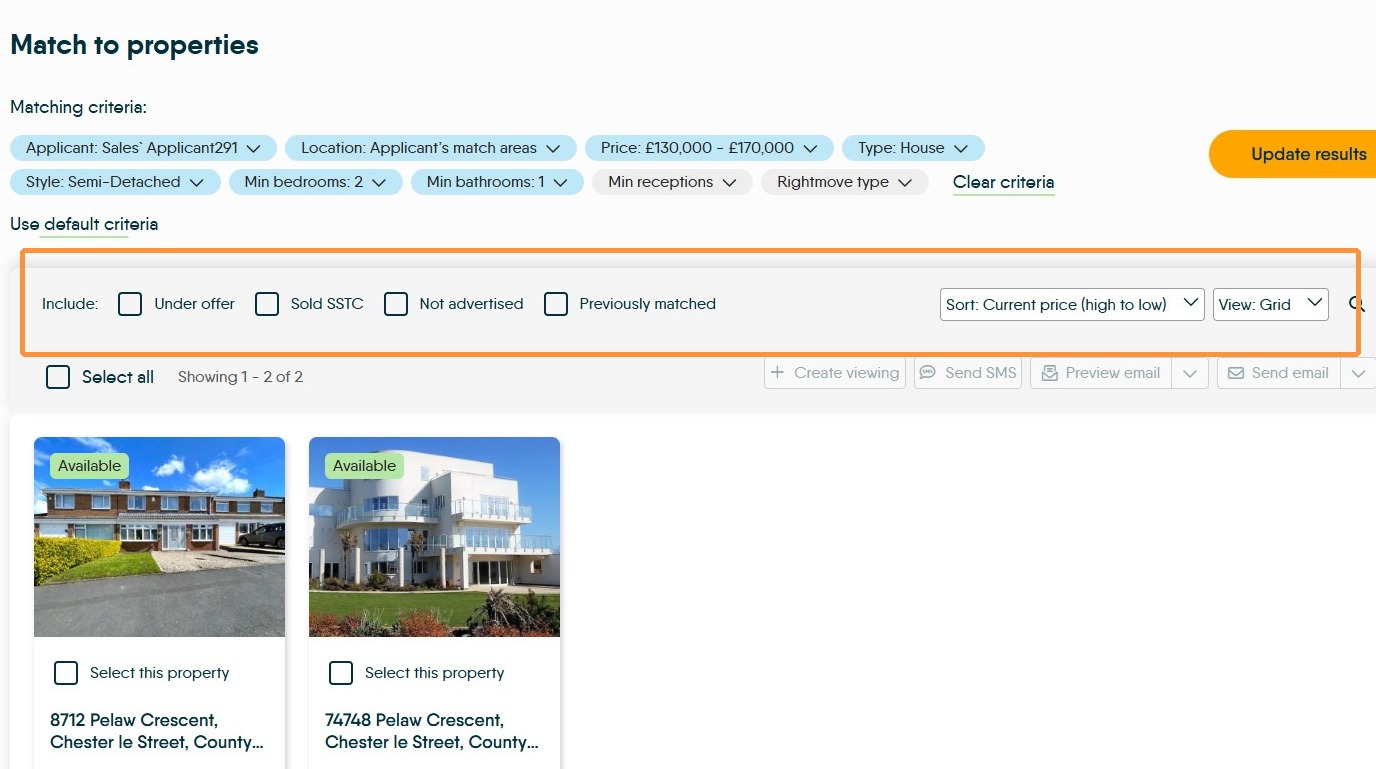
16. There are also options to to include other filter options, sort and alter the view.
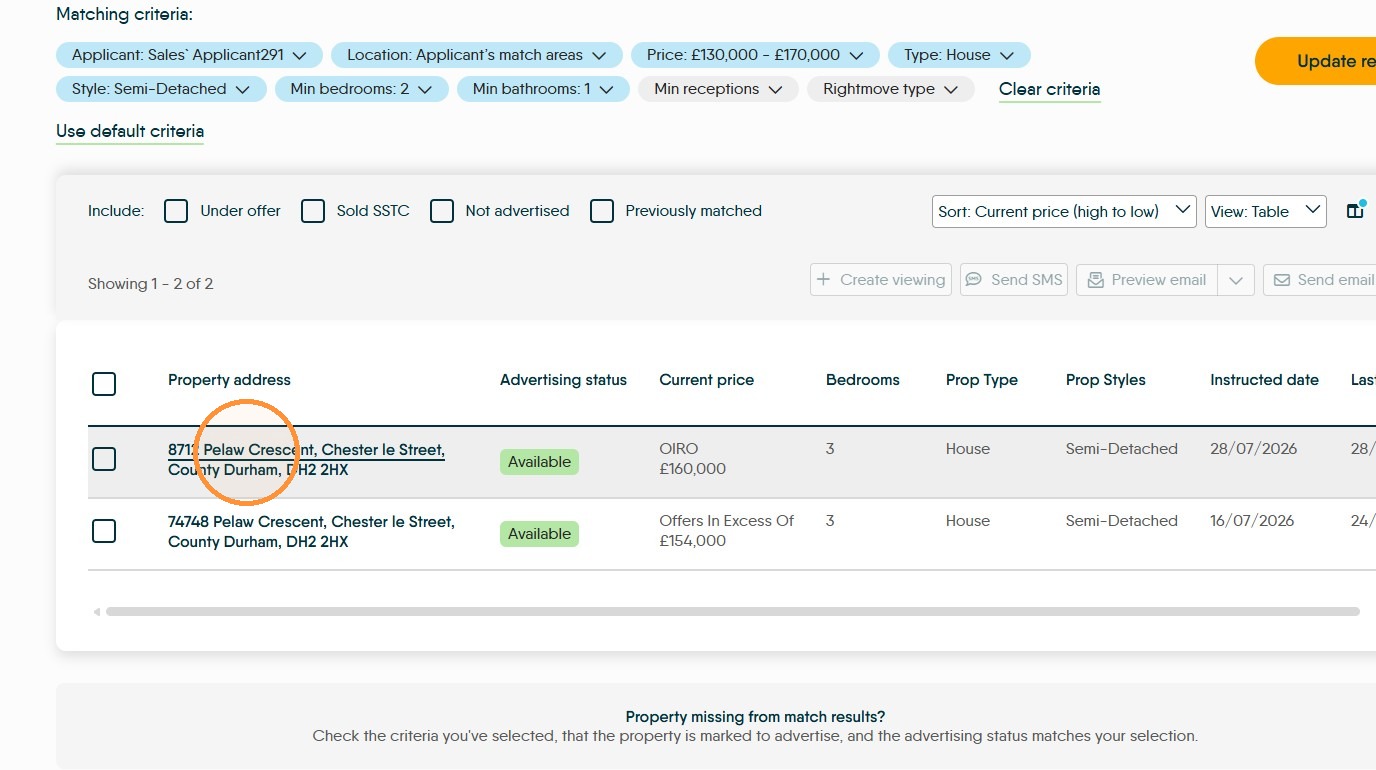
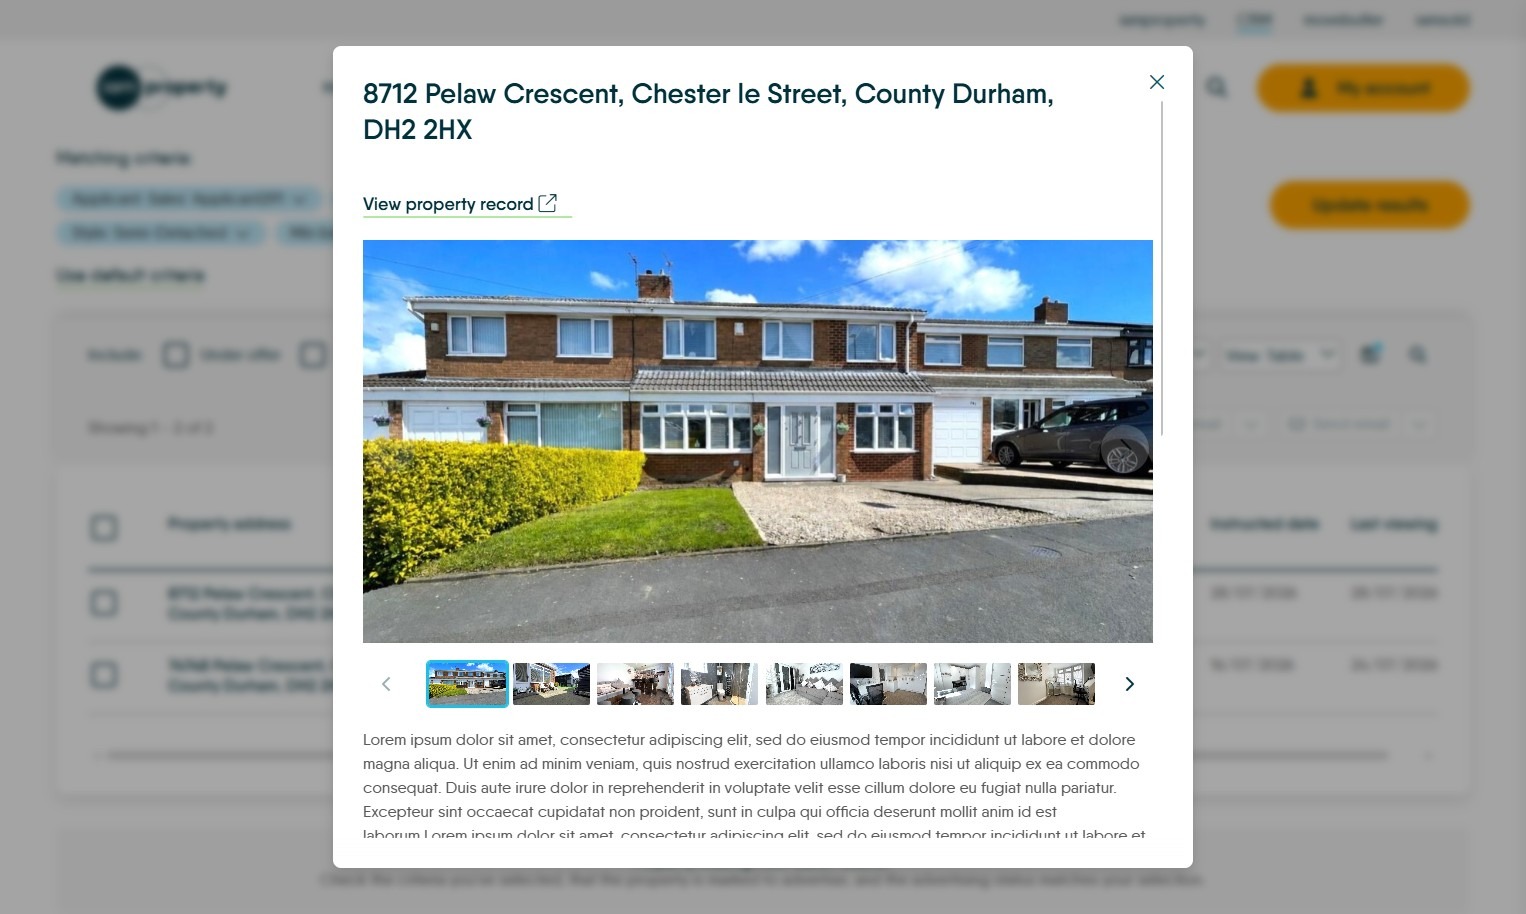
17. Clicking on the Property Address will open a Property Preview screen
18. To send the property details, select the property records, or multiple if required.
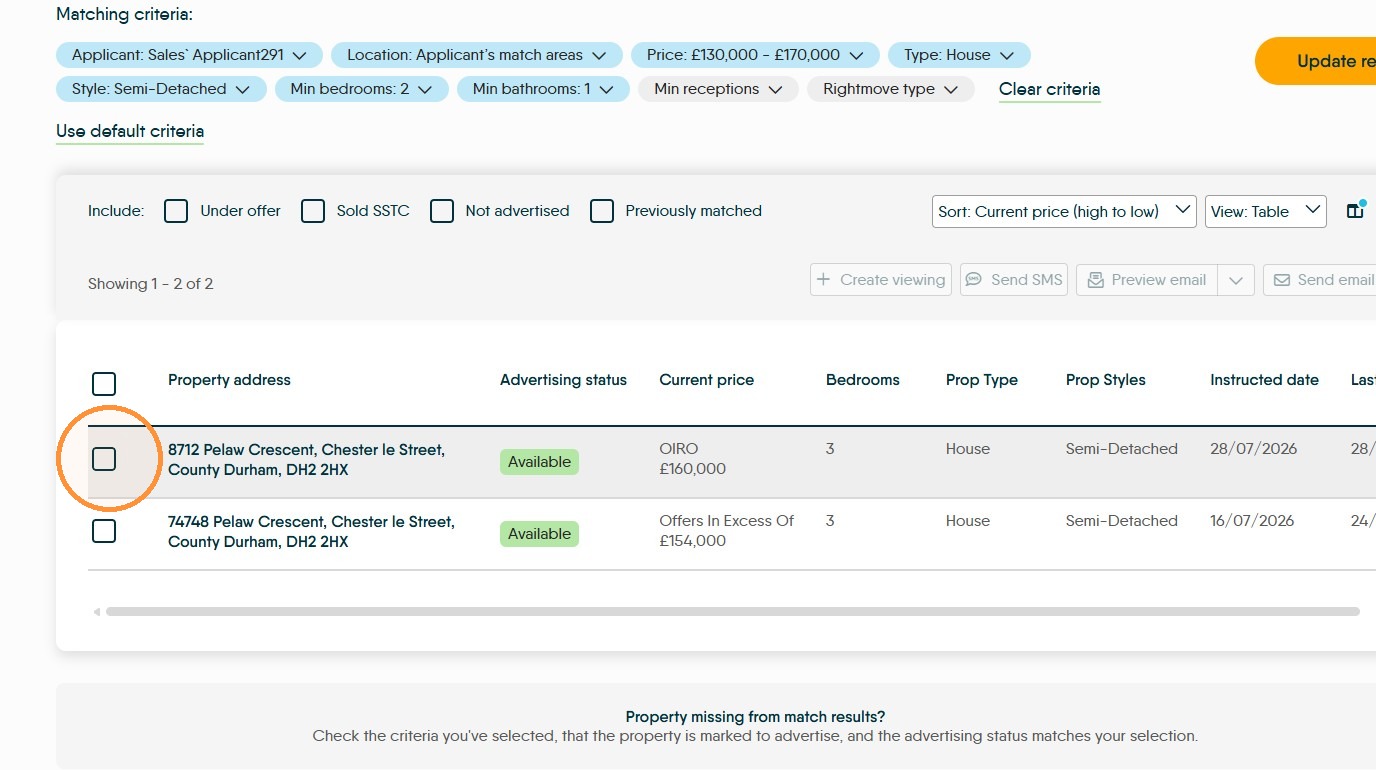
19. Click "Preview email" or "Send Email" there is an option to send a tracked email from the drop down menu on these buttons.
If Preview Email used, the email template that you have created will display on screen. Click "Send Email"