Follow this guide to successfully navigate the Letzone module in CRM and complete all necessary steps for a tenancy application. Learn how to add applicant details, manage documents, and generate agreements.
Tip: This is a long guide, however the process is one you will dip in and out of as notifications happen and items need to be updated or sent etc.
1. Navigate to https://crm.iamproperty.com/Dashboards/LetZoneDashboard
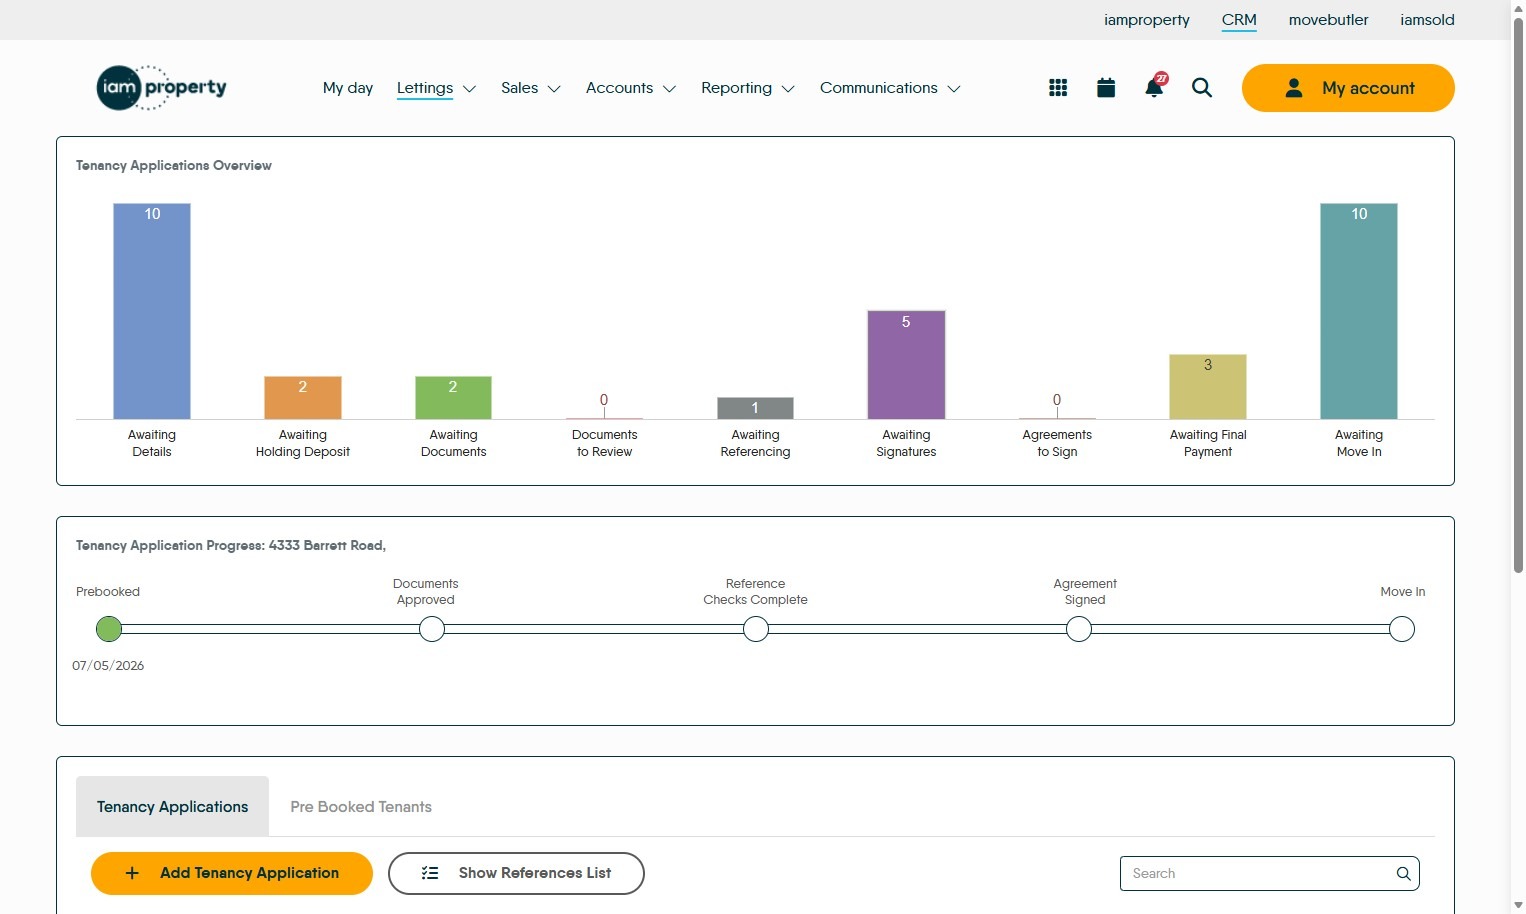
From this screen you have full visibility of all the Tenancy applications started in CRM, whether from within the Letzone or from a property/applicant record.
Tenancy Applications Overview; Shows an overview of all the applications held Letzone, in a graphical form, showing how many records are at each stage.
Tenancy Application Progress {Property Address}; Show the progress for a particular property you have selected in the 'Tenancy Applications' screen.
If a Tenancy Application is started in the Letzone (as shown below) then the Applicant will automatically be sent a link to access the Letzone portal to add in their details, answer any qualifying questions and upload documents.
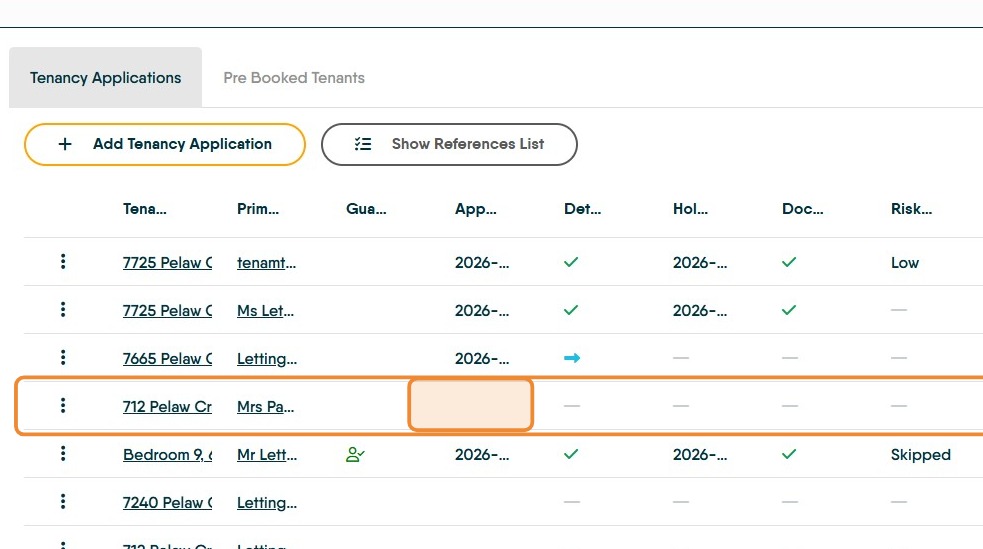
2. If a tenancy is started from the applicant or property record and you want to use Letzone to process it, you will need to send the welcome email. These can be identified as they do not have an Application Start date in the info line.
This screen will also allow you to review the progress of the tenancy application.
3. To send the Letzone invite to a tenancy that was NOT started in Letzone.
Click here.
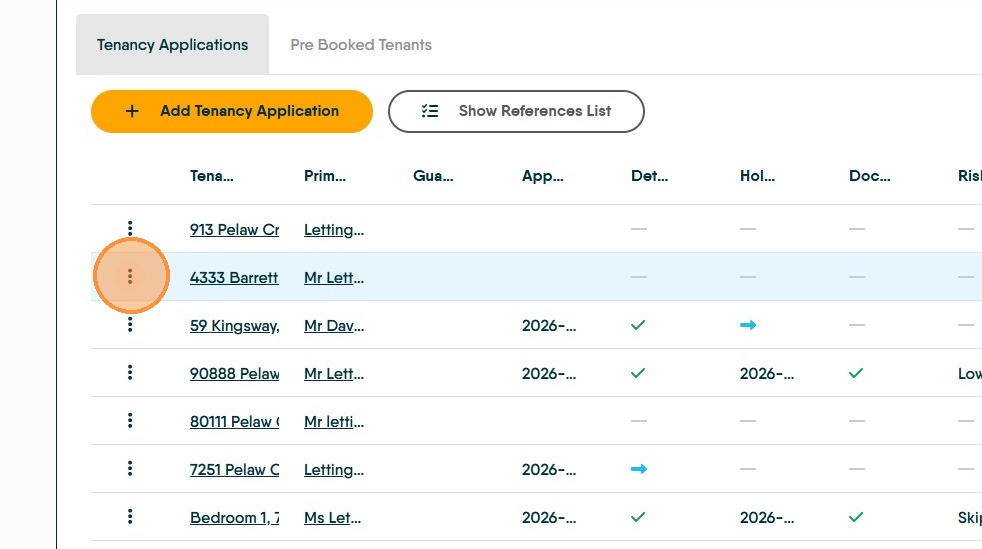
4. Click "Start Tenancy Application"
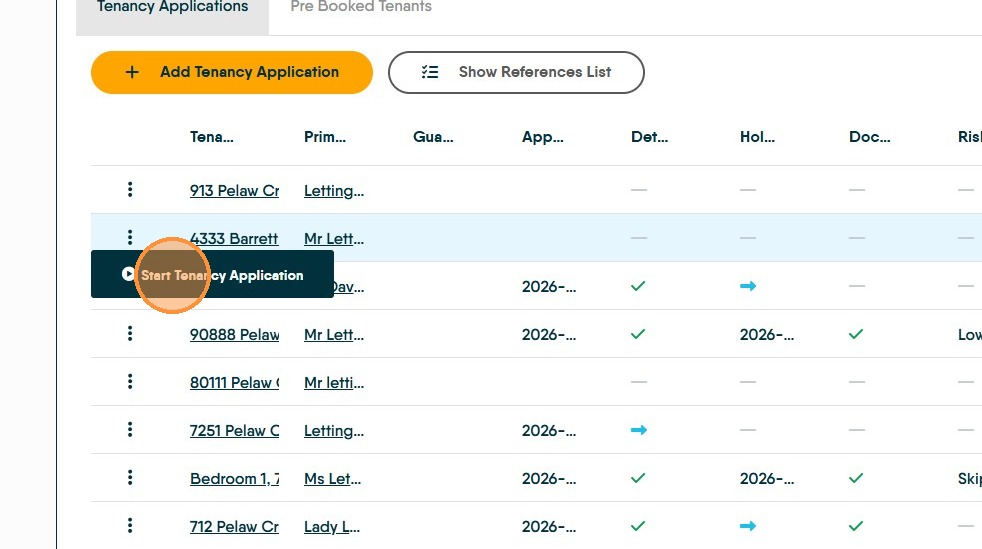
5. The Invite is now sent and the Application Start date will show.
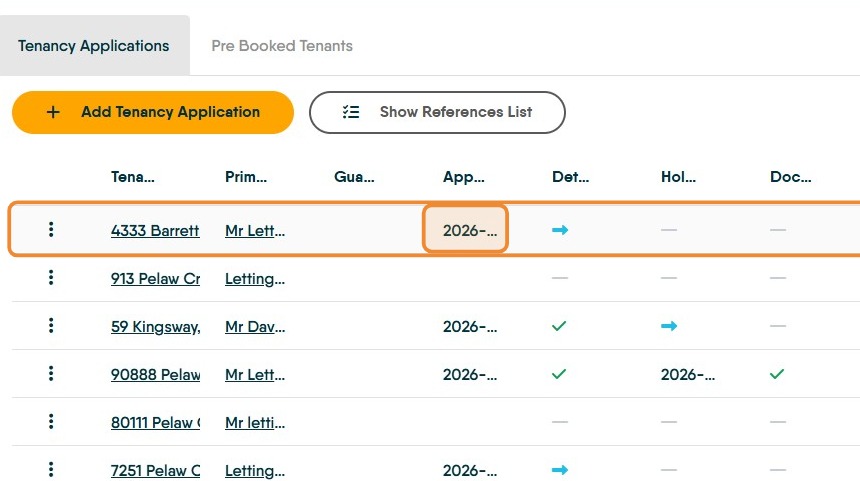
Add Tenancy Application
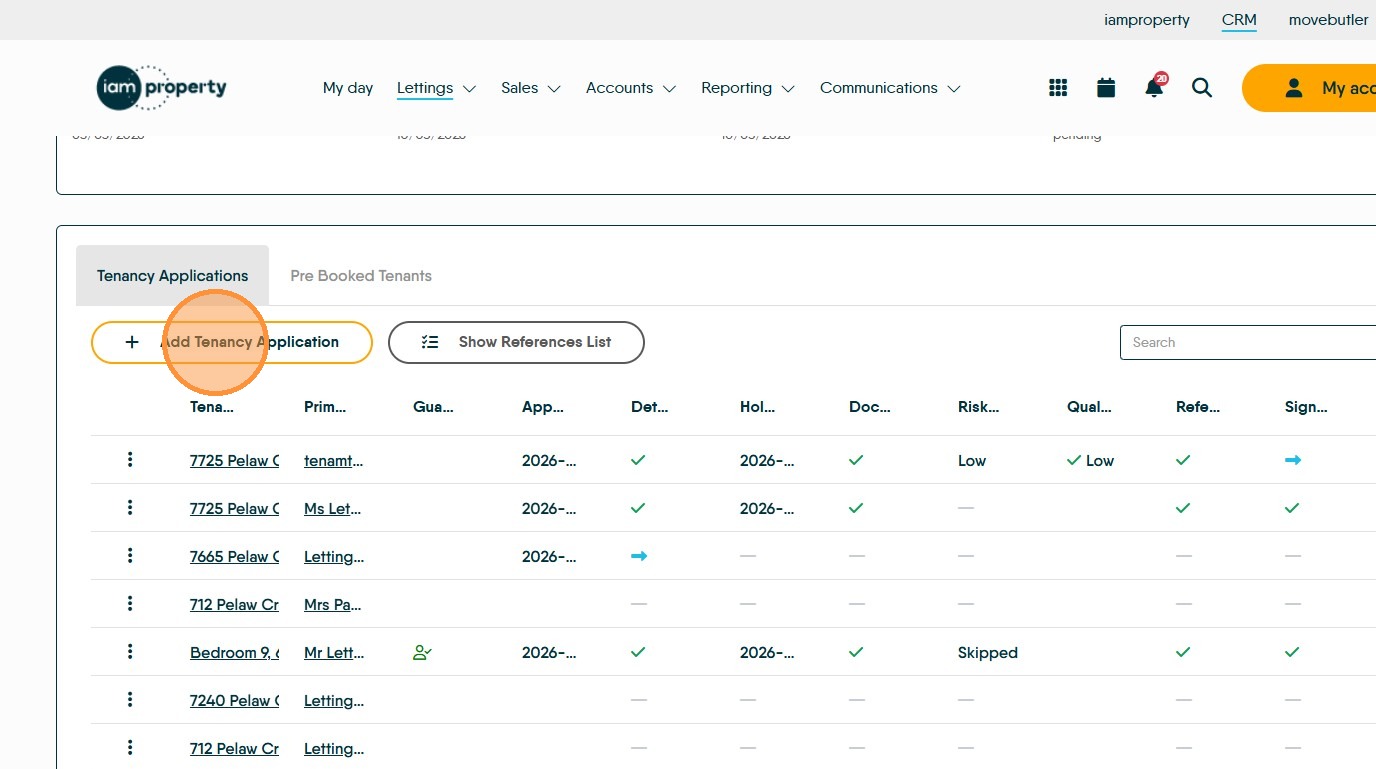
6. To start a tenancy in Letzone. Click "Add Tenancy Application"
7. Click "Select Property" and add the property details, after 3 characters the CRM will start to show matching records.
Click the blue plus icon to add a new property to CRM.
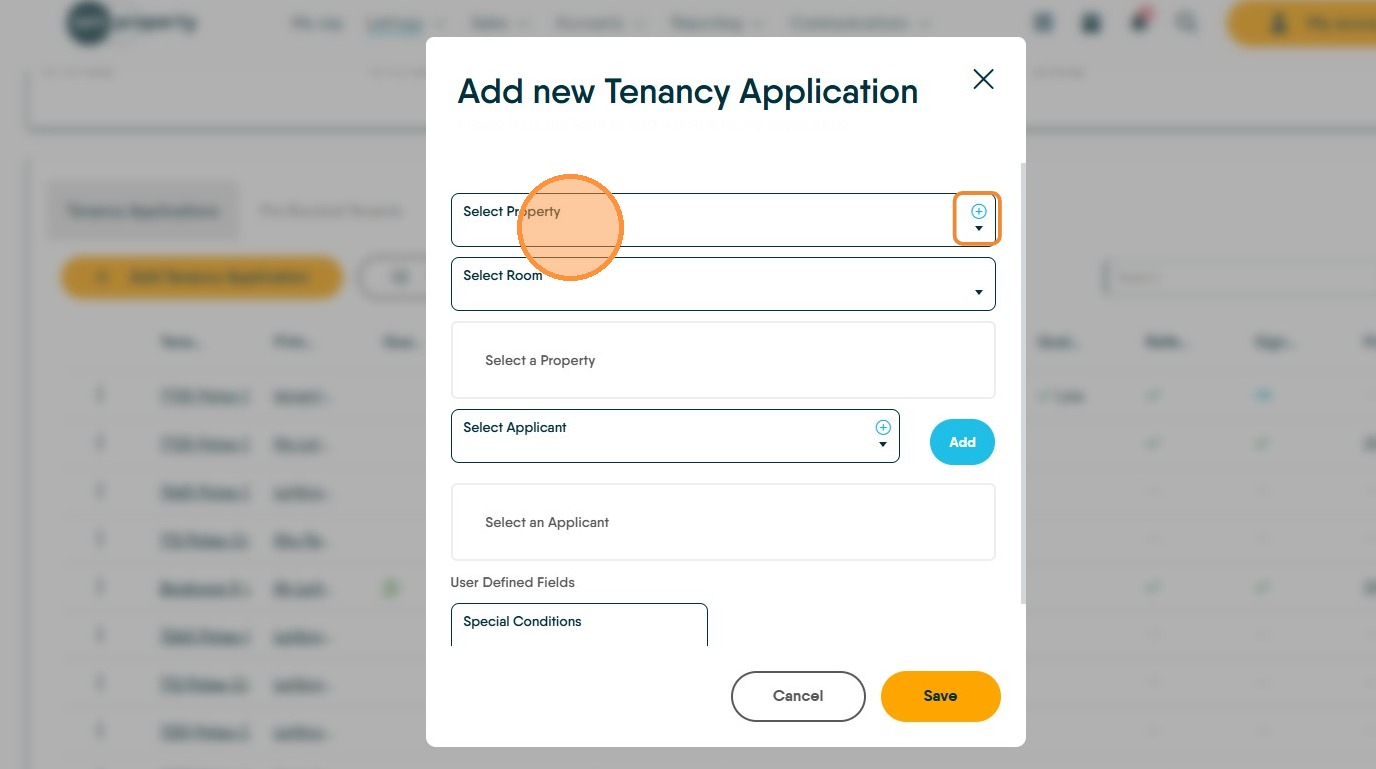
8. Once the Property is added, the details for the applicant can be added. Click "Select Applicant" and type the name, CRM will start showing matched records after 3 characters have been added. Clicking the 'blue +' will allow a totally new applicant to be added to CRM.
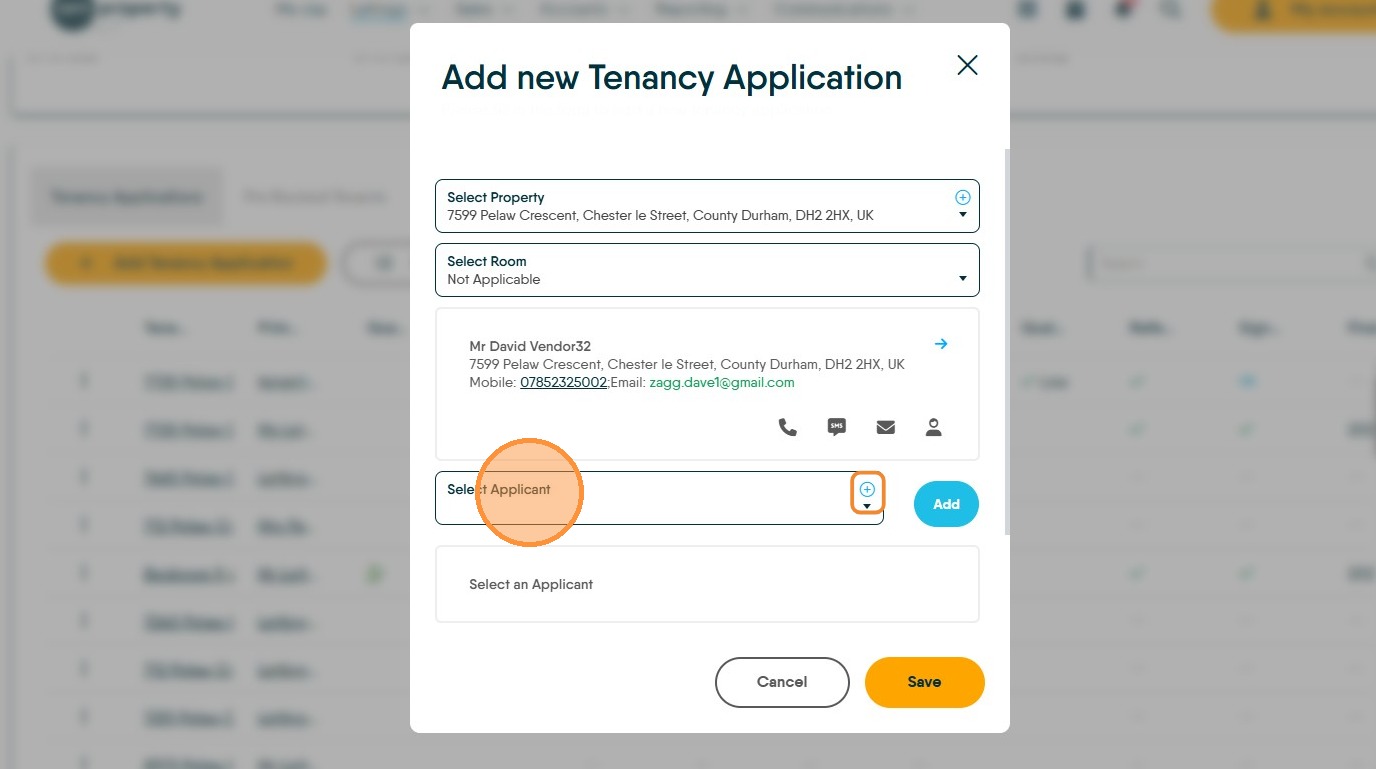
9. Click "Add" to add the applicant to the Tenancy, repeat this process to add additional tenants to the tenancy application for this property.
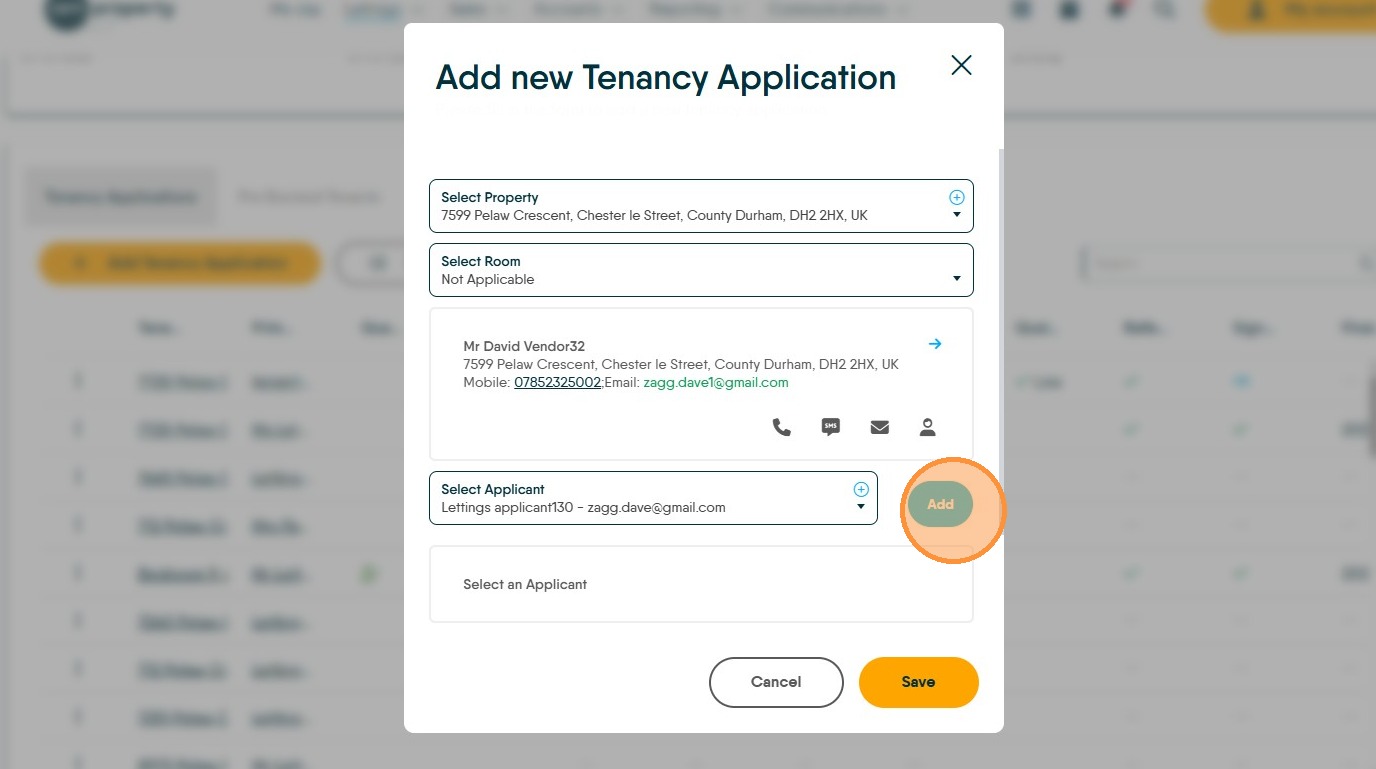
10. Click "Save" to save the tenancy application
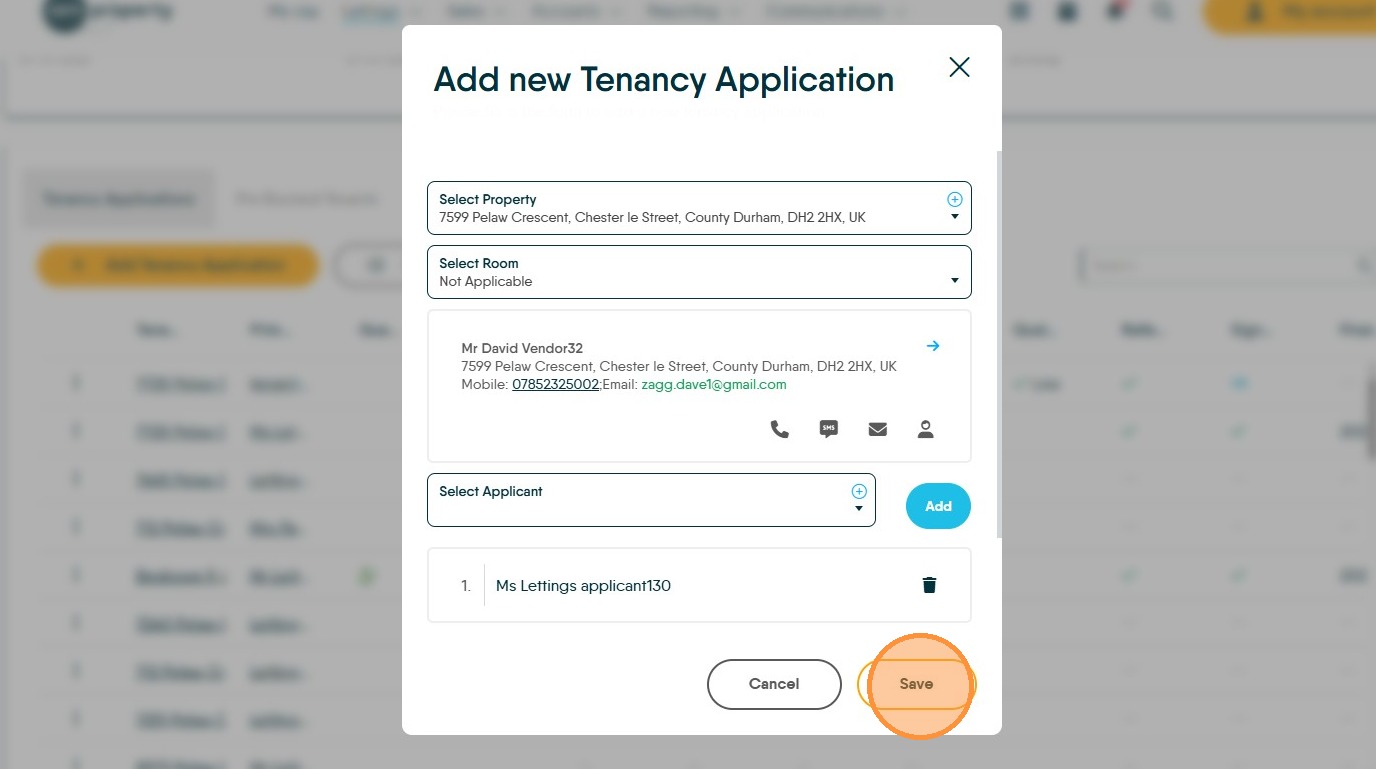
11. The Tenancy Application will then show on the screen, the applicants will be sent a link to a portal where they will be able to update their personal details, answer qualifying questions and upload their personal documents.
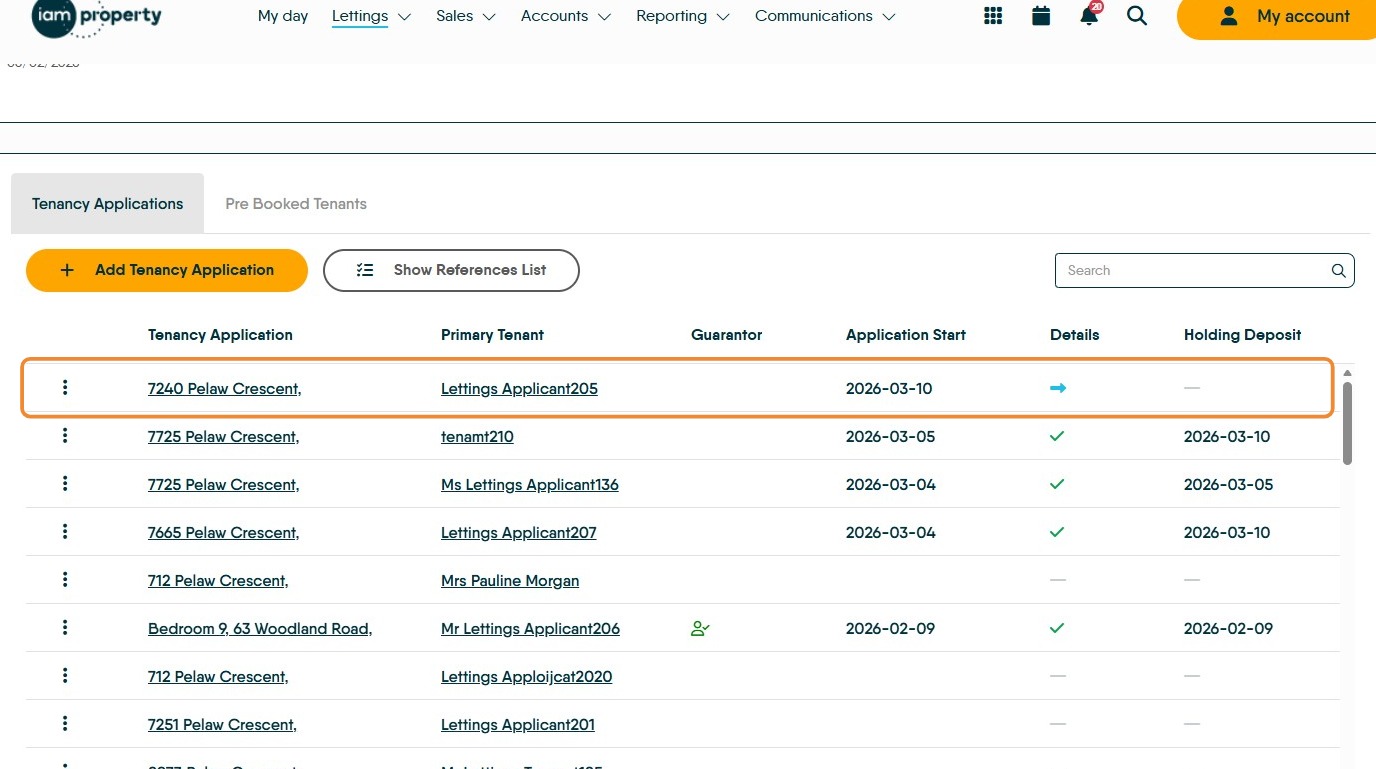
Letzone Portal
12. The invite email that the applicant receives will look like this. The email will include a username and a password, as well as a link to the portals. A guide to the portal is available here
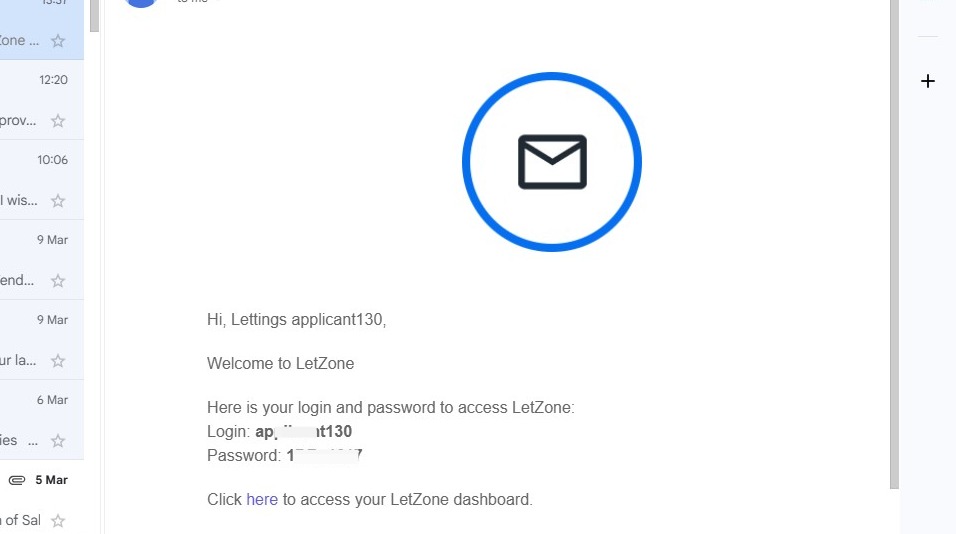
13. At this point there is nothing for the agent to do until the notifications are received informing that the applicant has completed their personal details and uploaded their 'Right to Rent' documents.
Notifications will be received in the 'Bell' icon at the top of the screen and, depending on configuration, also by email.

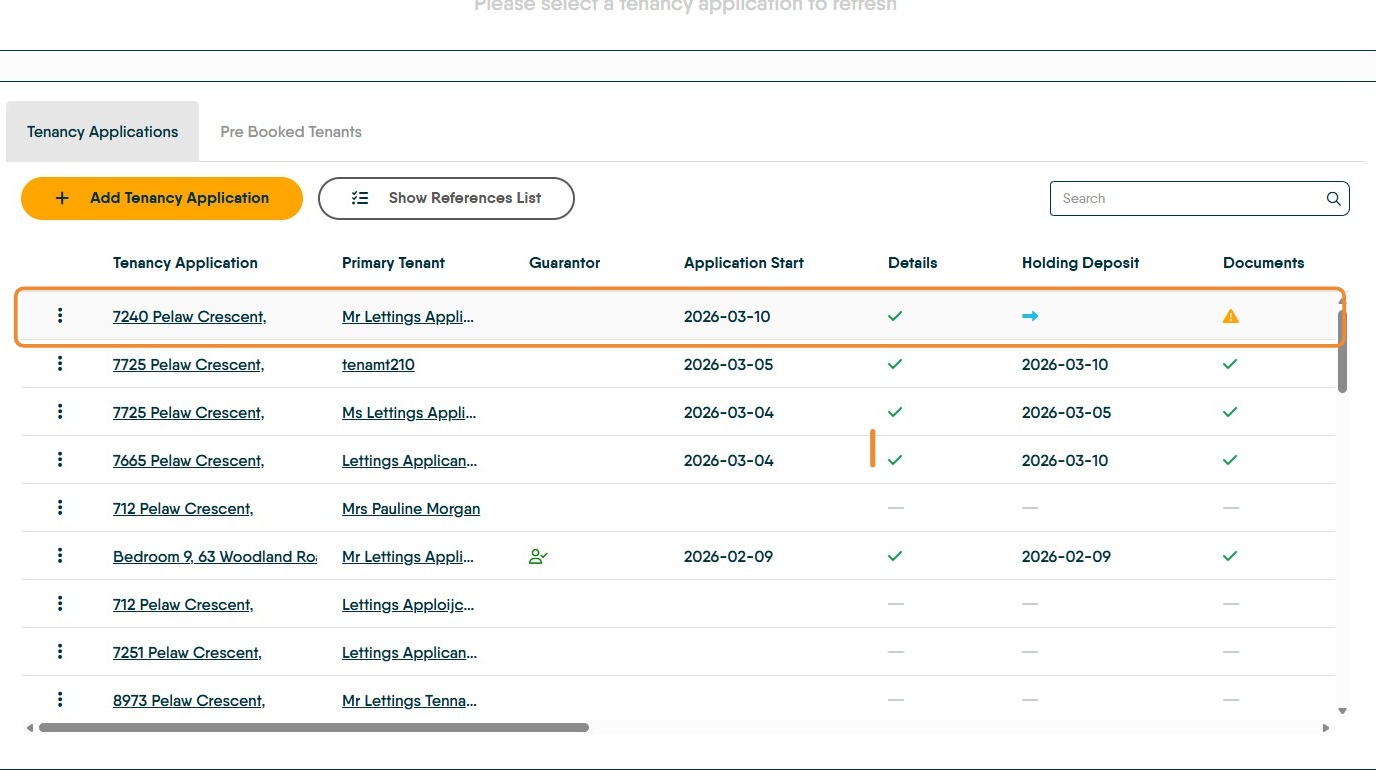
14. When the personal details have been updated the 'Details' column will show a green tick instead of the original blue arrow.
Once the 'Documents' are uploaded there will be an orange triangle to show documents have been uploaded and need to be approved.
Noting Holding Deposit Received

15. To mark that the holding deposit has been received, click the 3 dots.
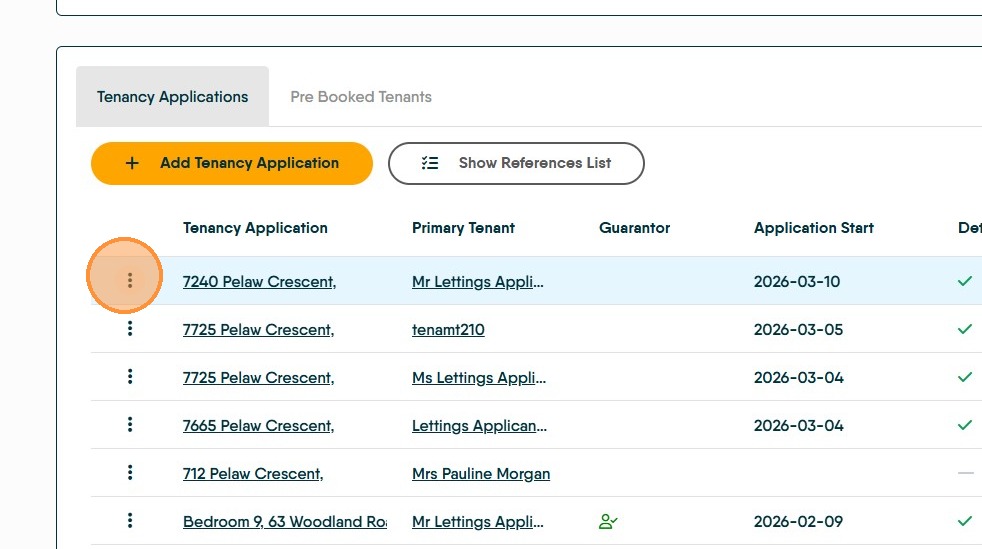
16. Click "Holding Deposit Received" set the date the payment was received and click "Yes". The date will show in the Holding Deposit Column.
Documents and Qualifying Questions
17. The documents are uploaded by the Tenant in the Letzone portal, however if required they can be uploaded by you from within the Letzone menu. Qualifying Questions are answered in the Letzone Portal by the applicant.
Once you have been notified the Right to Rent documents and Details have been uploaded you can review these from the Tenant Record. To do this follow the steps below.
18. On the Tenancy Applications screen. Click "Property Address"
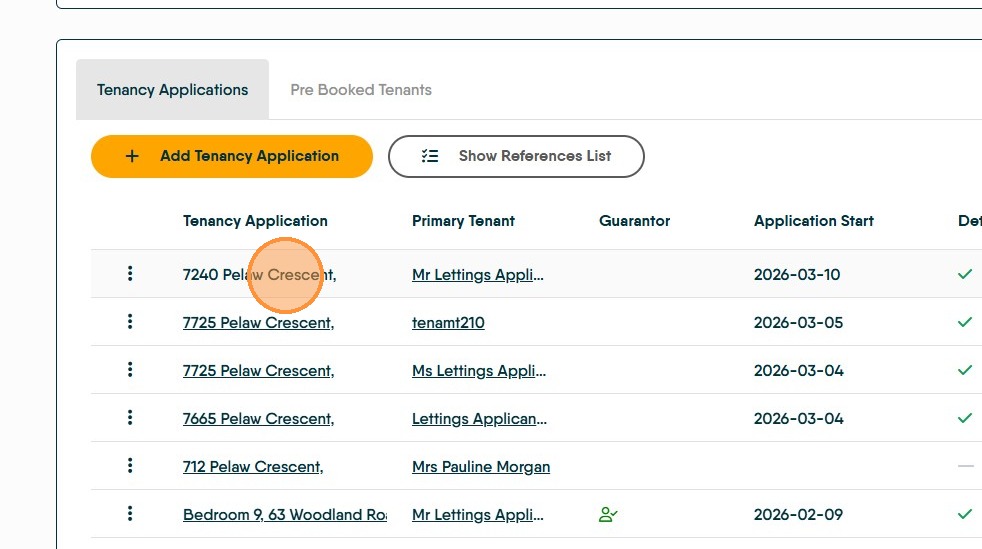
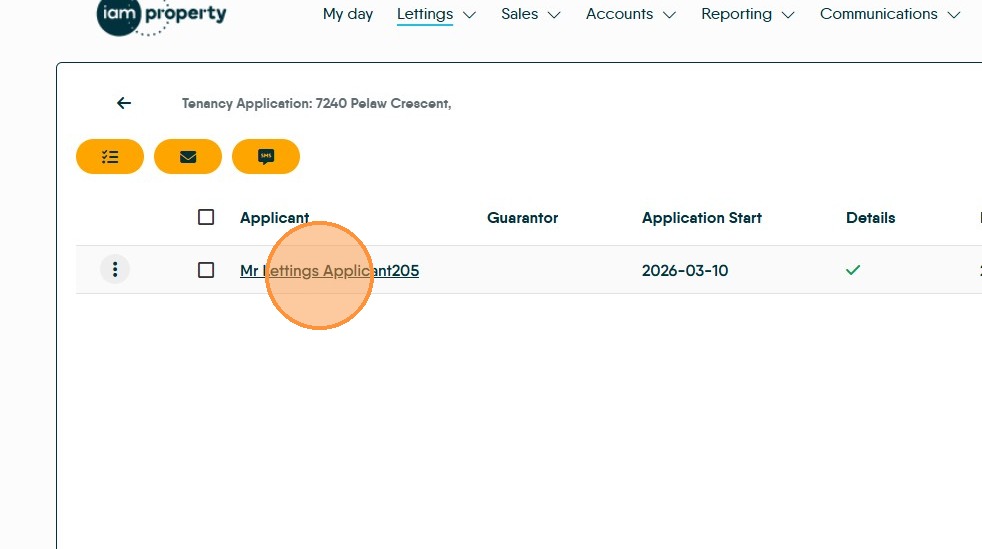
19. This will take you to the specific Tenancy Application for this property. All applicants for this tenancy will show. Clicking on the Tenant name will take you to the Tenant record for that tenant.

In the tenant record you will be able to review the documents uploaded, in the 'Documents' folder and the Letzone qualification questions, which are in the Letzone menu of the Tenant record.
20. The documents are in the documents tab. Click the Letzone option to review the Qualifying Questions and 'Terms and Conditions' to check if the applicant has accepted the Ts & Cs .
Click "Qualifying questions" this will allow you to review the answers to your Qualifying Questions.
Click "Terms and conditions" if you have added your Terms and Conditions of Rental then this screen will show if they have been accepted by the applicant. If you have requested the T+C's are accepted and they have not been a warning notice will show on your screen until the conditions are read to the applicant and marked accepted by you.
Click "Documents" this will allow you to review the documents uploaded.
21. Once the documents and answers have been reviewed, return to the Letzone 'Tenancy Application' screen, click on the 3 dot menu.
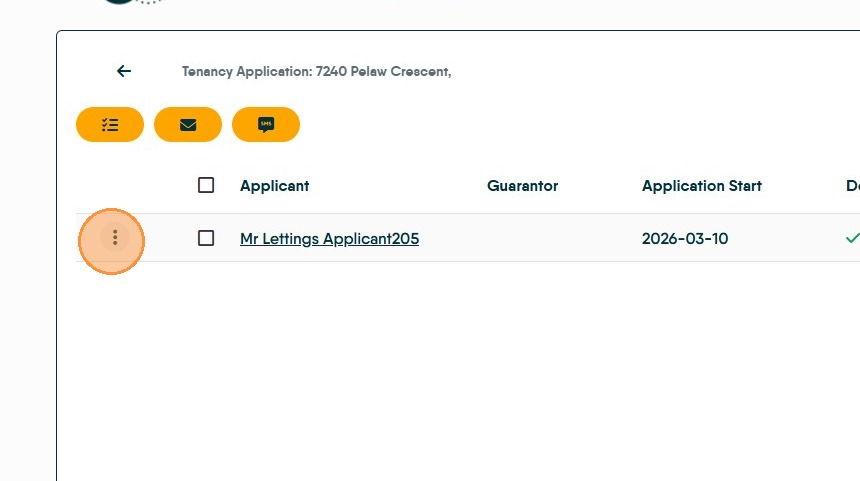
22. To approve the uploaded documents click "Approve Documents" or one of the other options.
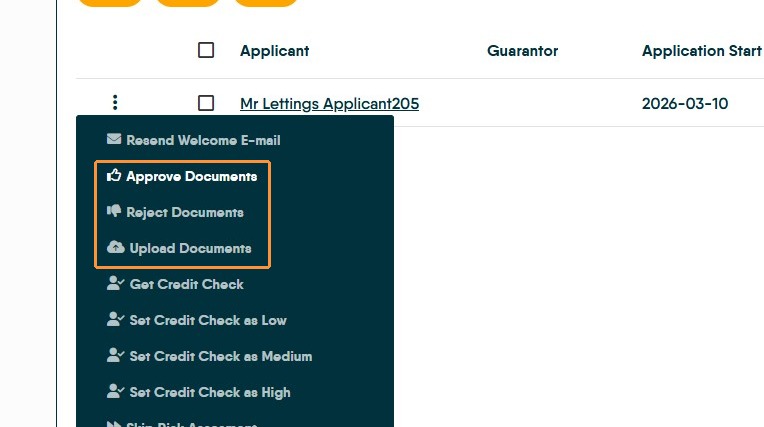
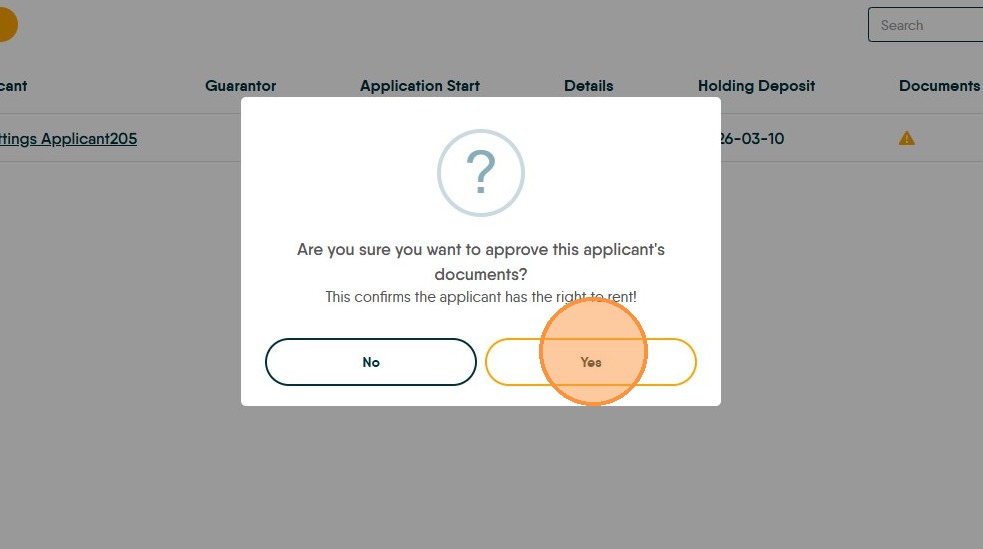
23. To approve the documents. Click "Yes". This will send an email to the Tenant informing them that the documents have been accepted or declined as appropriate. The orange triangle will change to a green tick.
24. The next action you may perform is requesting credit checks or referencing checks. Click here.
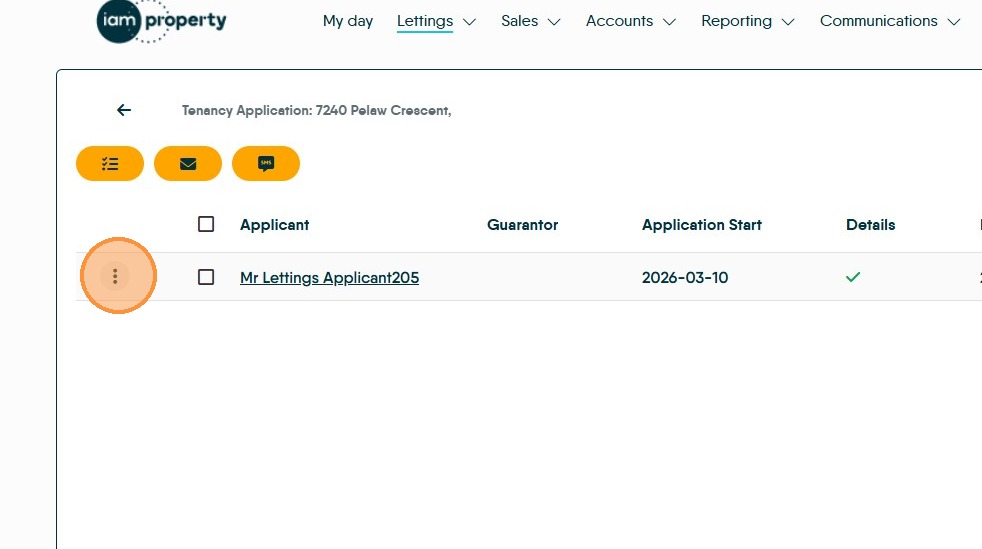
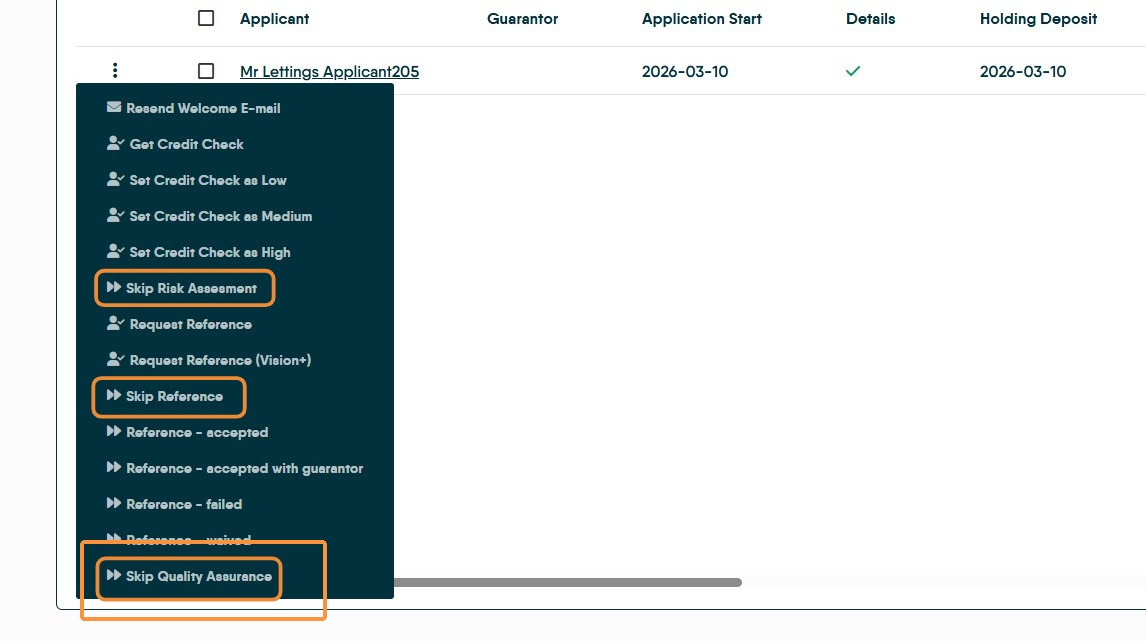
25. If you do not use any of the referencing tools within CRM (Rightmove, Vision+) you can either record the score in the CRM menu, as shown below or skip Risk Assessment and Referencing using the options in the menu.
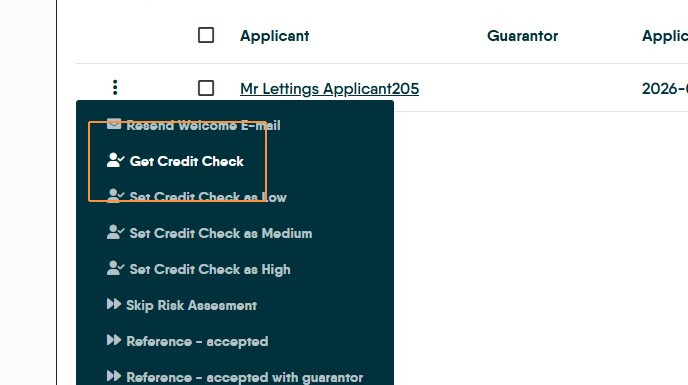
Credit Check
26. Click "Get Credit Check" This will open Rightmove referencing screen. To use Vision+ either create the referencing request from the Tenant record, or click 'Skip Risk Assessment' and the Vision+ option will show.
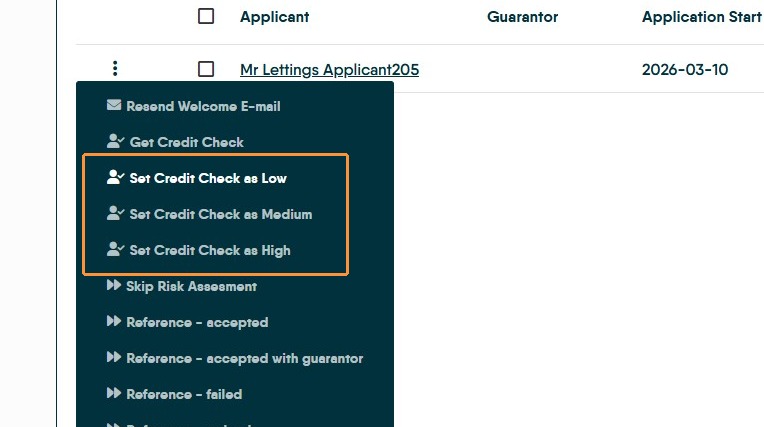
27. If you are using an external credit checking agency, set the credit check result from the drop down menu. Click "Set Credit Check as Low" or appropriate.
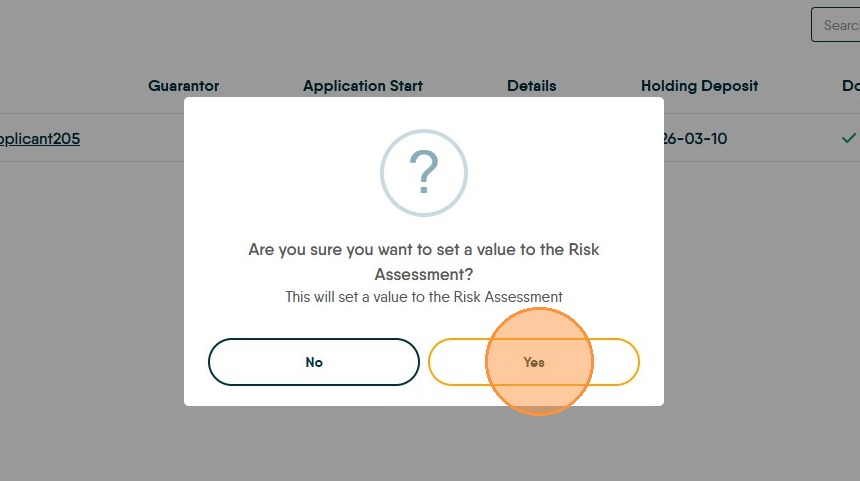
28. Click "Yes"
Referencing
29. Click here.
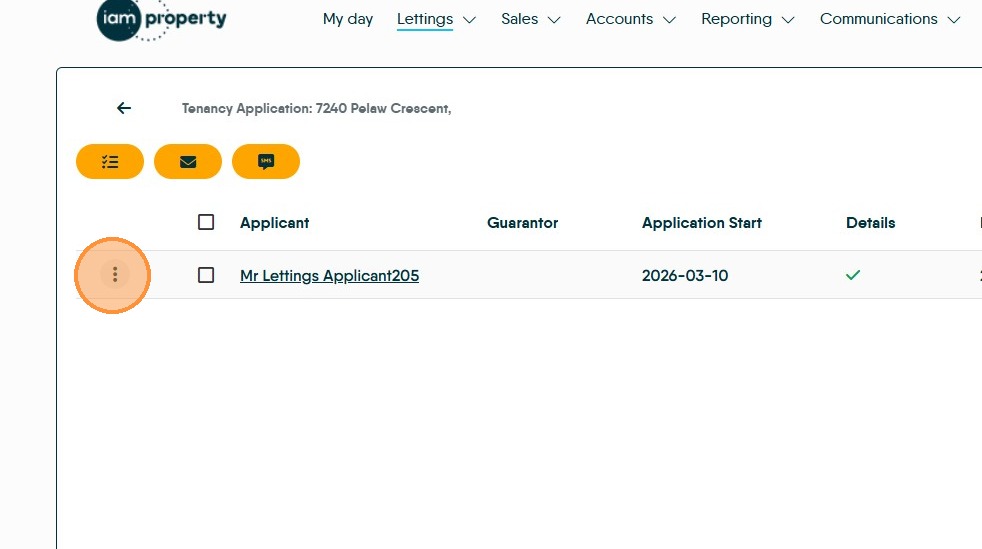
30. Click Request Reference for Rightmove - not required if a Credit Check has already been requested via Rightmove.
Click Request Reference - Vision+ to use the Vision+ integration.
Click Skip Reference to not record a reference via Letzone.
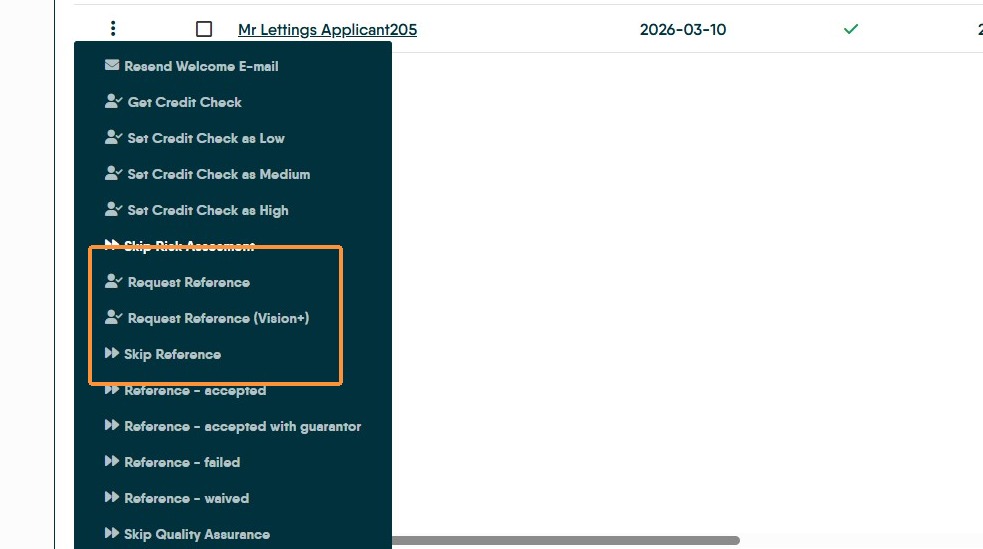
31. If you are using an external referencing service then you can show the referencing result or 'Skip Reference'.
Quality Assurance is set in the 'Additional Information' section of the Tenant Record details screen.
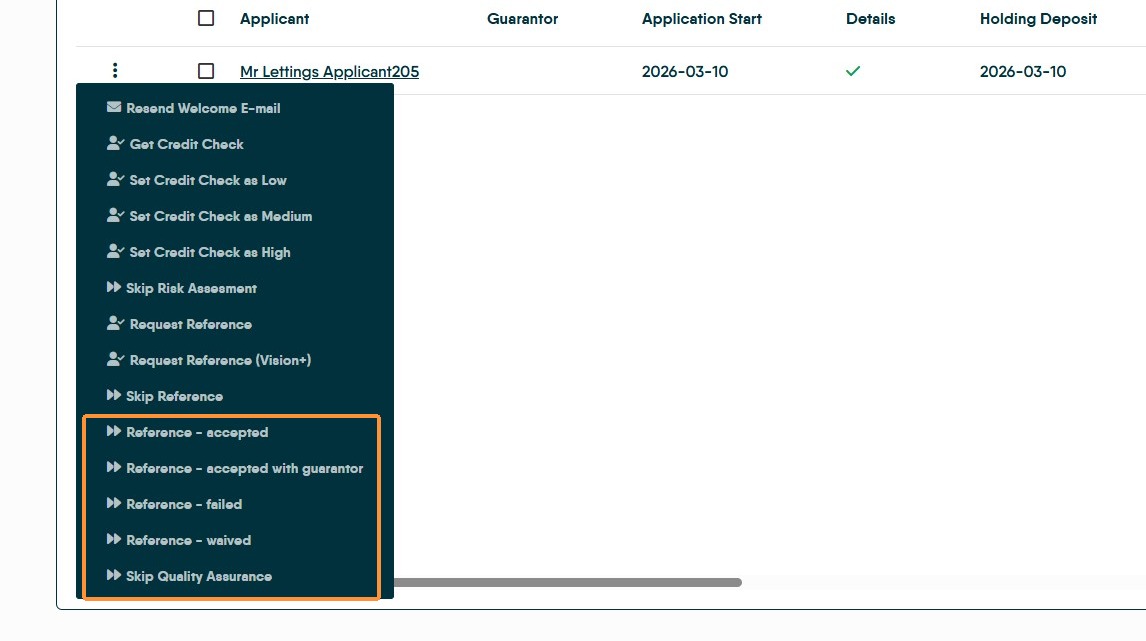
32. For example, click "Reference - accepted" and this will show in the tenancy row
Click "Yes"

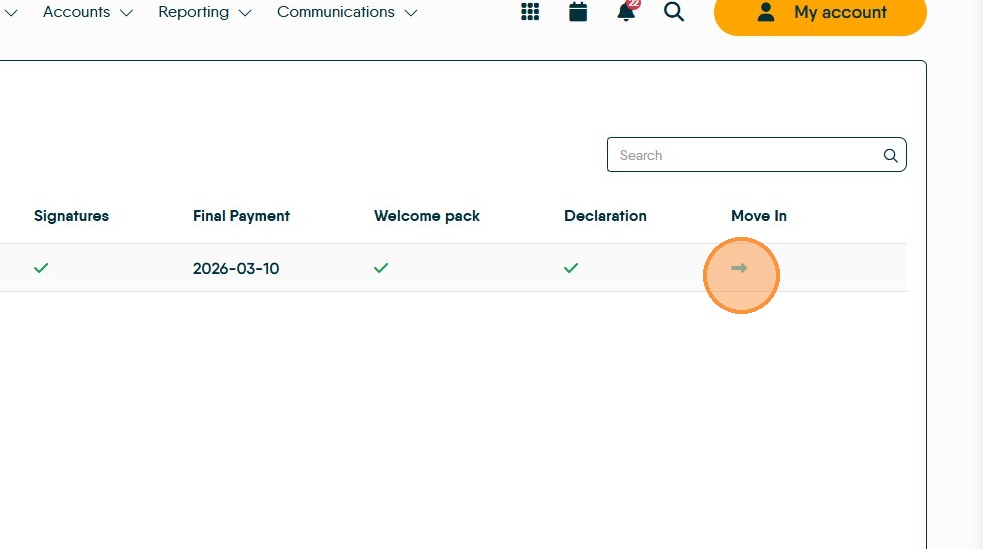
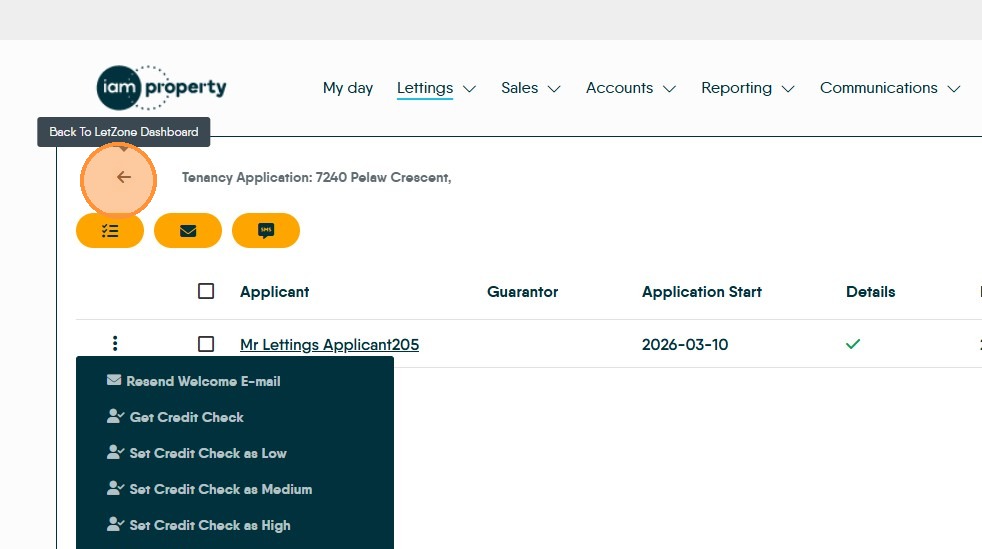
33. Click here to return to the main Letzone dashboard
Creating and Sending the Tenancy Agreement
34. If you send your AST from CRM then it can be sent and the receipt of the signed document by noting '...signed' in the menu.
35. Click here.
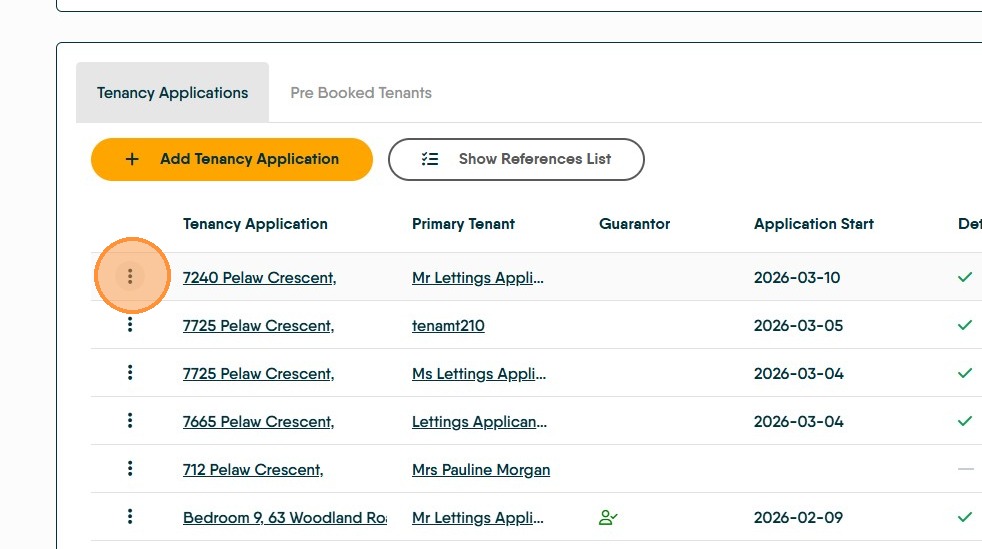
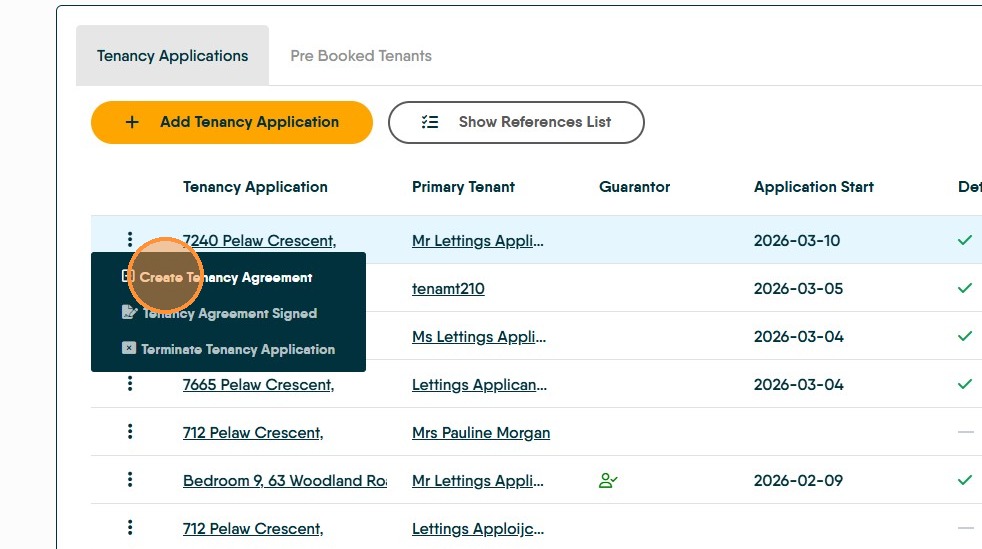
36. Click "Create Tenancy Agreement"

37. Click "Generate"
Click "Tenants"
Click "Generate"
38. Click here to send either via Email or via Esign (DocuSign).
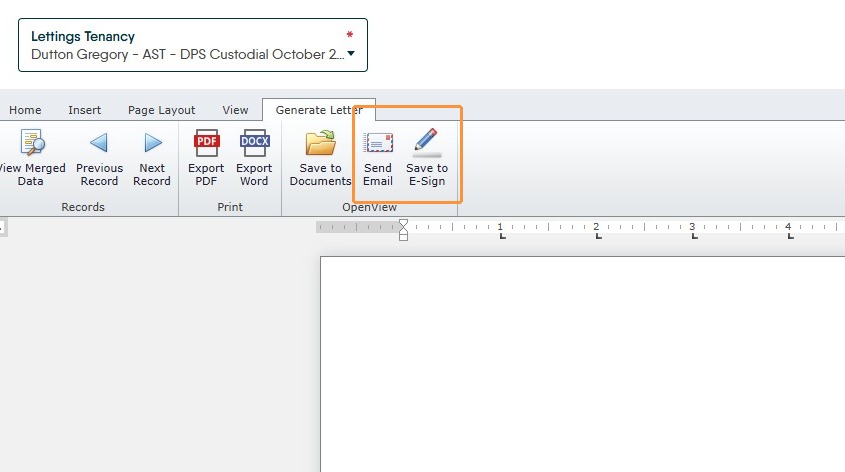
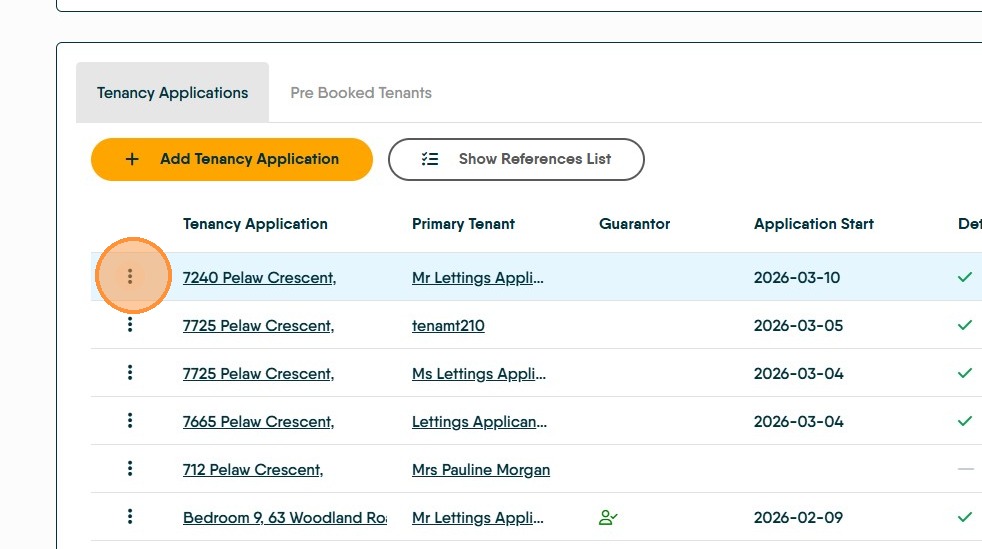
39. Once the Tenancy Agreement has been signed, you can note this on CRM.
Click here.
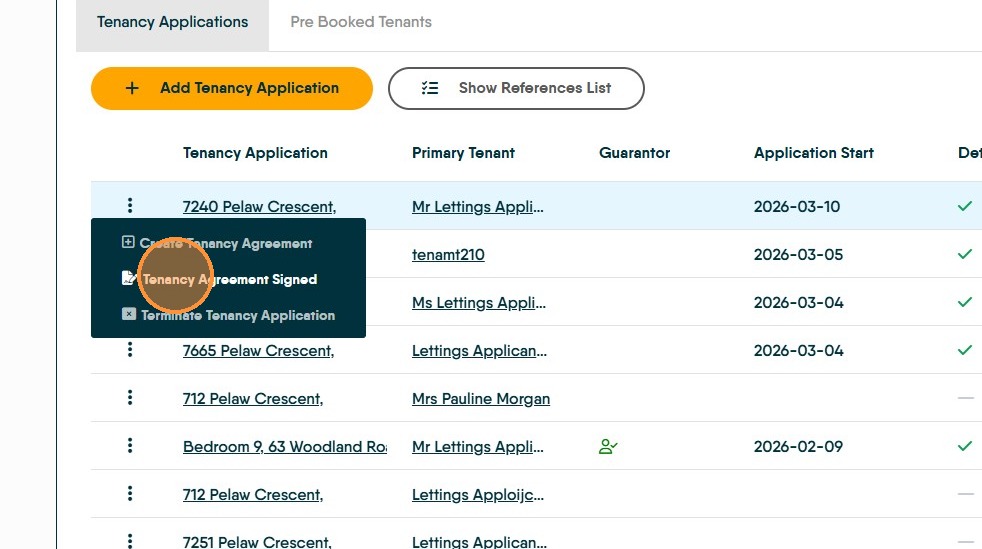
40. Click "Tenancy Agreement Signed"
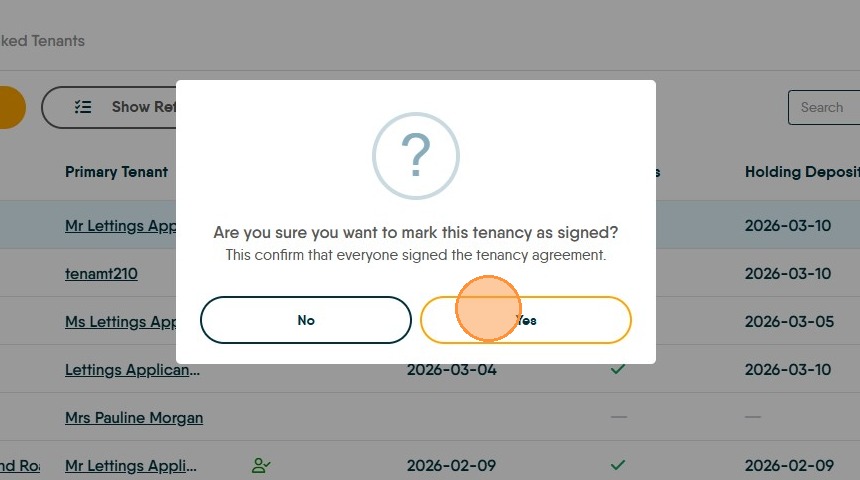
41. Click "Yes"
42. This will be marked with a tick mark.
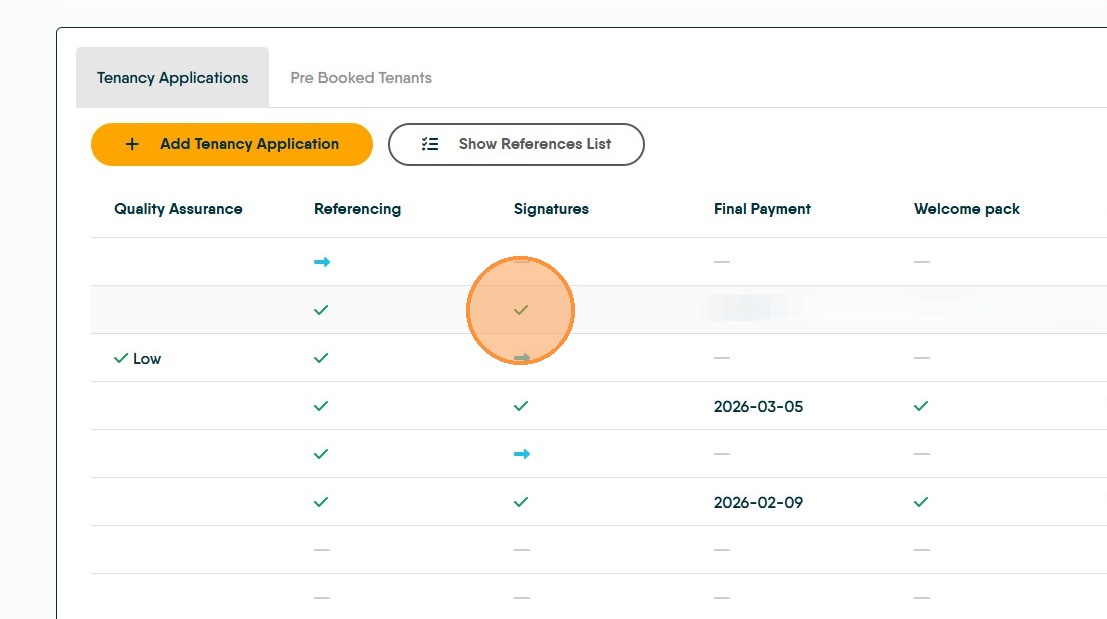
Final Payment
43. To note that the 'Final Payment' has been received. Click here.
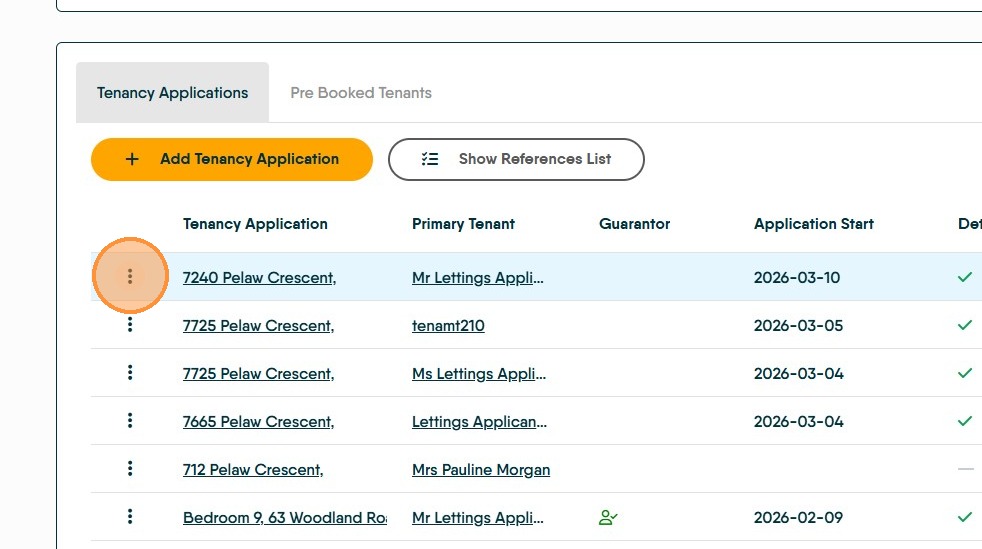
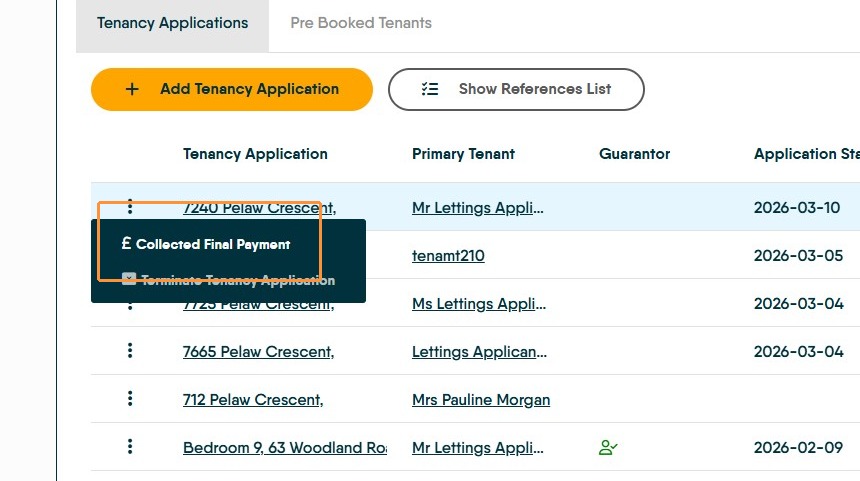
44. Click "Collected Final Payment"
45. Select the date the payment was collected from the screen
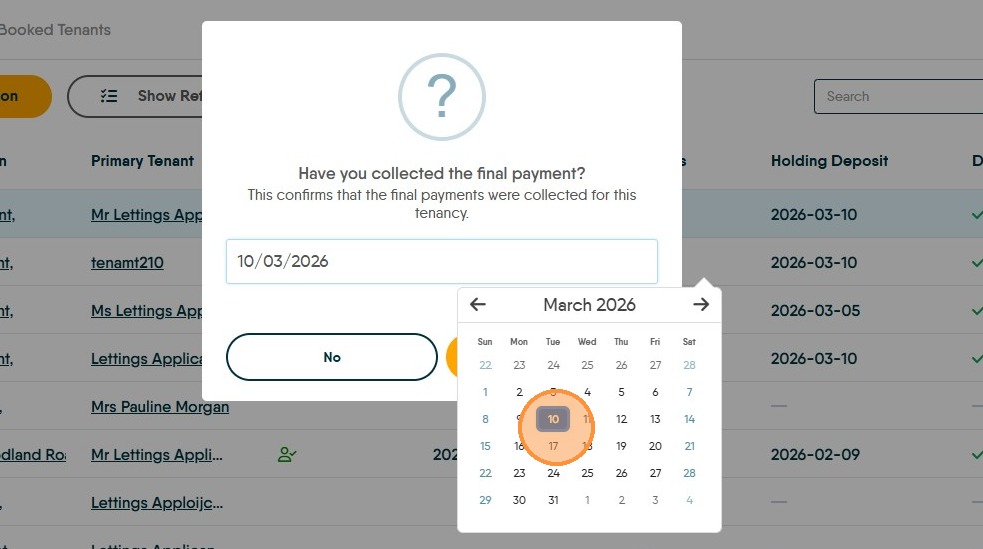
46. Click "Yes"
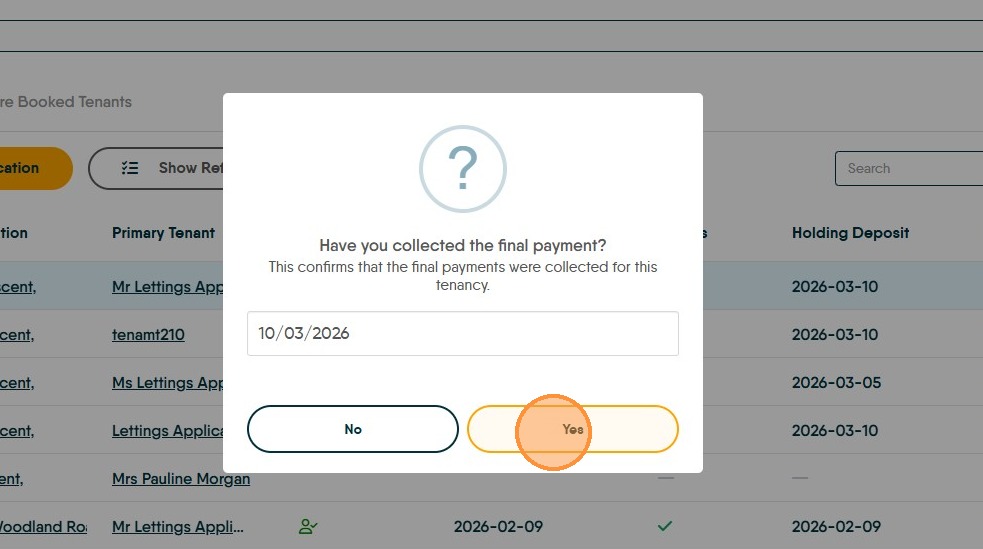
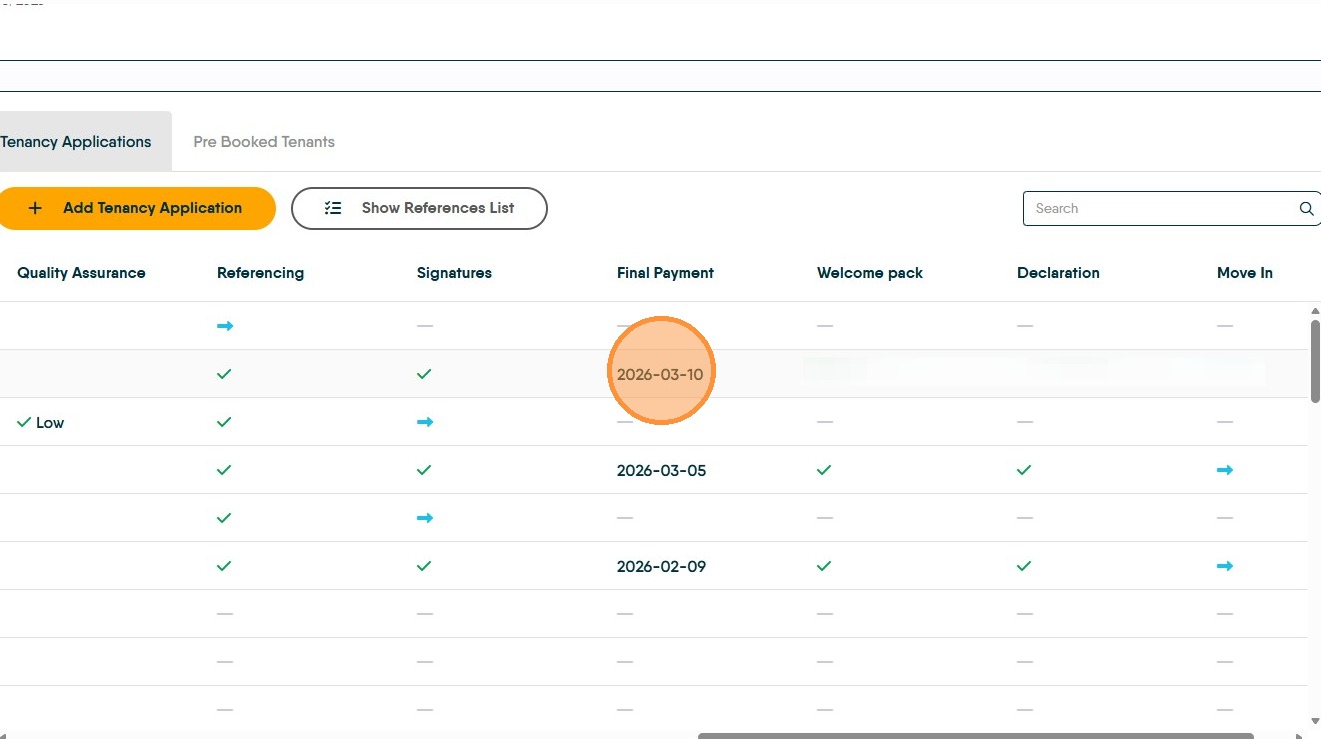
47. This will be marked with the date the payment was collected.
Welcome Pack - Sending
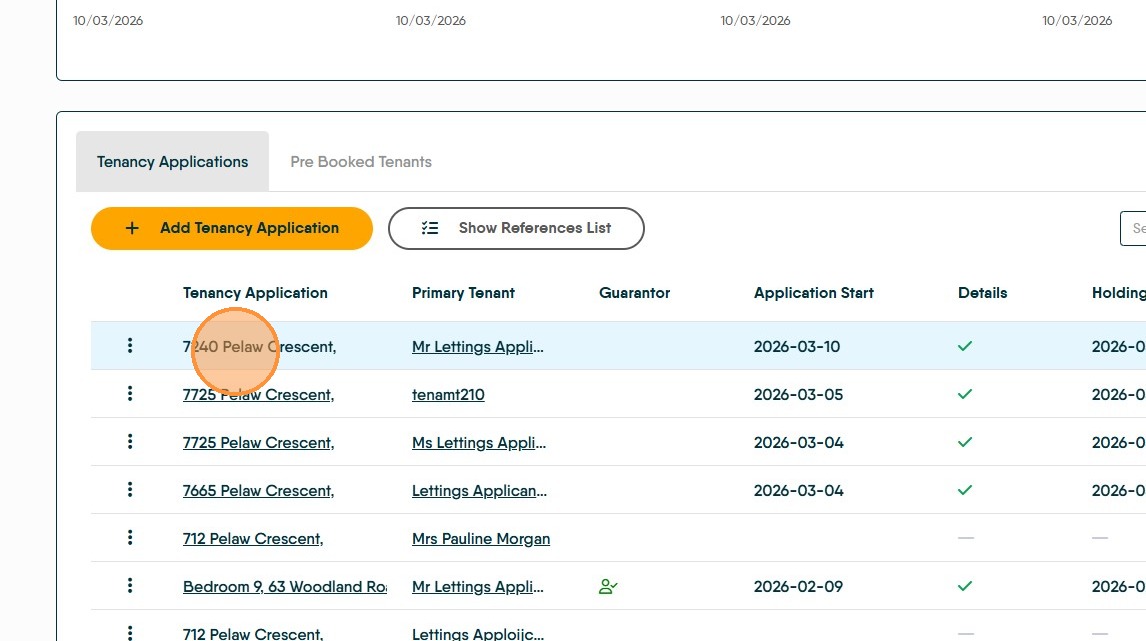
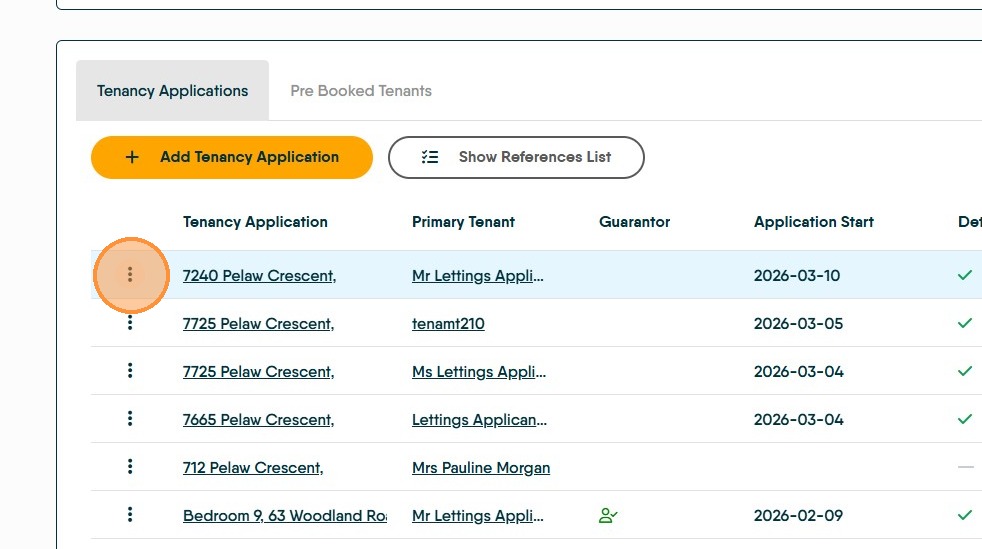
48. You can record that the Welcome Pack has been sent. to do this click the property address e.g. "7240 Pelaw Crescent,"
49. Click here.
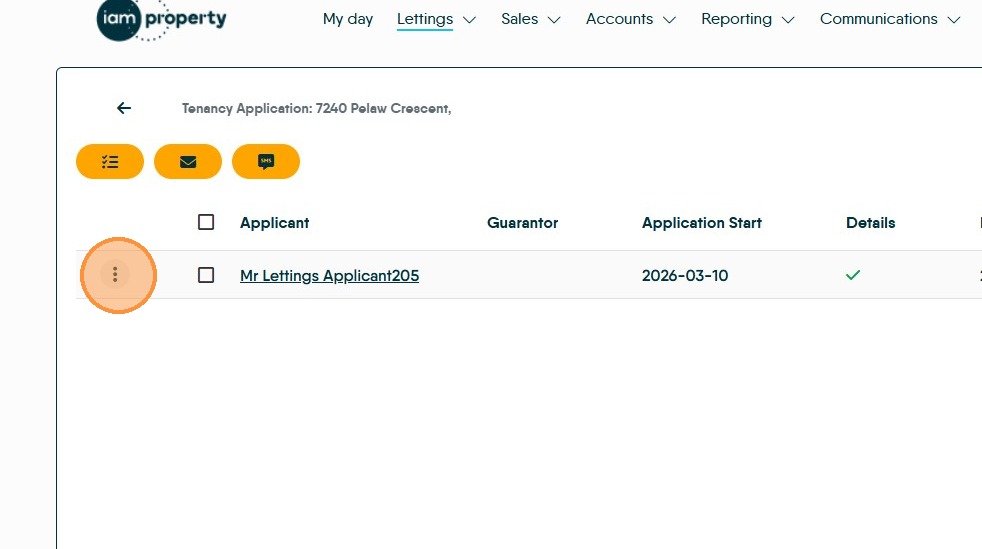
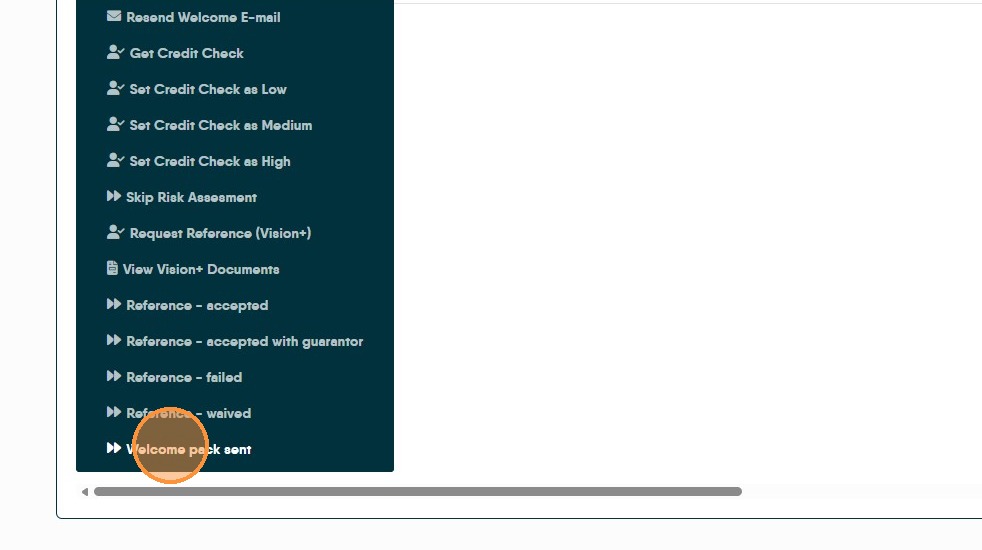
50. Click "Welcome pack sent"
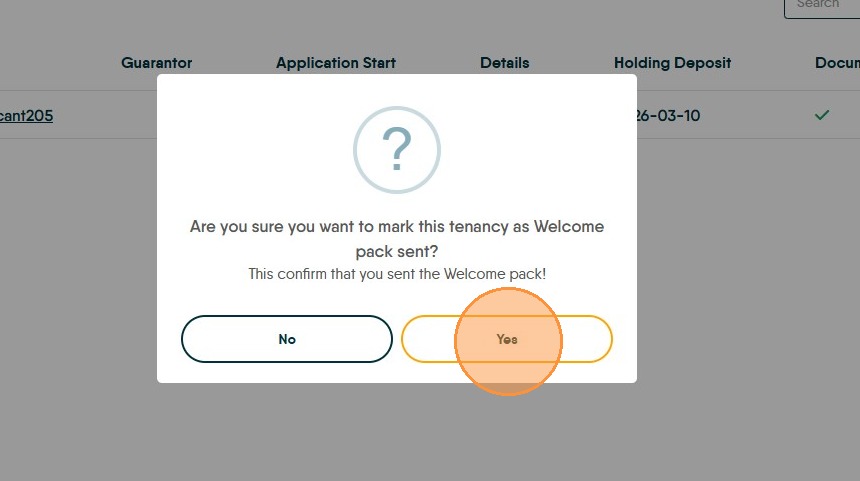
51. Click "Yes" if you do not want to note this, there is an option to skip this.
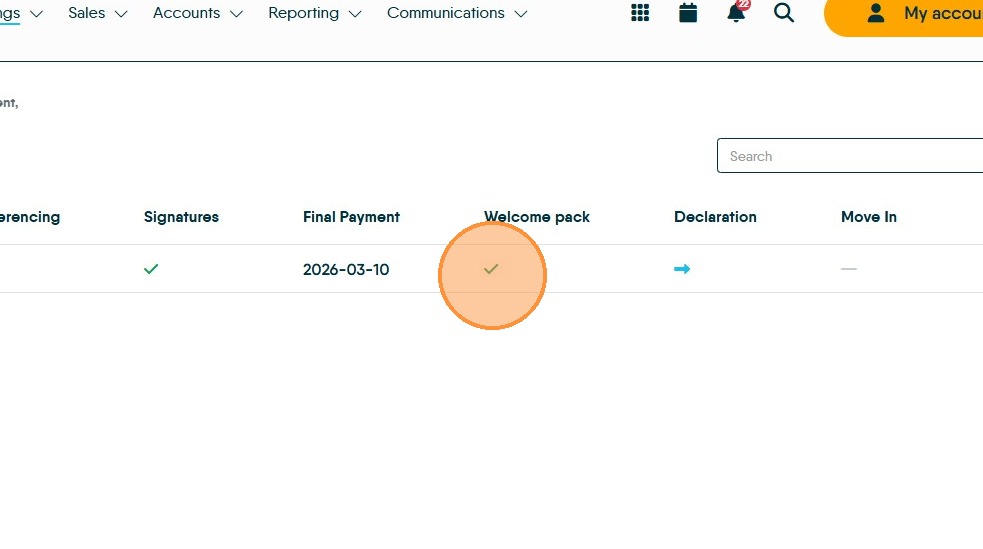
52. There will be a tick mark in the main Letzone screen to show either the pack is sent or the option skipped.
Declaration - Create and Send
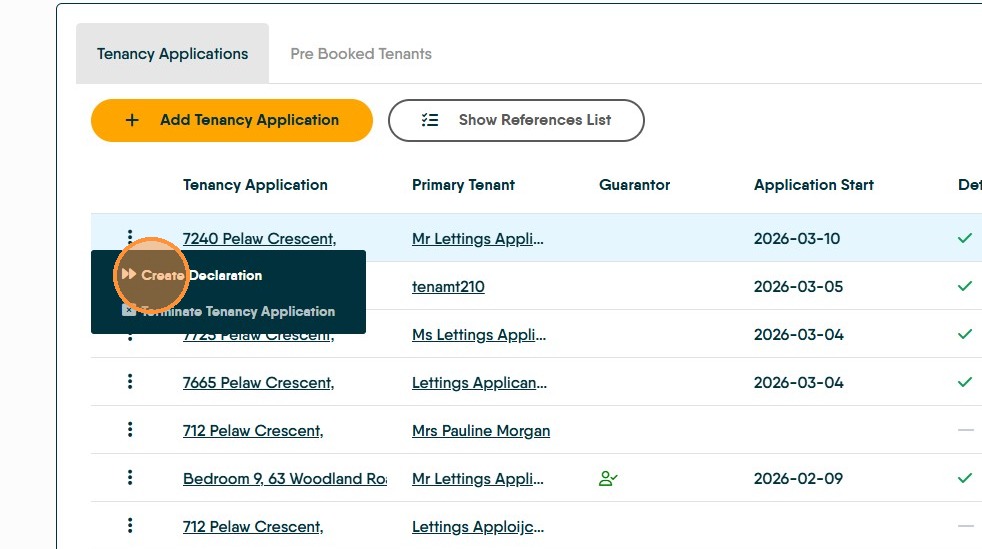
53. The Declaration allows you to send an e-signable (if available) document to your Tenant(s) to have confirmation they have received all the documents that they are required to be given at the start of a tenancy. From the main Letzone screen. Click here.
54. Click "Create Declaration"

55. Click "Please select a letter"
Click "Declaration" or whatever your declaration letter is named.
Click "Generate"
Click "Tenants" to check the details are correct
Click "Generate"
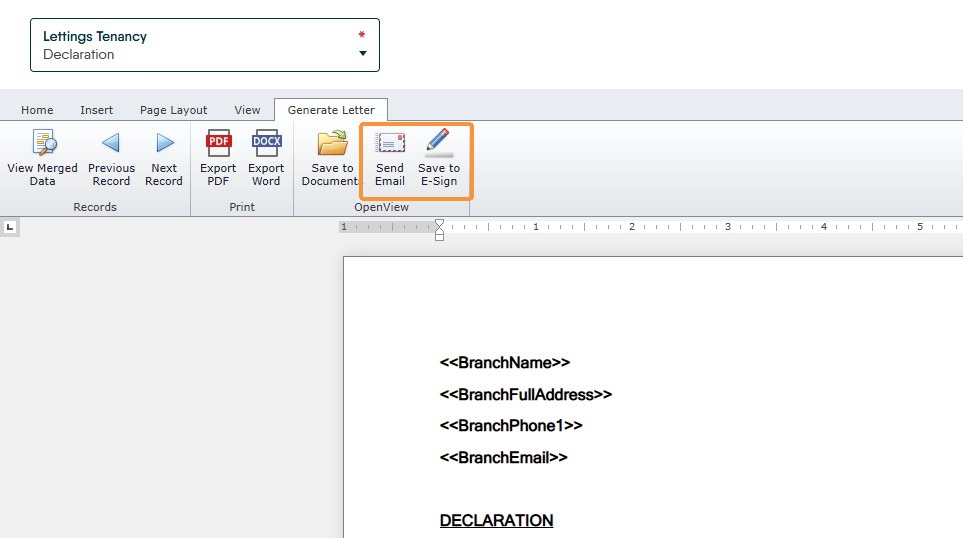
56. Click "Send Email" or "Save to E-Sign" to send the letter.
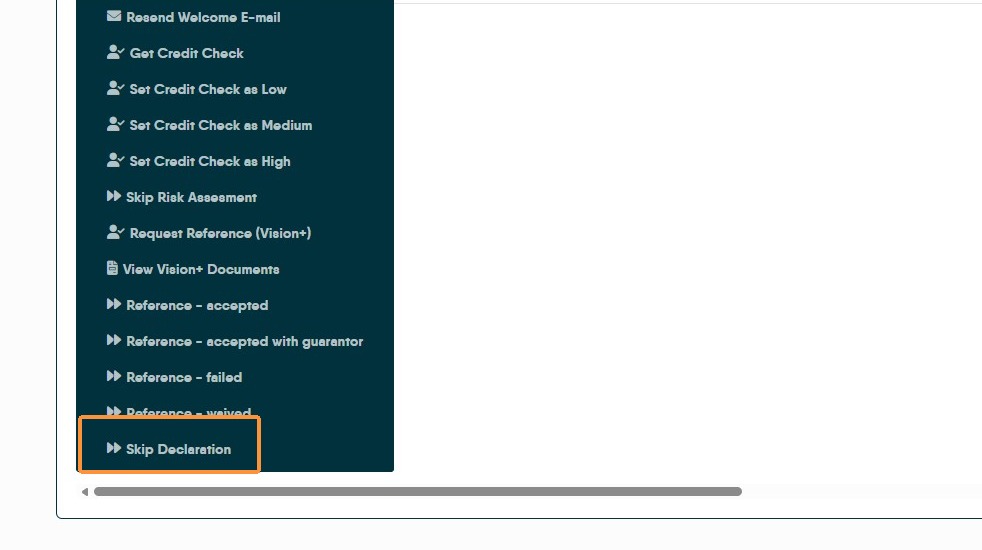
57. The Declaration can be skipped if required. Click the "Skip Declaration" option in the Tenancy Applicant list (from main screen click 'Property' > 3 dot menu next to each applicant you are skipping the declaration for) for example, you may want to do this if you have a married couple and you are only needing to note 1 person has received the documentation
58. Declaration is now marked as complete. The only option left is 'Move In' this is completed when the Tenancy is marked as live in the Tenancy Record. At this point the Tenancy Application will be completed and the line will be removed from Letzone.