This guide provides a step-by-step walk-through for navigating the Letzone Tenant Portal. It shows the login process and data entry, ensuring that users can quickly access and update their information. By following these instructions, users can easily use the Letzone portal to update their personal information. This process is the same for Tenants and Guarantors
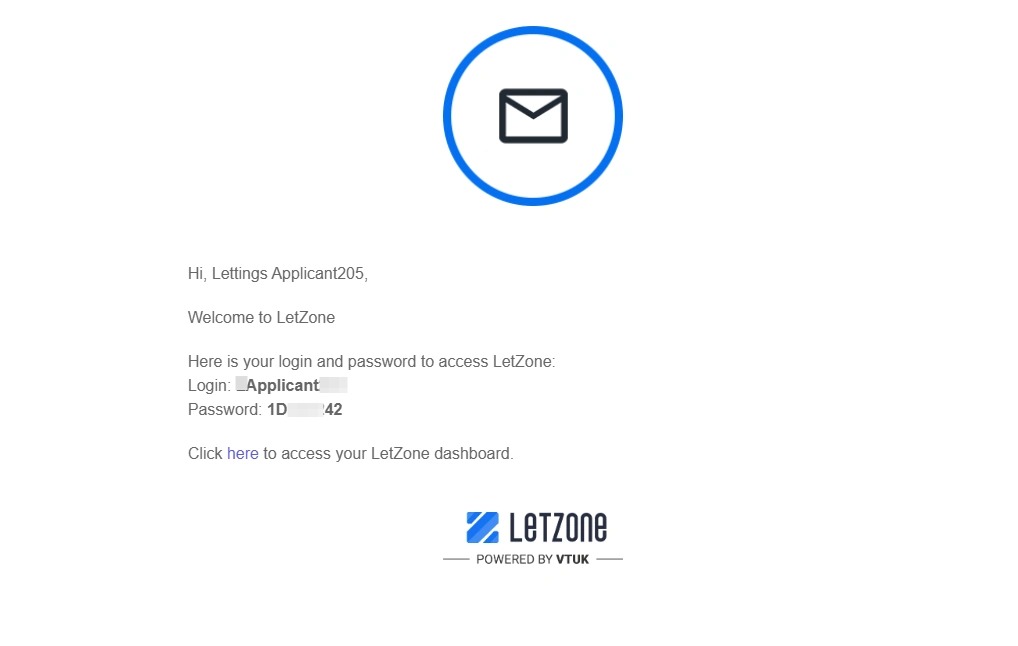
1. The Tenant/Guarantor will receive an email similar to this, with a Username and password, plus a link to access the actual portal.
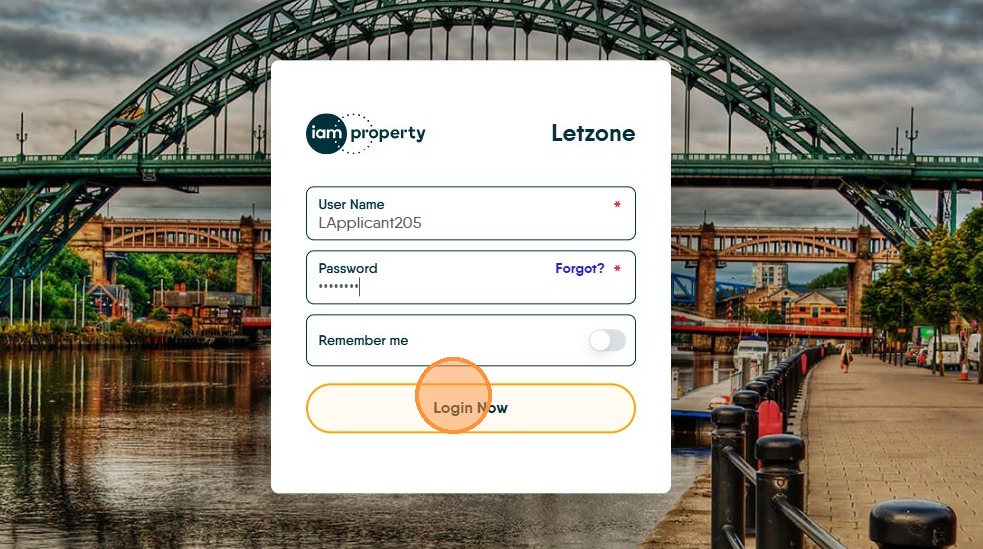
2. Click the "User Name" field add the Username and then the supplied password.
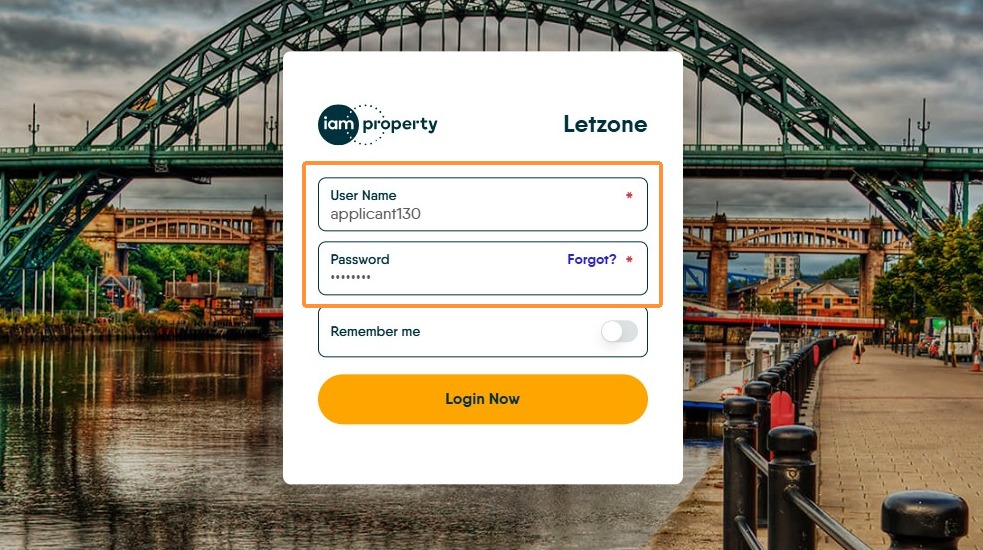
3. Click "Login Now"
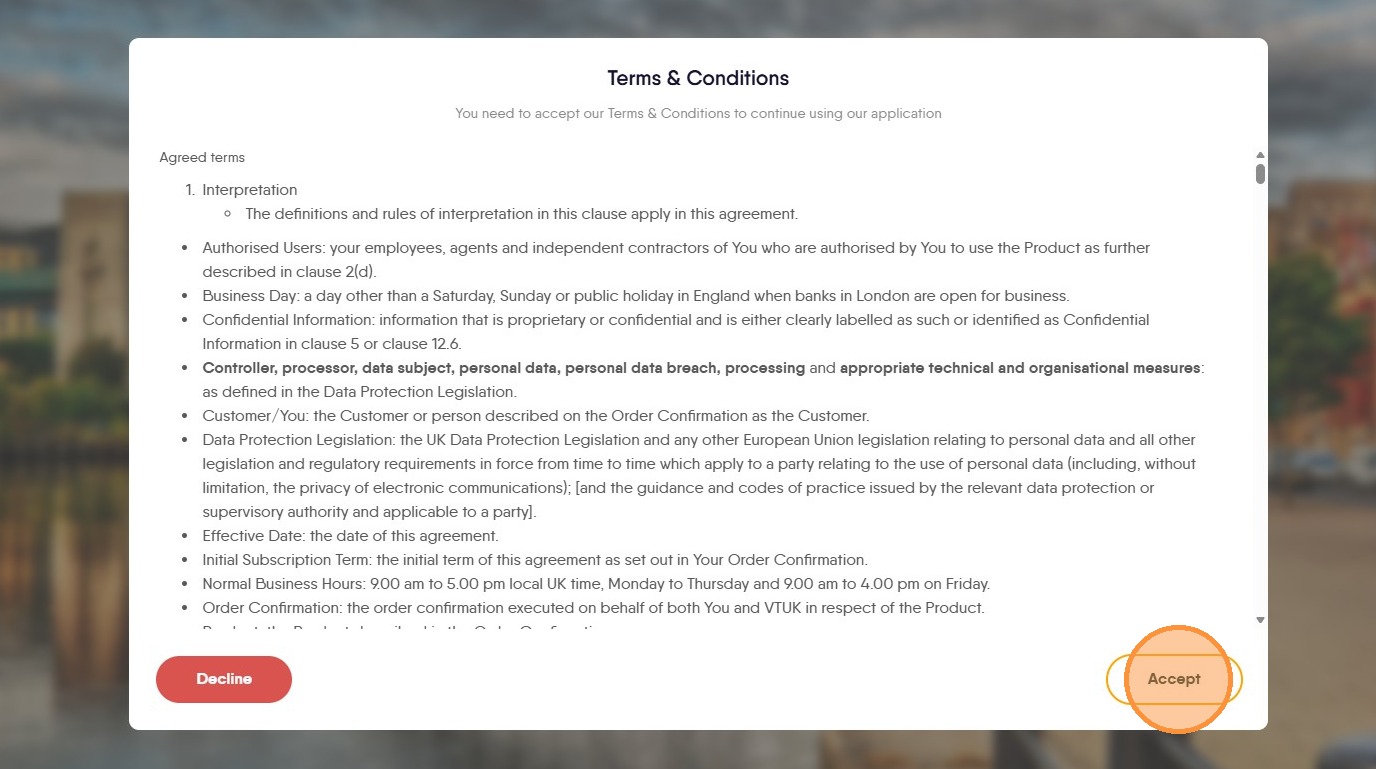
4. The Letzone terms and conditions will display. Click "Accept" to move on and login, these will only show once.
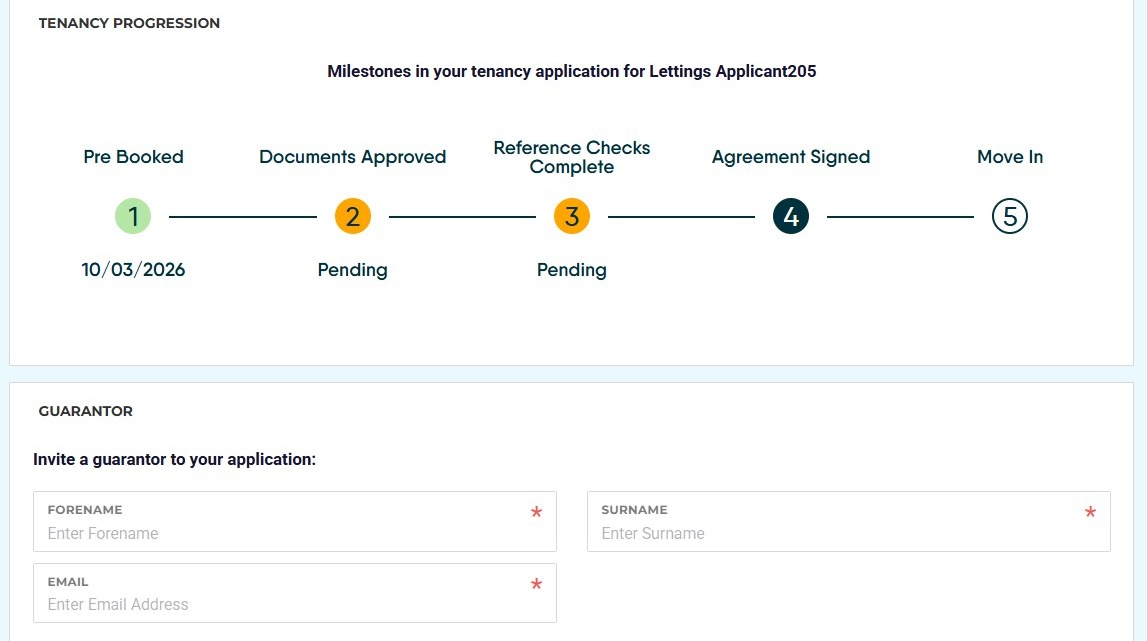
5. The "Home" screen shows a timeline for the progress through the tenant on-boarding process. At the bottom of the screen there is the option to add a Guarantor to the Tenant. The Guarantor will also be sent a login for this portal.
Alert: Alert! Throughout this Portal all areas with a 'red '*' are required to be completed.
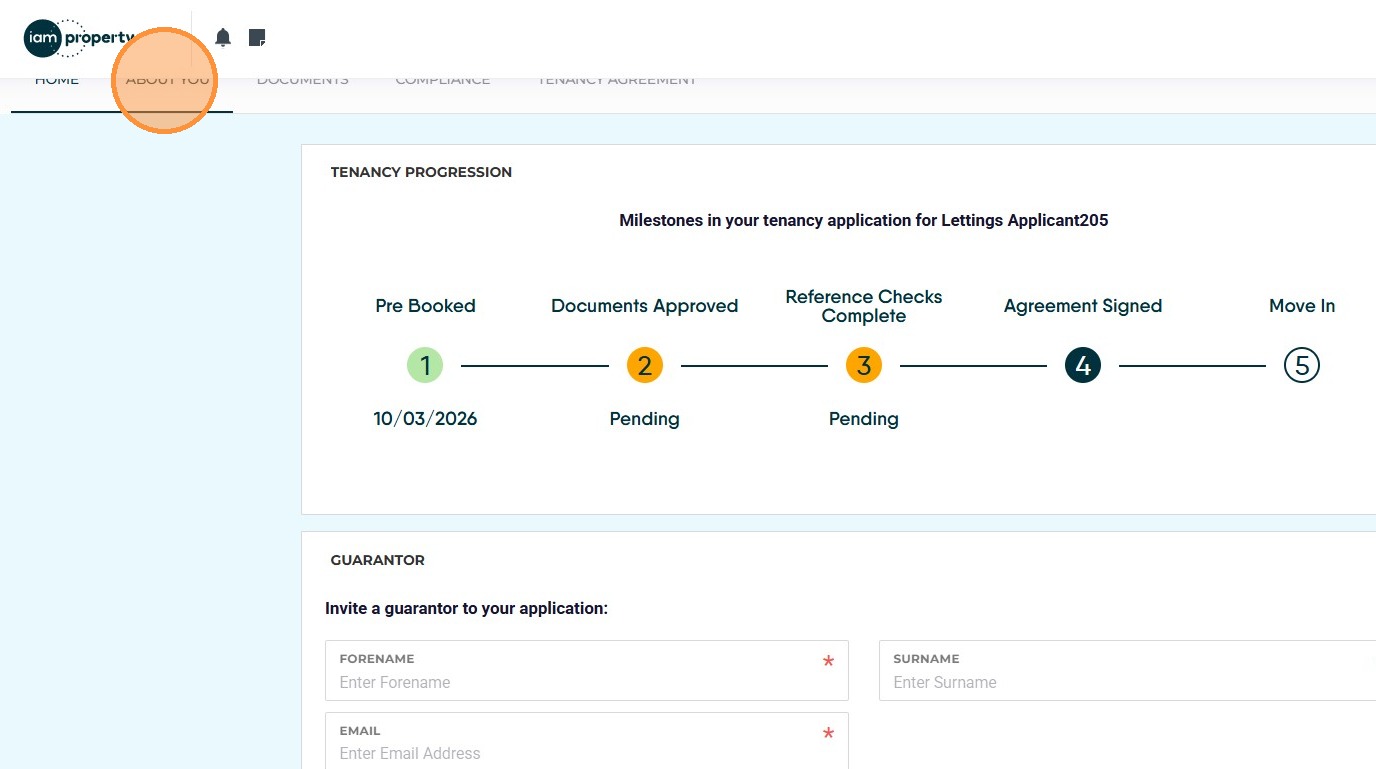
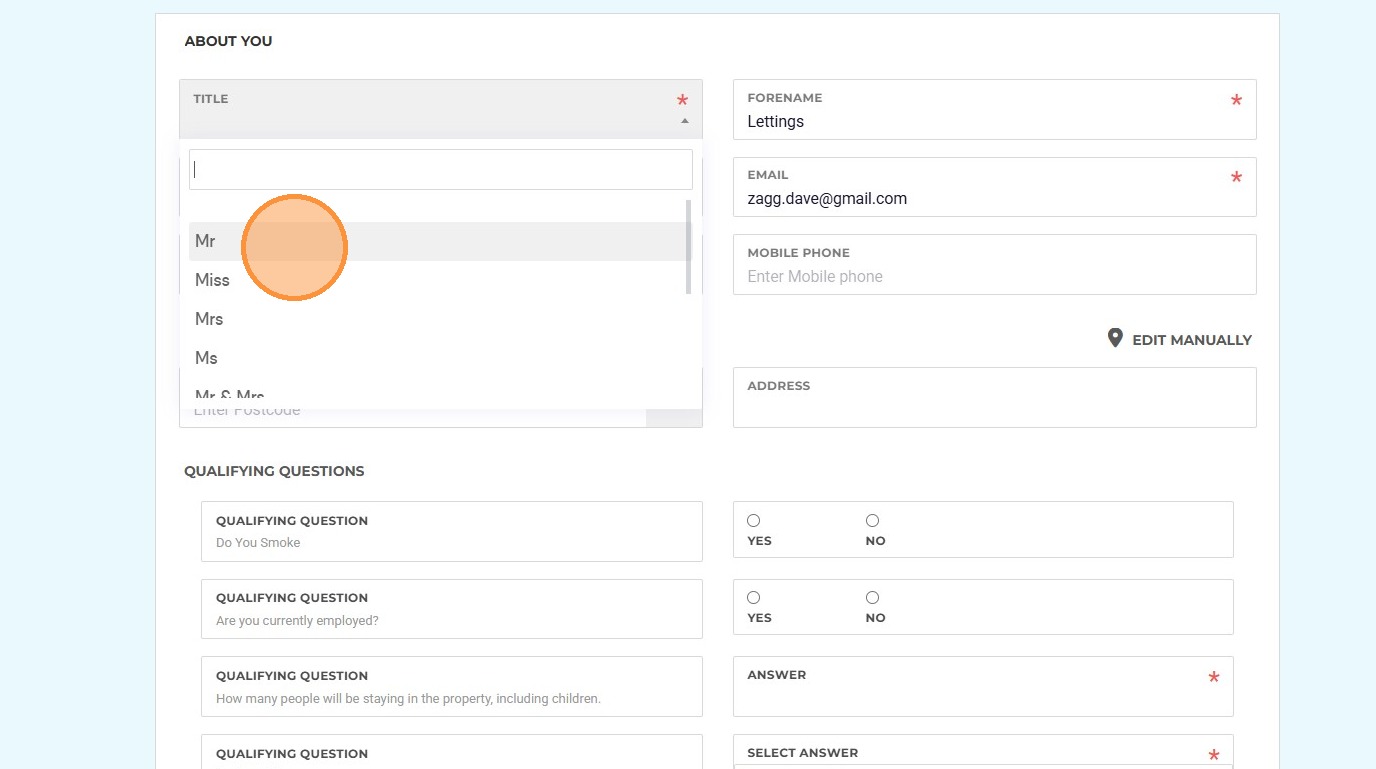
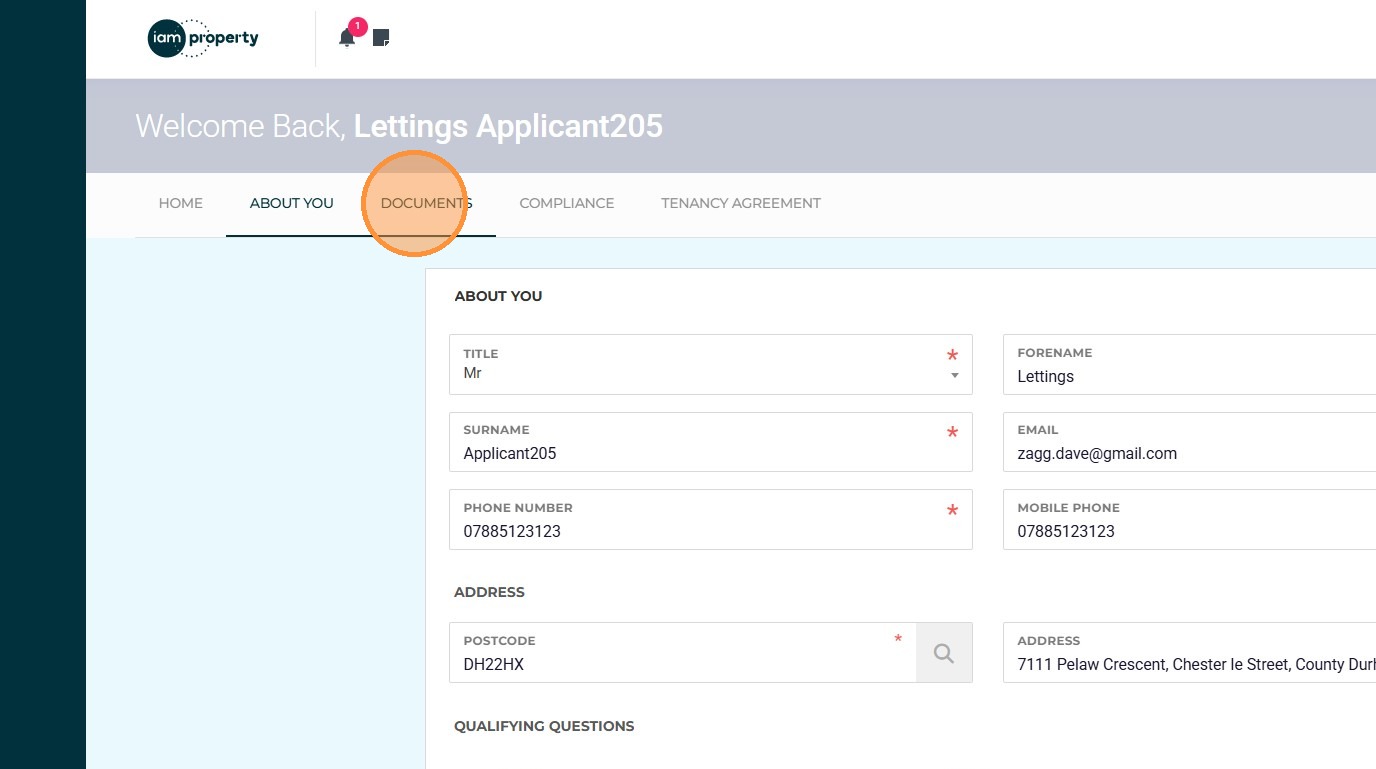
6. Click "About You"
7. In the About You section update all of the personal details and add any that are missing. Once complete your Agent will receive a notification.
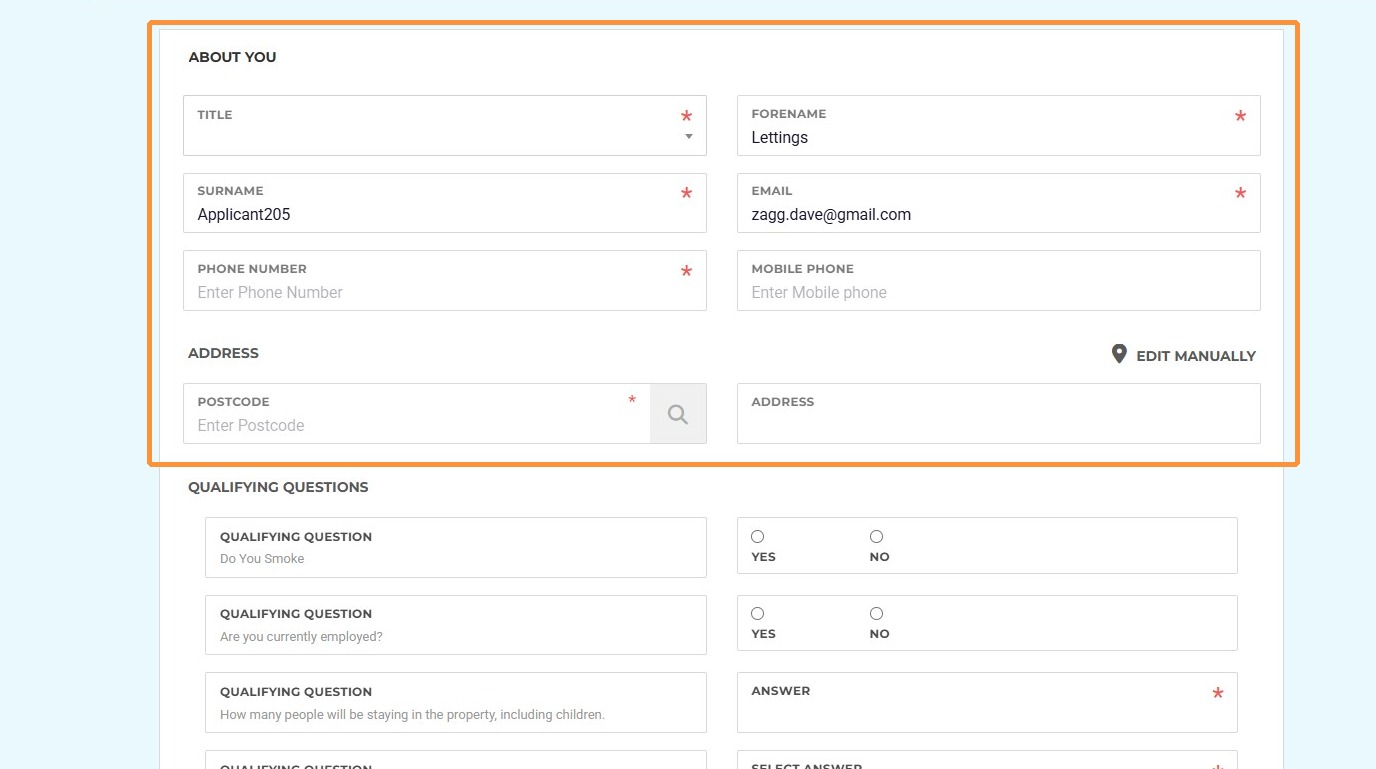
8. Click "Title" and set your title.
9. Click the "Phone Number" field and add in the phone number.
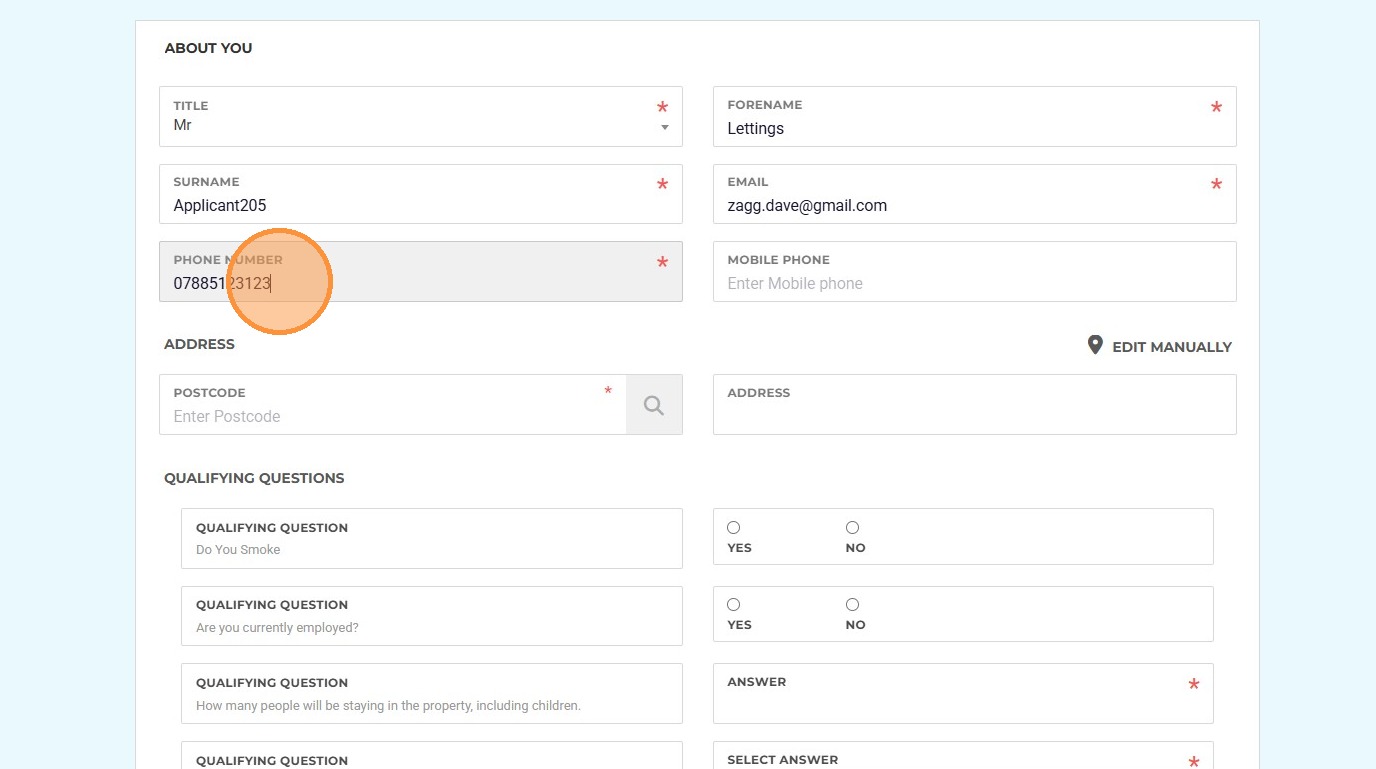
Tip: Tip! If you only have a Mobile Number, add this to both the Phone Number and Mobile Phone fields to enable SMS to be sent.
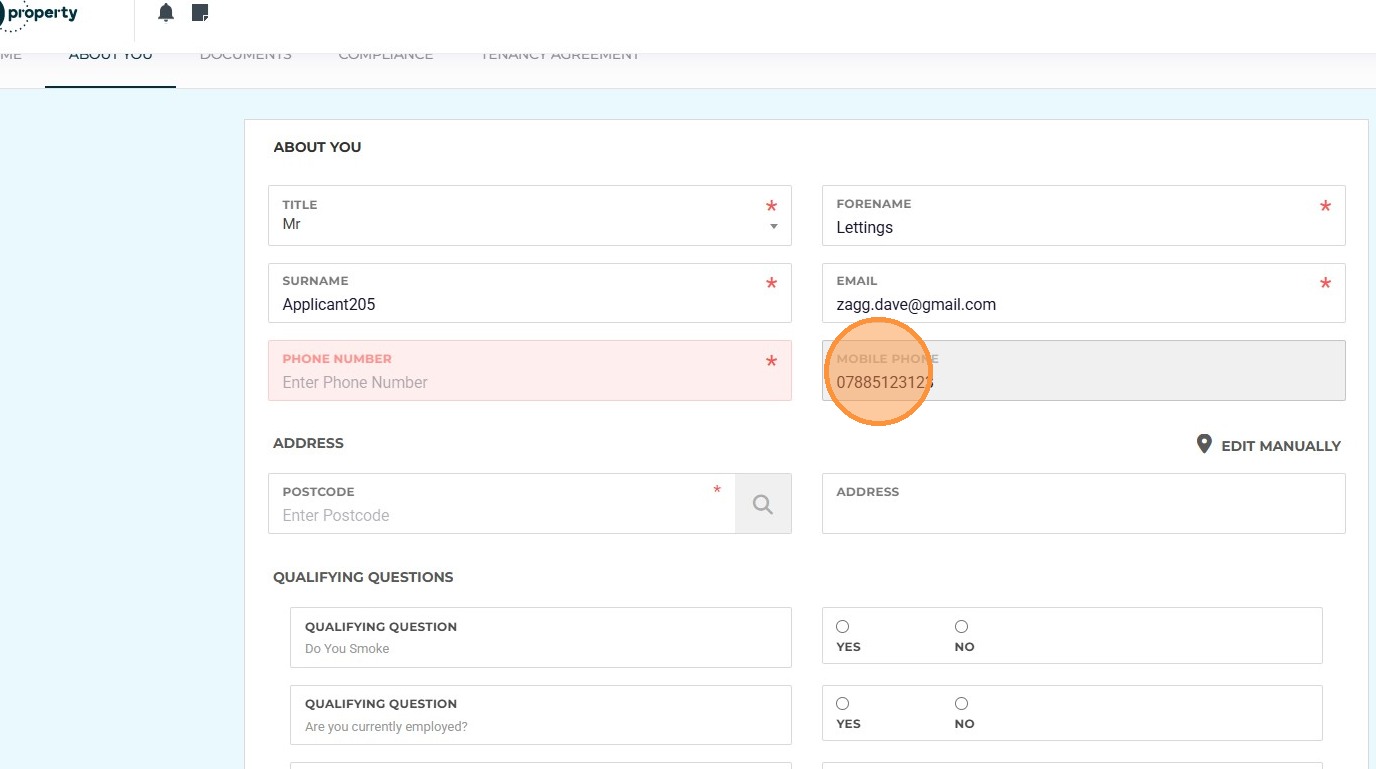
10. Click the "Mobile Phone" number field and add in the mobile phone number.
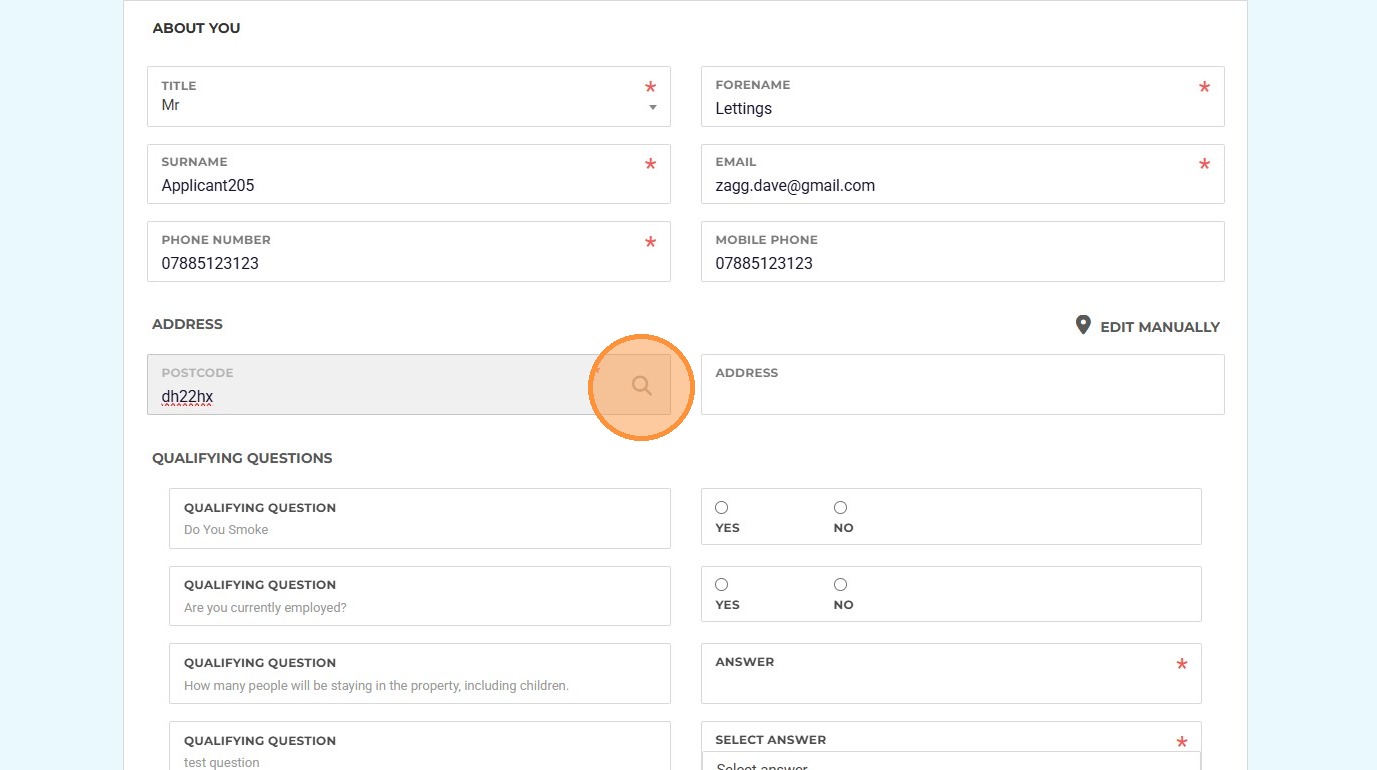
11. Click the "Enter Postcode" field. Enter the postcode and select the address from the drop down menu. If required click on ' Edit Manually' to either edit or add the address yourself.

12. Click here to search.
13. Click "-- Select Address --" and pick the address from the drop down menu. If the address cannot be found, or is incorrect, click the 'Edit Manually' option to edit the address.
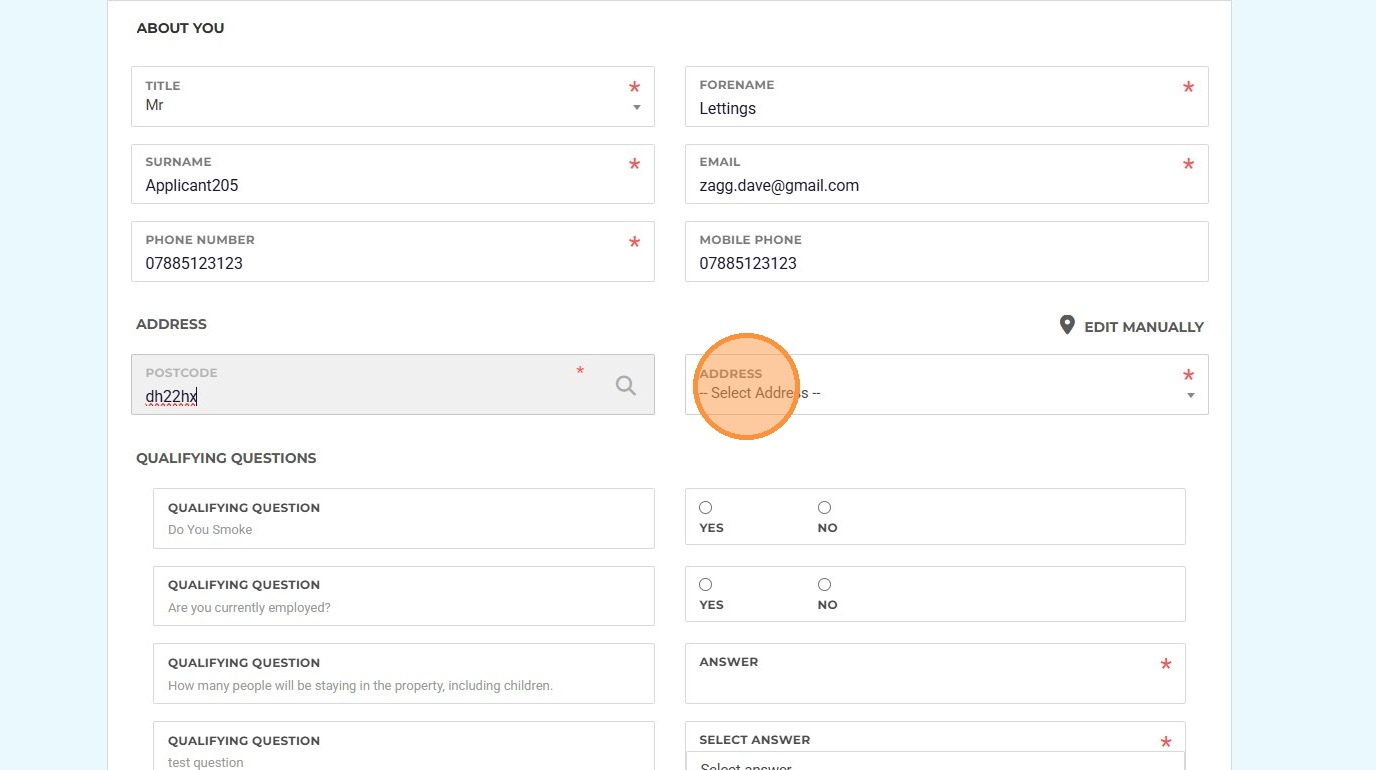
14. The next section to complete are the 'Qualifying Questions' these will be set by the Agent and should all be completed
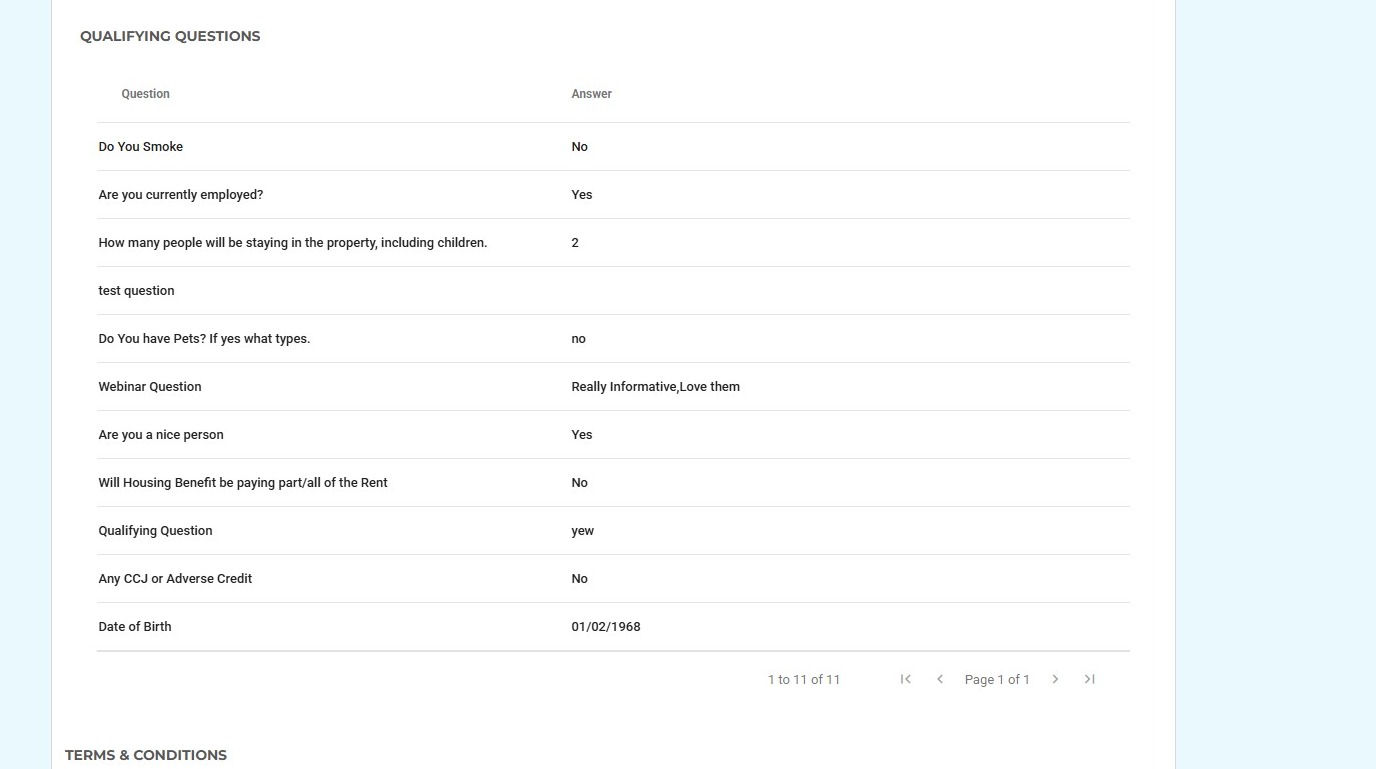
15. The Qualification Questions will look similar to this. There may be a mixture of yes/no, text/list etc questions to answer.

16. Click here to review and accept the terms and conditions.
You will be able to see a full version of the the Agents terms and conditions of rental. (We have not added any information here to avoid confusion) It is possible this section may not show as it is an optional screen for your Agent.
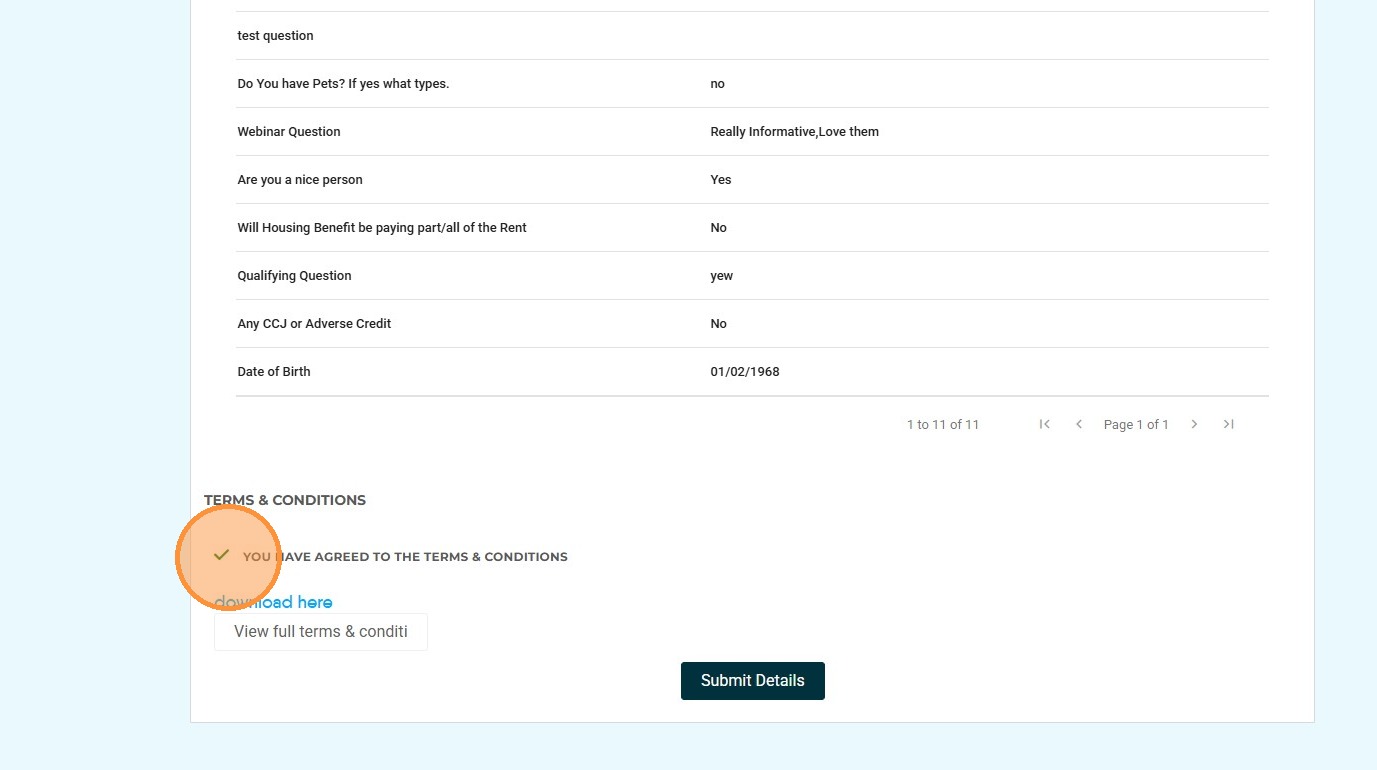
17. Click "Submit Details"
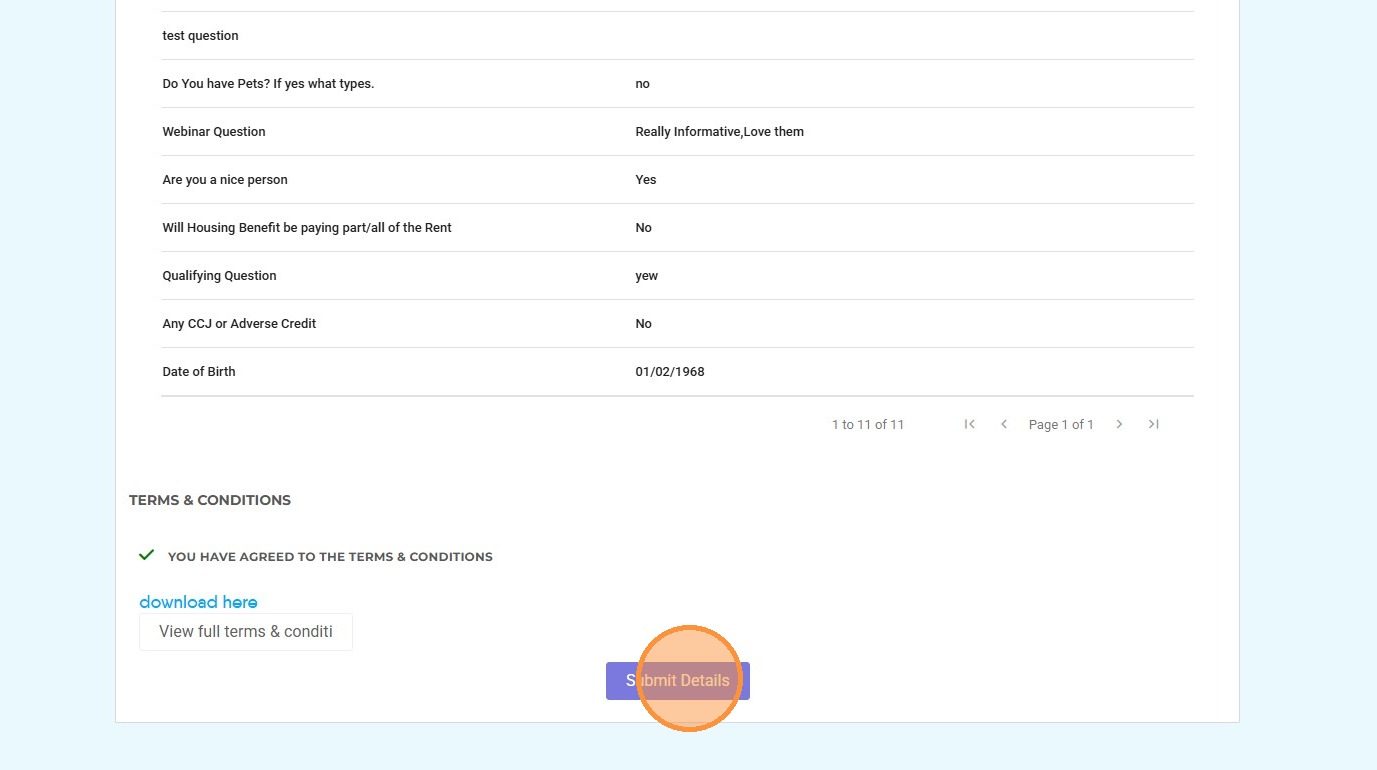
Tip: Once this section is completed, your Agent will receive a notification.
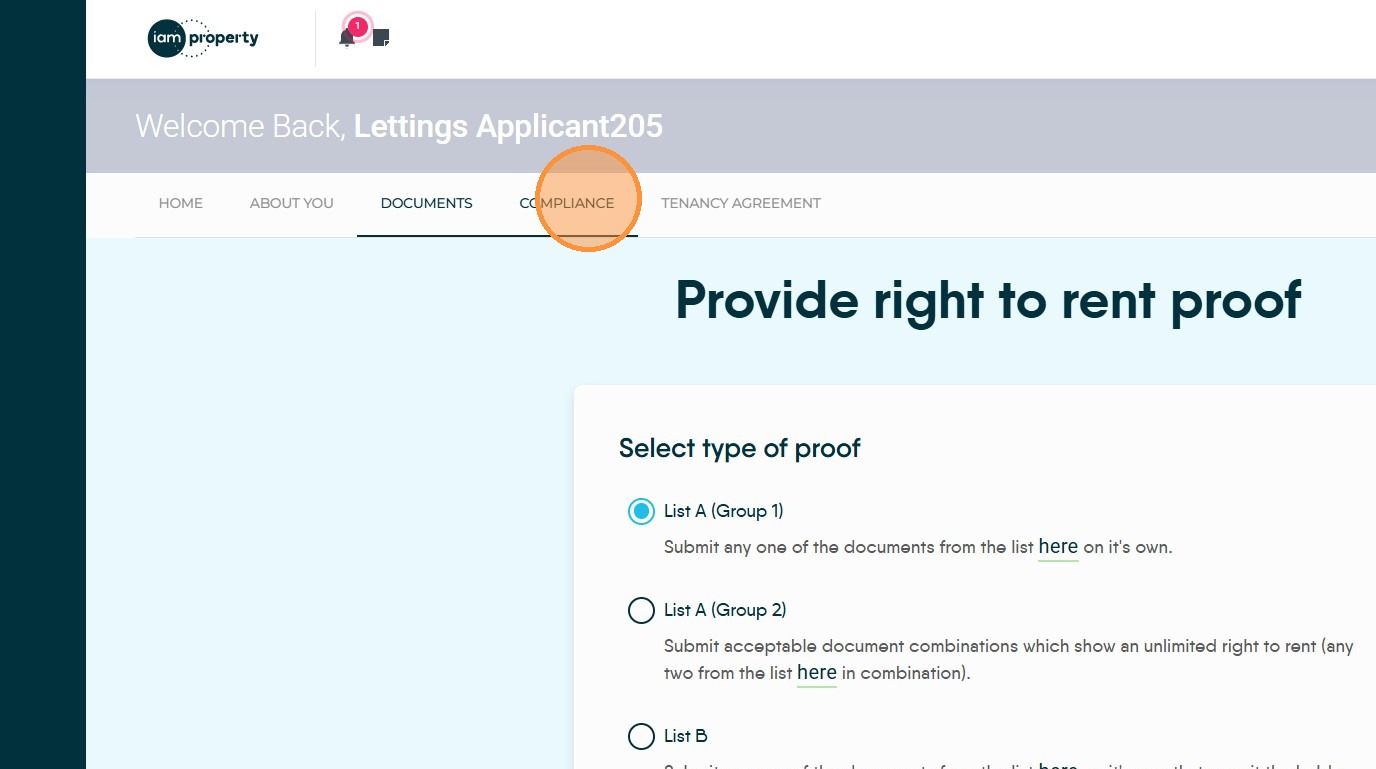
18. Click "Documents"
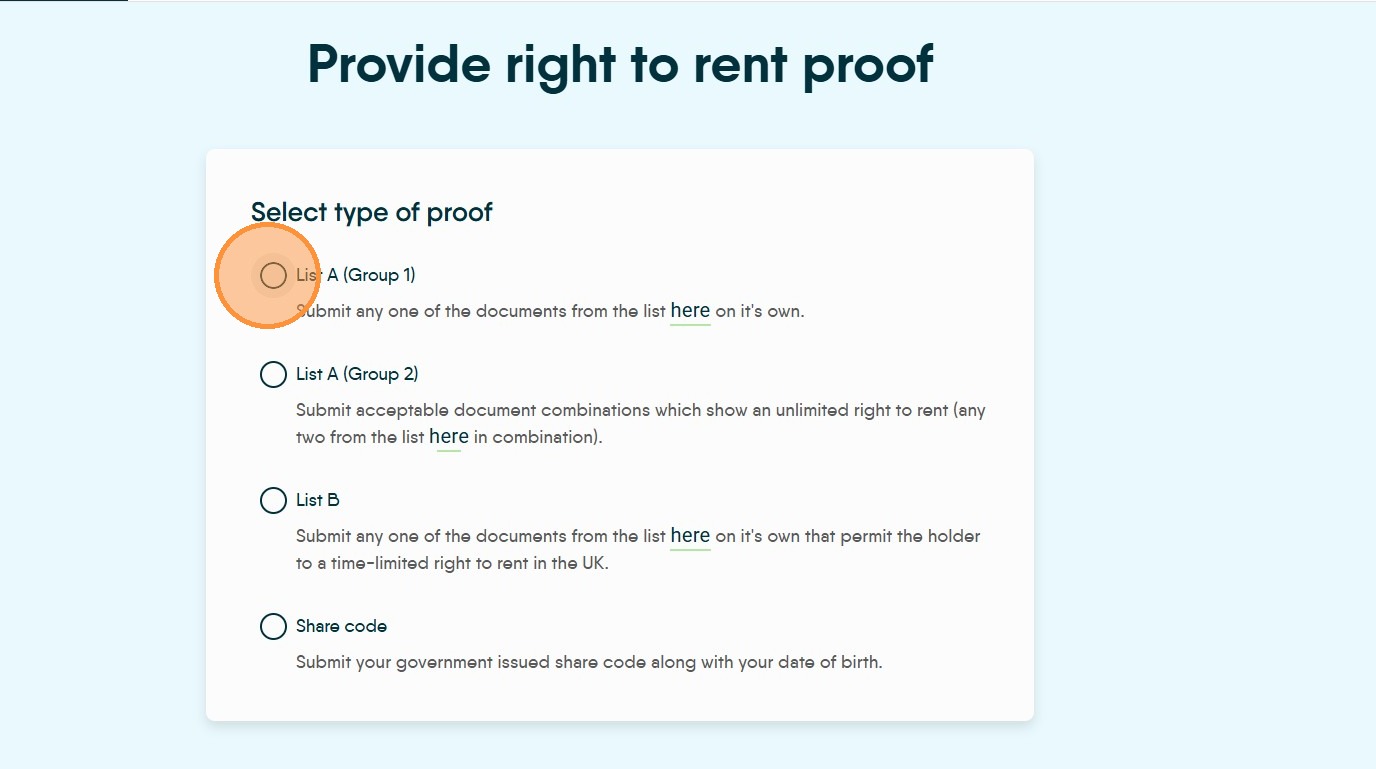
19. There are 4 options for proofs, as shown below.
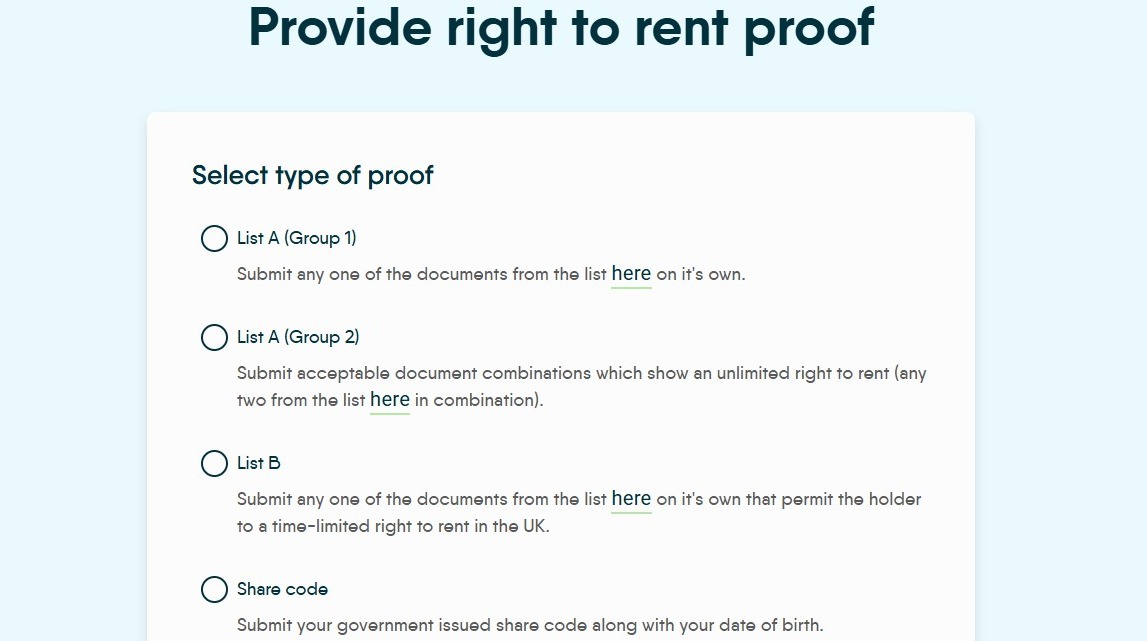
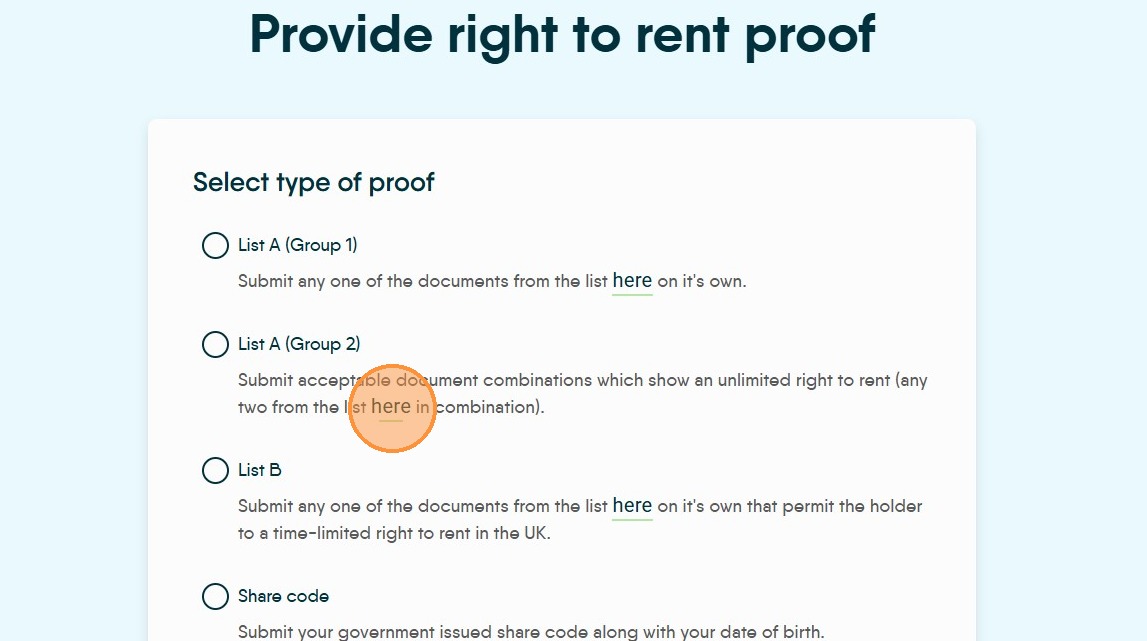
20. Click "here" to see the list of acceptable proofs.
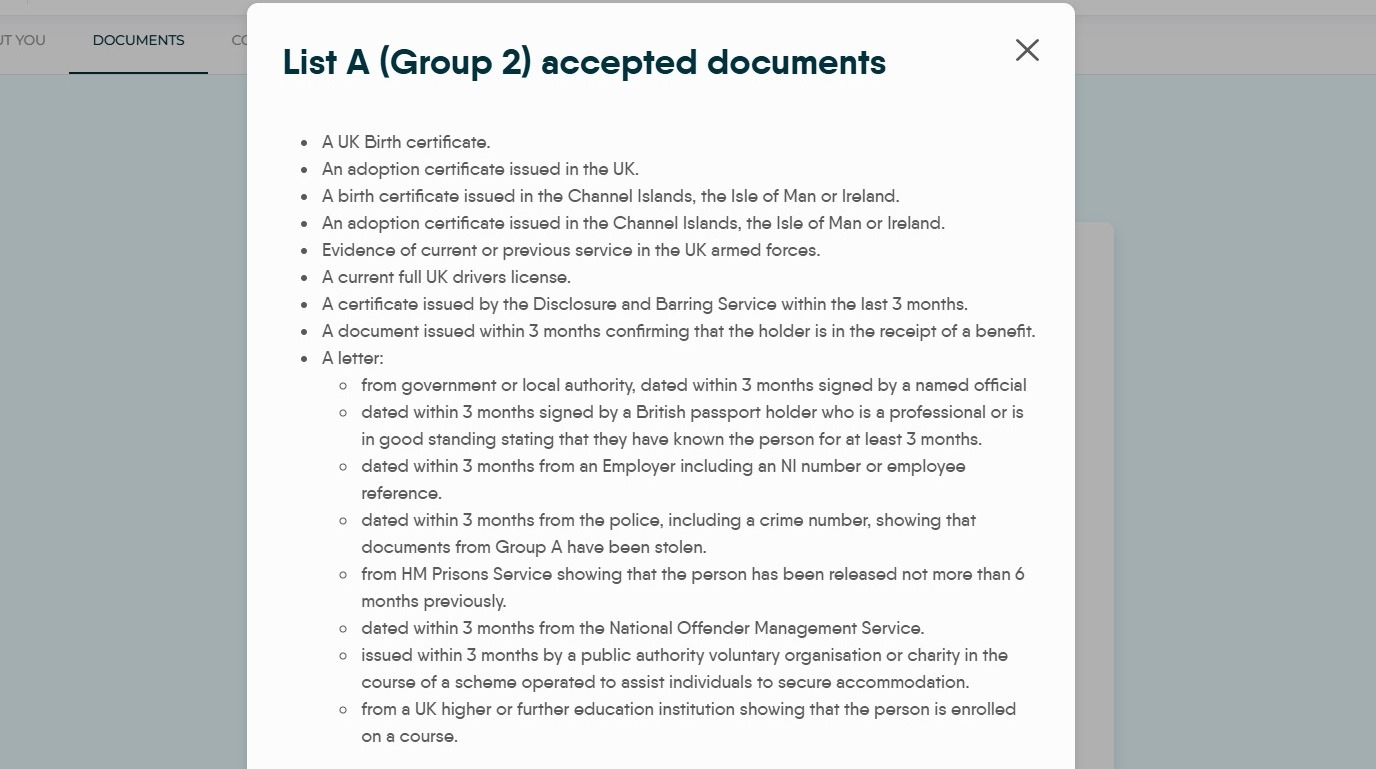
21. A sample list of the accepted documents.
22. Select the proof option you are using. e.g. Click "List A (Group 1)"
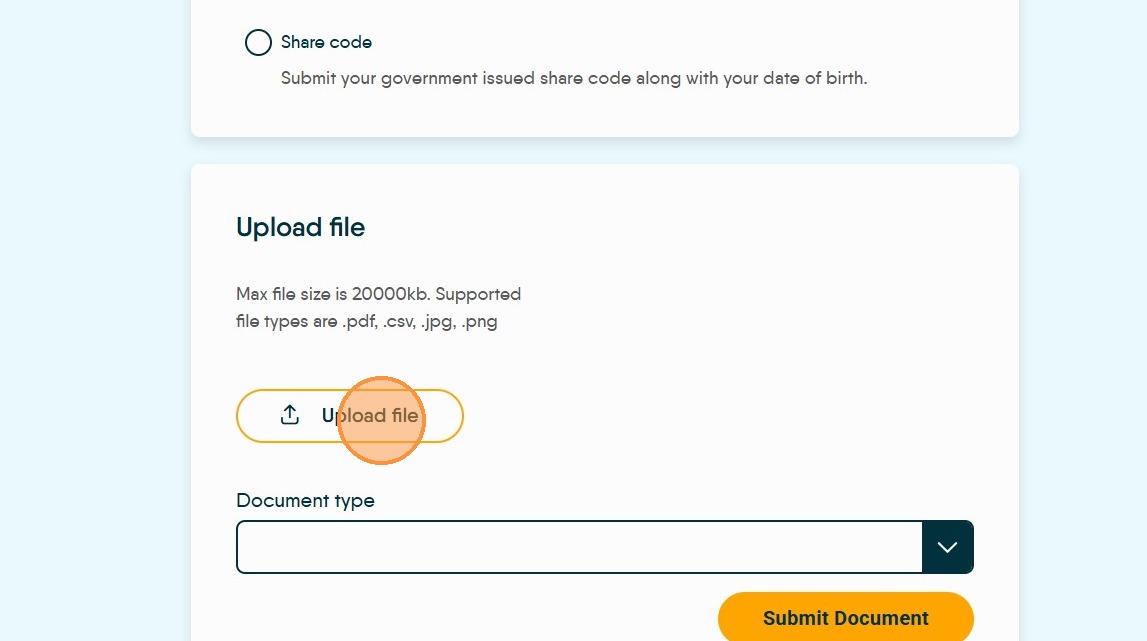
23. Click "Upload File" to search for and upload the file. This can be uploaded from a folder on your computer, or if you are using a mobile phone or a tablet can be uploaded directly from the camera or photo gallery.
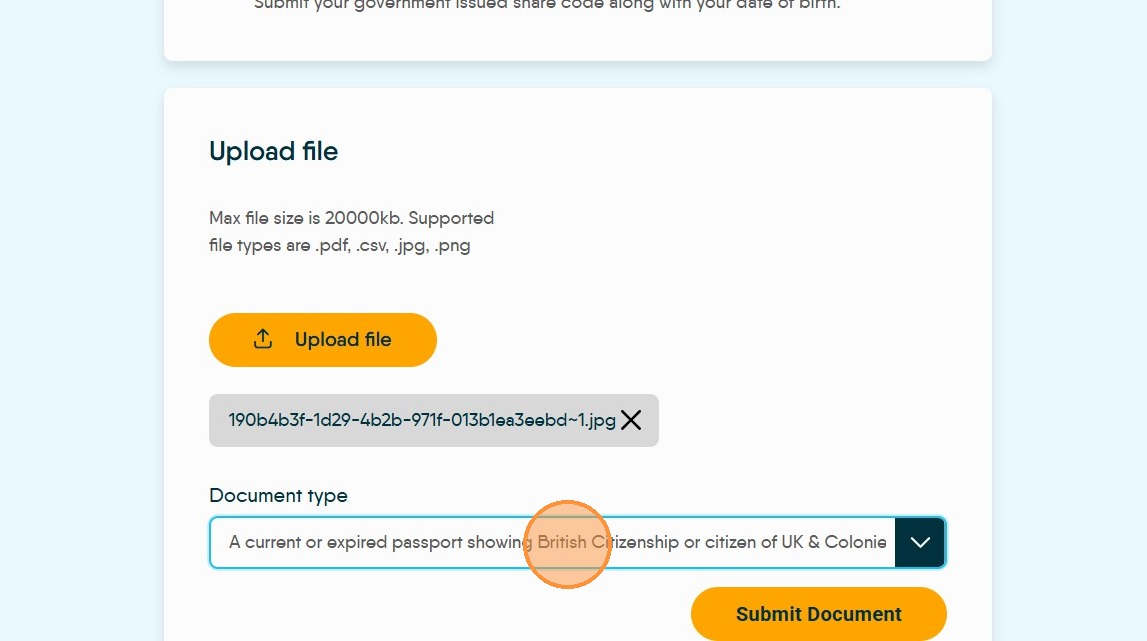
24. Select the type of document you are uploading e.g. "A current or expired passport showing British Citizenship or citizen of UK & Colonies with "right of abode"" option.
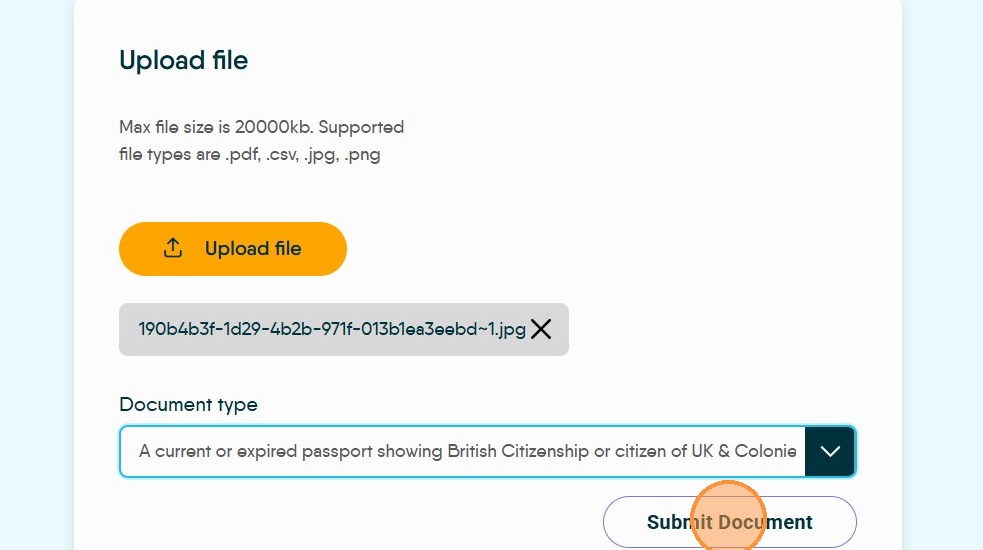
25. Click "Submit Document" Your agent will get notification that you have uploaded a document and what type of document you have uploaded.
26. Click "Compliance"
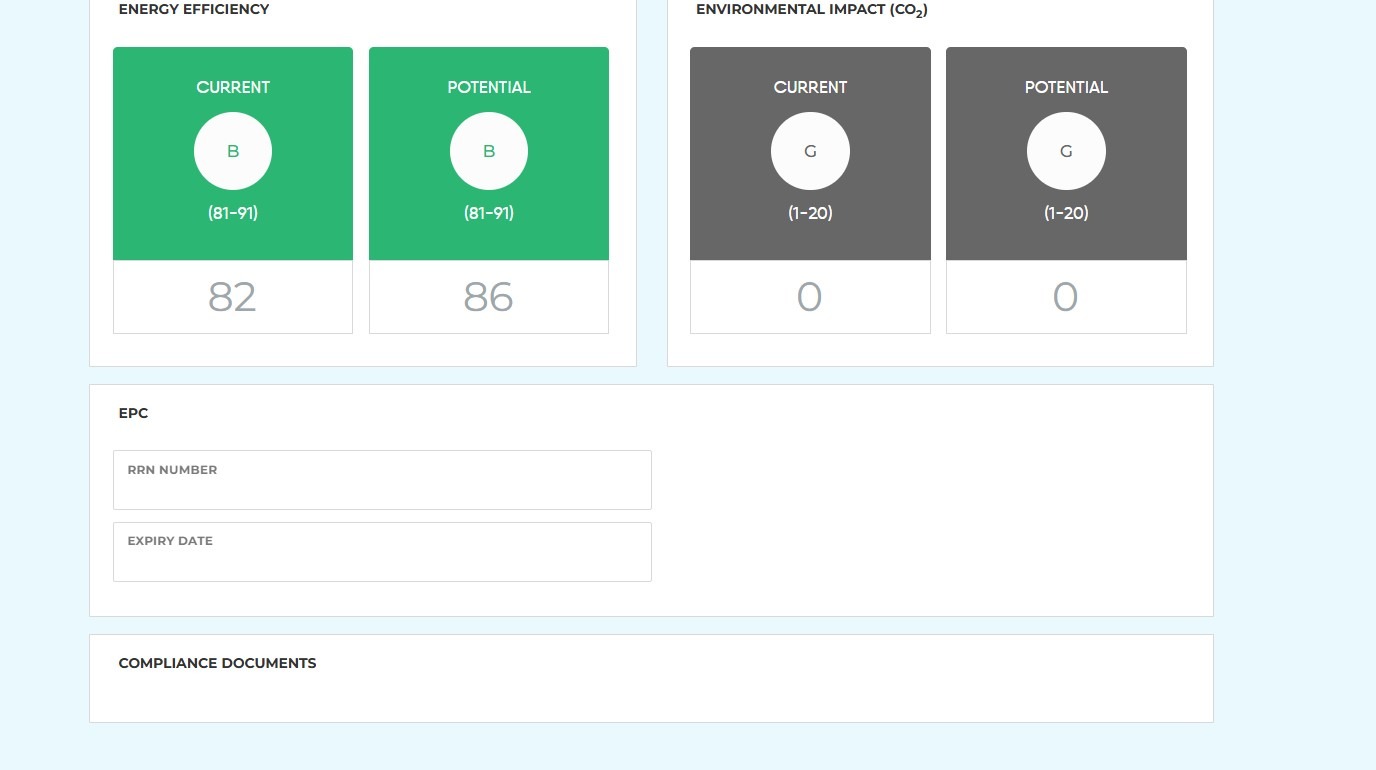
27. In "Compliance" you will see all the compliance/safety checks that are set for the property, including the EPC details. There is also an option to tick and note you have read and understood these documents.
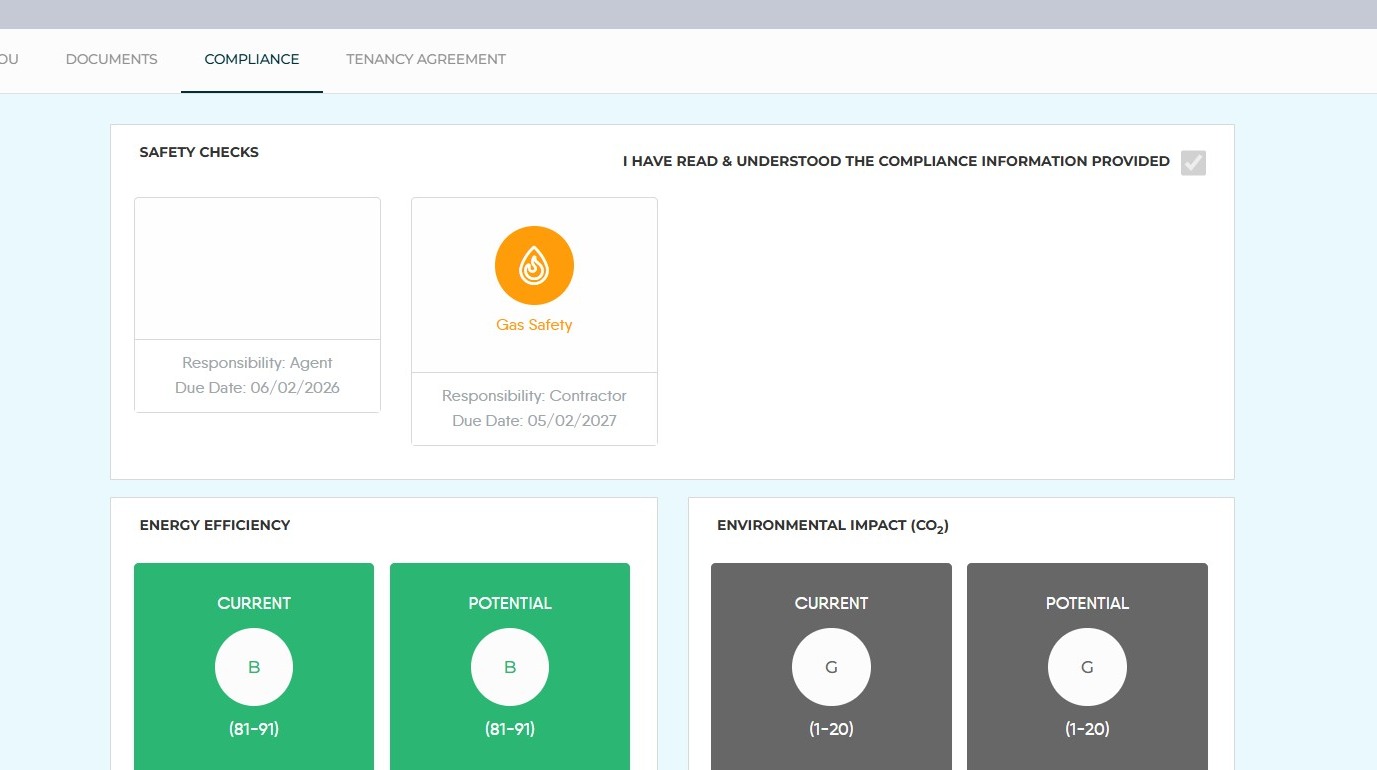
28. If made available you will also be able to see the actual compliance certificates e.g gas safety, smoke detector etc.
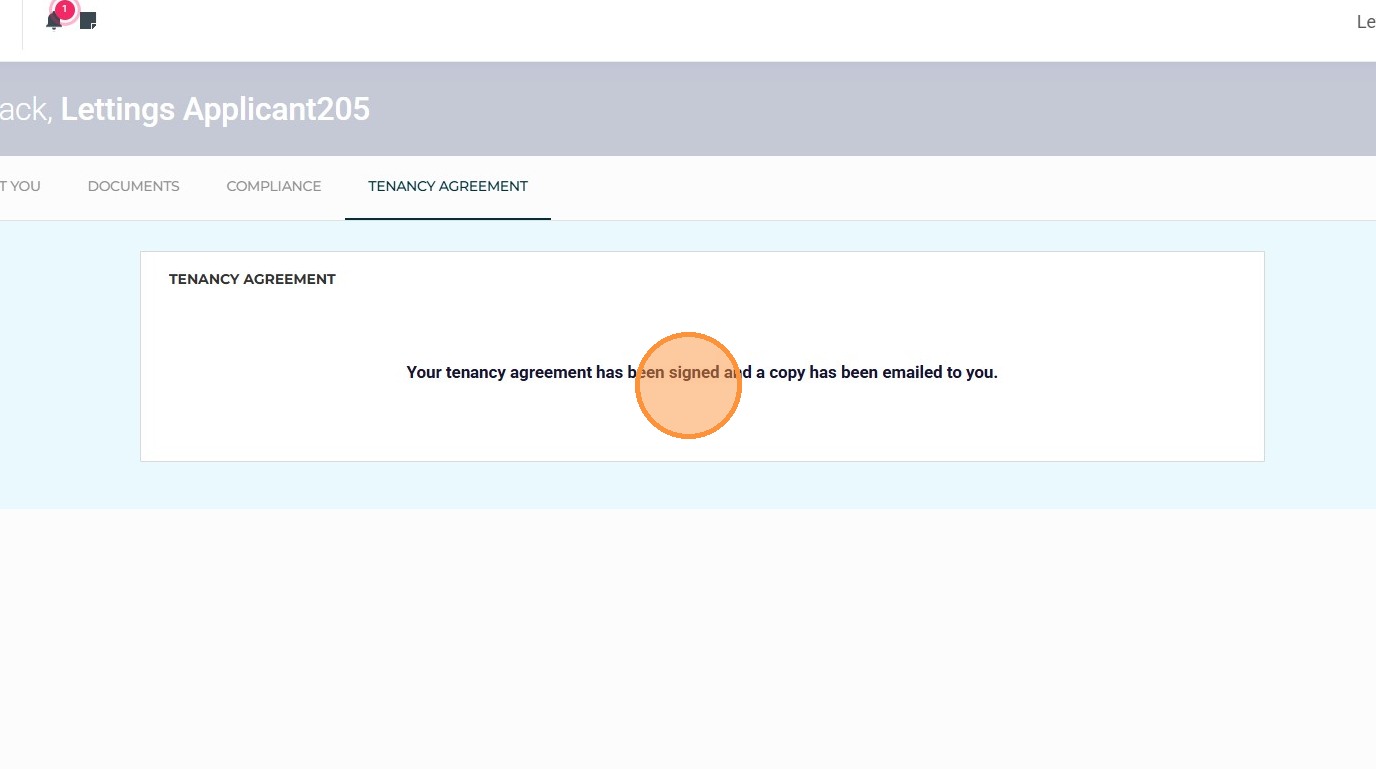
29. The "Tenancy Agreement" this will show the current progress in your application.