This guide provides a step-by-step process for adding a letter template in iamproperty CRM, enhancing your branding and professionalism in communications. Also this guide shows how to add merge tags to automatically add client data. By following these clear instructions, you can easily customise letters for your lettings applicants. This guide will save you time and help you maintain consistency across your correspondence, ultimately improving your business's image.
Alert: Alert! When creating a letter to be uploaded to CRM the letter must be created and saved in .RTF format. This can easily be done in MS Word or other similar software.
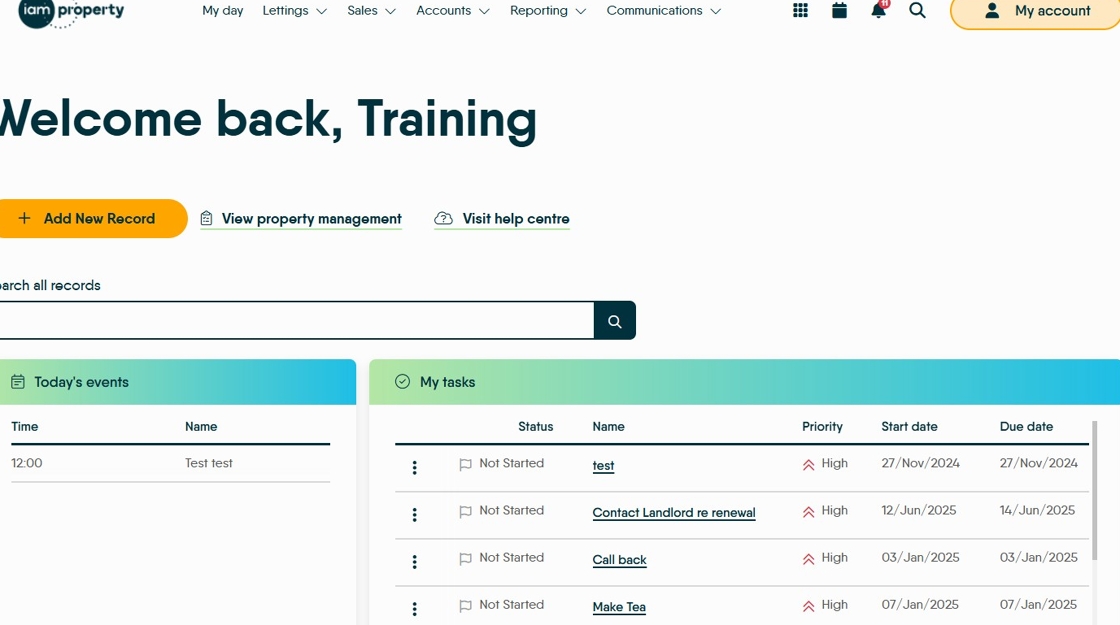
1. Navigate to https://crm.iamproperty.com/MyDay
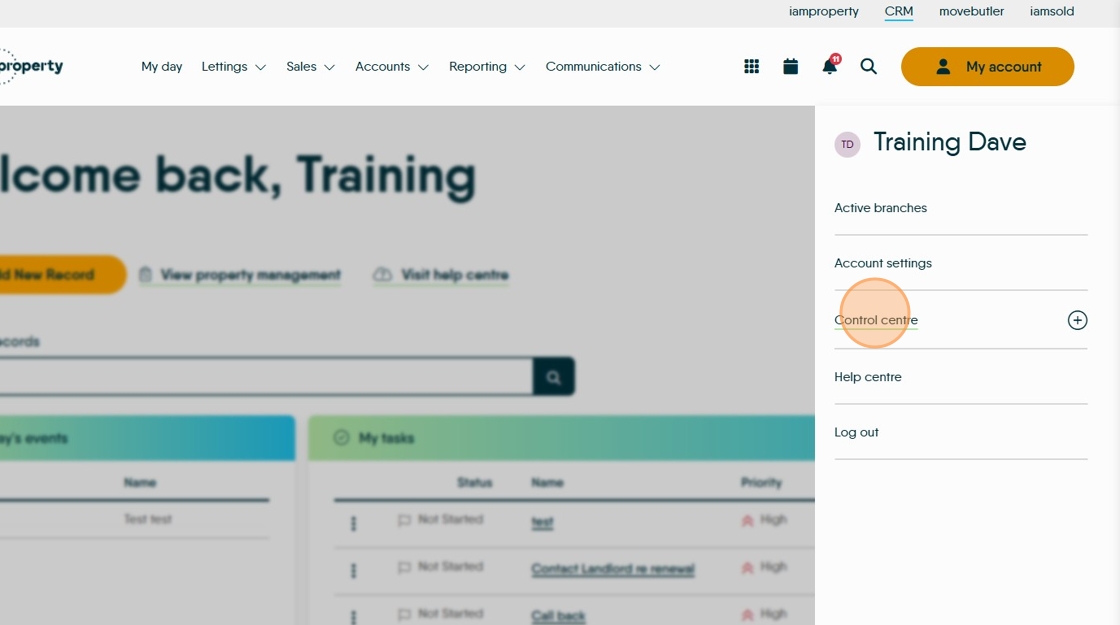
2. Click "My account"

3. Click "Control centre"
4. Click "Configuration"

5. Scroll down and Click "Letters"

6. To add a new letter click "Add Letter"

7. Click "Letter Type" and select the recipient you are creating the letter for.

Alert: Alert! When creating a letter in CRM it is important you create the correct letter type in the Add New Letter section. If you select Lettings Applicant as the letter type, this letter will only be available in the Lettings Applicant area of CRM and NOT in another section e.g. Landlord. If you want a letter in multiple places it needs to be created into those areas.
8. Click and select the letter type from the drop down menu.

9. Click the "Letter Name" field, name your letter as you would like it to be seen in CRM

10. Click "Drag and drop files here or click to upload letters templates" this will take you to a documents screen where you can search for and find your letter.

11. Once your document is added click "Save"

Alert: Alert! Once the letter is added you can add 'Merge Fields' to automatically include information in the letter. For example, you may want to add client addresses, property sales details etc.
12. In the letters menu of CRM scroll to find the letter you have just added, it will most likely be at the end of the list. Click here to open the editor.

13. Merge Fields will show like those highlighted below. If the uploaded letter has text that looks like this it is advised to test the letter to see if the merge fields need to be updated.
Test the merge fields by selecting either the 'View Merge Data' or 'Test this Letter to PDF' options, highlighted below.

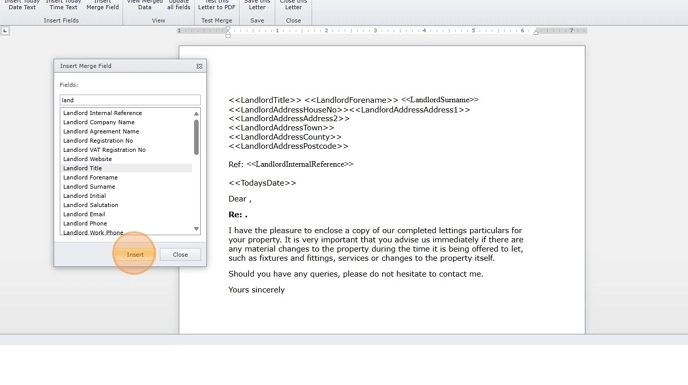
14. To add or update the merge fields. Click "Insert Merge Field"

15. Click onto the letter where you want the tag to be placed.
Click the "Fields:" search option at the top of the screen. Search for the tag you want to use.
N.B. Scrolling will not always find you the option required.

16. For example, type Land this will show all the merge fields with 'Land' as part of the field name. Click "Landlord Title"

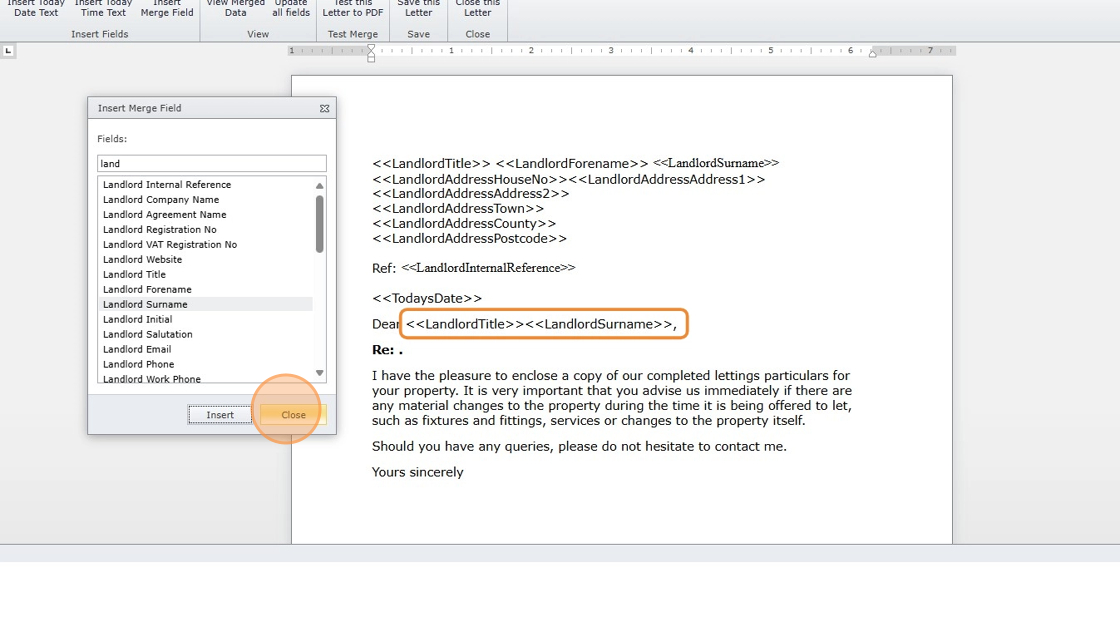
17. Click "Insert" this will then add the merge field to the letter.
18. To add another merge field, click on the screen where you want the merge field to be placed and select the option from the list e.g. Click "Landlord Surname"

Tip: Tip! Once you are comfortable with this process you may find that it is not necessary to click on the screen each time.
19. Click "Insert"

20. The merge field will be added. Once all your merge fields are added, click "Close"
21. Click "Save this Letter" ypu will return to the main Letters Configuration screen.
