
This guide provides a step-by-step walkthrough for efficiently importing bank statements into the CRM Accounts system, streamlining the financial management process. By following the instructions, users can easily match transactions, ensuring accurate record-keeping and minimising discrepancies. The guide also highlights important setup steps and troubleshooting tips for a smooth import experience. Viewing this guide will enhance your understanding of the bank import process and improve your overall workflow in managing accounts.
Alert: Alert! To use this feature you need to be able to download your Bank Statement from your banks website in a .csv file format.
1. Navigate to https://crm.iamproperty.com/Dashboards/Accounts
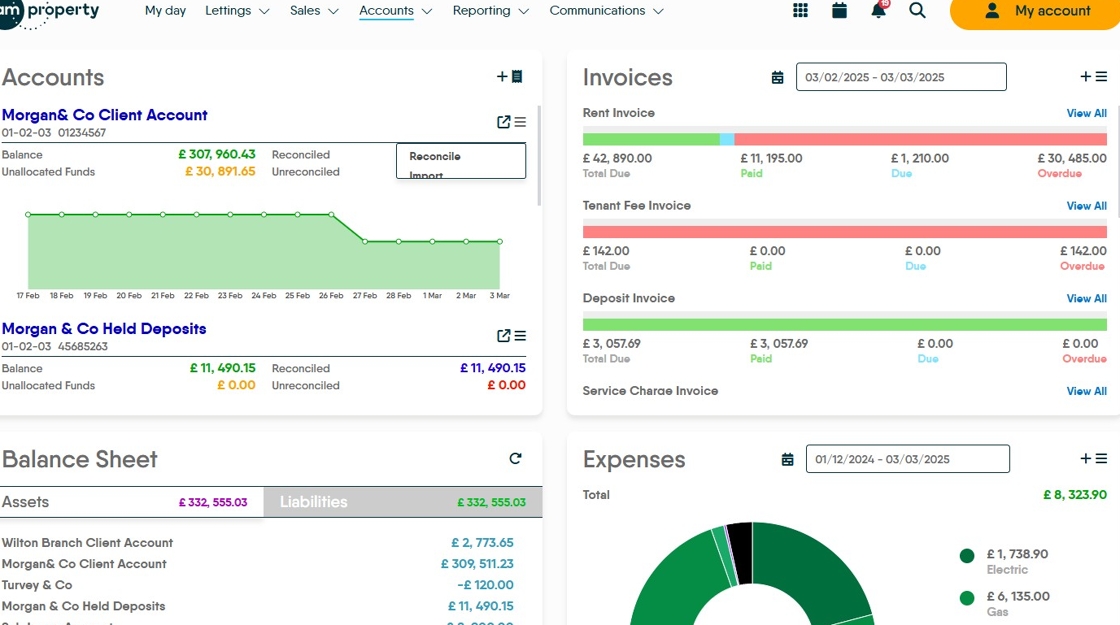
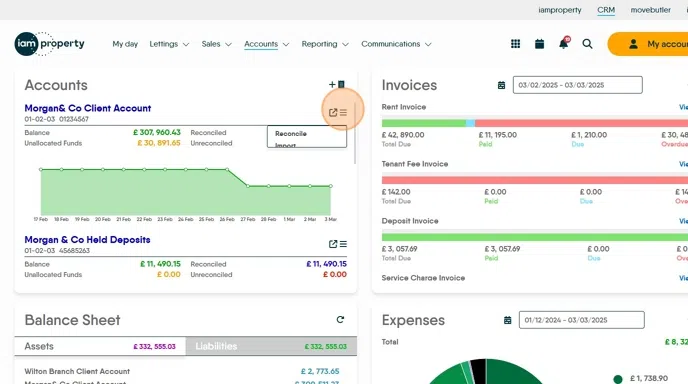
2. Click here then click "Import"
Importing Bank Statement to CRM
3. Click here and use the upload tool to find and upload your downloaded bank statement.

4. The statement will show on the screen.
The first time that this process is used, there is some setup to do. The columns in your statement download need to be linked to the options in CRM. Do these and click here to save.

5. Click "Next"

6. There may be a screen that informs of some issues. These don't stop the import, however they may mean that some payments wont match/link. Click "Yes"

Matching Transactions
All transactions will match automatically if the key match criteria are met. These are, Bank Reference used by payee, unpaid invoice that matches the amount paid in. If the bank account details are also part of the statement upload and you have these as part of your tenant record these are also used to match transactions.
7. Any line in green is matched to a payment.

8. A white line shows that a tenant can be matched to a receipt, however there are either no invoices to pay (e.g. early payment of rent) or there are multiple invoices that could be matched. Click here to check and update.

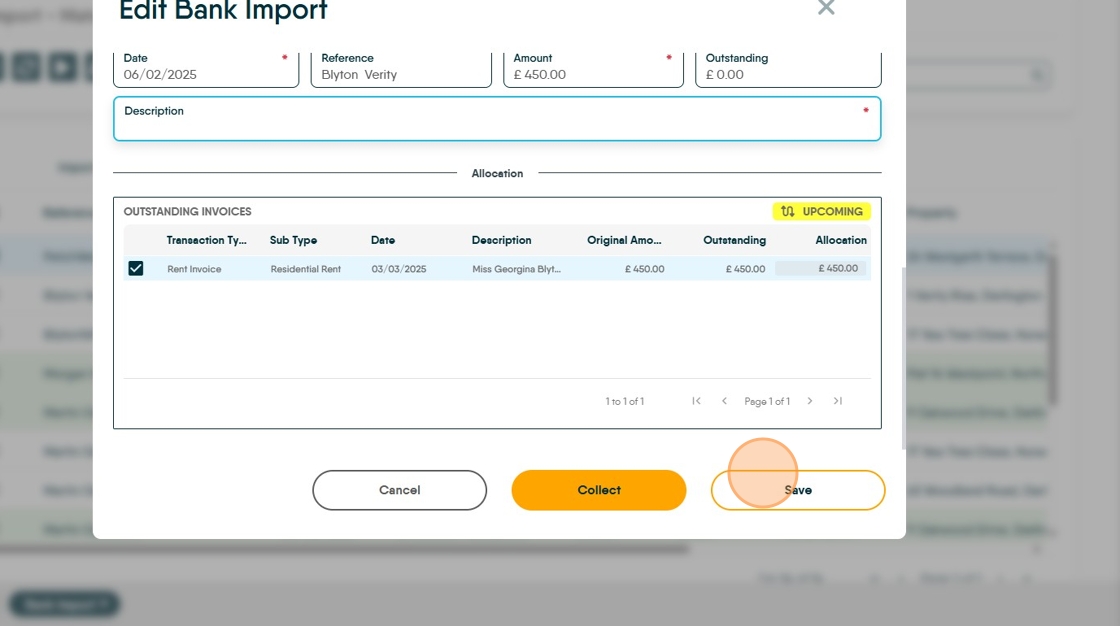
9. You will see this screen. You can see the payee details have matched

10. Scroll down to see the invoices that can be matched and select, or if no invoices show there is the option to select upcoming and select an upcoming (rent) invoices.

11. Click the "Description" field.

12. Click "Save"
13. Any line marked red, shows that there is insufficient information to match the ban receipt to any Tenant or transactions in the CRM. As shown previously, click the 3-dot menu and using the information available to try and search for and find the tenant or landlord and property.

14. The transactions can be sorted to only view a specific option e.g. Matched, Click "Matched" to select the matched transactions

15. Click this checkbox.

16. Click here to import the transactions.

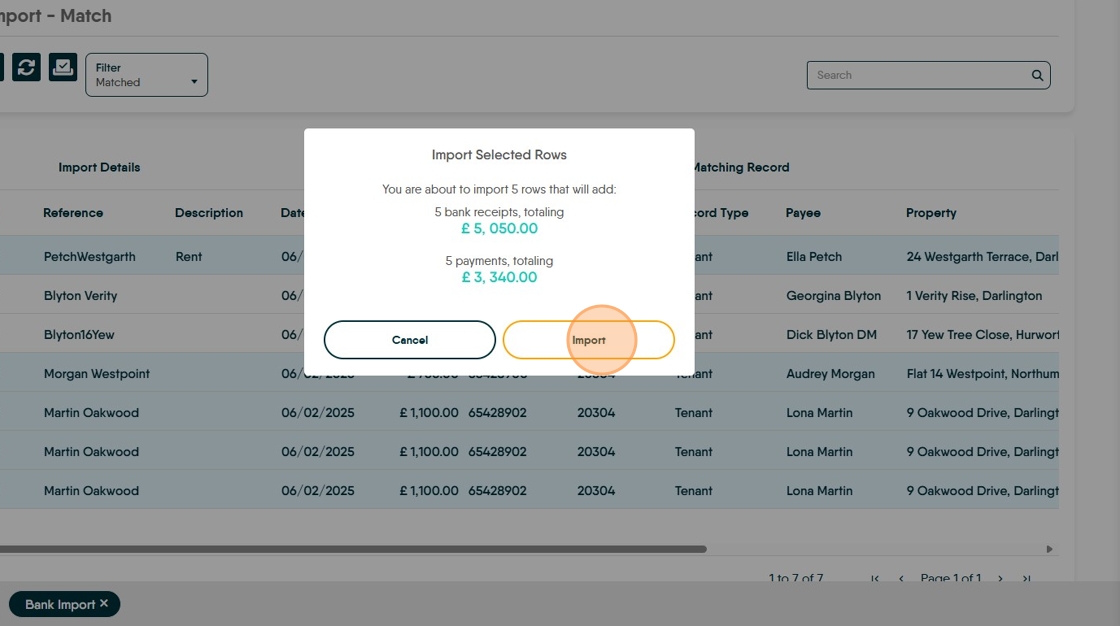
17. The next screen will show how much the transactions are for and how much is due to be paid out to the Landlords.

18. Click "Import"
Comments
0 comments
Please sign in to leave a comment.