This guide provides a straightforward, step-by-step process for adding appointments to your CRM calendar, ensuring you can efficiently manage your schedule. By following these instructions, you can easily set up client calls and other events, enhancing your productivity and organisation. Whether you're new to the CRM or just need a refresher, this guide simplifies the appointment-setting process, making it accessible for everyone.
Alert: This is not how we advise to add Viewings, Appraisals etc. There are separate options for that.
1. Navigate to https://crm.iamproperty.com/Calendar
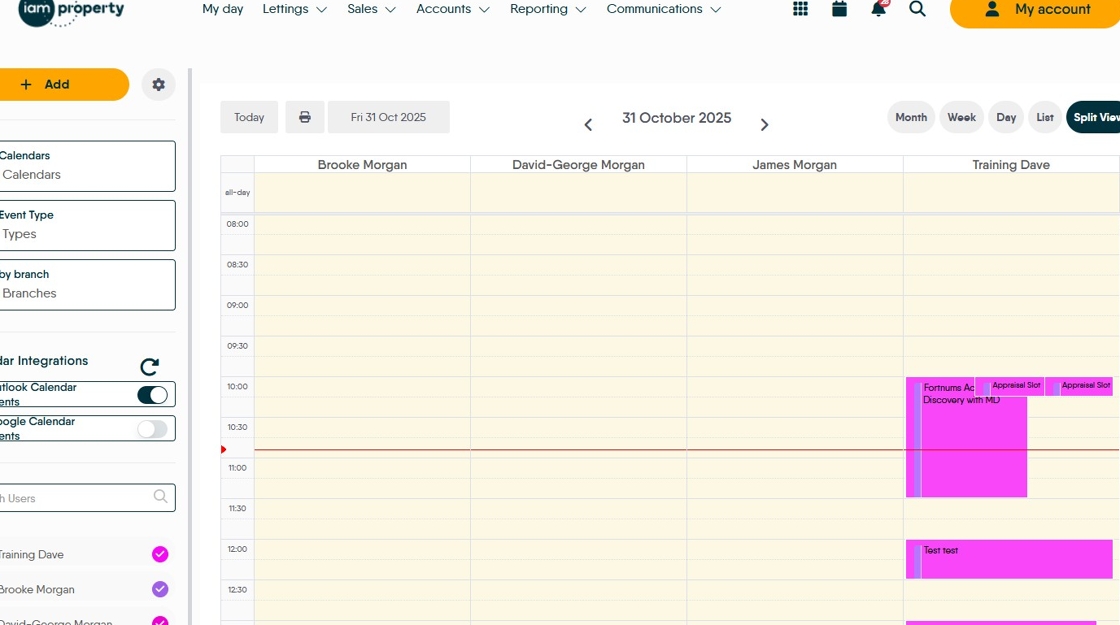
2. Right-click where you want to add the appointment.

3. Click "Add Appointment"
If you want to add viewings, appraisals etc. click the lettings or sales options.

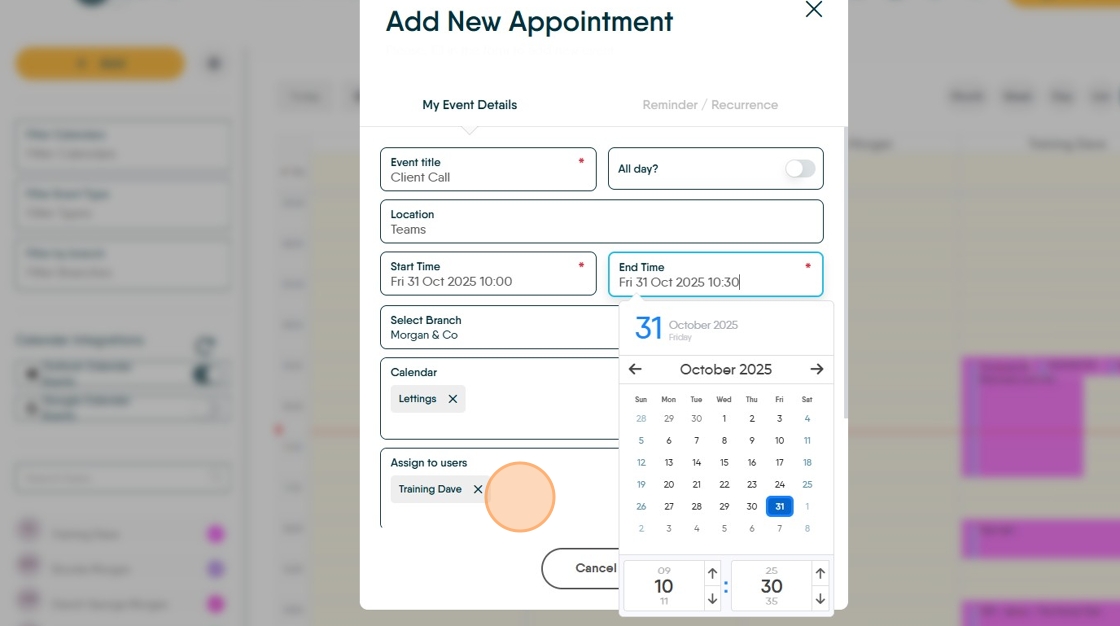
4. Click "Event Title" and add the title. If it is an "All Day" appointment then click that.

5. Click the "Add location" field add a location if required. This field will assist you by searching for locations based on the text you type.

6. Click "Calendar" and select the calendar you want to add the appointment to.
e.g. Click "Lettings"
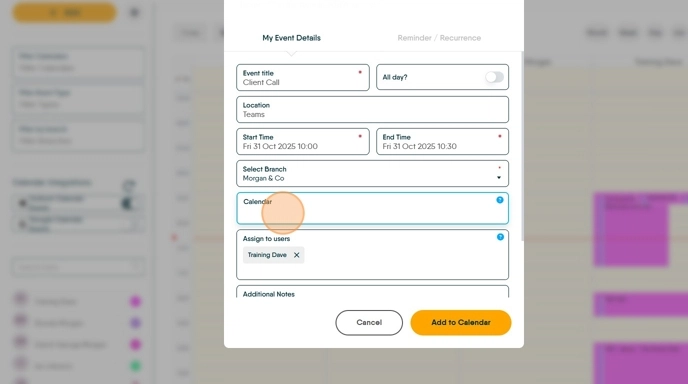
7. Click the "Start Time" field and set the start time. The date can also be edited here.

8. Click the "End Time" field and set the end date and time.

9. Click "Assign to users" if you are creating an appointment for other people, or including others in this appointment.
N.B. this appointment will be visible to anyone who has your calendar enabled in their CRM regardless of that user being added to the 'Assign to Users' field.
10. Click "Additional Notes" and add any notes.

11. If this is a private appointment, click "Private Event" this will mask any additional detail added when viewed by other CRM users.

12. Click "Add to Calendar"

Adding Reminder/Recurrence
13. Click "Reminder / Recurrence"

14. Click "Reminder" to set any reminders you might need. Click here to set the timescale (hours/minutes/days)

15. Click here to set whether the reminder is minutes/hours/or days.

16. Click "Recurrence" to set any schedule you want for your appointment to repeat on.

17. Click "Ends" to set an end date for the appointment schedule.

18. Click here to set the timescale for the repeat.

19. Click "Save Changes"

20. The appointment will then show in your calendar and be repeated as per your settings.
