This guide provides a step-by-step process for collecting a deposit payment from a tenant through the CRM Accounts platform, ensuring a smooth and efficient transaction. It details the necessary actions and choices to make during the collection process, which can save time and reduce errors for property managers. N.B. Deposit invoices are NOT automatically created.
Creating the Deposit Invoice
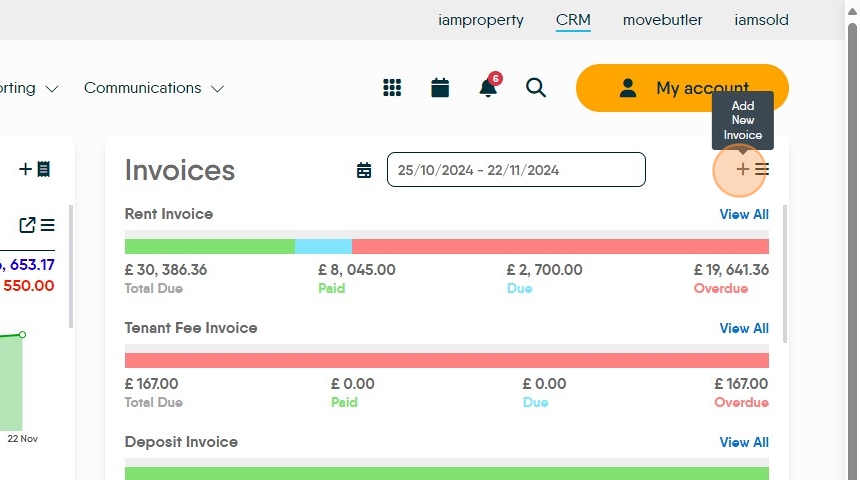
2. On the Accounts Dashboard find the Invoices tile.
To create the deposit invoice. Click here.
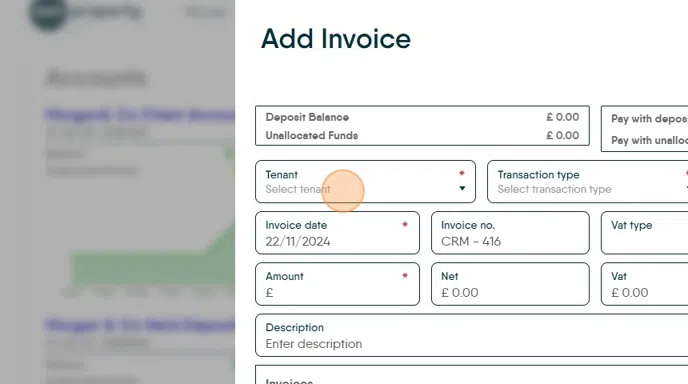
3. Click "Select tenant" and type the tenant name, then from the drop down list select the Tenant you are creating the Deposit Invoice for.
Click the name of the applicant you are creating the invoice for.
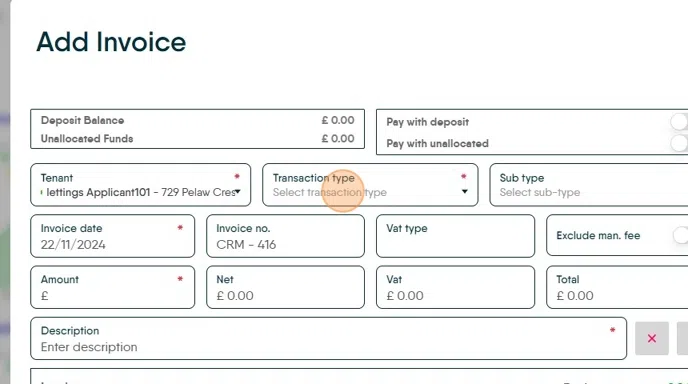
4. Click "Select transaction type"
Click "Deposit Invoice" This will complete all the amount fields with the information set when the prebooked tenancy was created i.e. the current rent as shown on the Tenant record.
5. Click the "Description" field. Add the description for the Invoice you are creating

Tip: Tip! Make the Invoice descriptions clear and complete, this helps when allocating payments later.
6. Click here.

7. The Invoice will show on the screen. To create another invoice (for the same or different person) click 'Another' otherwise click "OK" to move on

8. There will be an option to produce a tenant invoice. Click "No" or "Yes" to this, yes will take you to a screen to print or save a copy invoice.

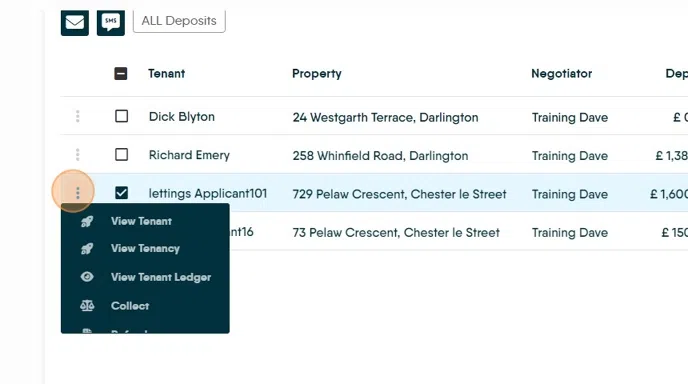
9. The deposit invoice will now show as "Due" in the Deposit Invoices section of the Invoices tile. Click "View All" to see all the currently Due and Overdue (uncollected) deposit invoices.
Click this checkbox.

Collecting the Deposit Payment
10. To collect the deposit payment (show that the Deposit Invoice has been paid) a Bank Transfer is used. Click here.

11. Click "Select property" and search for the property.

12. Click to select it from the drop down menu.

13. Click to "Select tenant"

14. This will show the outstanding invoice at the bottom of the screen. Click this checkbox to select the invoice you are paying.
N.B. It is possible there will be more than 1 invoice showing so be sure to select the correct invoice at this point.

15. Click "Select payment account" (the account the payment came into) and "Select payment method" (how the payment was made) set as appropriate

16. Click the "Description" field
Make the description as clear as possible, to aid in future use/reference

17. Click "Collect" to pay the invoice and show this in the Deposit record as well as the Client Account.

18. Click "No" or "Yes" to this.

Transfering the Deposit Payment to the Landlord, Scheme or Bank Account
19. On the Deposit tile, click here.

20. You may need to refresh the screen to show the new deposit receipt. Click here.

21. Click this checkbox, to select the payment you are managing.

22. Click here and click "Transfer"
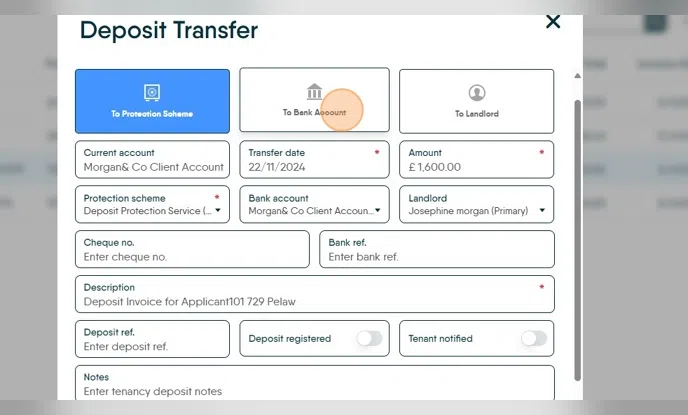
23. This will take you to the Deposit Transfer screen.
The first option is to transfer to a Protection Scheme. If this is being used, the scheme that was set up when the tenancy was created will show or can be added in the 'Protection scheme' drop down menu. Complete all the relevant fields and add any notes. If the deposit has already been transferred to the scheme update the 'Deposit Ref' Deposit Registered' 'Tenant notified' fields, these will update the tenant records.
Click Transfer to show the movement, this transaction will show on the Client Account as a Bank Transfer.

24. Second option is "To Bank Account". Click "To Bank Account" and set the bank account that holds your deposits in the bank account (highlighted) field.
Best Practice is to have a separate Deposit Account in the CRM accounts module, this helps manage witheld deposits.
25. Click "To Landlord" if you are transferring the Deposit to a Landlord. Ensure the Landlord details are correct, the description is accurate.
If the Landlord is set up to be paid via BACS the deposit will be transferred to them via the next BACs upload. If not the payment will show in the Client Account.

26. Once any of the previous processes are completed, Click "Transfer"
