This guide provides clear, step-by-step instructions for accessing and utilising the Lettings or Sales Dashboard Activity lists effectively, ensuring users can navigate the platform with ease. Also an example of how the Activity list can be used. By following the outlined steps, users will be able to update and save changes efficiently, enhancing their experience and productivity within the system.
1. Navigate to https://crm.iamproperty.com/Dashboards/Lettings
Tip: Both the Sales and Lettings Activity Lists work the same way, different types of information are shown, but they work and are configured the same way.
2. Click "Lettings" or "Sales"

3. Click "Lettings dashboard" or "Sales Dashboard"

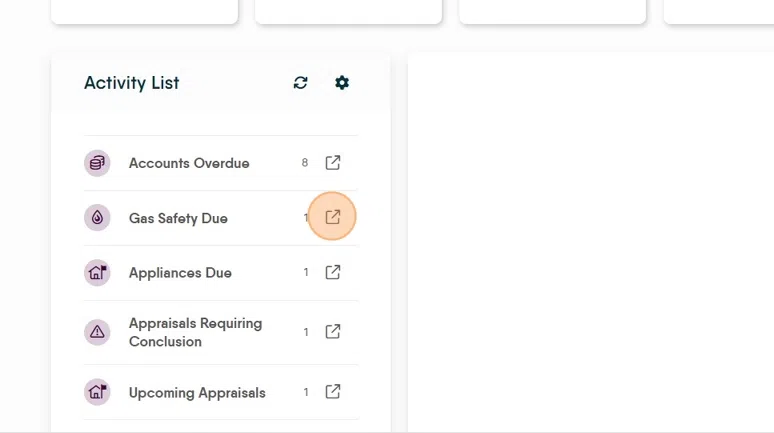
4. Once the Activity List appears you will see a list of items that are due, or overdue to be dealt with. These have come from a property or person record and are created by a date set against an activity e.g. a rent overdue by X many days.
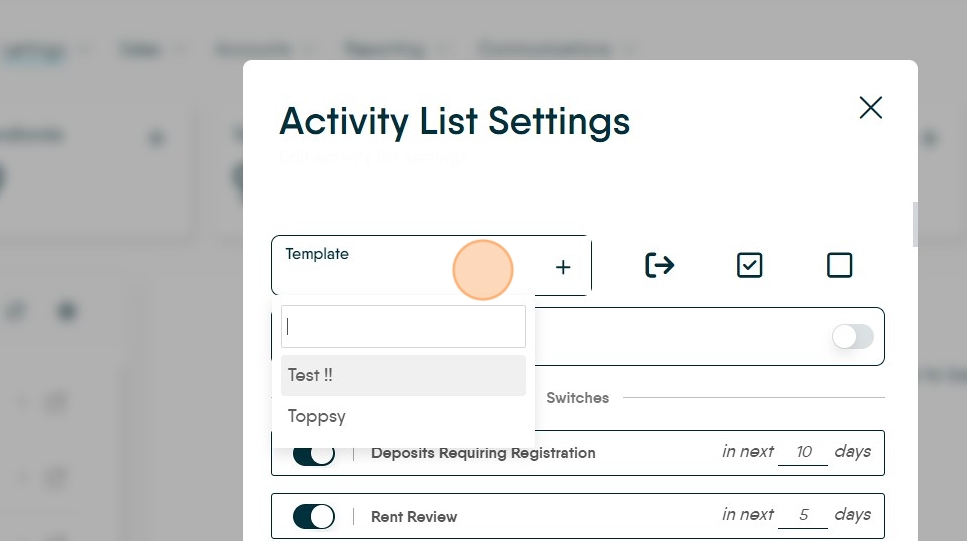
The date range, controlling the information displayed in the list, can be edited from the settings option. To do this we can go into the settings cog and change the settings.

Editing the Activity List
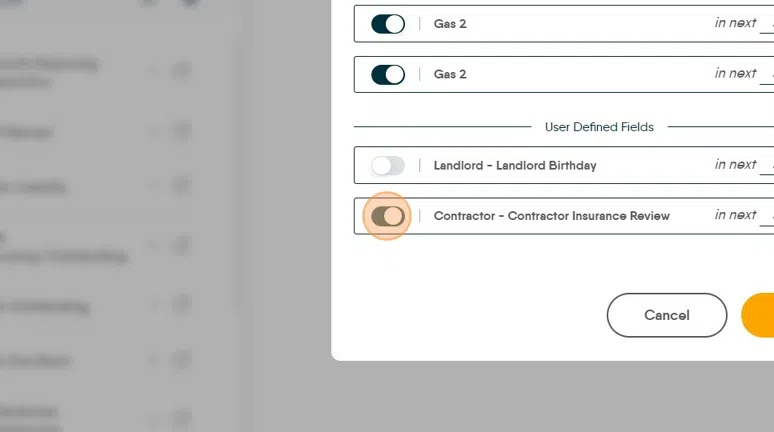
5. This brings up a screen where we can edit the date range and switch off options.
We can add a template if various users have different activities that they look after. To add the template follow this.
6. The next icon is Deselect all, this allows you to deselect all the currently selected options and select only the ones that you require & 'select all' allows you to do the reverse.
Click here.
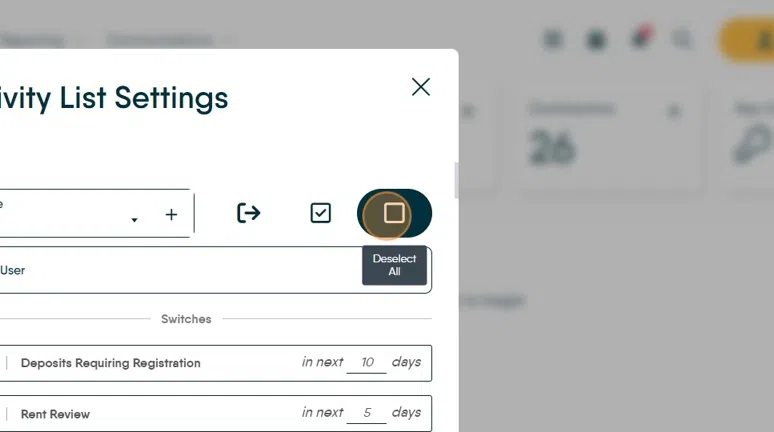
7. To the left of each activity is a button where you can select and deselect items individually.
Click here.

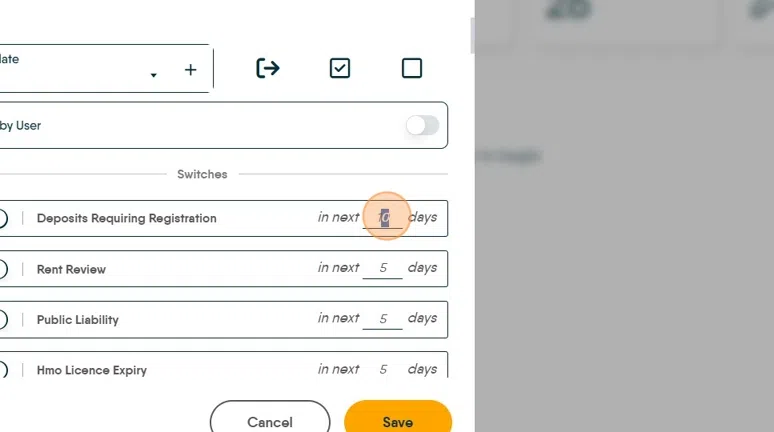
8. To the right of the activity is the number of days notice that you receive of an activity. This can be set from 1-999.

Alert: Alert! Be aware there are options in this list e.g. 'in the next' 'from the last' 'in last' 'older than' 'by' 'in' these all act differently with days so a blanket number of days set may not be appropriate. For example 1 day for 'applicant not contacted' would mean an applicant contacted today will re appear on the list tomorrow.
9. Click this field.
Type the number of days you want to use
10. At the bottom of the page you can also track UDF's (User Defined Fields) you have created. The requirement is that the UDF has a date as the response and they will show on the activity list, and can be selected and deselected the same as above,

11. Make sure you save the changes.
Click "Save"
Using the Activity List
12. Once you have carried out all the changes, then return to the Activity List screen
To use the activity list, scroll down to the activity you wish to look at then click in the small box to the right hand side.
Tip: Tip! To show how the Activty List can be used, we will use Gas Safety as an example and run through the process of sending notifications and updating the due date from within the activity list.
13. When you have selected an option in the Activity List the information will show in the right side of the screen.
In this instance we have selected Gas Safety Due. Scroll left and right to view the information provided.
If you now click on the box next to Negotiator, that will highlight all properties or you can select individually.
From there you can either Email or Text with the templates that you have created in the system. This message will be sent to the Landlord to get the Gas Safety checks completed and then sent back to you.

Tip: Tip! Once you have then sent the email/Text off to the landlord and once you have a reply back, you can now carry on to the next part.
14. Click the 3 dot menu to see other options. These options can change depending on which activity list you are looking at.

15. Click "Add Call (Landlord)"
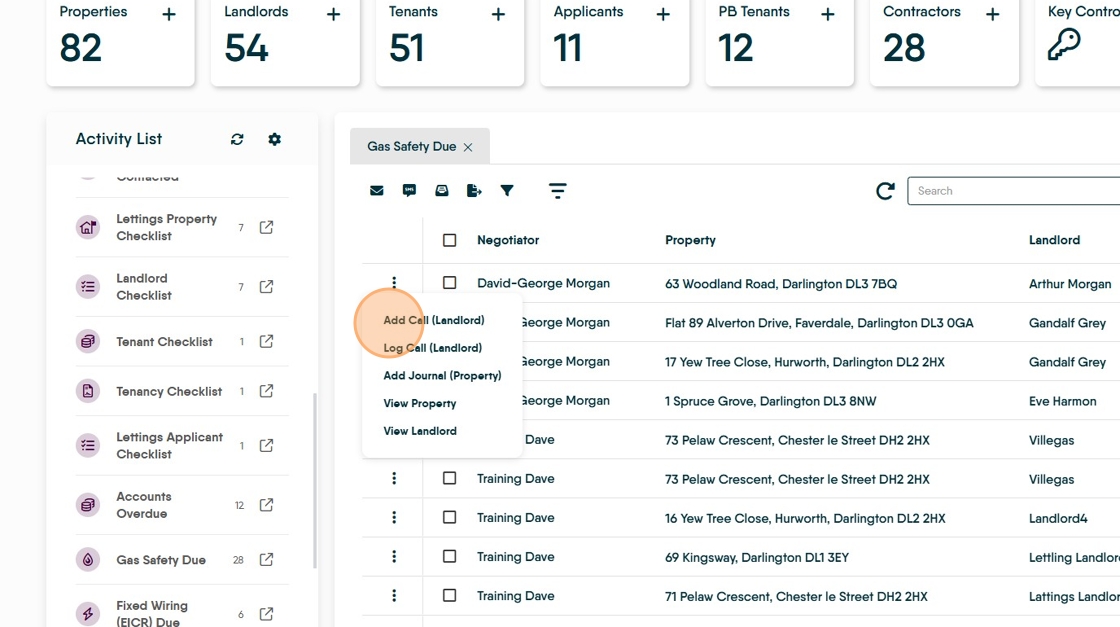
16. This will allow you to either (Add New Call) plan a call you will be making in the future or (Log Call) create a record of a call made to a Landlord.

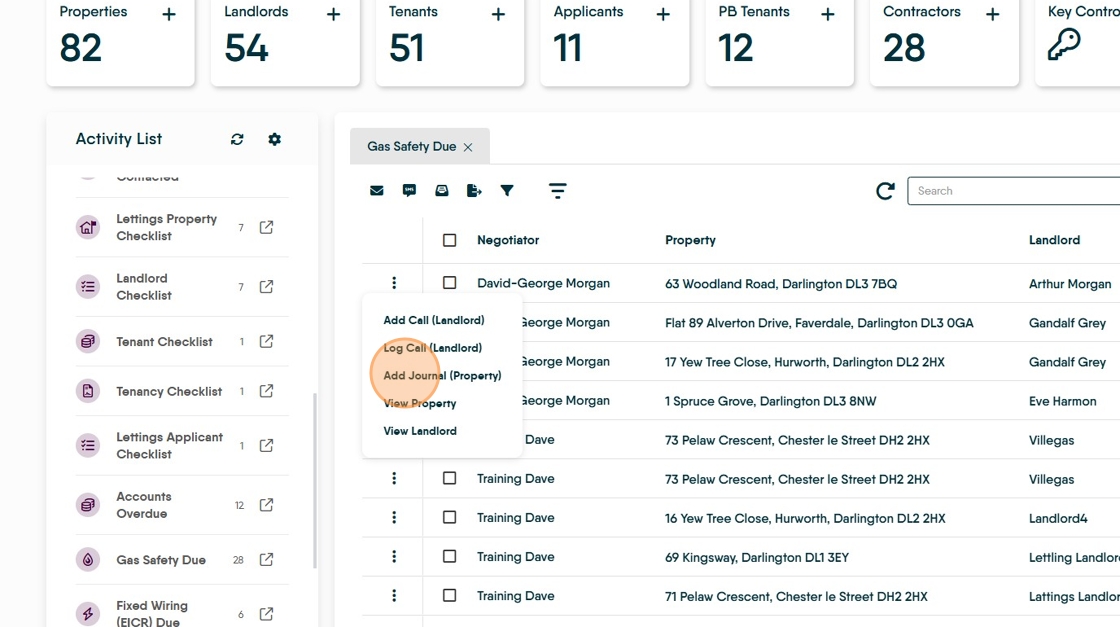
17. Click "Add Journal (Property)" allows us to add a journal entry to the Property Record. The other options in this list View Property and View Landlord will take you to the appropriate record in the CRM.
18. Click here.

Using the Activity List to record the outcome
19. To get to the property record. Click here.

20. Click "View Property"

21. Once in the property record, left hand menu, click on Compliance

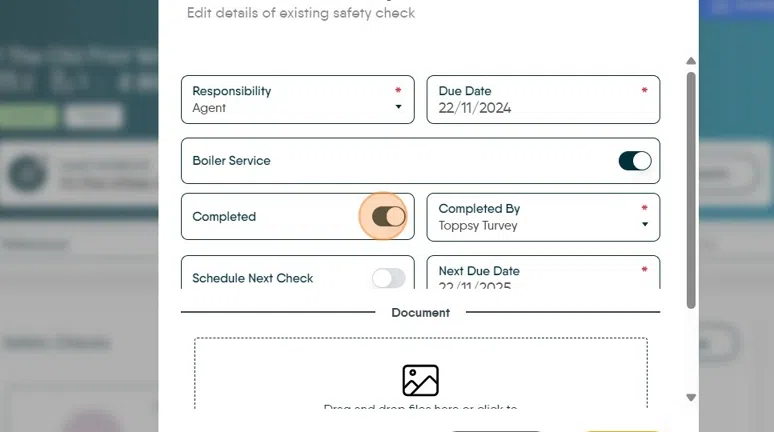
22. This will show the Safety Checks, click on the Gas Safety tile top right 3 dot menu and go to Edit.

23. Once page open's click on completed tab and Schedule next check that will put the date into next year and also you can up load any documents if needed and Save.
24. Once you have scrolled down find Gas Safety and click on it the property you where managing is no longer showing in the list.