This guide provides a step-by-step process for navigating the Renters Rights Act using iamproperty CRM, making it essential for landlords and property managers. This document will detail what is changing in the Renters Rights Act and how to manage those changes in CRM.
From 1st May 2026 (or for tenancies that start from that date):
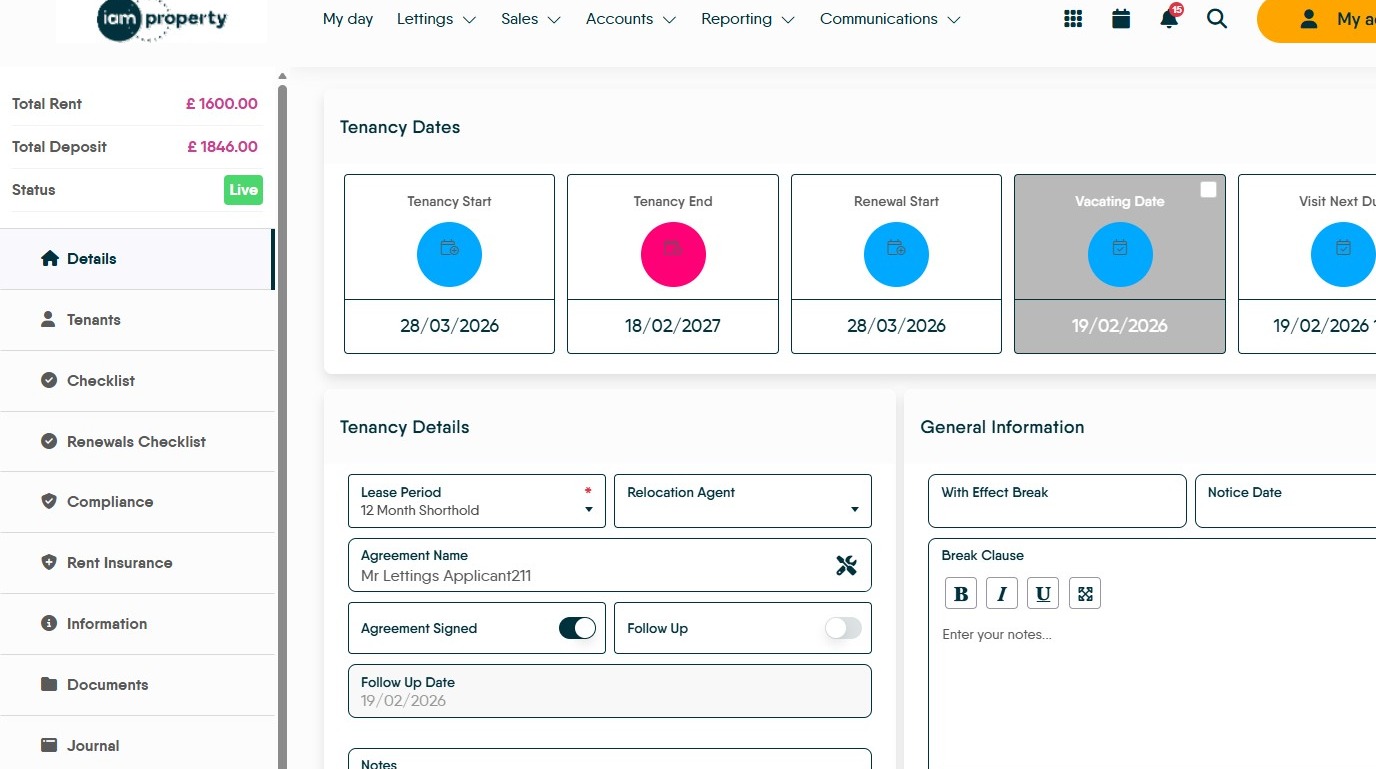
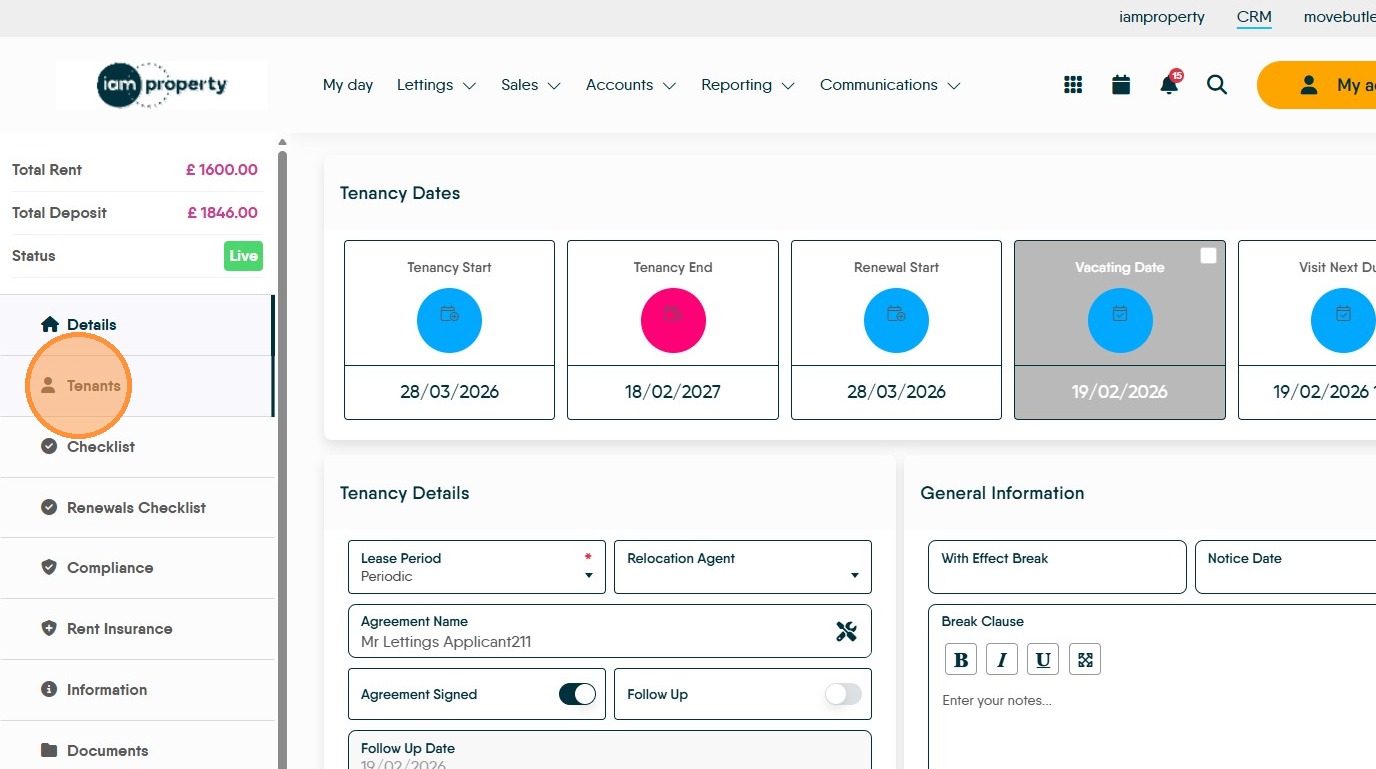
1. Add tenancies as normal – when adding the tenancy and setting periodic as the lease type, you can choose an indicative end date or leave the end date the same as the start date and select the drop down for the lease type to be periodic. To learn how to add a tenancy [Add Tenancy]])
Set the Lease type to Periodic see below for a guide on this.
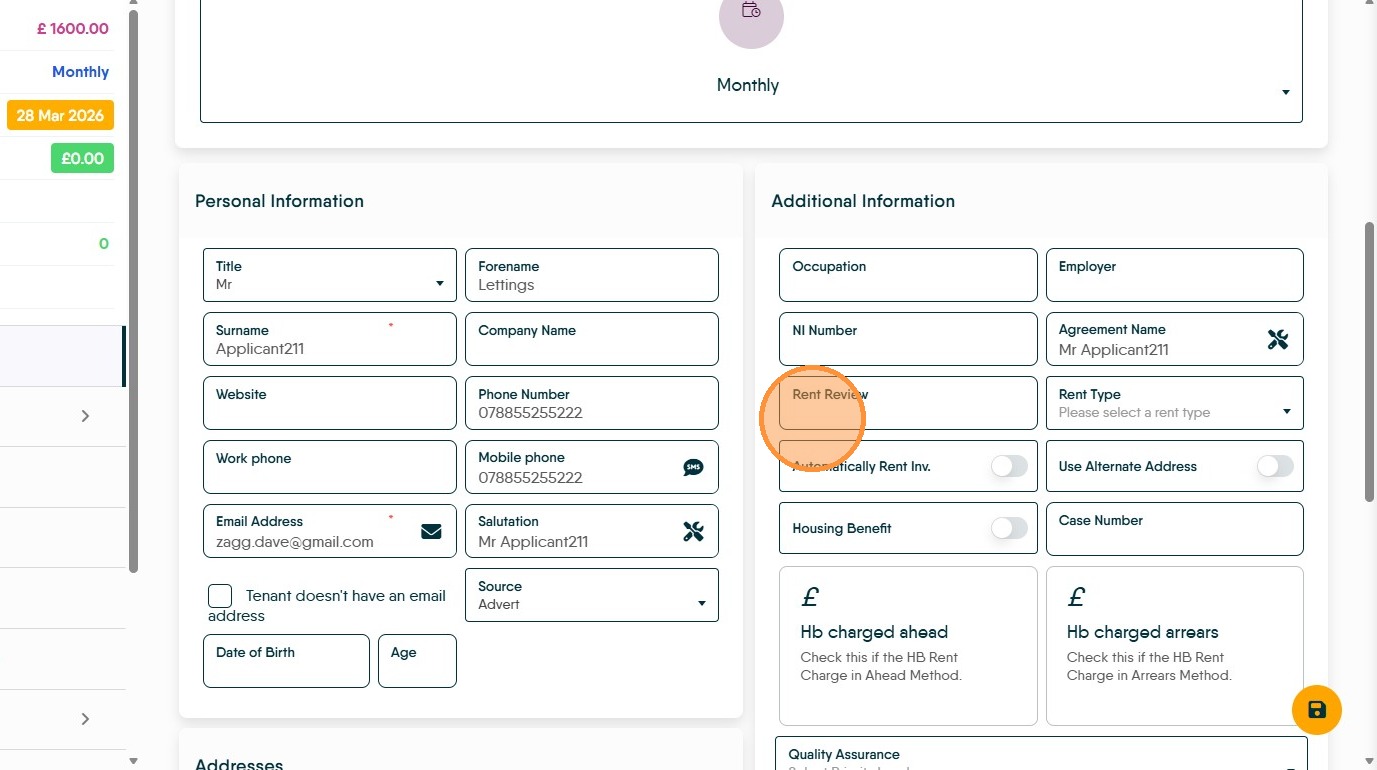
Once the tenancy has been added you can add a rent review date onto the primary tenant in the 'Additional Information' section on the tenants details tab – this would be 12 months after the tenancy start date. To learn how to add a Rent Review date [Add Rent Review Date]
Using the activity list to track the Rent Review dates you have set. On the lettings dashboard set rent review to notify of upcoming reviews due, we suggest 90 days. To learn How to use the Activity List [Configure Activity List]
If a Rent Increase is required. The Rent Review date will give you the opportunity to track upcoming opportunities to issue a Section 13 notice. To learn how to send a Section 13 [Issue Section 13 letter]
If a rent increase is implemented. Use tiered rent to initiate the new amount for the correct date. To learn how to create a Tiered rent [Create a Tiered Rent]
Once reviews etc are completed. Update the Rent review date on the tenant record 12 months forward
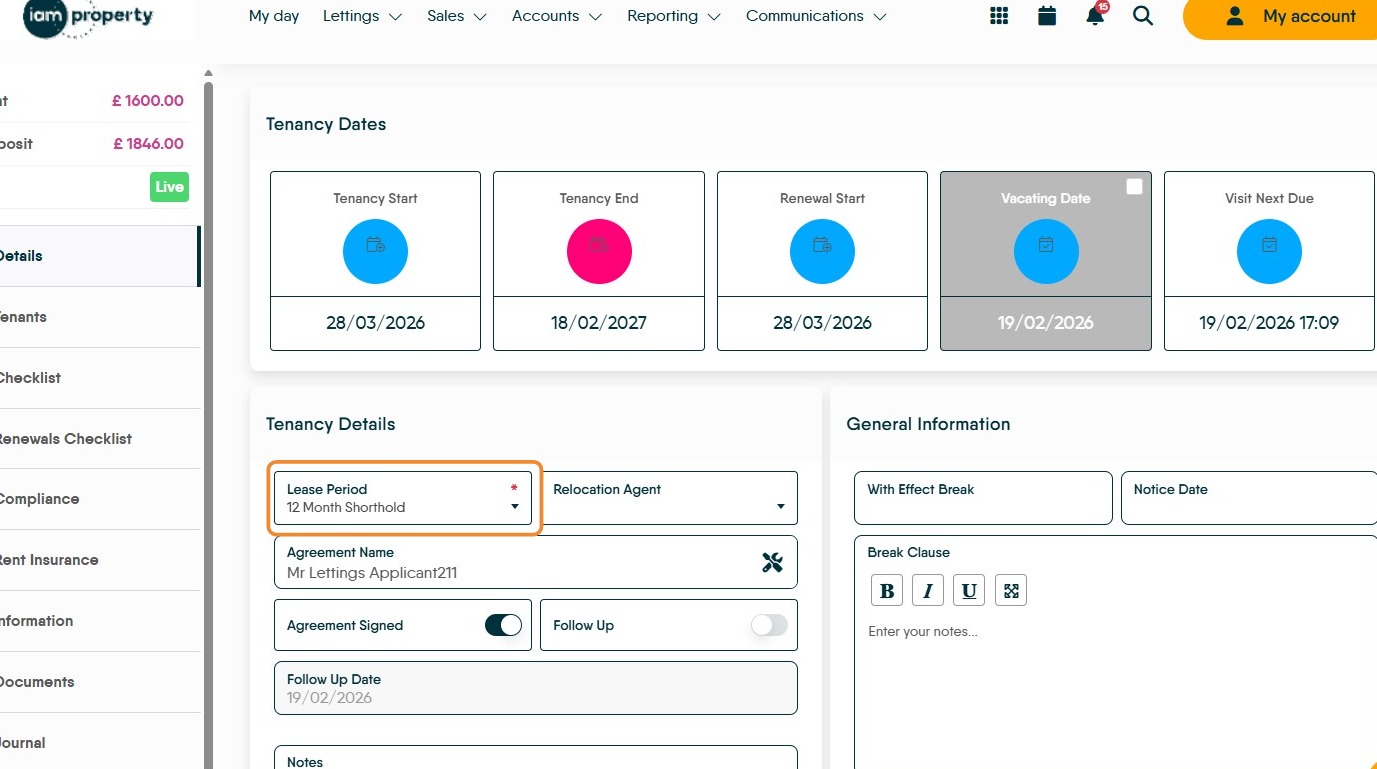
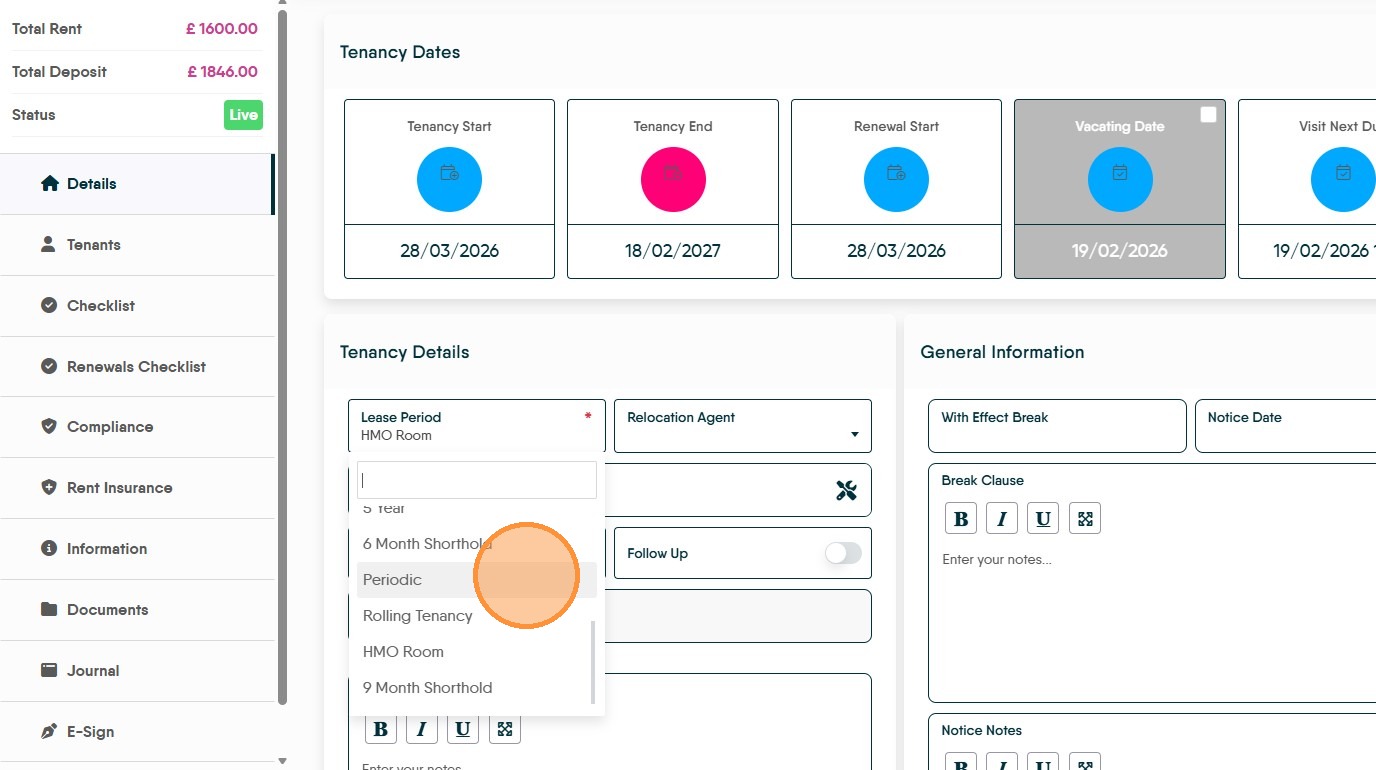
2. How to change the lease period to 'Periodic'
3. Navigate to the Tenancy Record
4. Click "Lease Period"
5. Click "Periodic"
6. Setting a Rent Review Date
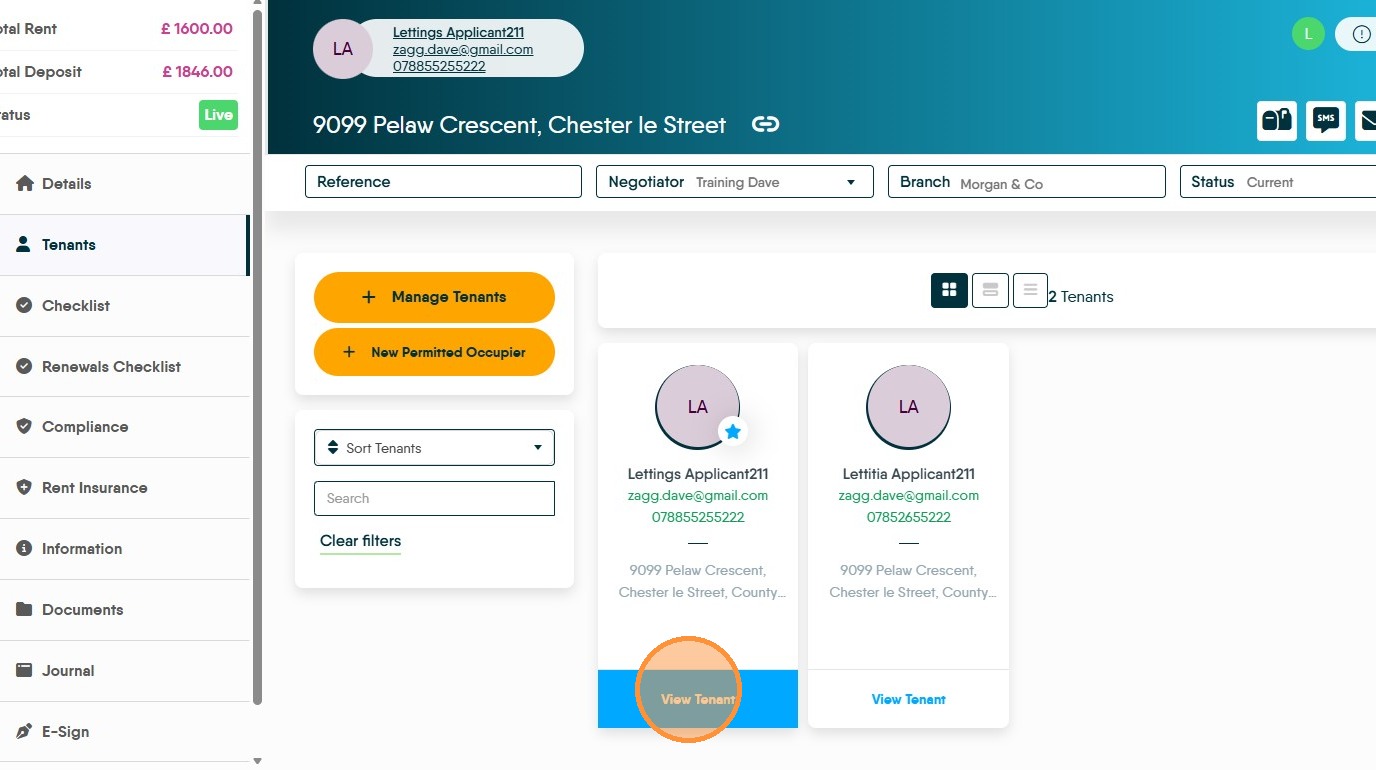
7. Click "Tenants"
8. Click "View Tenant"
9. In the Tenant screen click the "Rent Review" field.
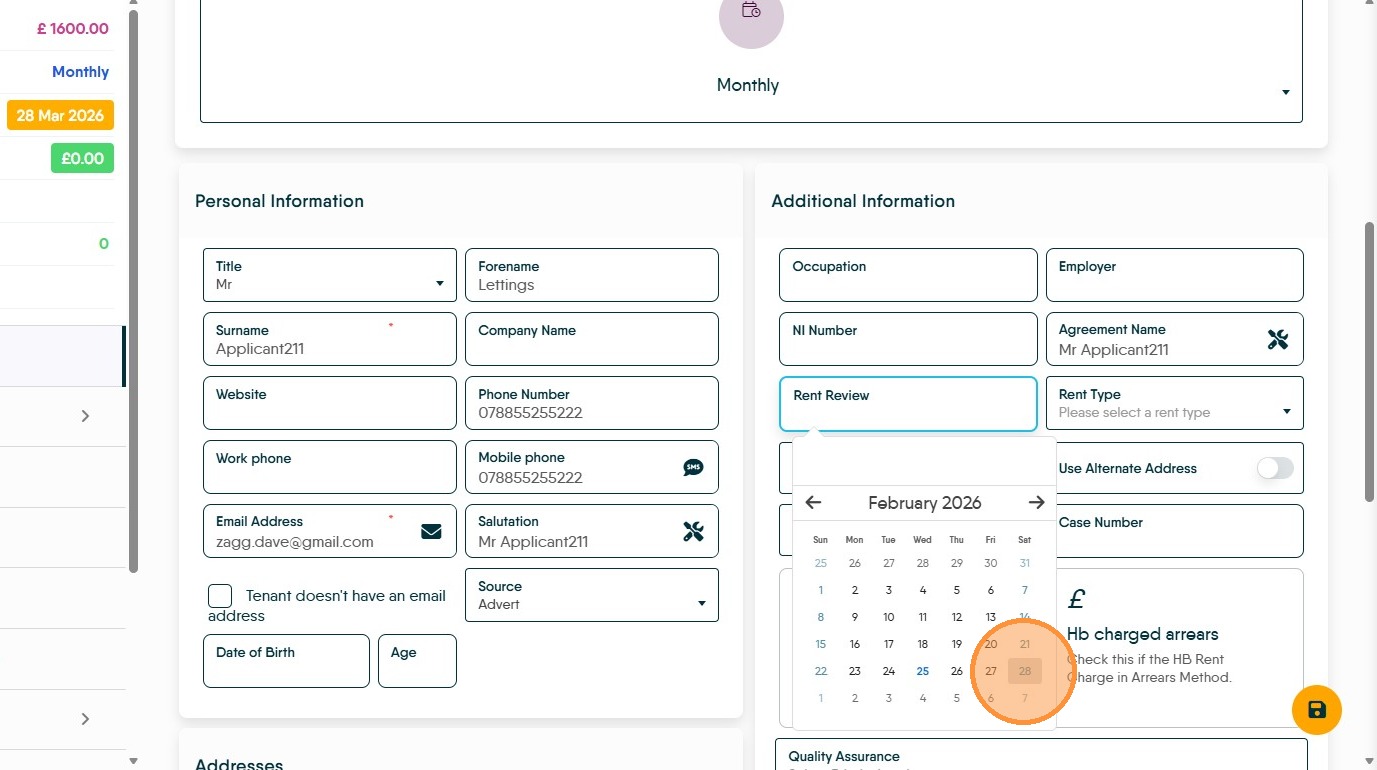
10. Update the Rent Review Date
11. Navigate to the Lettings dashboard. Rent Review dates will show in here (once selected) Click the 'cog' to edit the notification timescales.

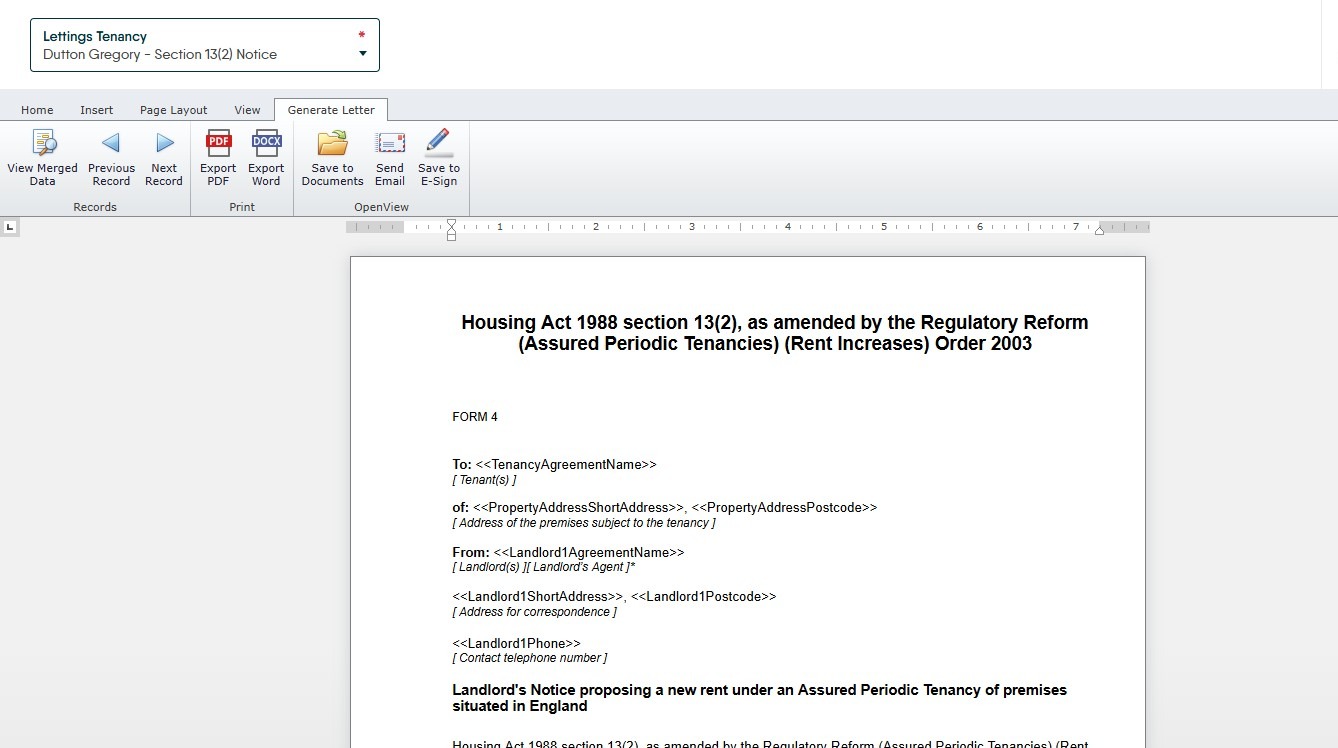
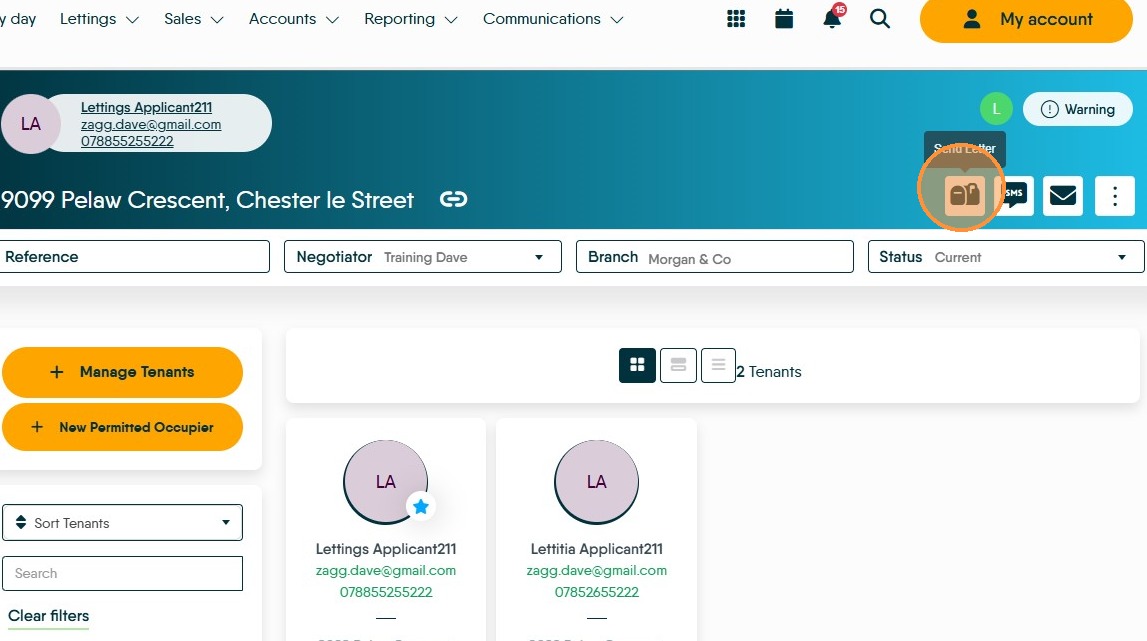
12. Sending the Section 13 from CRM
13. From the Tenancy record, click the 'Send Letter' icon.
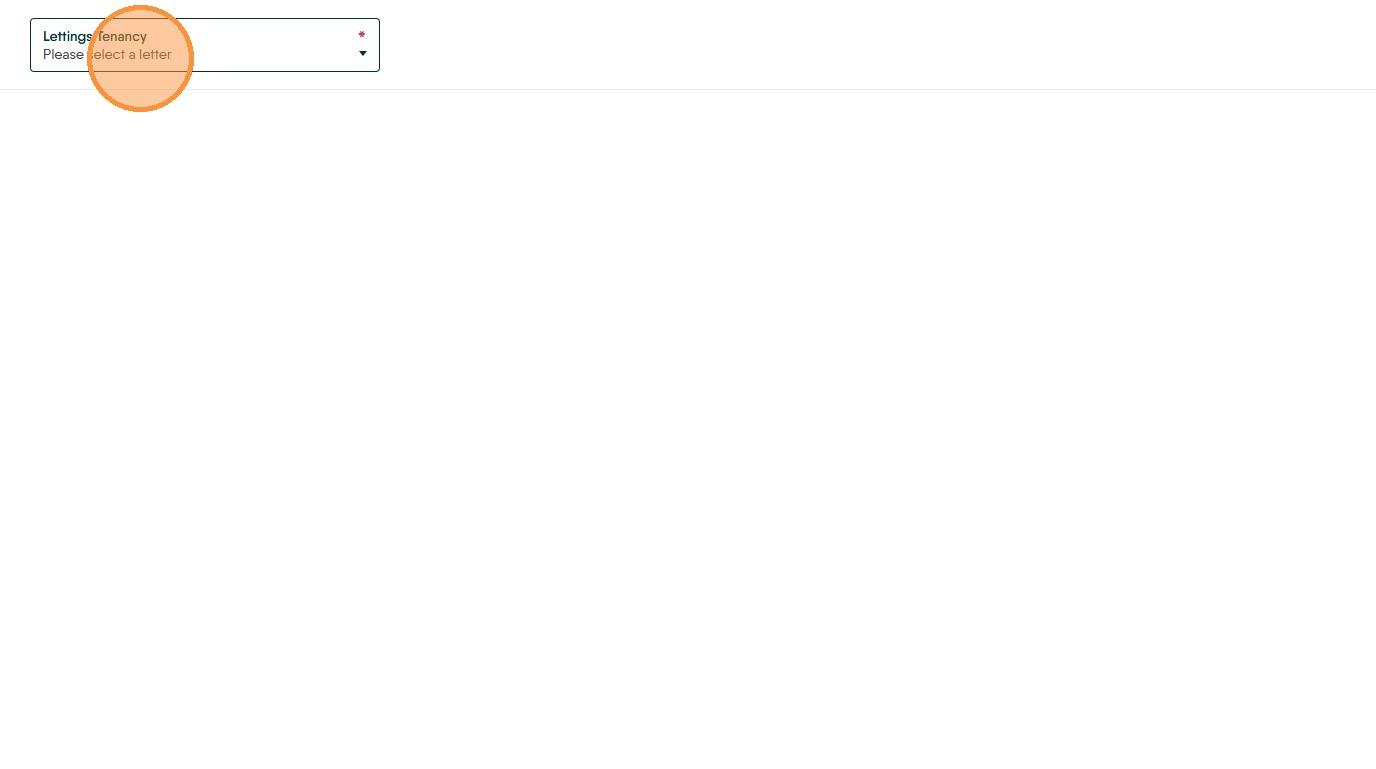
14. Click "Please select a letter"
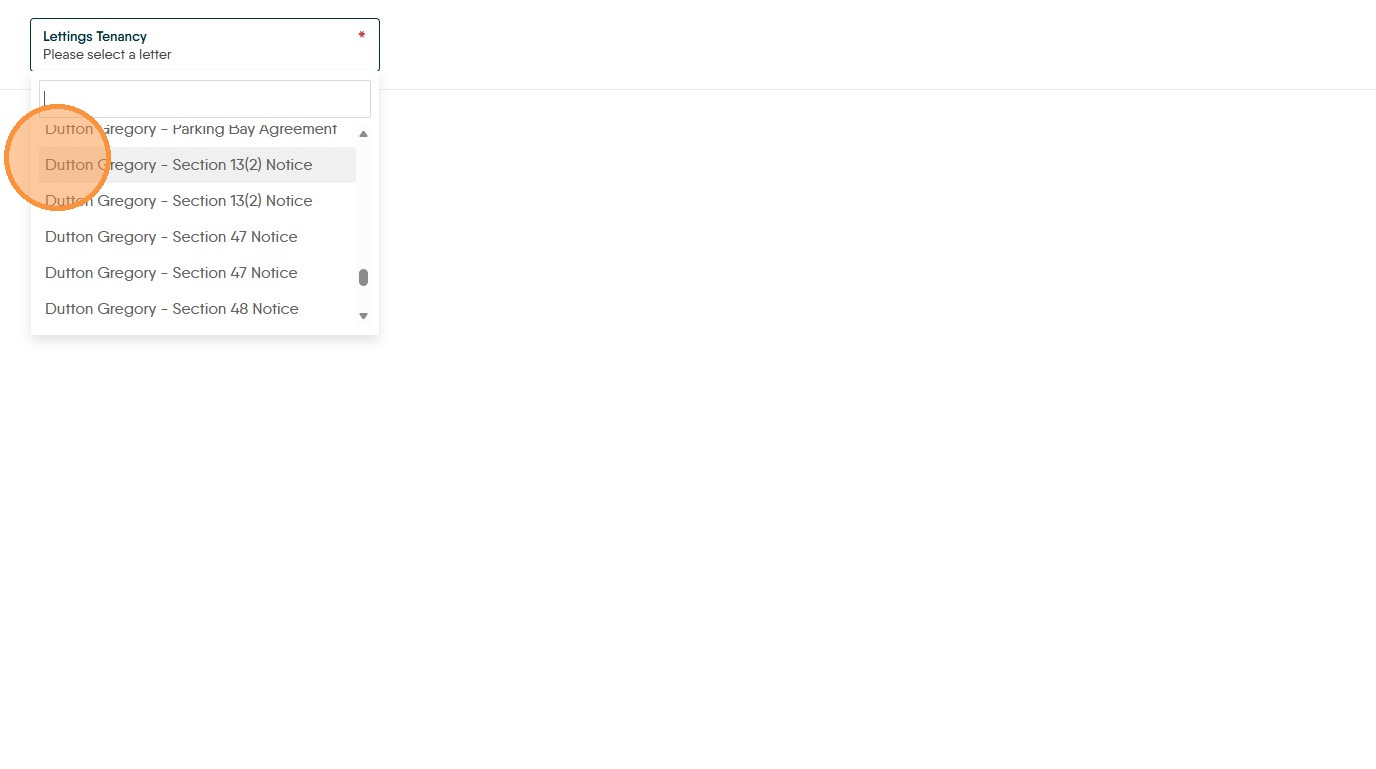
15. Select your Section 13 notice from the the drop down menu in this example we are using the optional Dutton Gregory letters pack so we select "Dutton Gregory - Section 13(2) Notice"
16. Click here to create the letter.
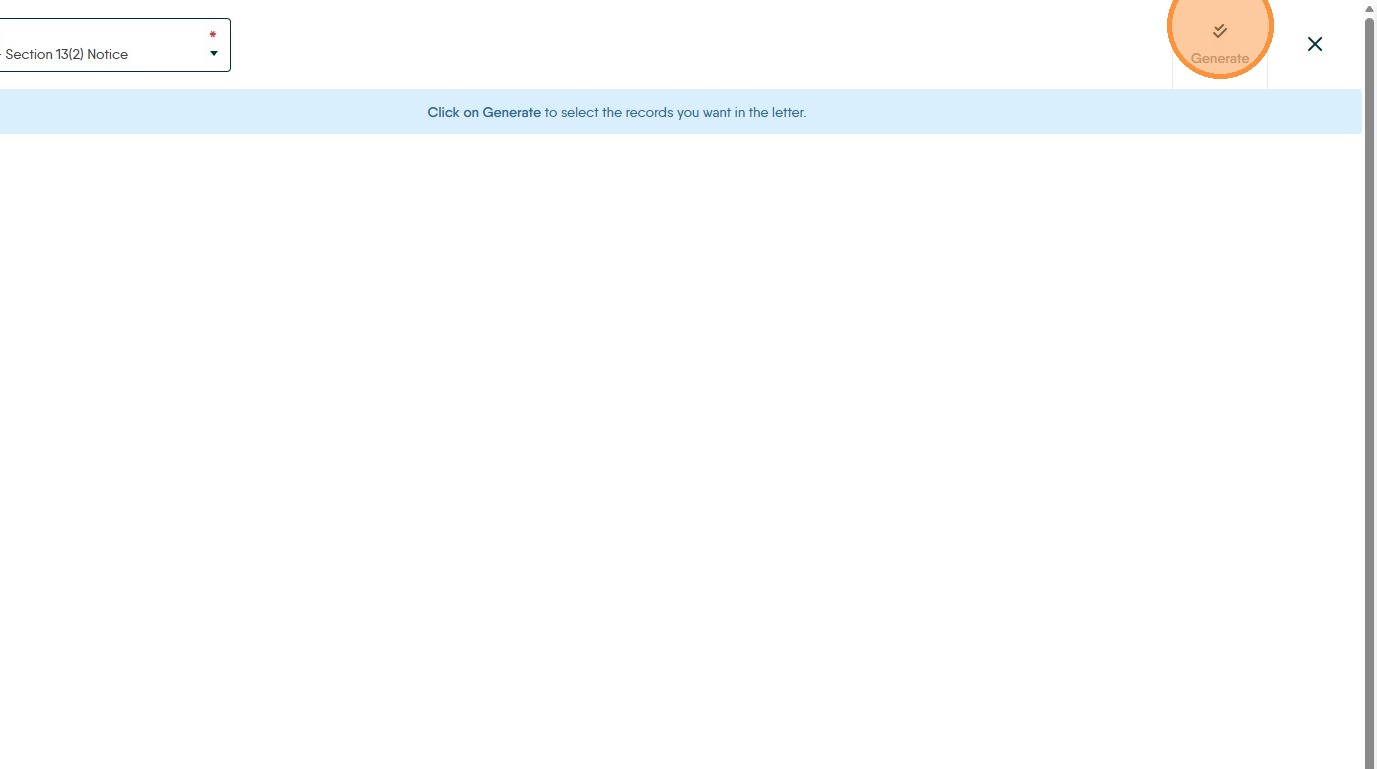
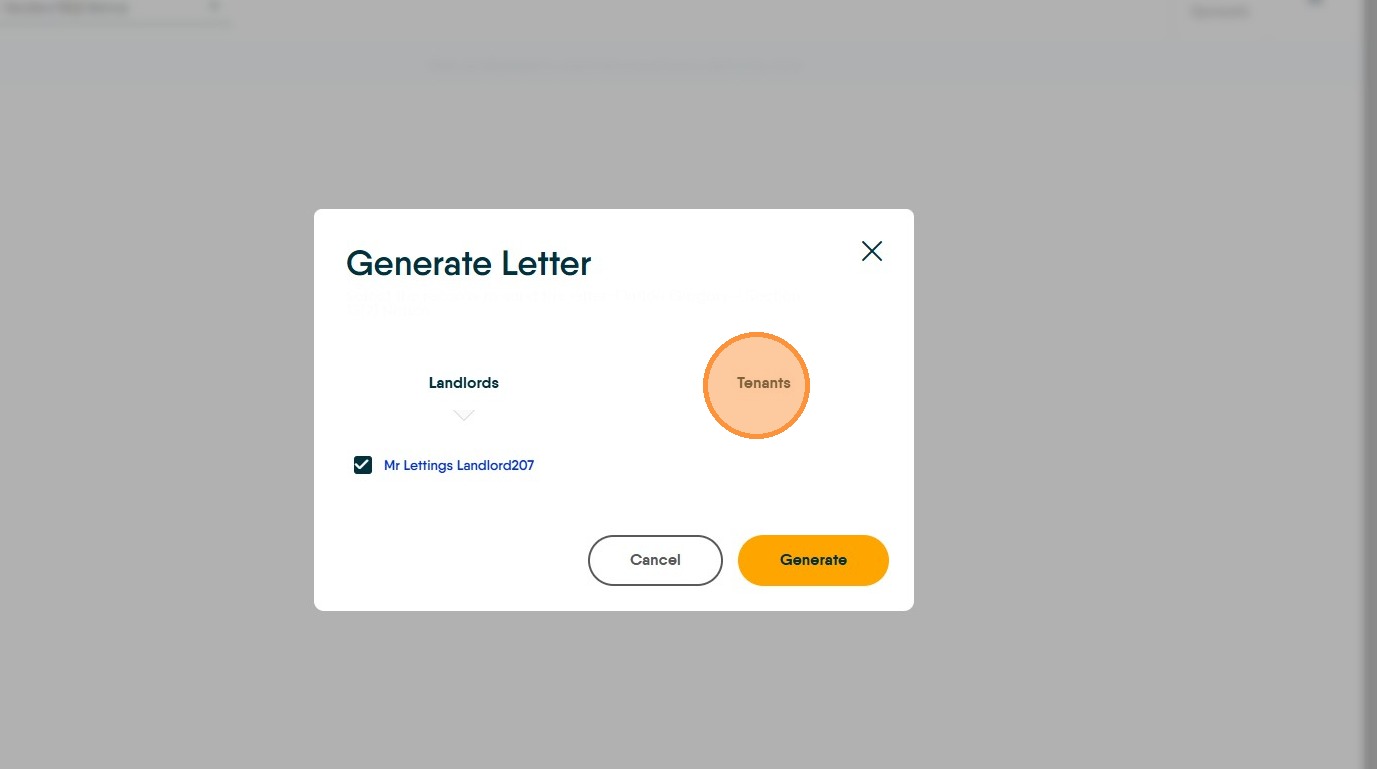
17. Check the details for the Landlord and click "Tenants"...
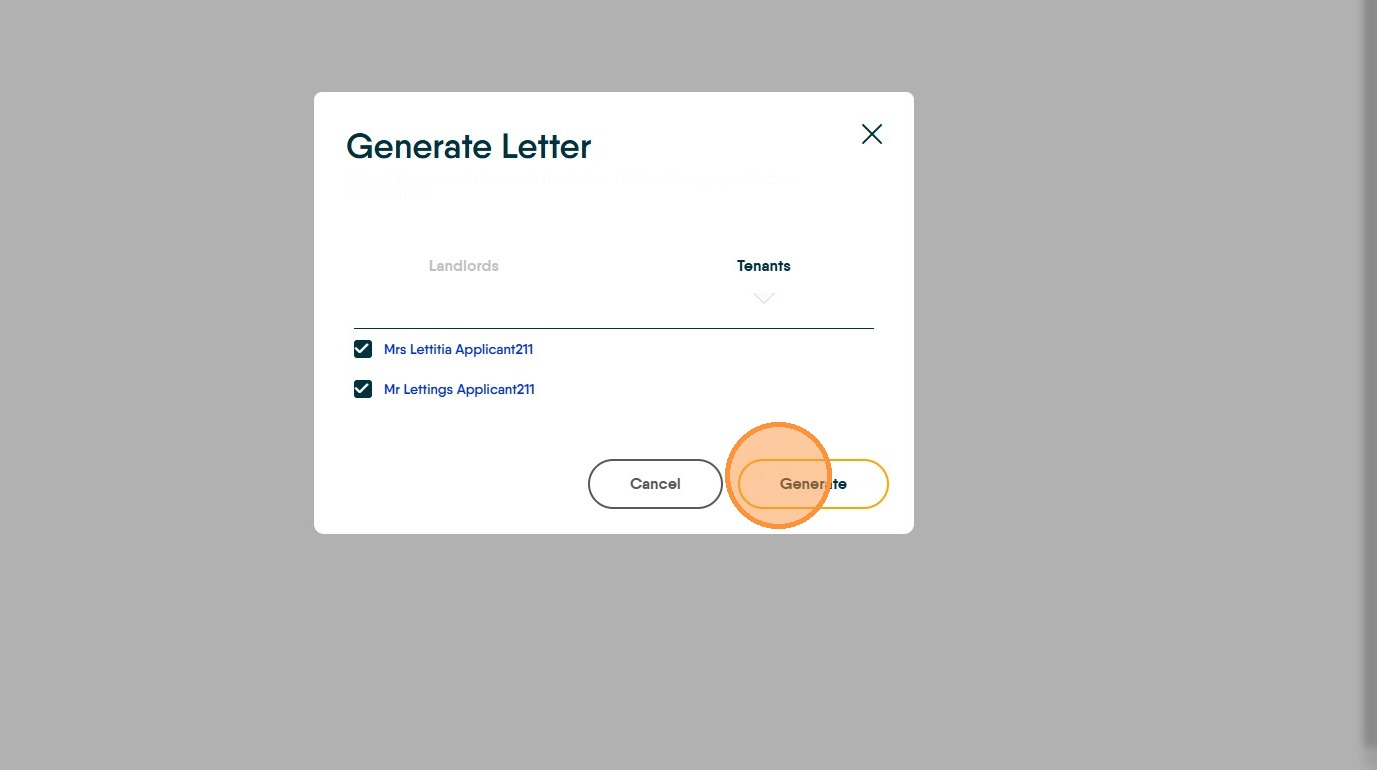
18. ...to check the details for the Tenants. Click "Generate" to create the letter.
19. Click The letter will show on the screen. Click 'View Merged Data' to see the letter as it will be sent, to send the letter use either the Send Email option or (if enabled) E-Sign.